PowerMax Vacuum Switch Test and Repair
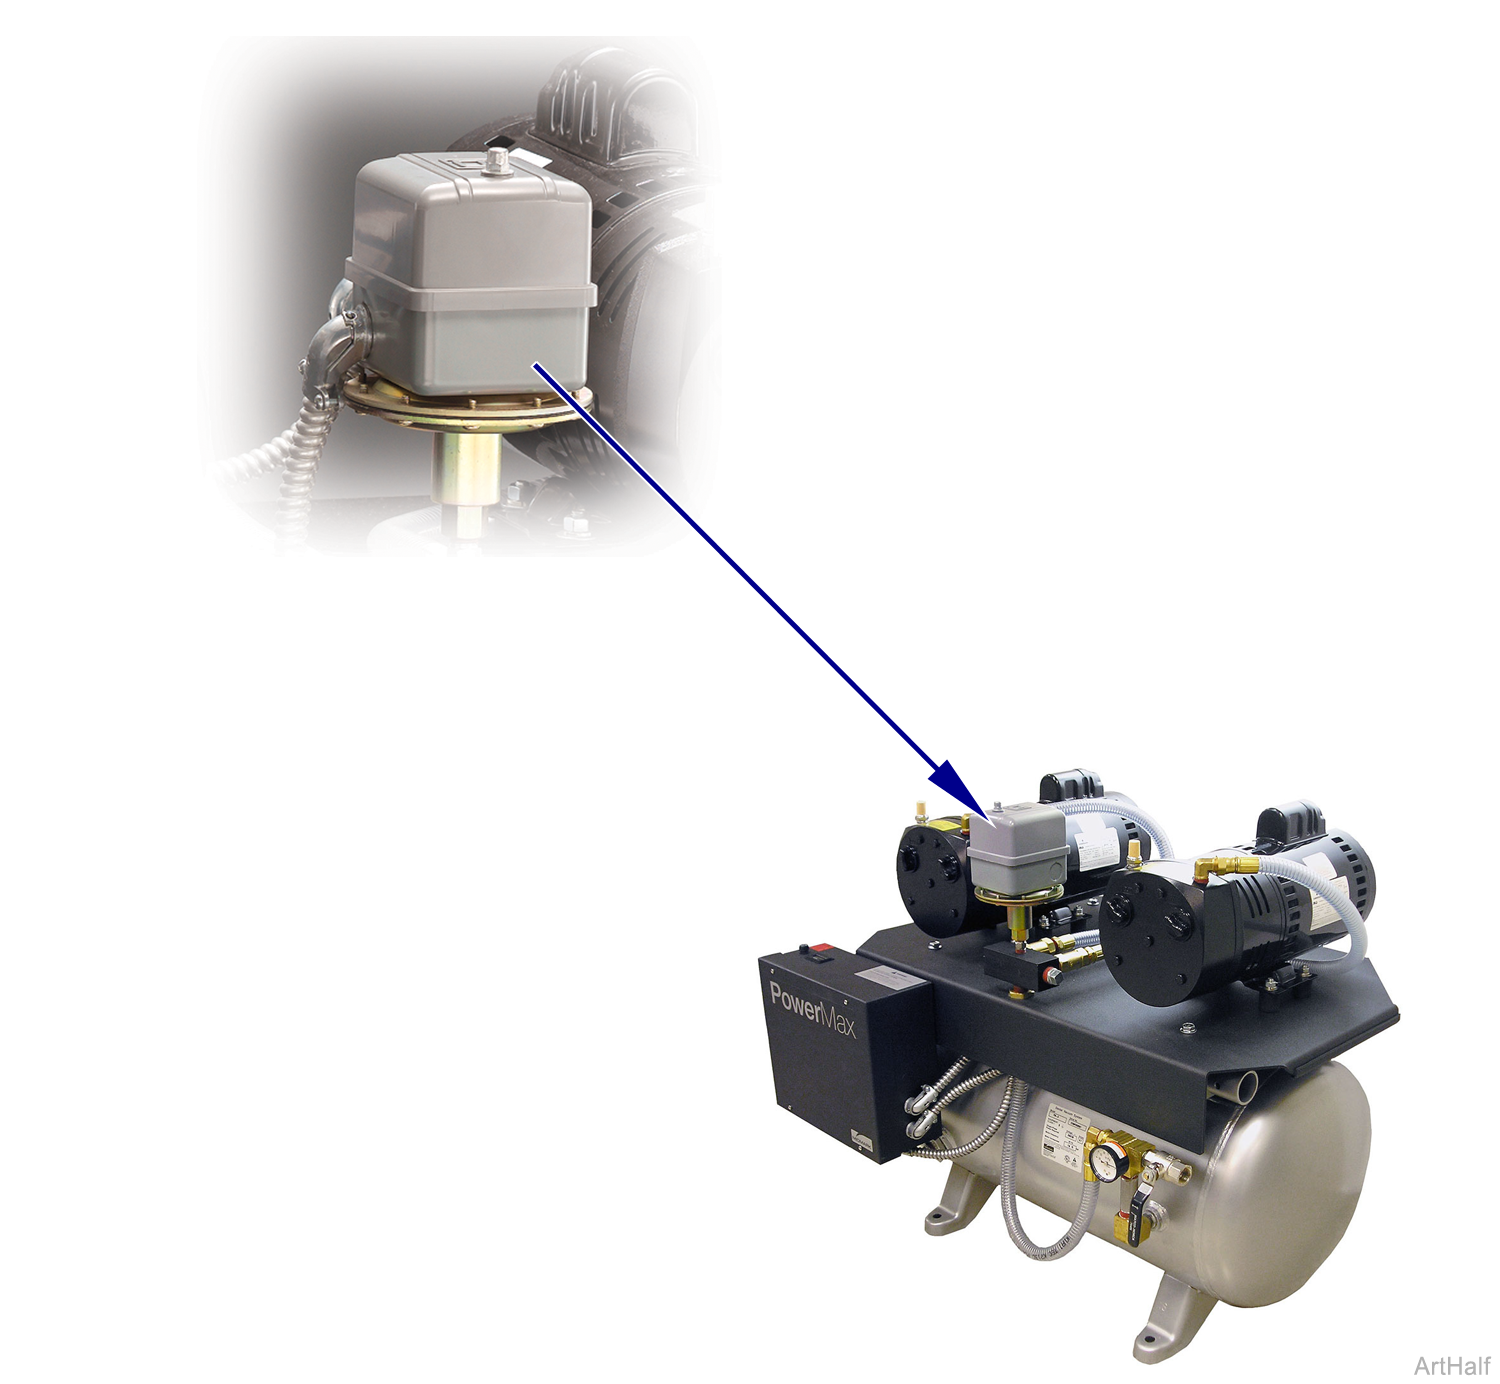
The vacuum switch regulates the vacuum level. A vacuum gauge monitors the vacuum levels. Vacuum switch is factory set at 13 "Hg.
When testing components with power on use care to prevent electrical shock.
|
Model |
PM-1 | PM-3 | PM-4 |
| Serial Number | 0701PM10001 thru 0810PM10022 | 0701PM30001 thru 0902PM30083 | 0701PM40001 thru 0811PM40016 |
Check Vacuum Setpoints
1.Close ball valve and drain valve.
2.Turn unit on.
3.Observe Gauge, unit should shut off at 20”Hg.
4.Open drain valve, unit should turn on at 13”Hg.
5.Perform adjustment if necessary
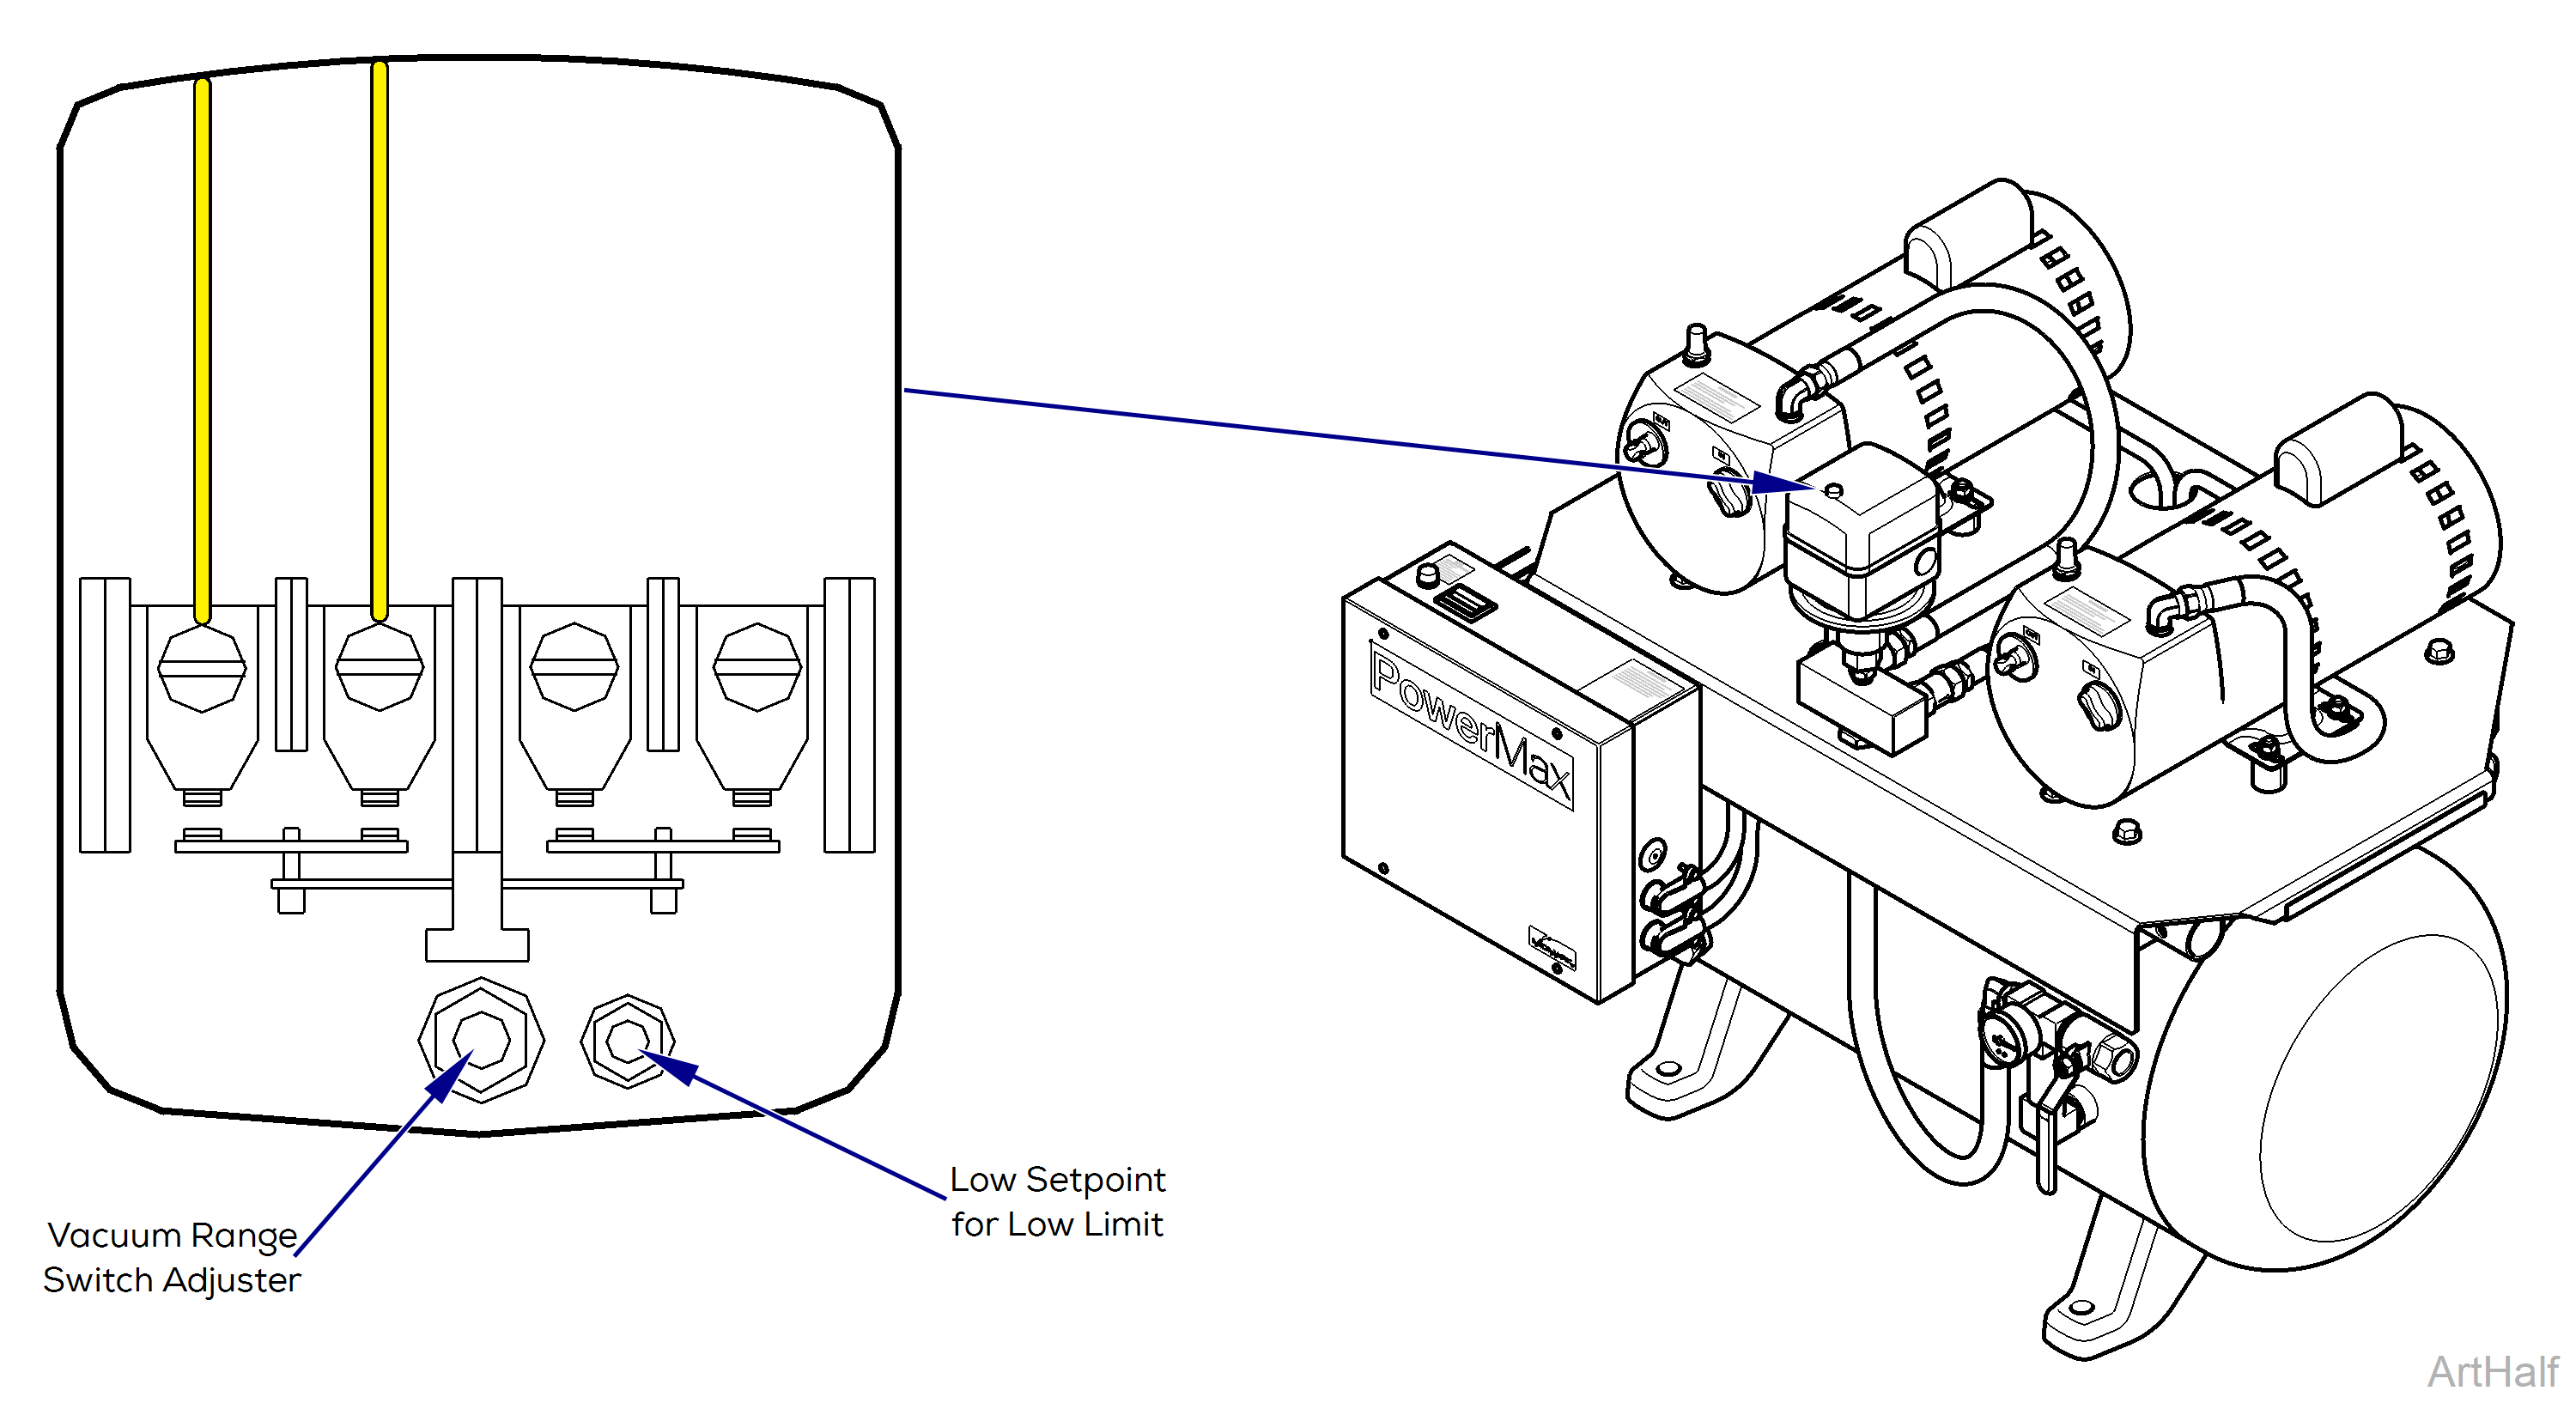
Vacuum Range
1.Adjust vacuum range if system didn’t shut off at 20”Hg. Clockwise will decrease reading and Counter Clockwise will increase reading.
Low Setpoint
1.Adjust Low Limit if system didn’t turn on at 13”Hg. Clockwise will decrease reading and Counter Clockwise will increase reading.
|
Model |
PM-1 | PM-3 | PM-4 |
| Serial Number | 0810PM10023 thru Present | 0902PM30084 thru Present | 0811PM40017 thru Present |
Check Vacuum Setpoints
1.Close ball valve and drain valve.
2.Turn unit on.
3.Observe Gauge, unit should shut off at 20”Hg.
4.Open drain valve, unit should turn on at 13”Hg.
5.Perform adjustment if necessary
Vacuum Range
1.Adjust vacuum range if system didn’t shut off at 20”Hg. Clockwise will decrease reading and Counter Clockwise will increase reading.
Low Setpoint
1.Adjust Low Limit if system didn’t turn on at 13”Hg. Clockwise will decrease reading and Counter Clockwise will increase reading.
|
Model |
PM-1 | PM-3 | PM-4 |
| Serial Number | 0701PM10001 thru 0810PM10023 | 0701PM30001 thru 0902PM30084 | 0701PM40001 thru 0811PM40016 |
When testing components with power on use care to prevent electrical shock.
1.Perform Adjustment. Refer to: Vacuum Switch Adjustment.
2.Turn power off.
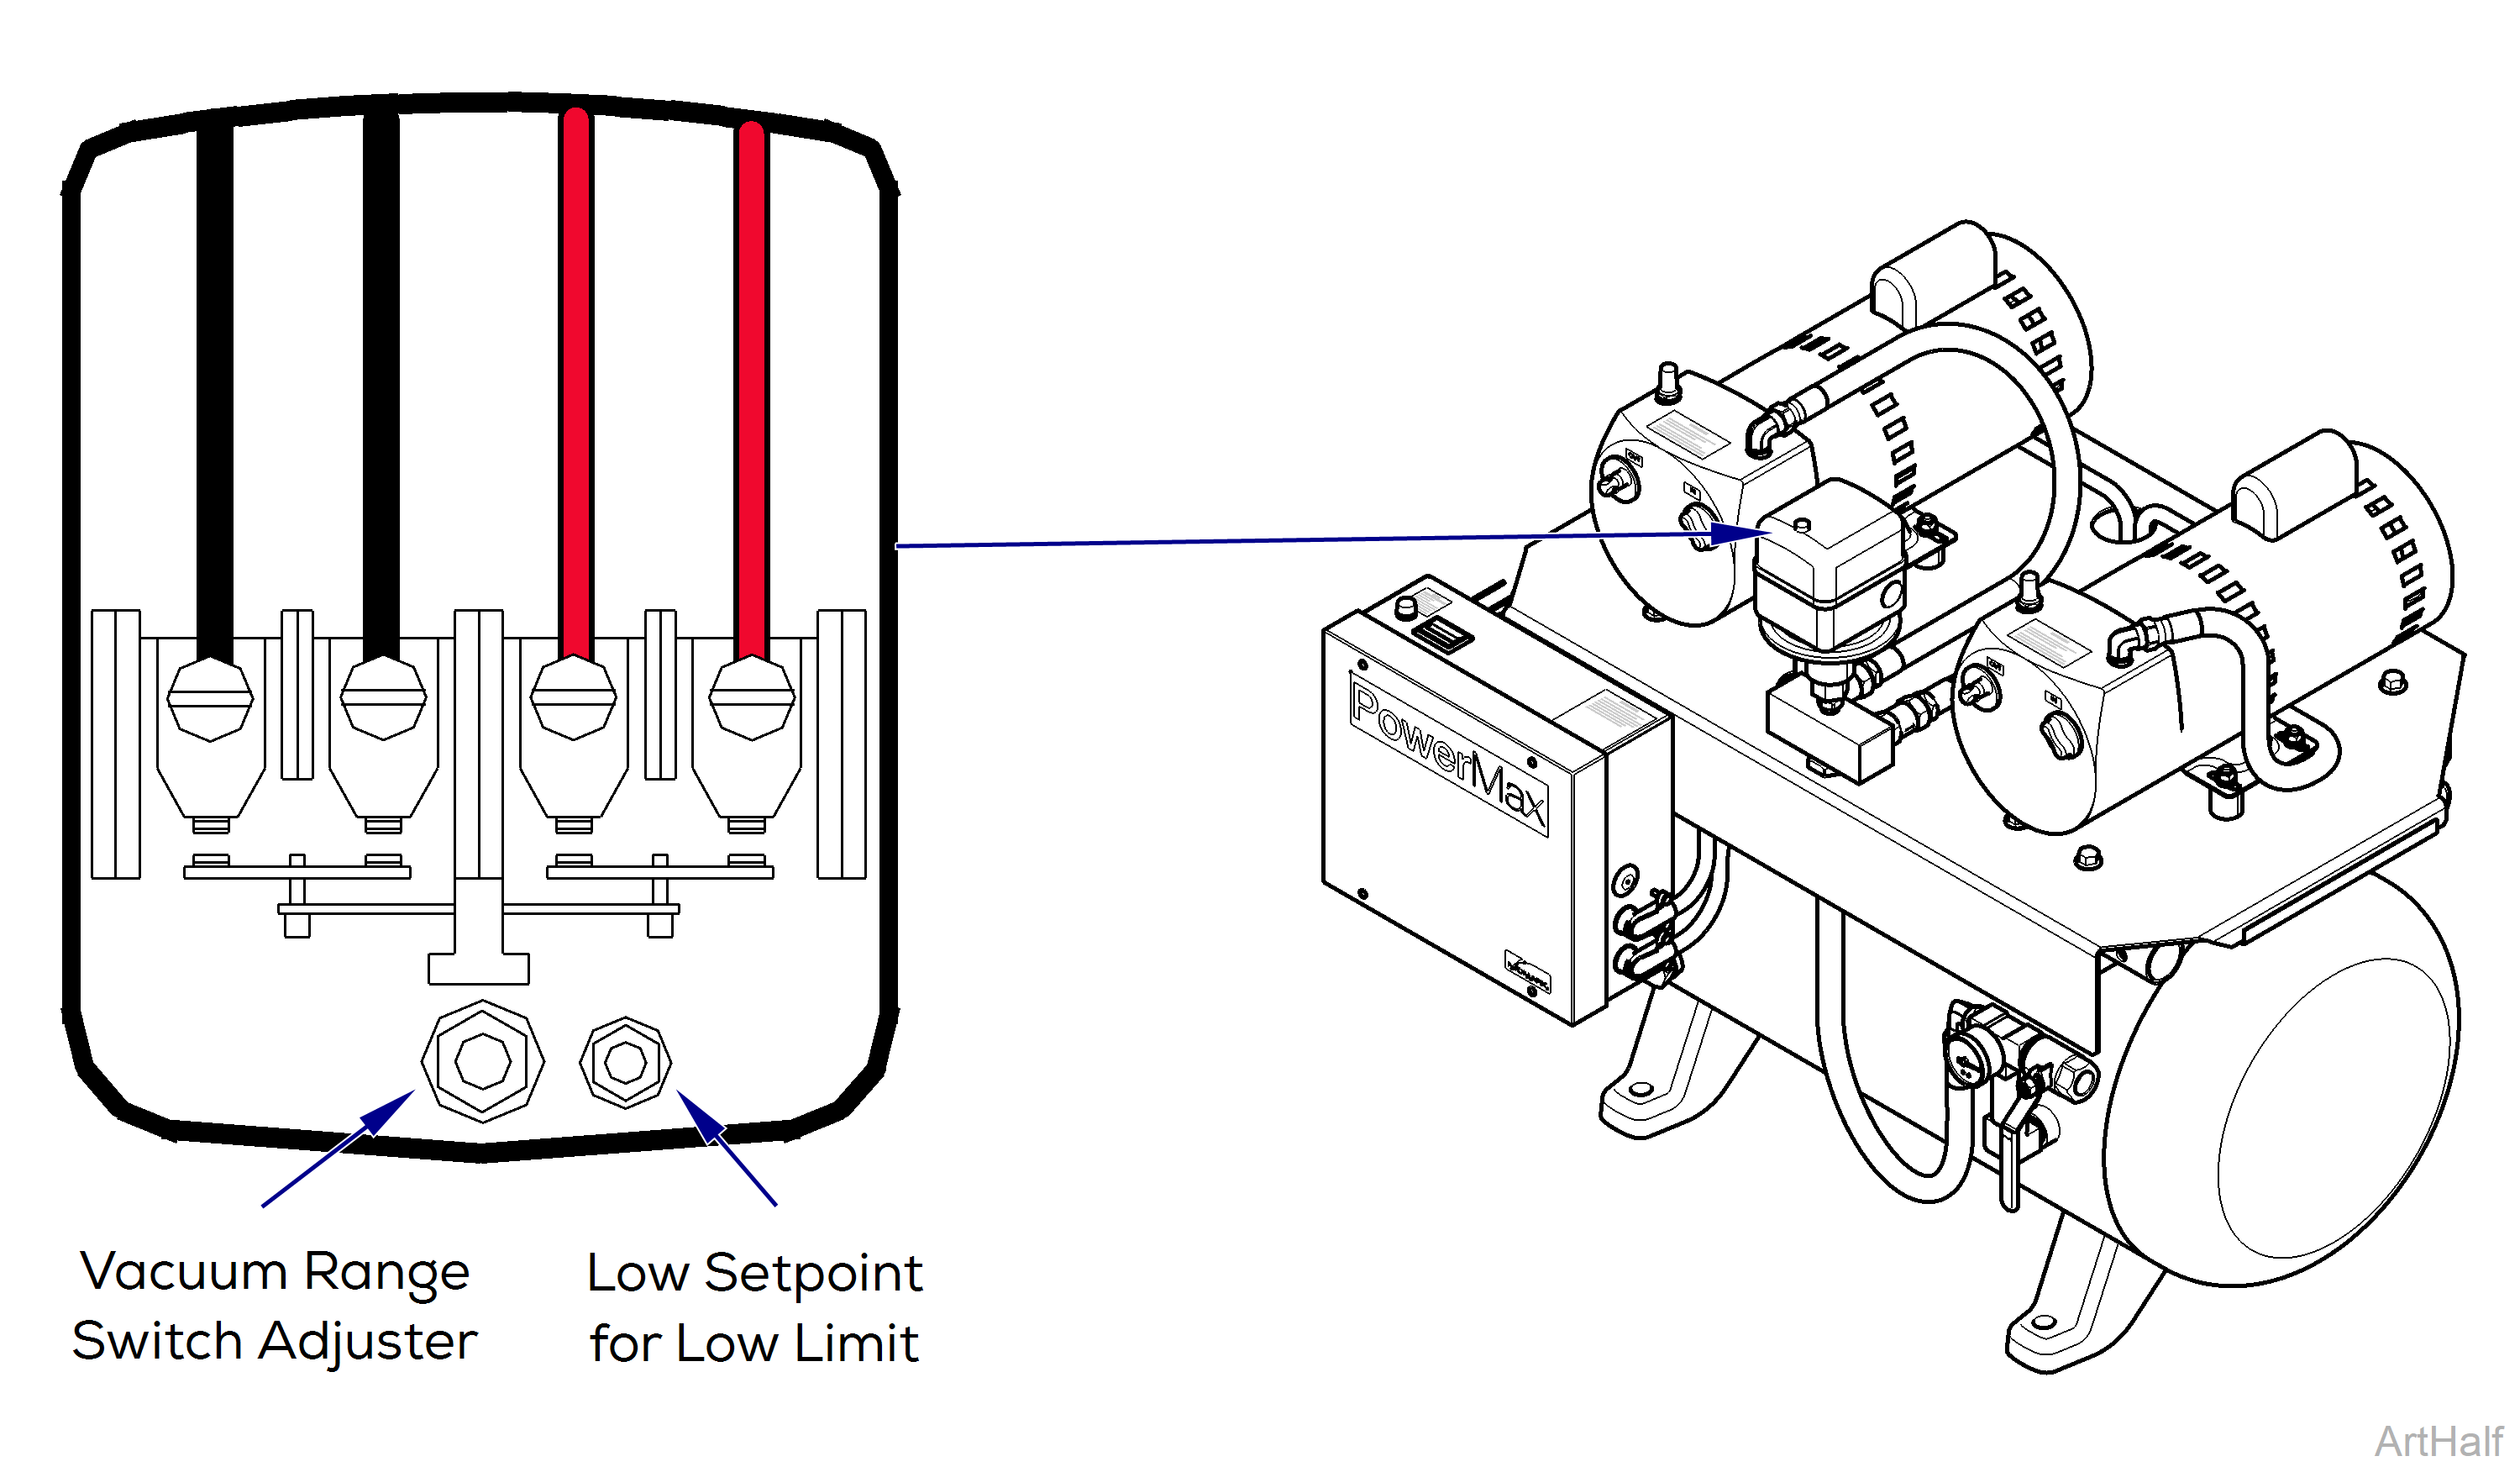
3.Remove vacuum switch cover and verify there are no black/burnt melted wires. If there are replace pressure switch. Refer to: Vacuum Switch Cover.
4.Turn power on.
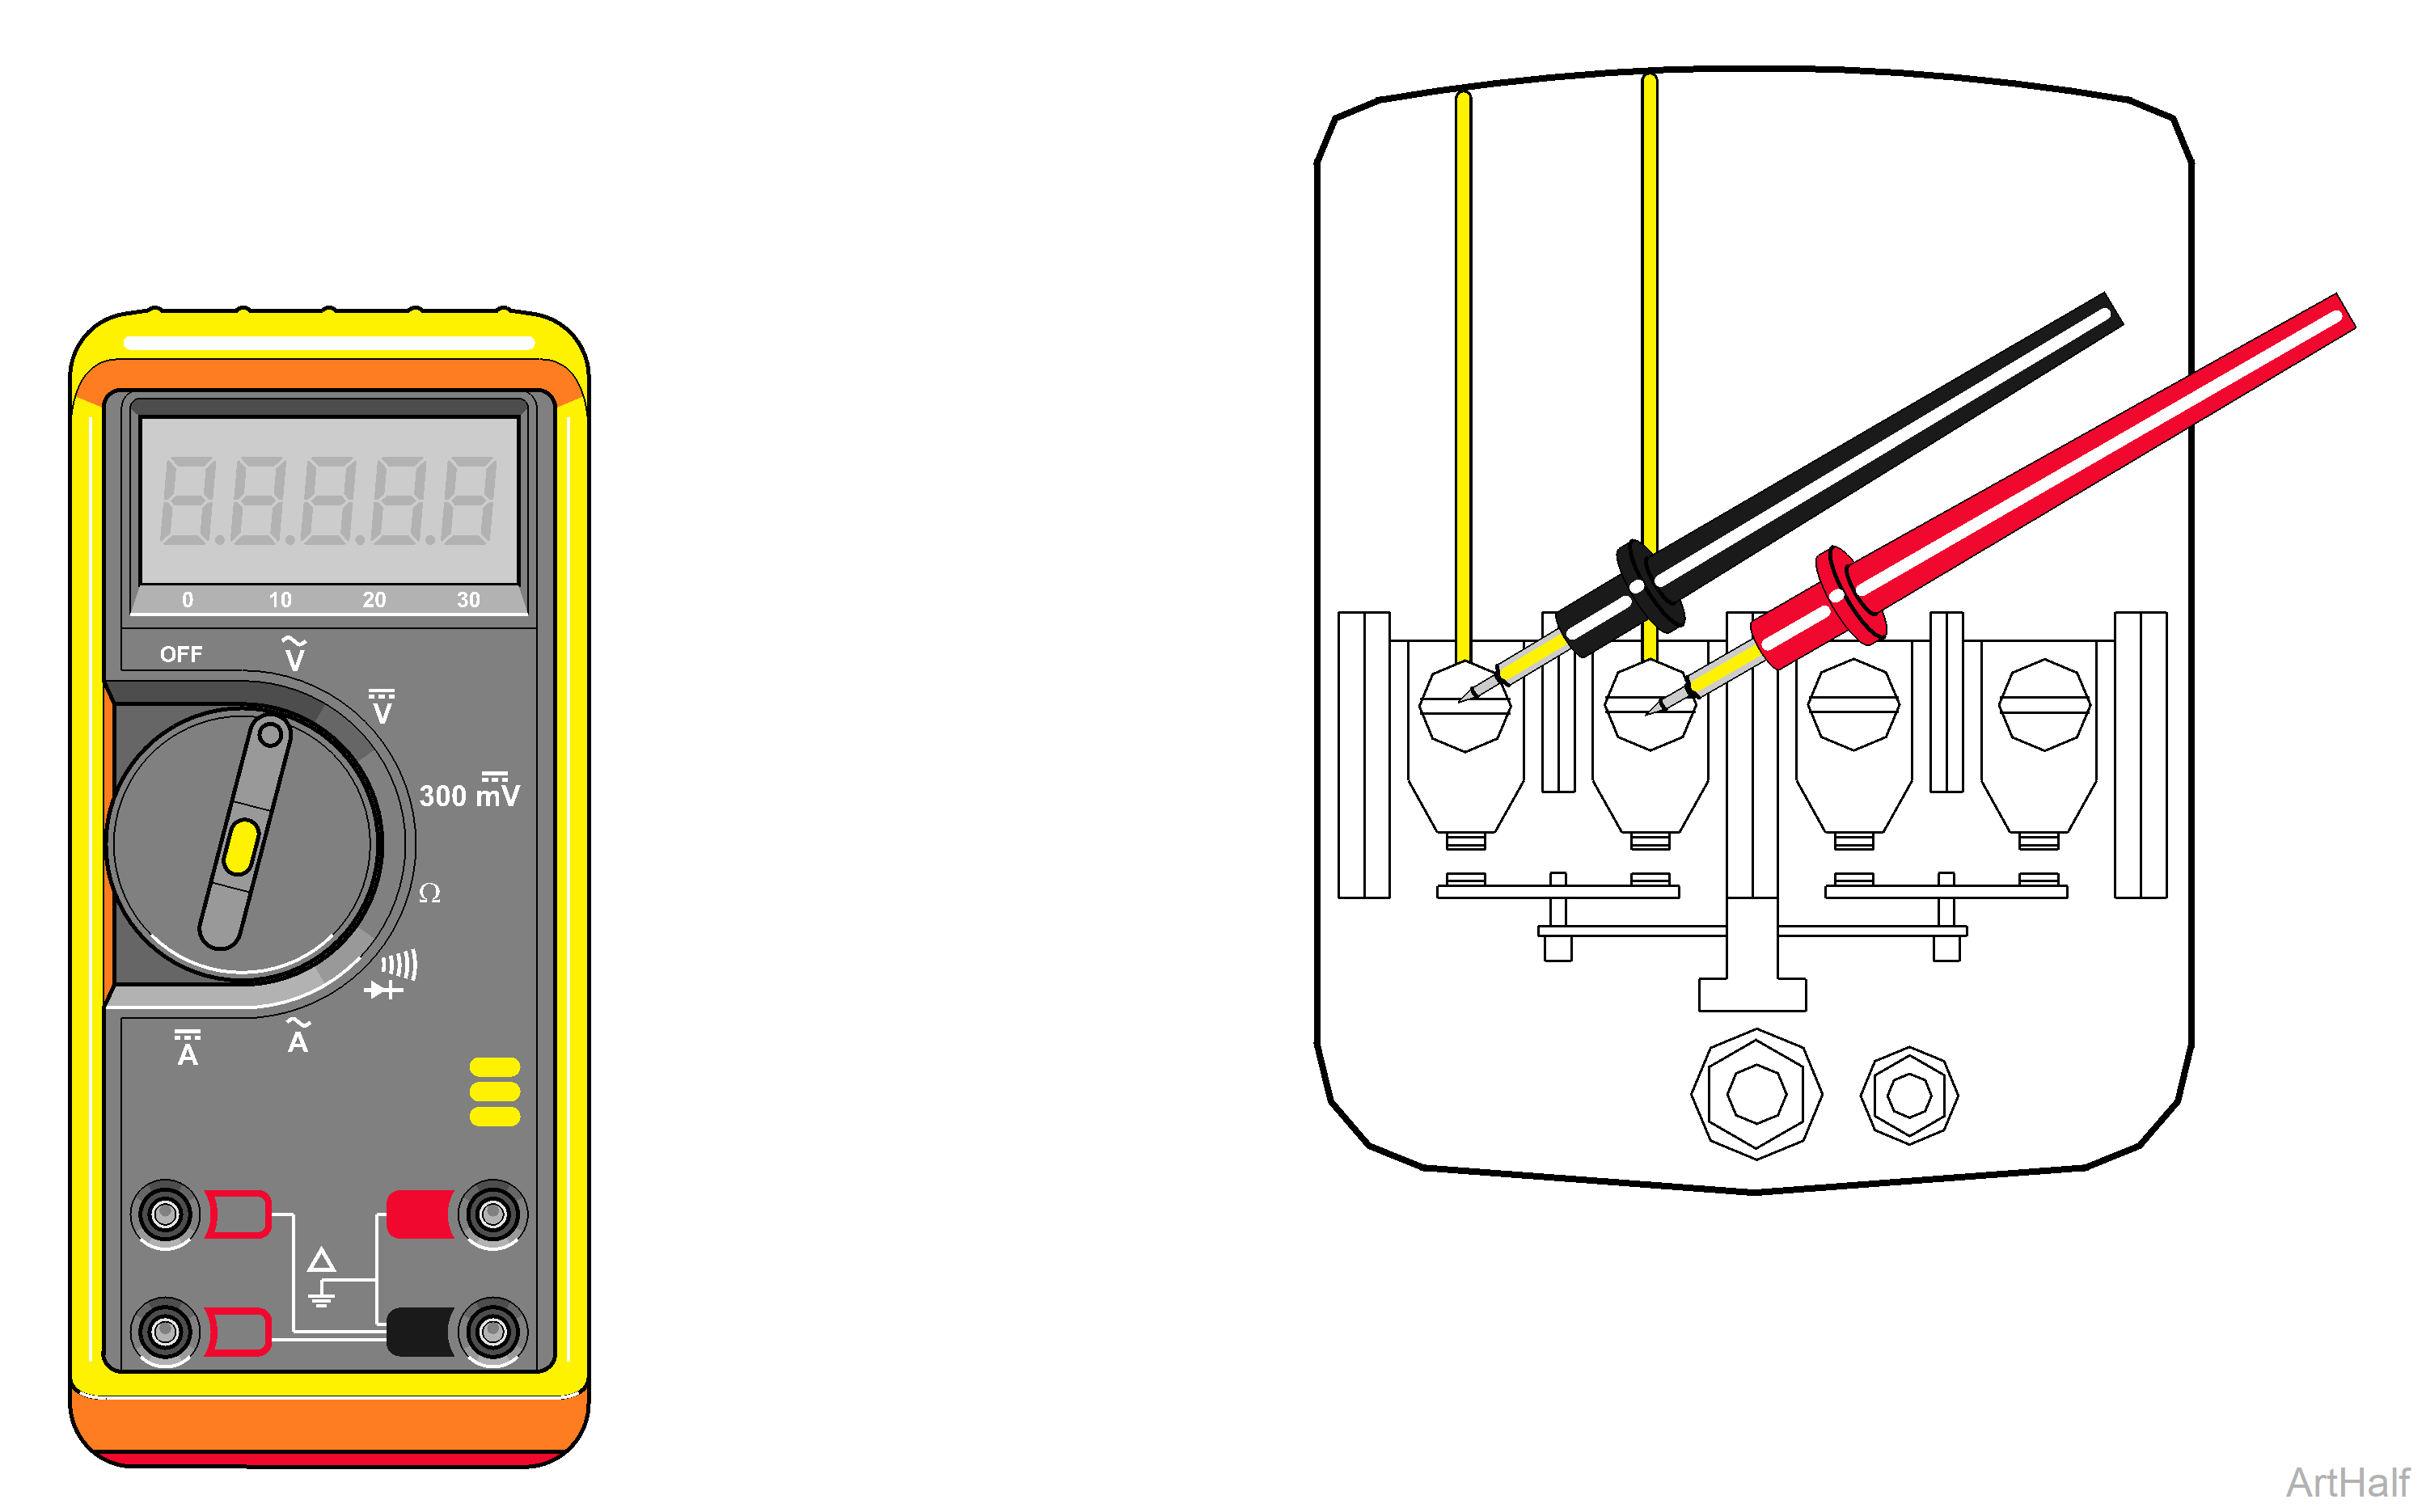
5.Set meter to V~.
6.Place meter probes on both yellow wires.
| Meter Reading | Status | Required Action |
|---|---|---|
| No Vacuum on Gauge Less than 24 Volts on Reading |

|
Replace Vacuum Switch. |
| 24 Volt Reading |

|
Vacuum Switch OK |
|
Model |
PM-1 | PM-3 | PM-4 |
| Serial Number | 0810PM10023 thru Present | 0902PM30084 thru Present | 0811PM40017 thru Present |
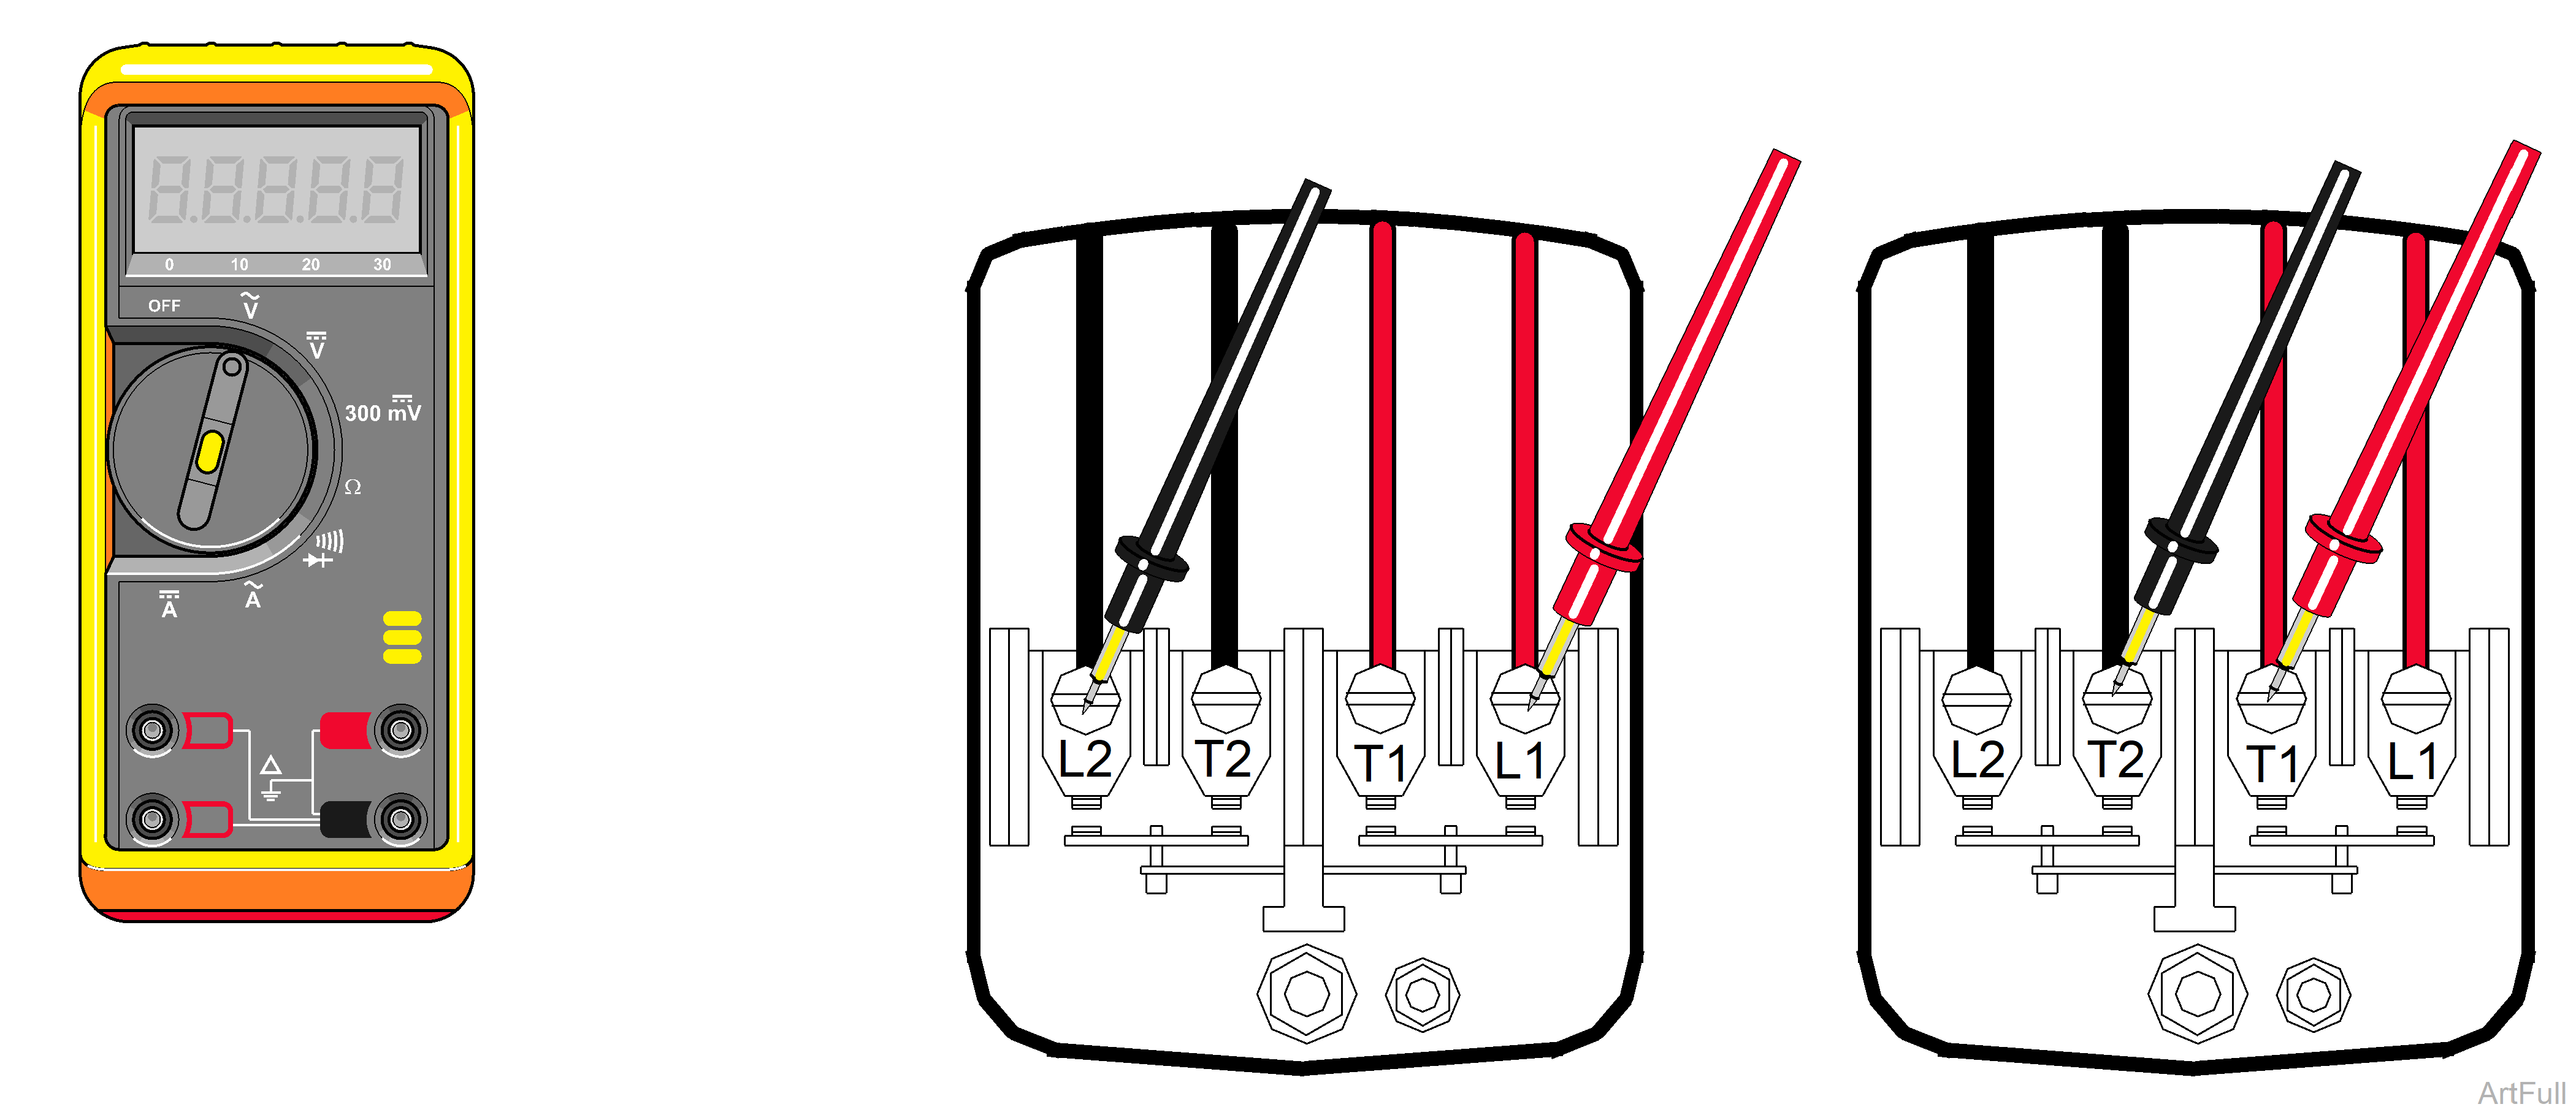
When testing components with power on use care to prevent electrical shock.
1.Perform Adjustment. Refer to: Vacuum Switch Adjustment.
2.Turn power off.
3.Remove vacuum switch cover and verify there are no black/burnt melted wires. If there are replace pressure switch. Refer to: Vacuum Switch Cover.
4.Turn power on.
5.Set meter to V~.
6.Bleed tank vacuum level down to less than 13"Hg. Vacuum switch will make an audible click.
7.Check line voltage across L1 and L2. Check line voltage across T1 and T2. These voltages should be the same.
| Meter Reading | Status | Required Action |
|---|---|---|
| Voltage Not Equal |
|
Replace Vacuum Switch. |
| T1 & T2 Voltage = L1 & L2 Voltage |
|
Vacuum Switch OK |
