PowerVac G Covers Access Procedures
The On/Off switch controls only the secondary circuit power. The main power source must be turned off to remove all power in the control box. When testing components with power on, use care to prevent electrical shock.
When working on Twin units, unplug parallel harness.
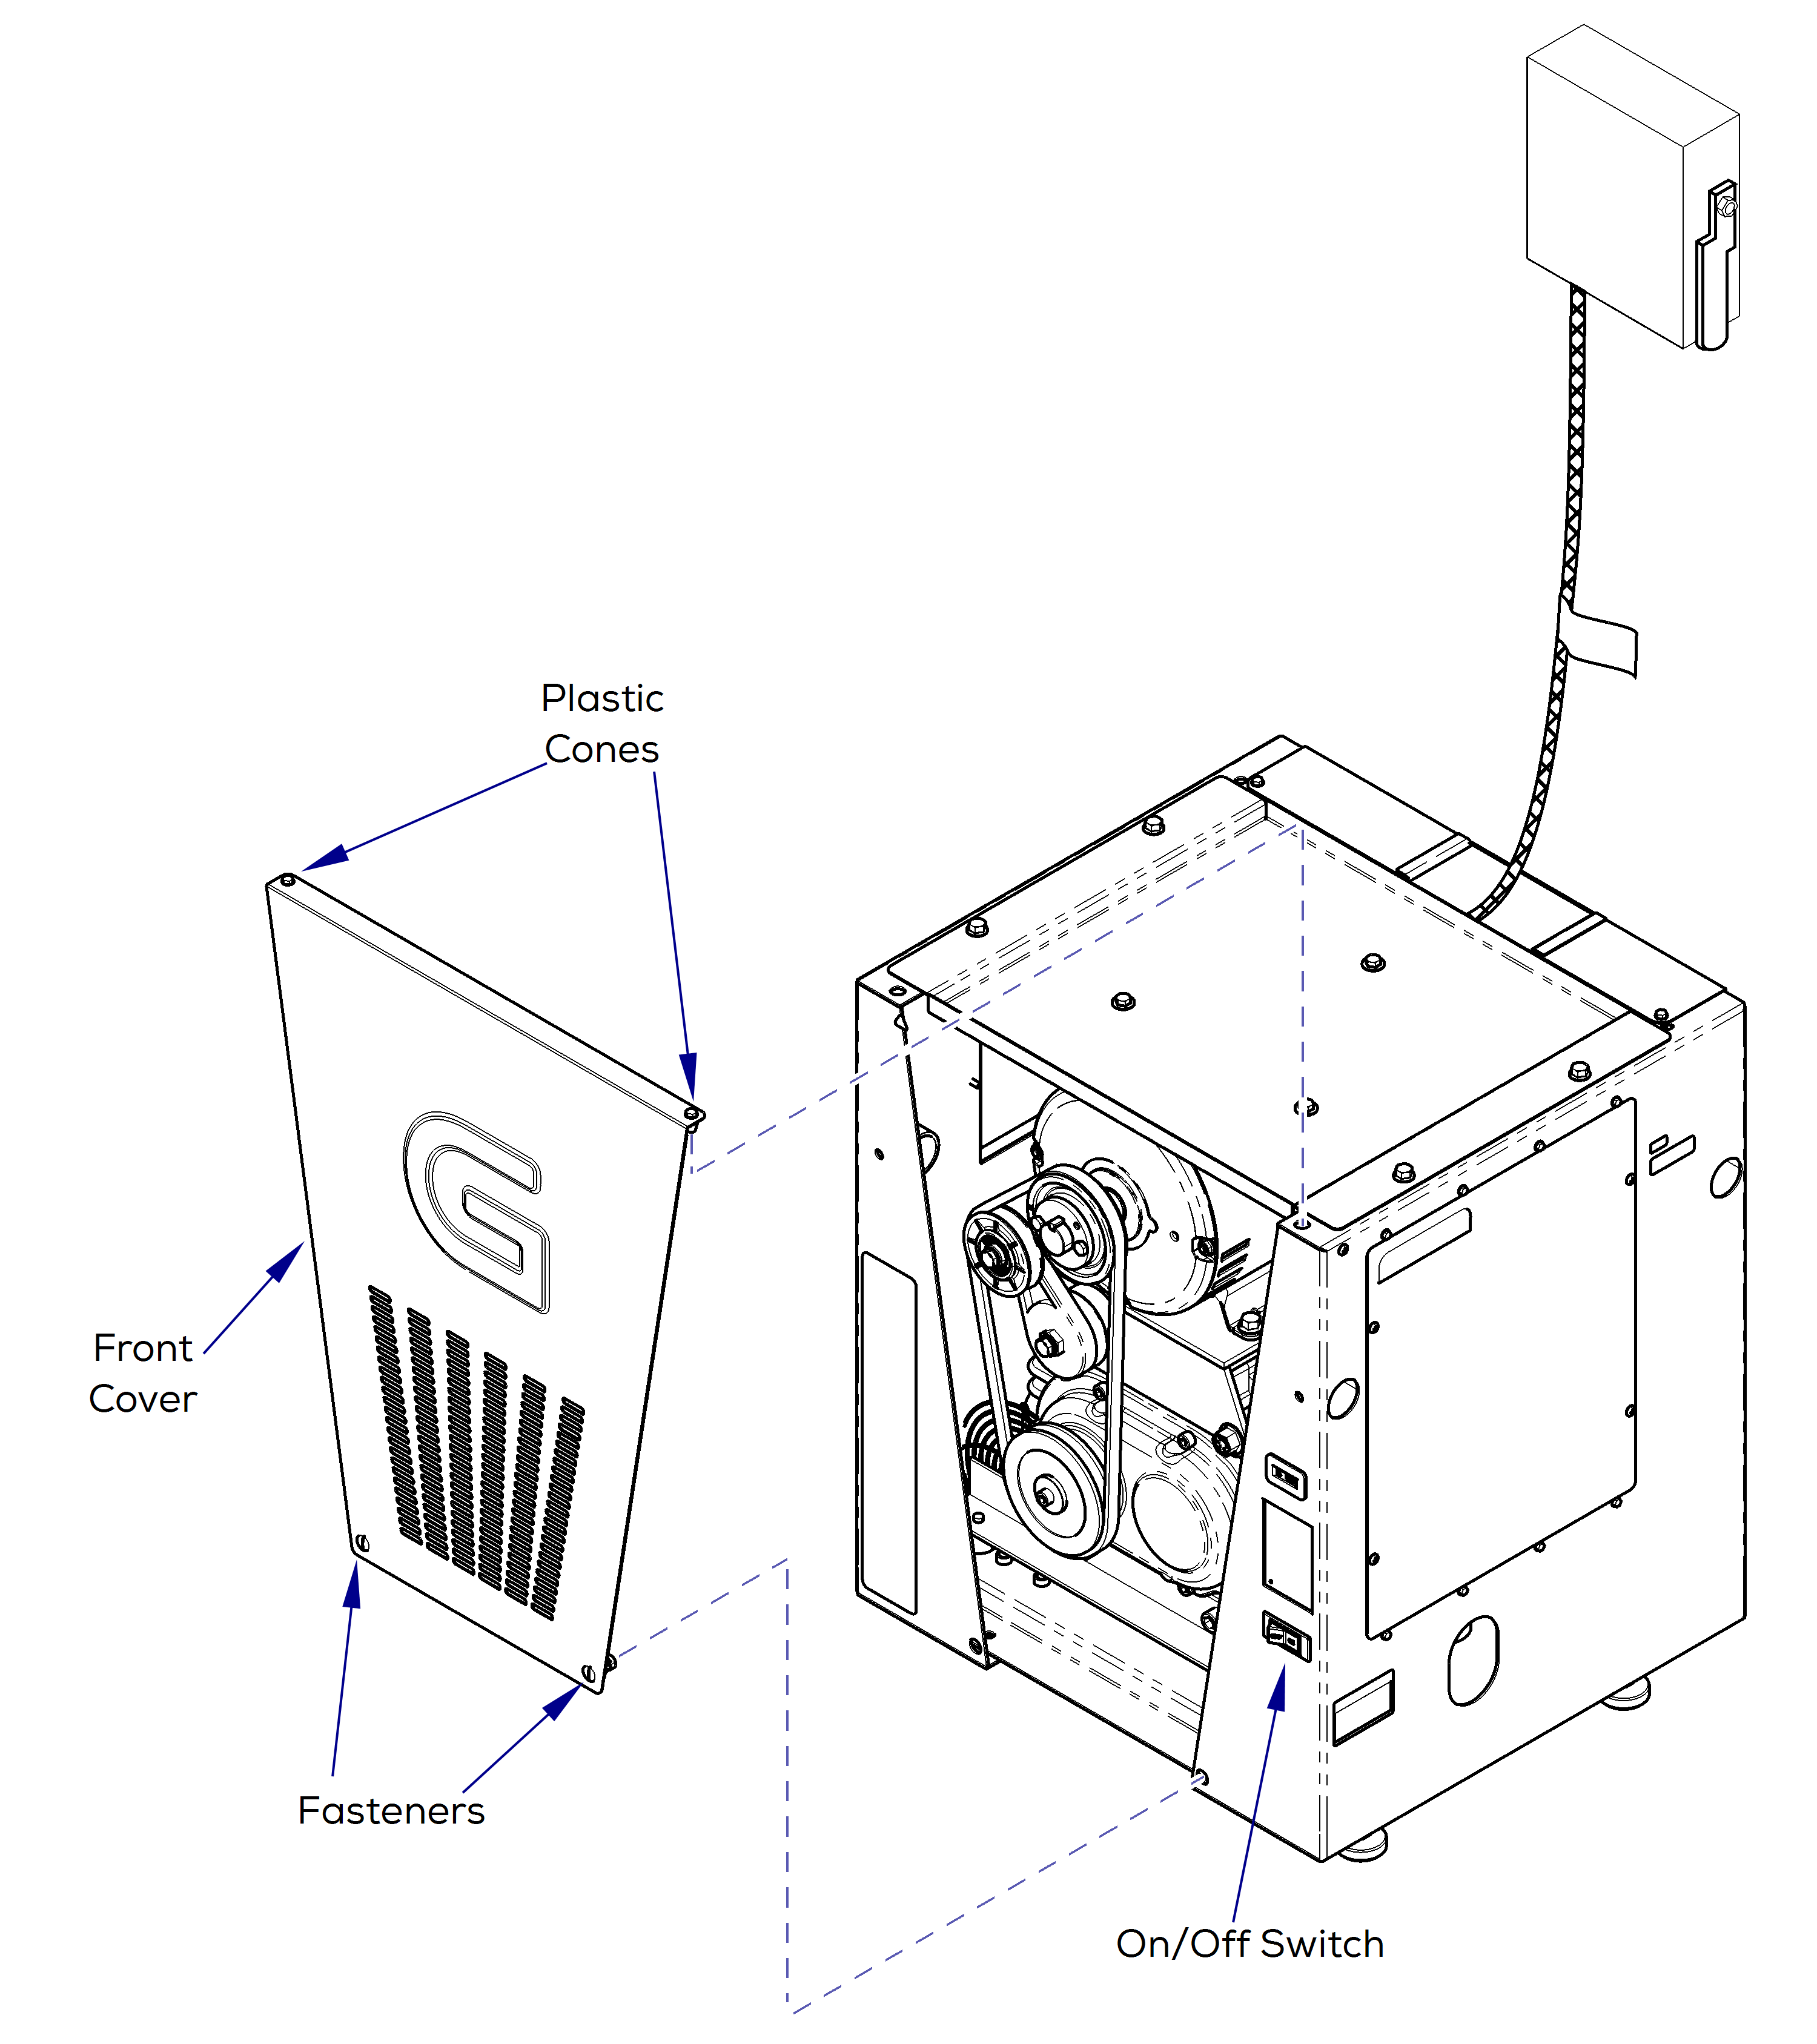
Power must be turned off when removing front cover.
1.Disconnect power.
2.Unfasten front cover by turning two fasteners 1/4 turn, counter clockwise.
3.Lift front cover straight up to remove from side panels.
1.Align plastic cones on new front cover to holes in side panels.
2.Turn fasteners 1/4 turn clockwise to secure front cover.
3.Install front cover.
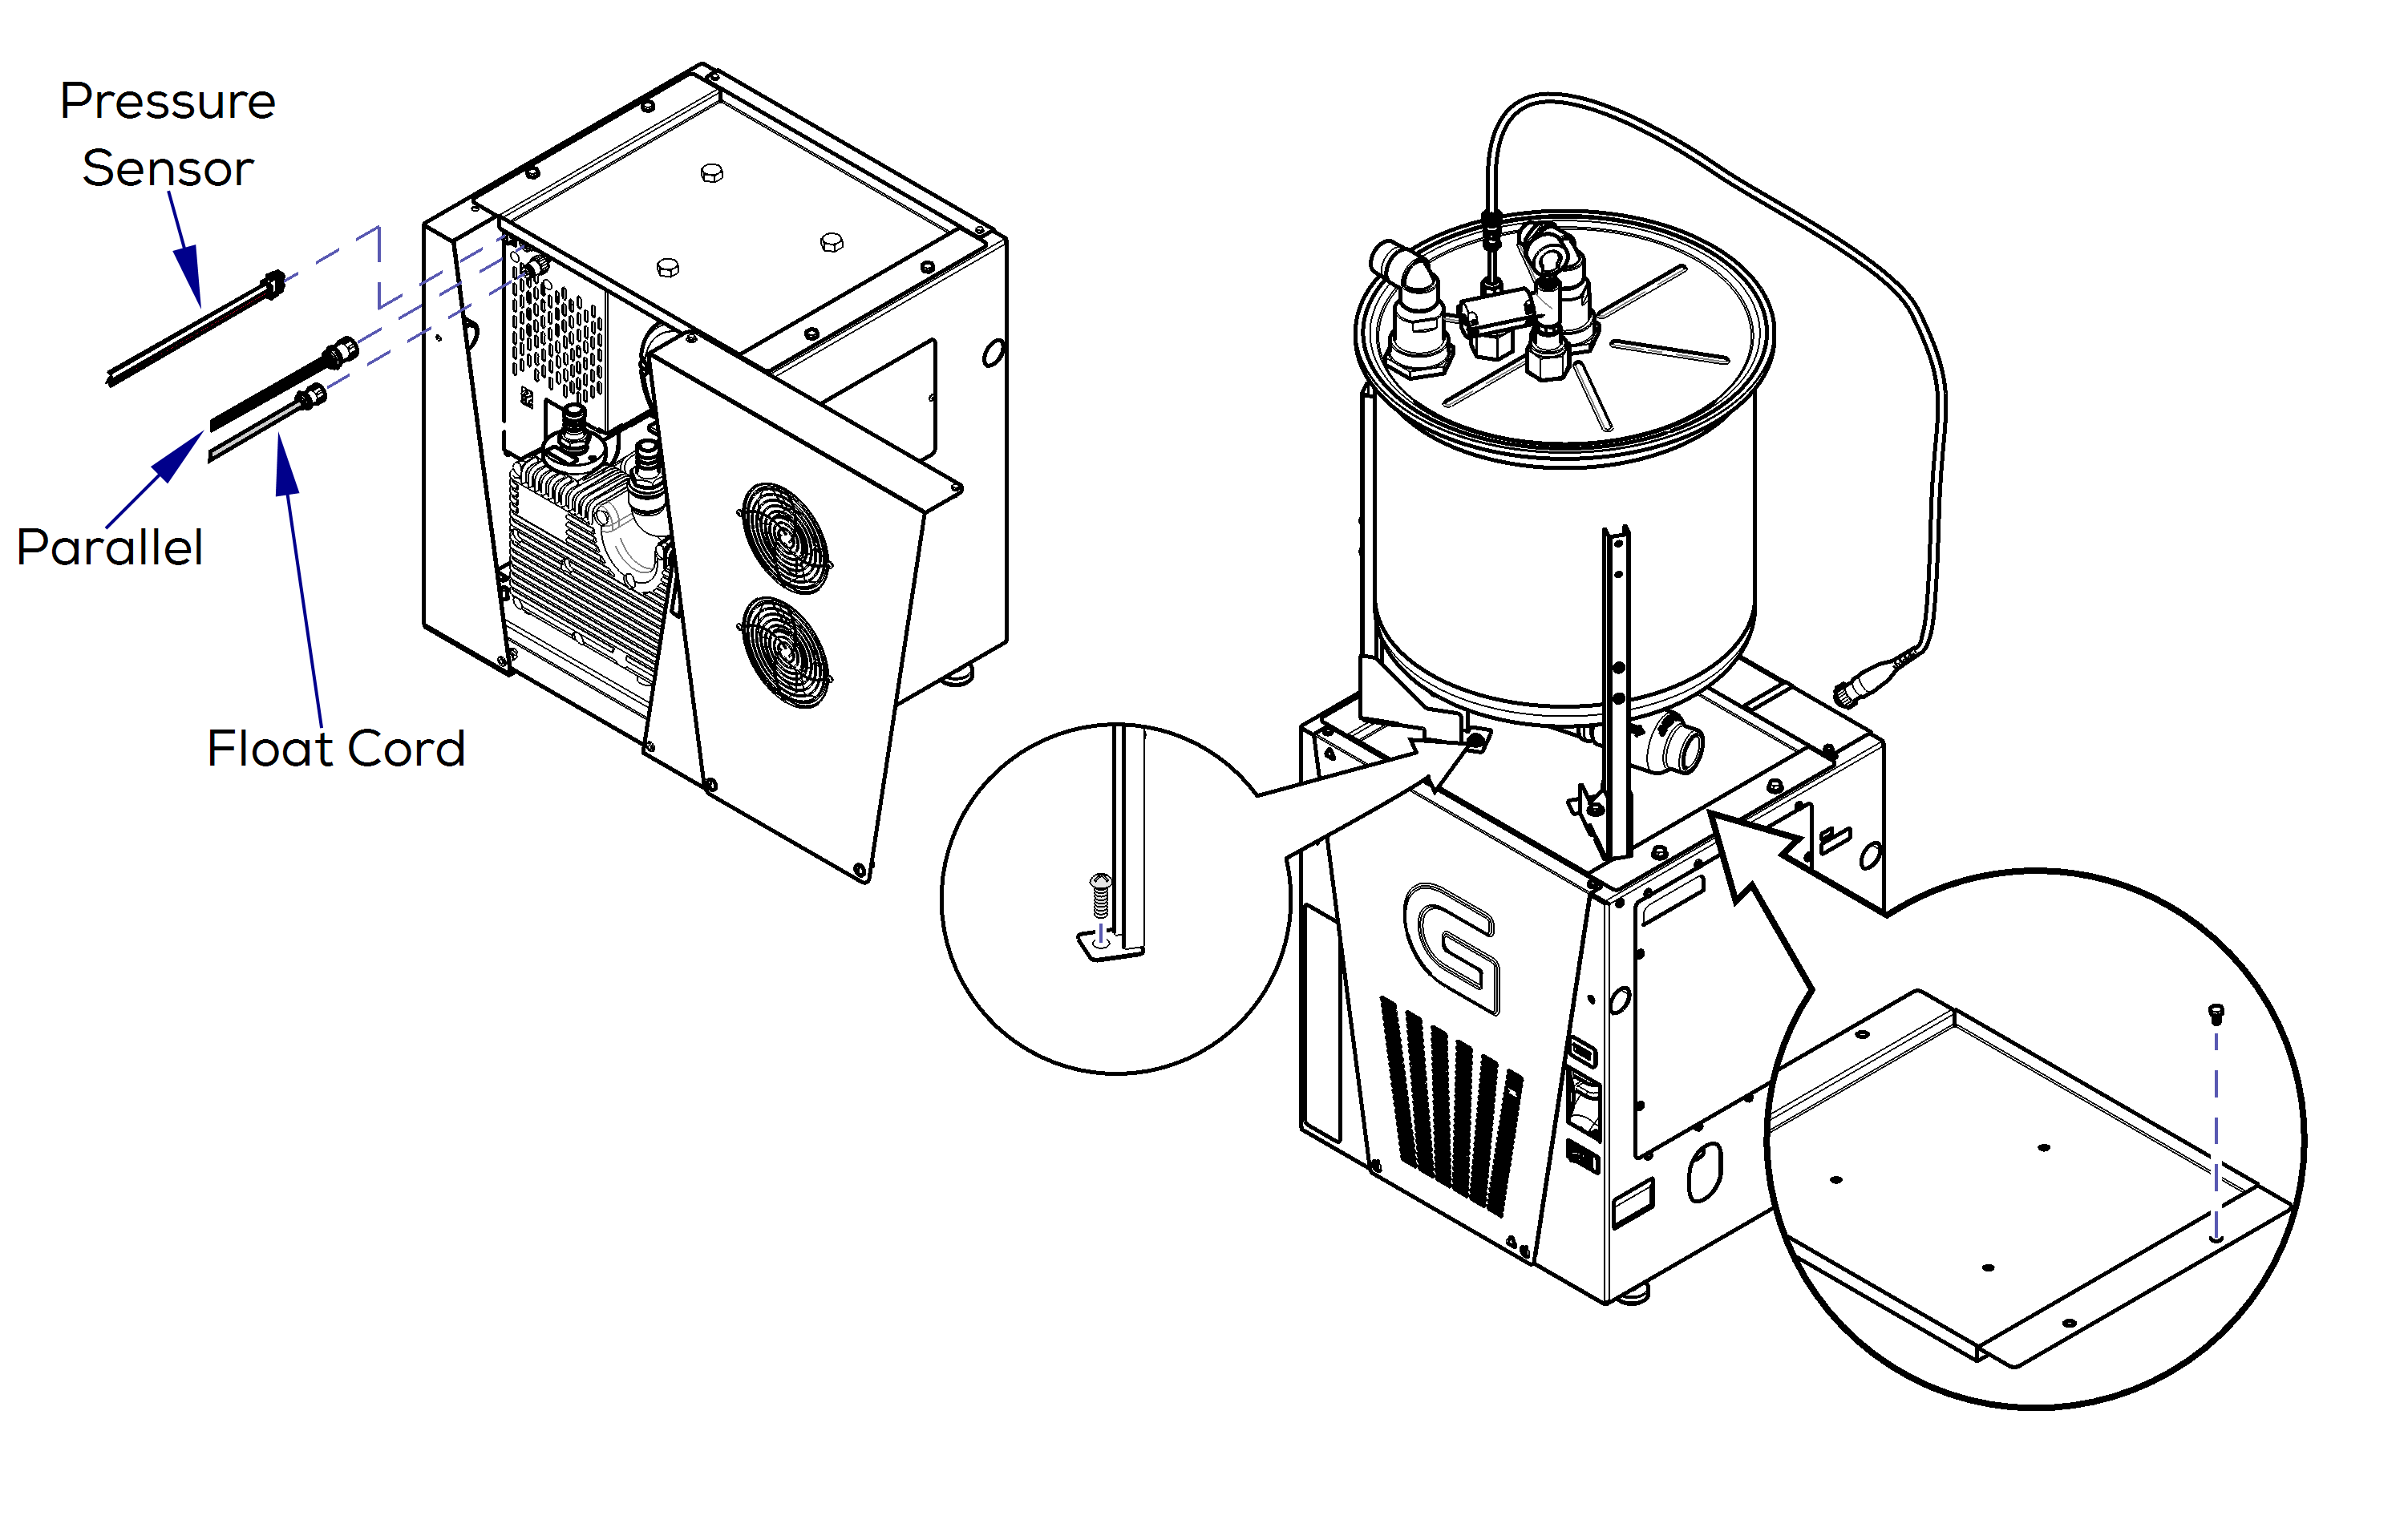
Removal and Installation
1.Disconnect power.
2.Remove back cover. Refer to: Back Cover
3. Unplug float, pressure sensor, and parallel cord from base unit.
4.Remove separator from vacuum base unit if applicable.
5.Remove top plate.
6.Reverse steps to install.
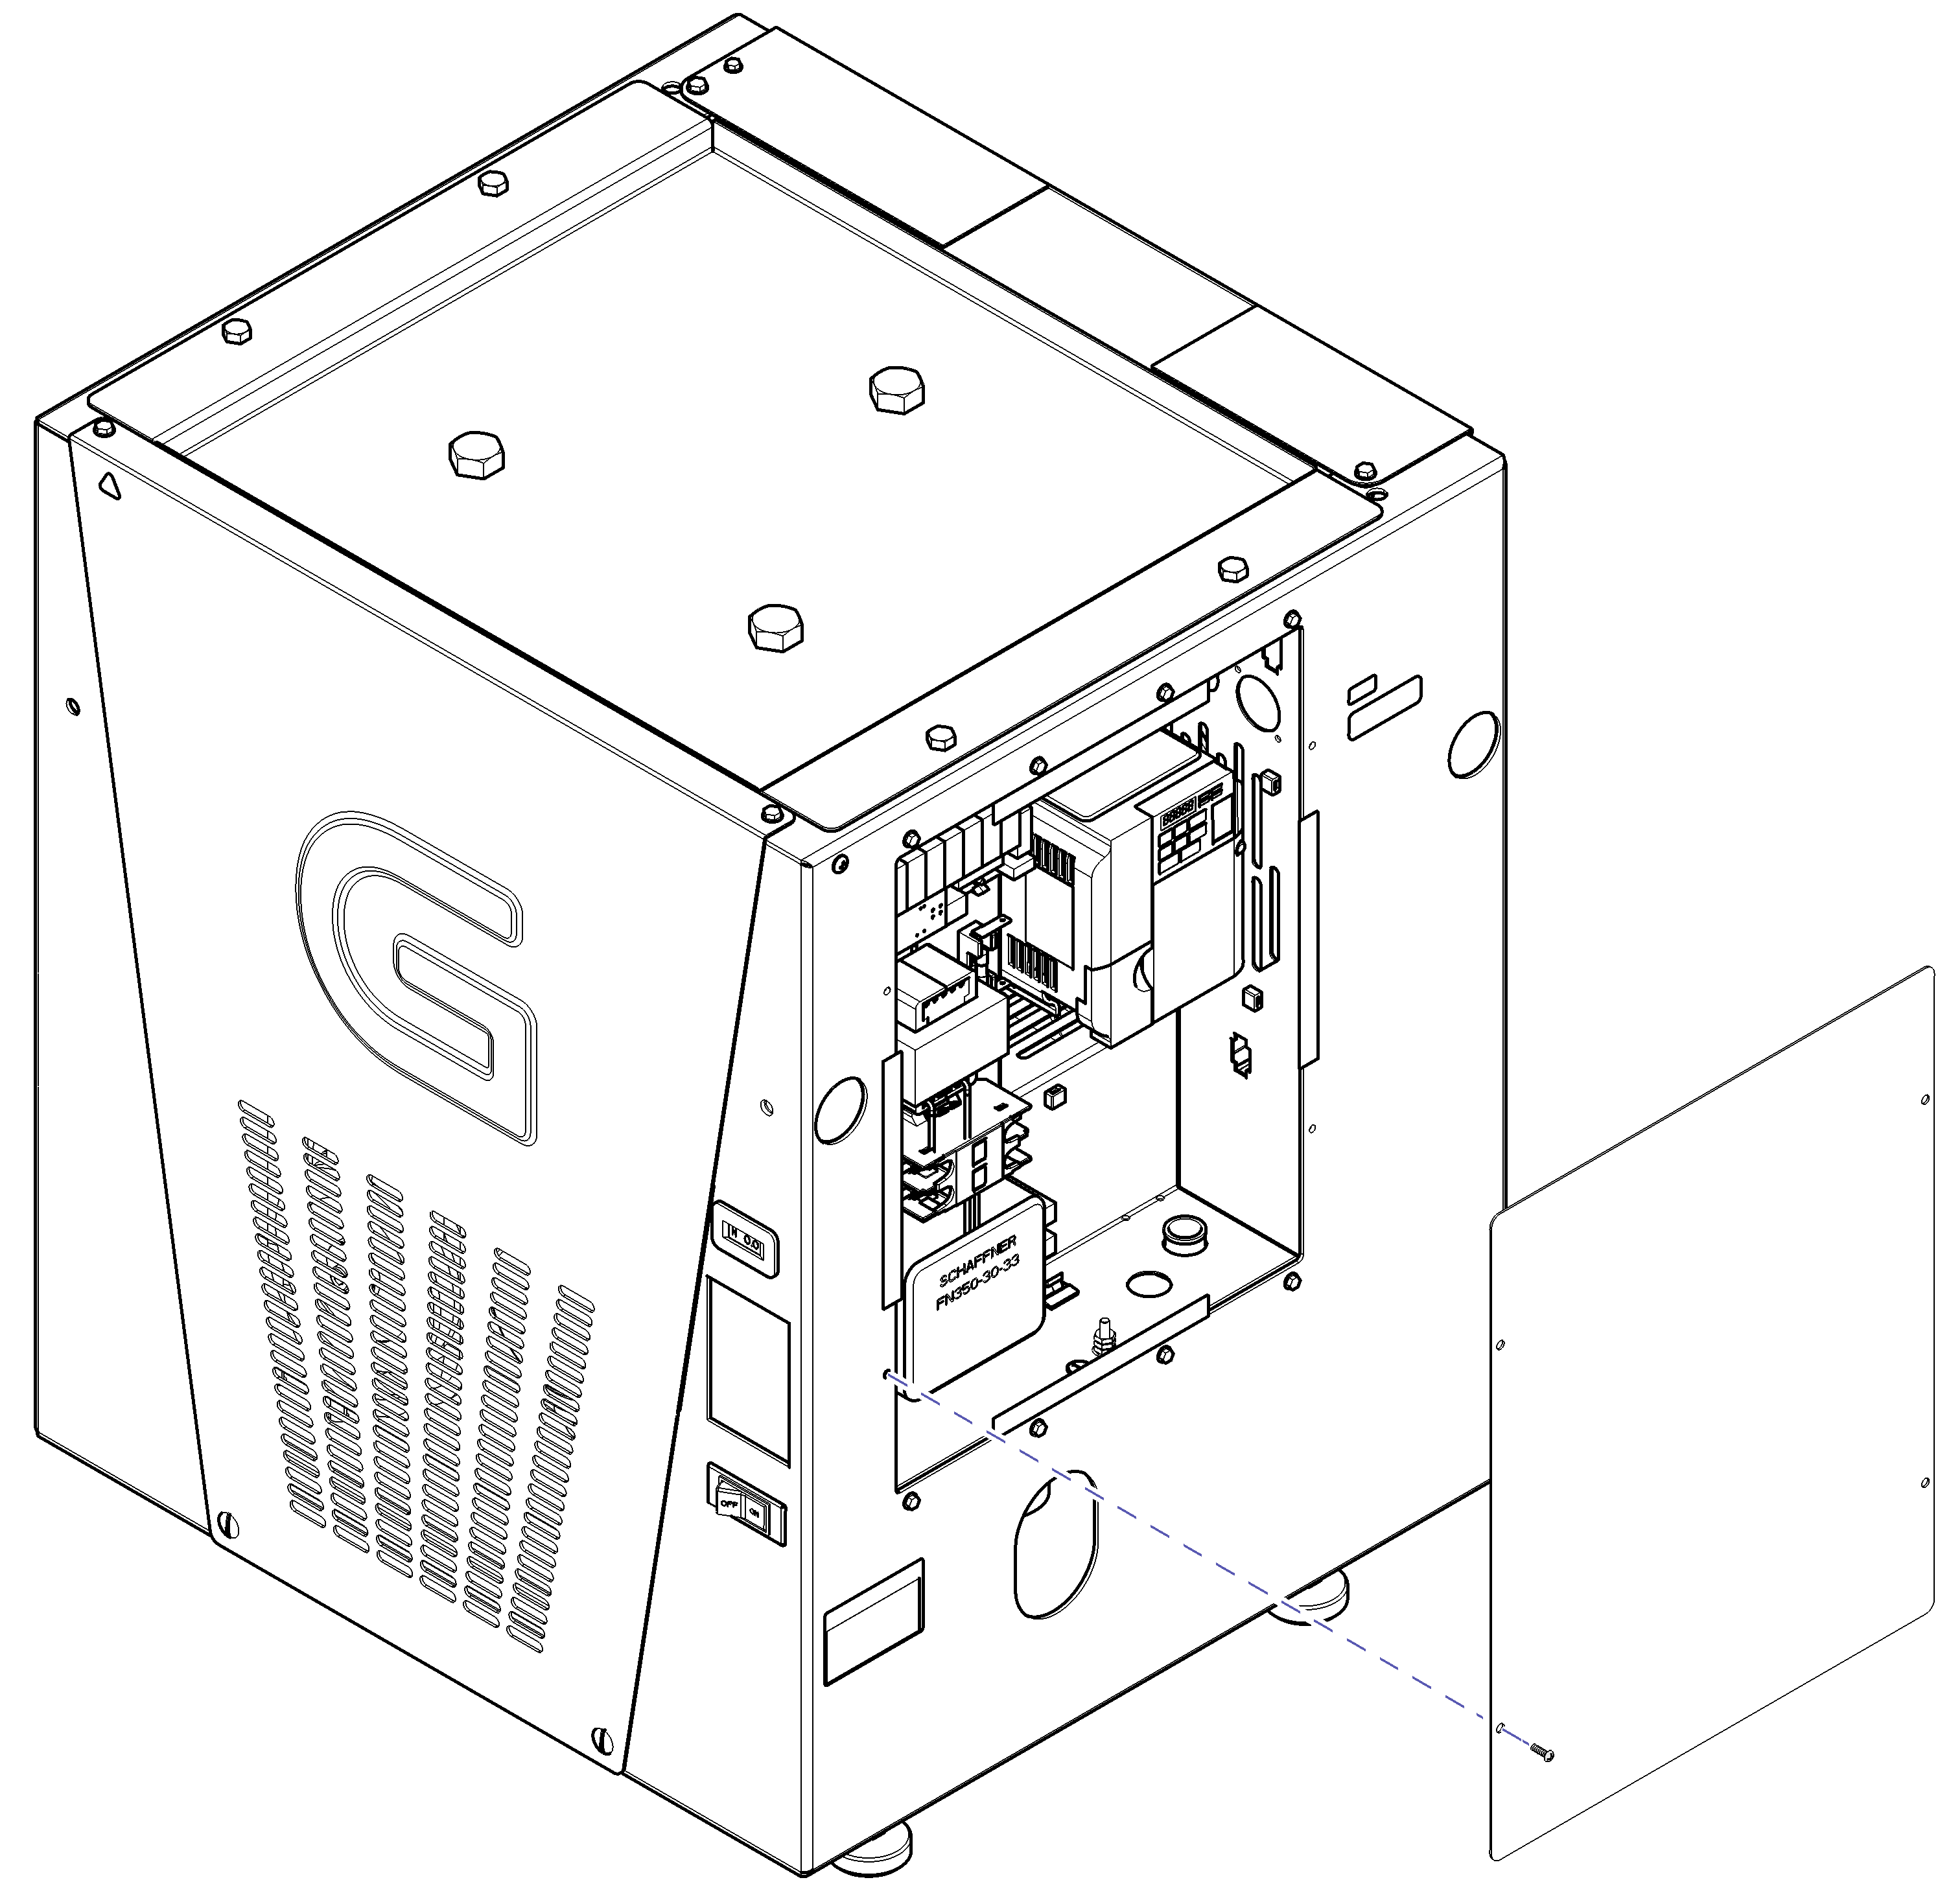
Removal and Installation
1.Disconnect power.
2.Remove four screws from electrical cover.
3.Remove electrical cover.
4.Install electrical cover.
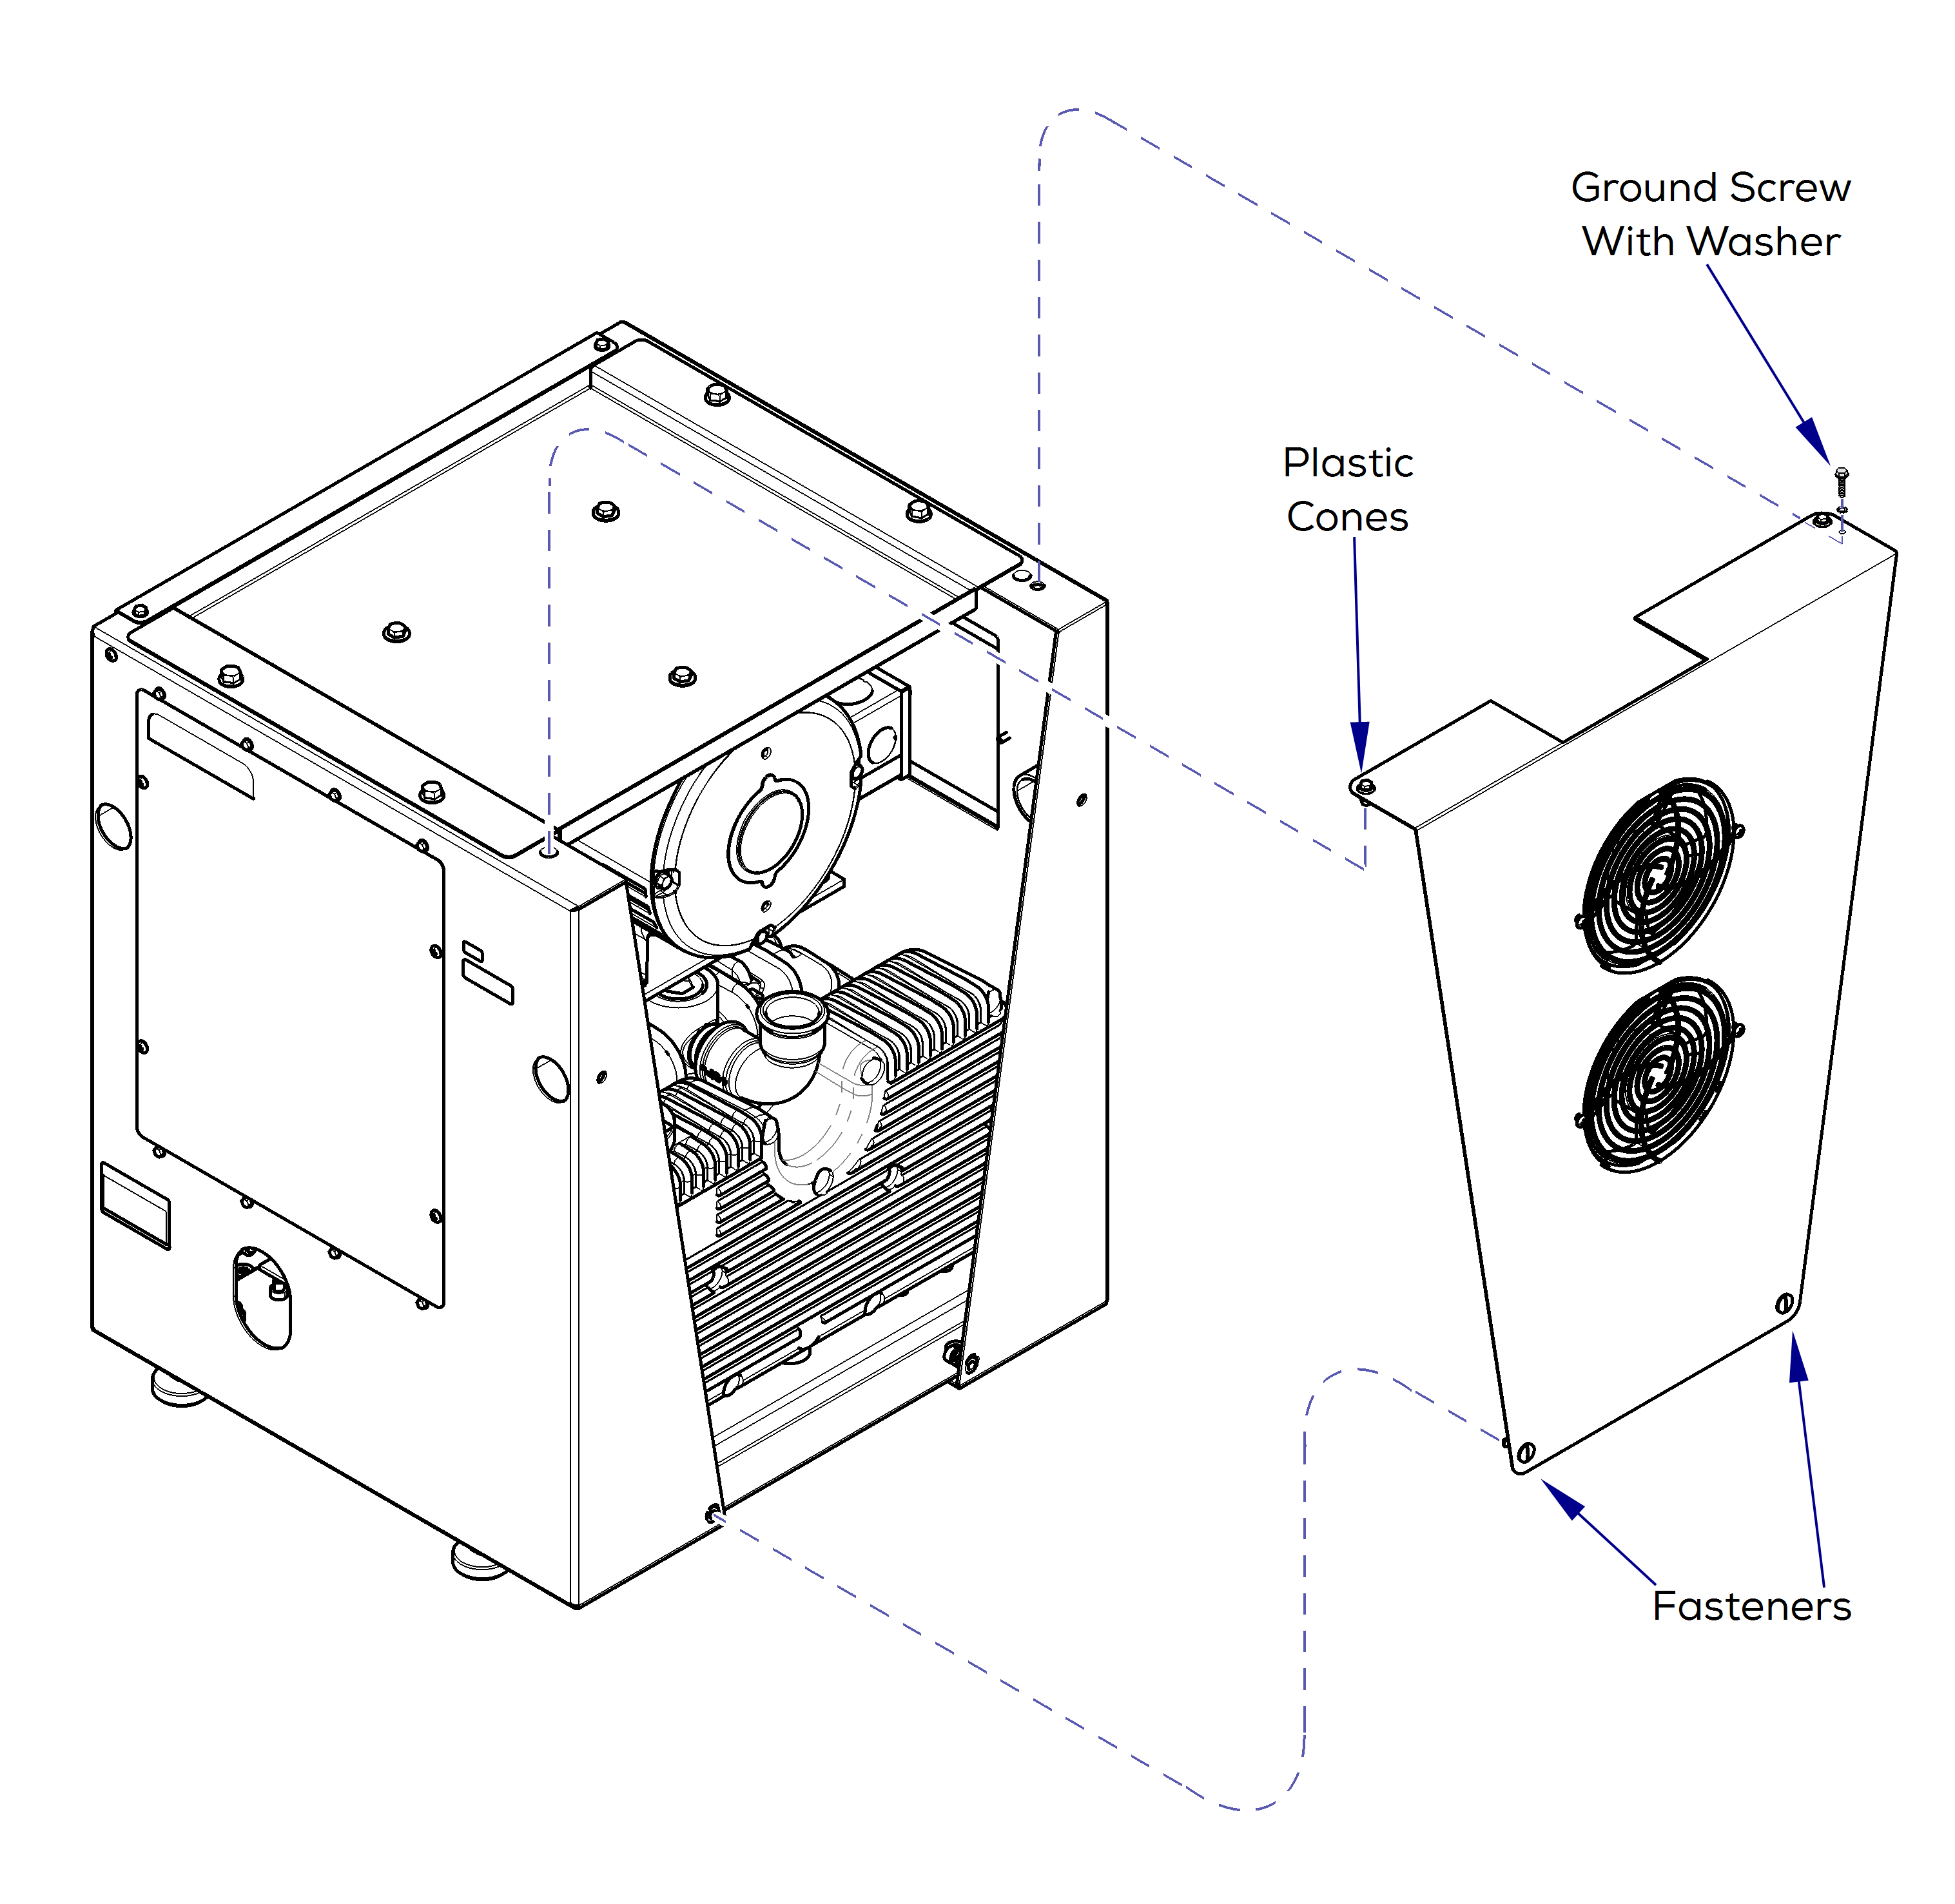
Power must be disconnected when removing back cover.
1.Disconnect power.
2.Remove ground screw.
3.Unfasten back cover by turning two fasteners 1/4 turn, counter clockwise.
4.Lift back cover straight up to loosen from side panels.
5.Unplug both fans.
1.Align plastic cones on new back cover to holes in side panels.
2.Turn fasteners 1/4 turn clockwise to secure back cover.
3.Plug in fans and install back cover.
4.Install ground screw.
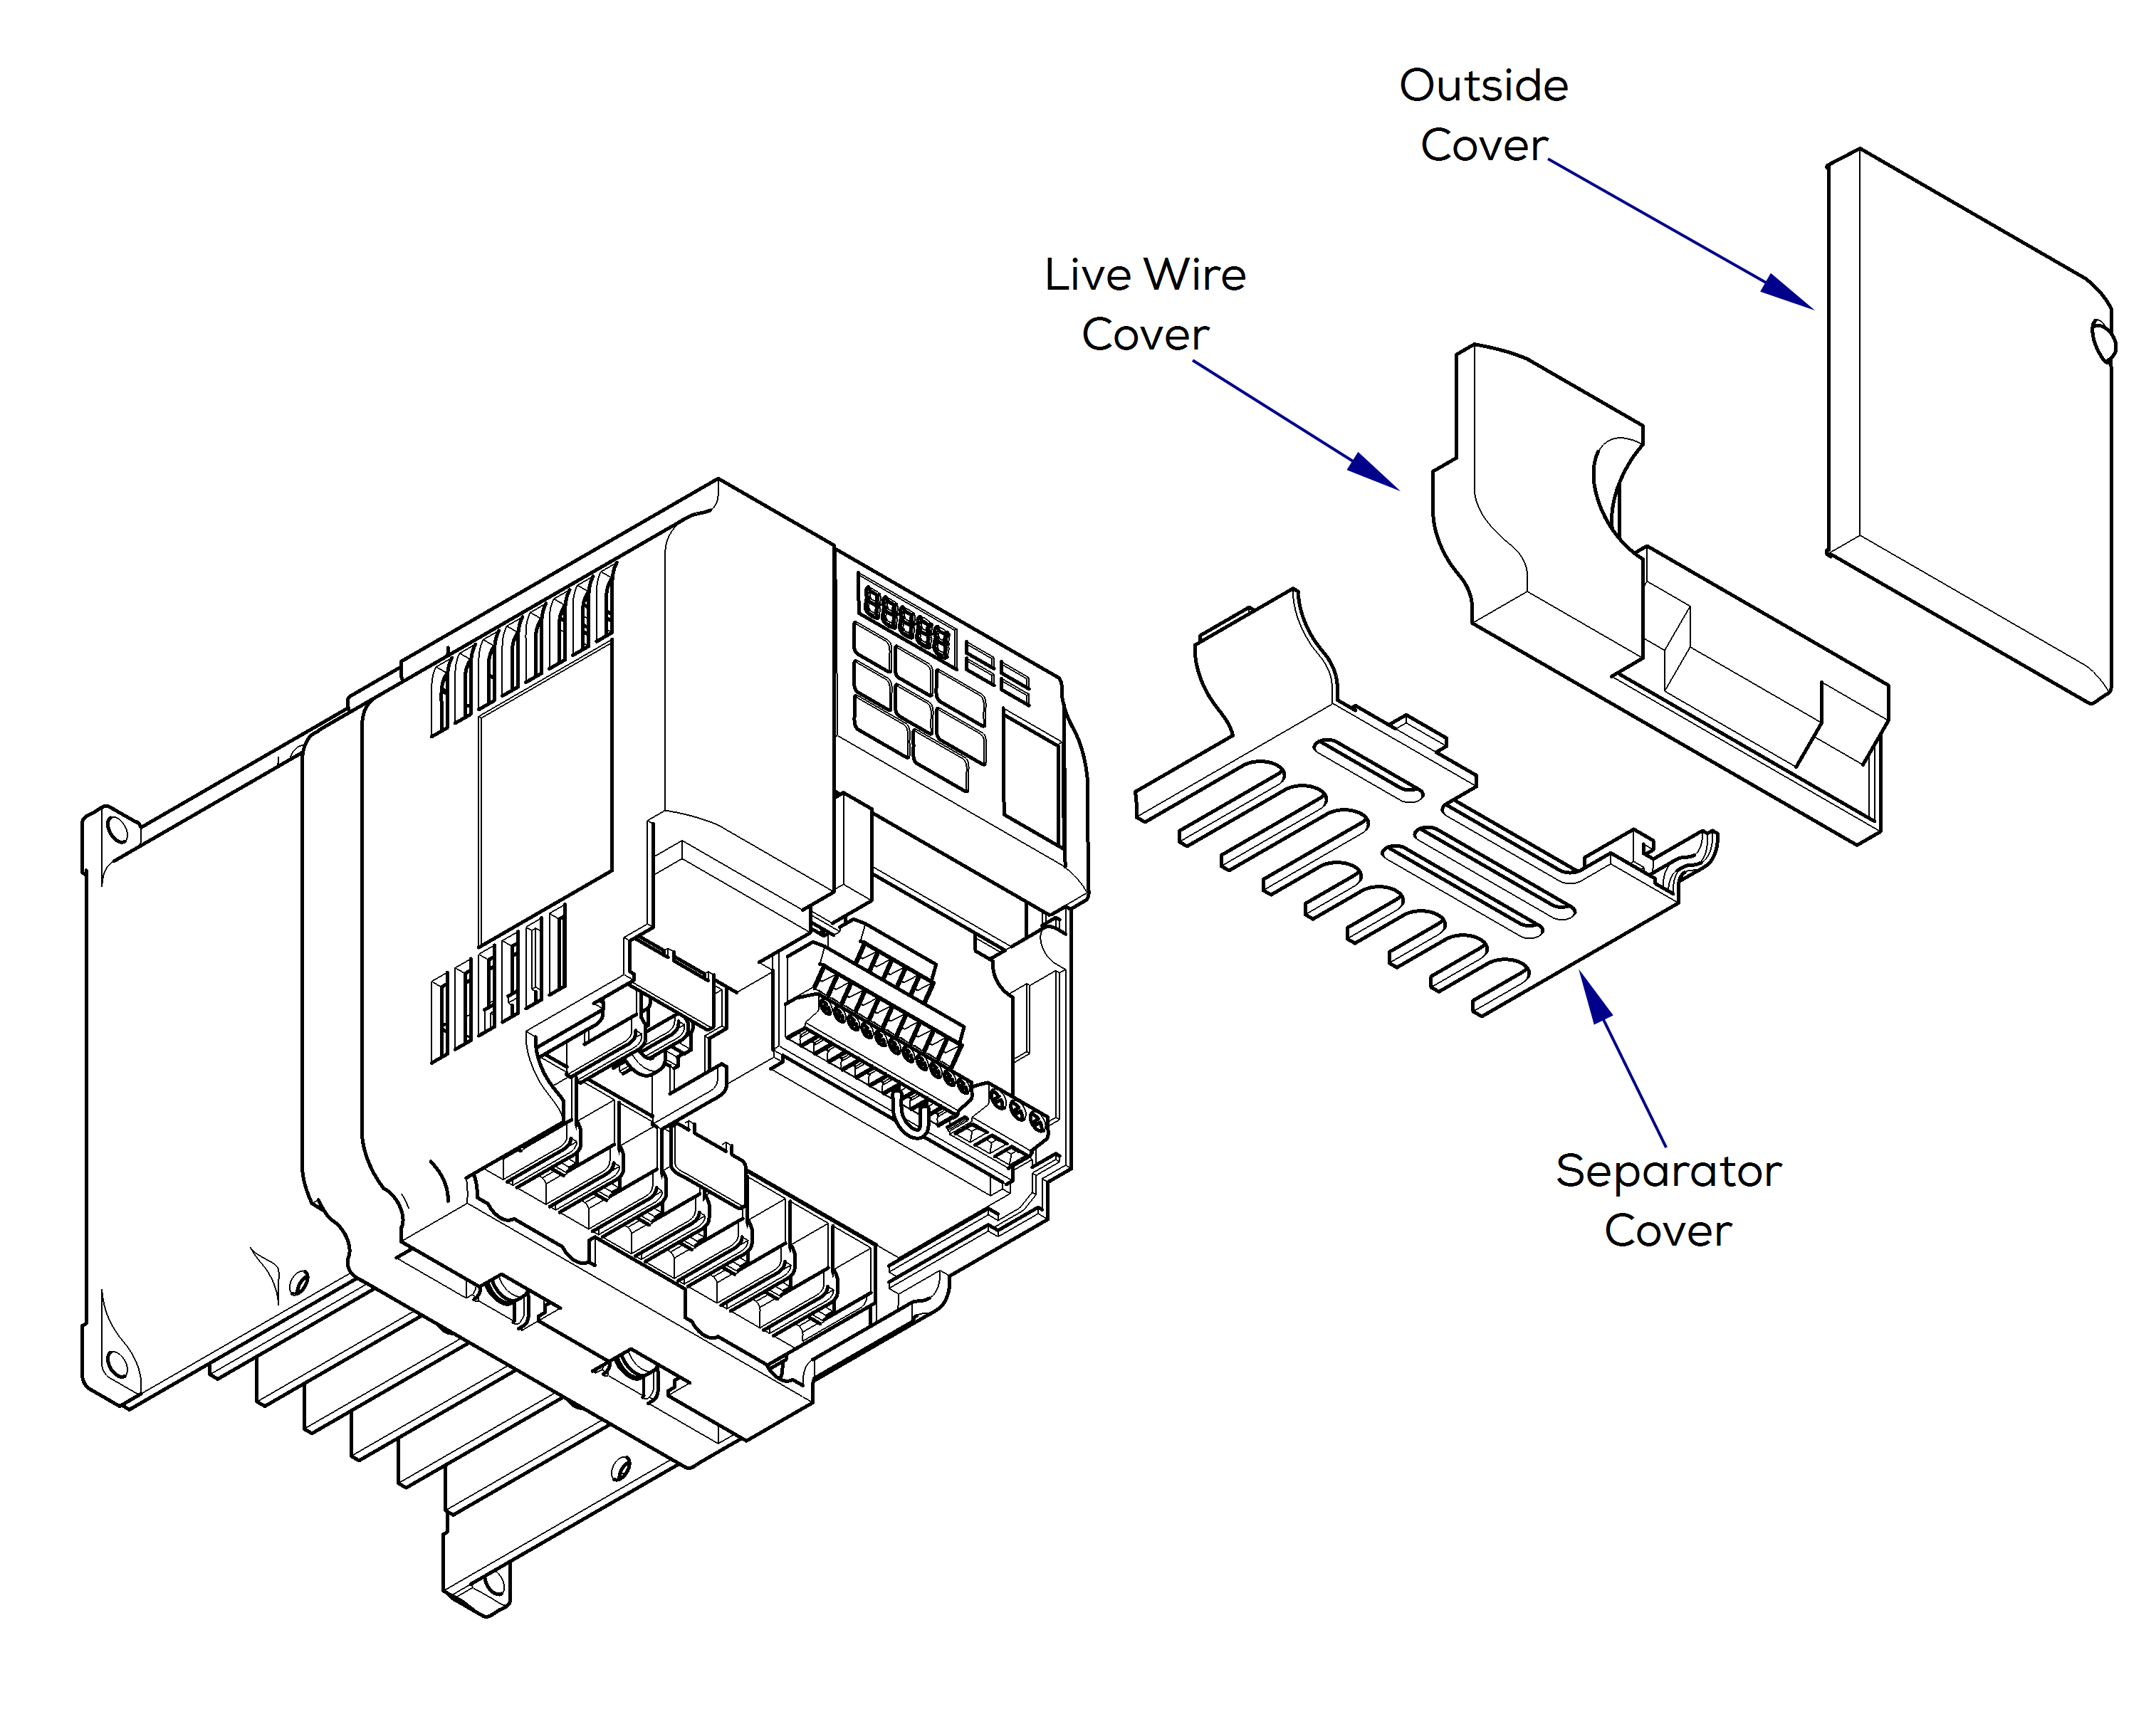
1.Disconnect power.
2.Loosen screw and remove outside cover.
3.Pull off live wire cover.
4.Pull off wire separator cover.
5.To install covers, just push back onto VFD box and tighten screw.

