PowerVac® P Belt Test and Repair
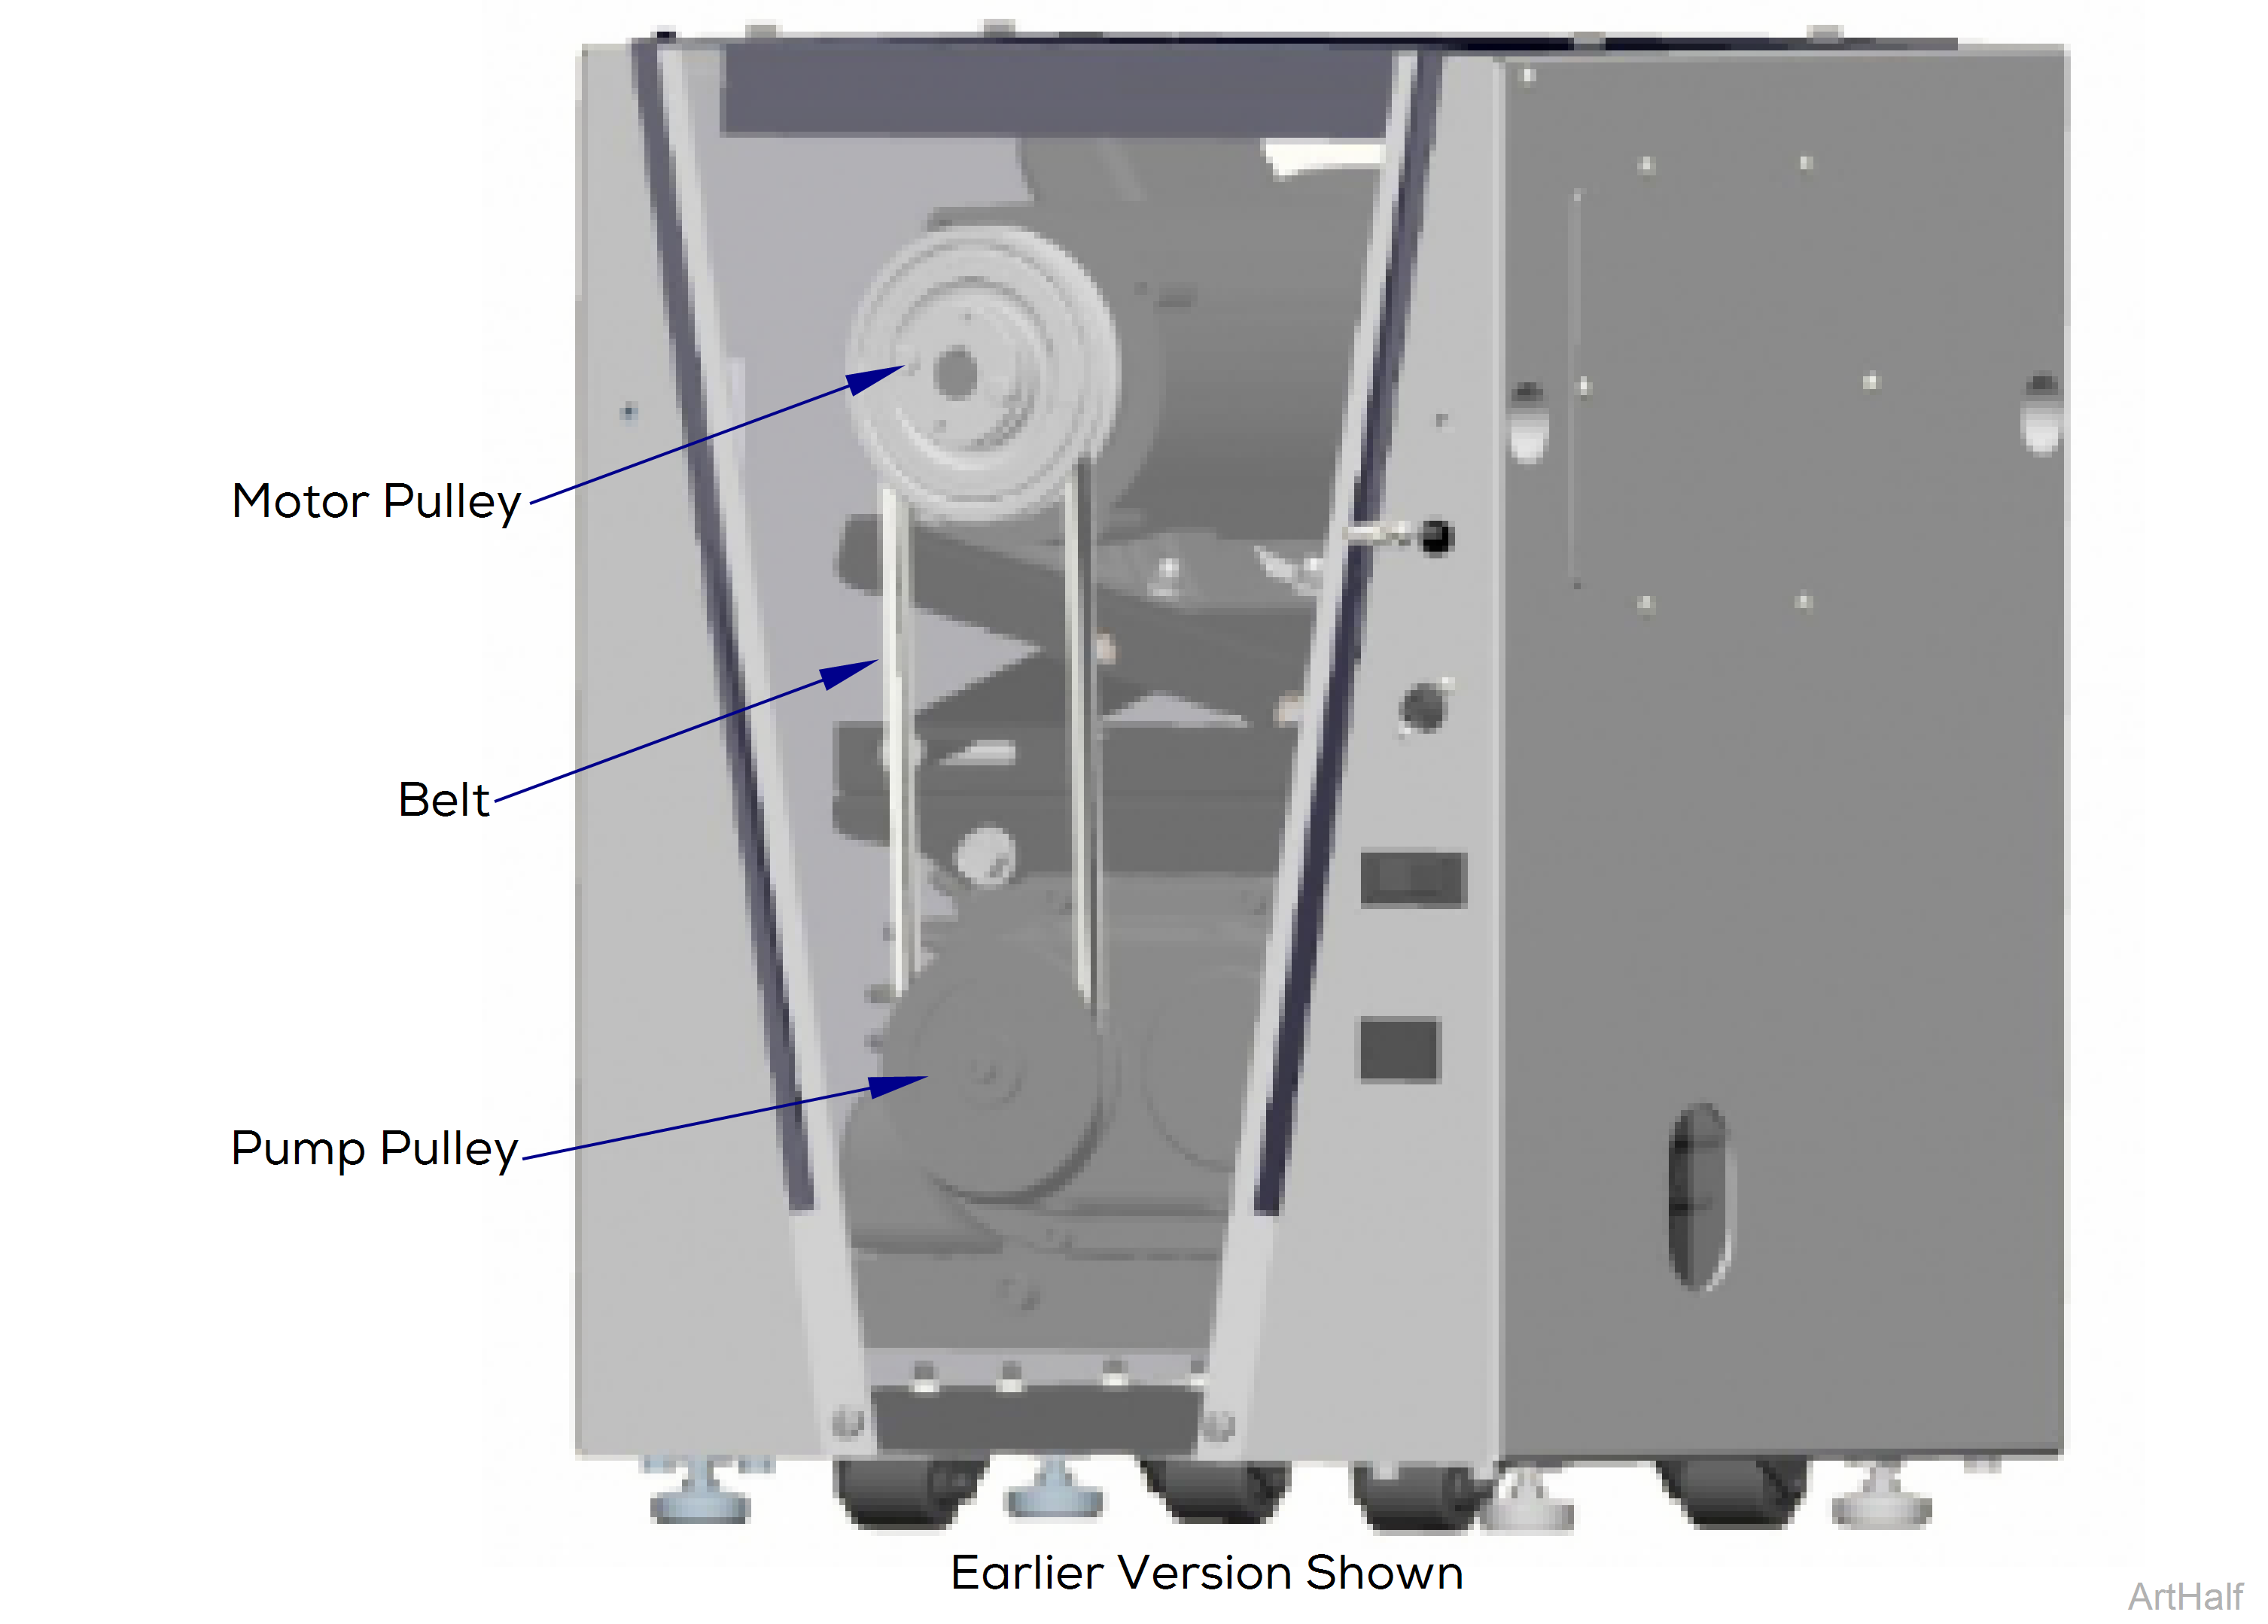
The Belt runs on a motor pulley system operating the pump. Belt should never have nicks, cracks or any visible damage, this will affect performance.
Earlier versions of the PowerVac® the belt will need adjusting from time to time. Newer versions of the PowerVac® have an auto tensioner.
Motors installed after 12/08 are thermally protected with automatic reset. Unit may start without warning.
1.Remove front cover. Refer to: Front Cover.
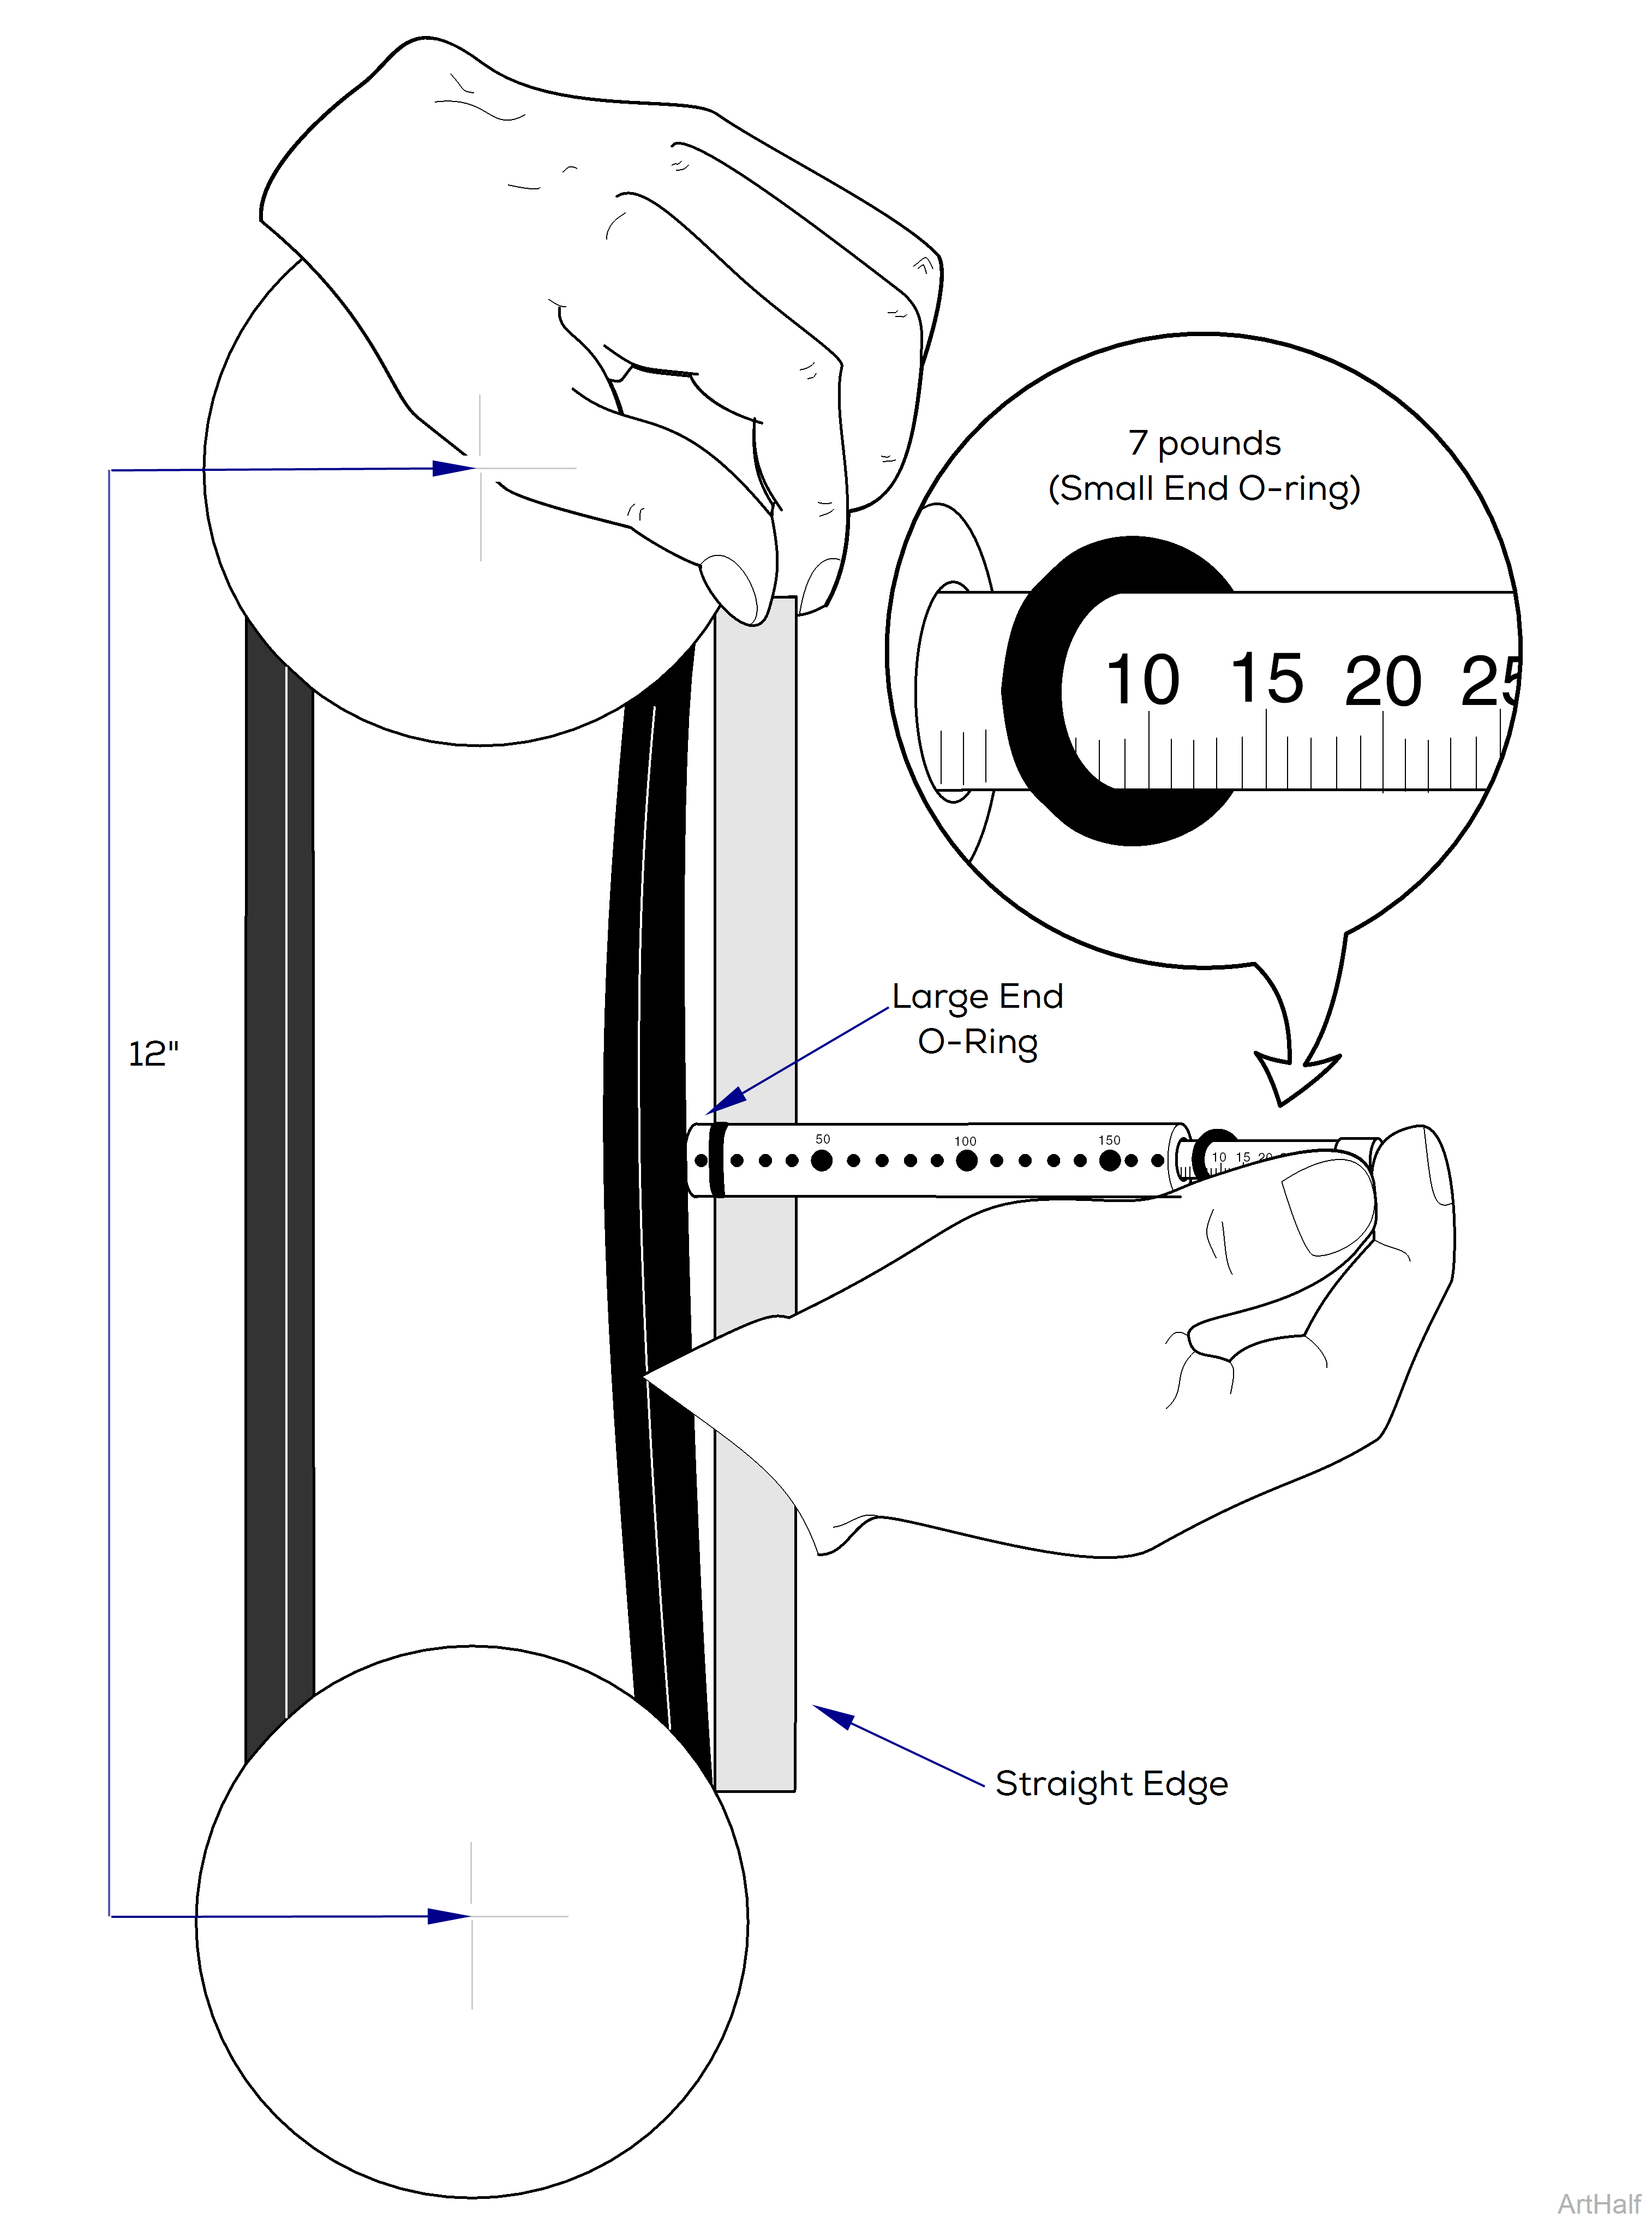
2.Position o-ring on large end of tension checker to 12”. Use “Inches of Span Length” increments on checker.
3.Slide o-ring on small shaft to 0 pounds.
4.Align straight edge with belt.
5.Apply force on the plunger until o-ring on large shaft is even with straight edge.
6.Remove the tension checker and read the defection force the small o-ring was moved to. Verify deflection reading is 7 lbs.
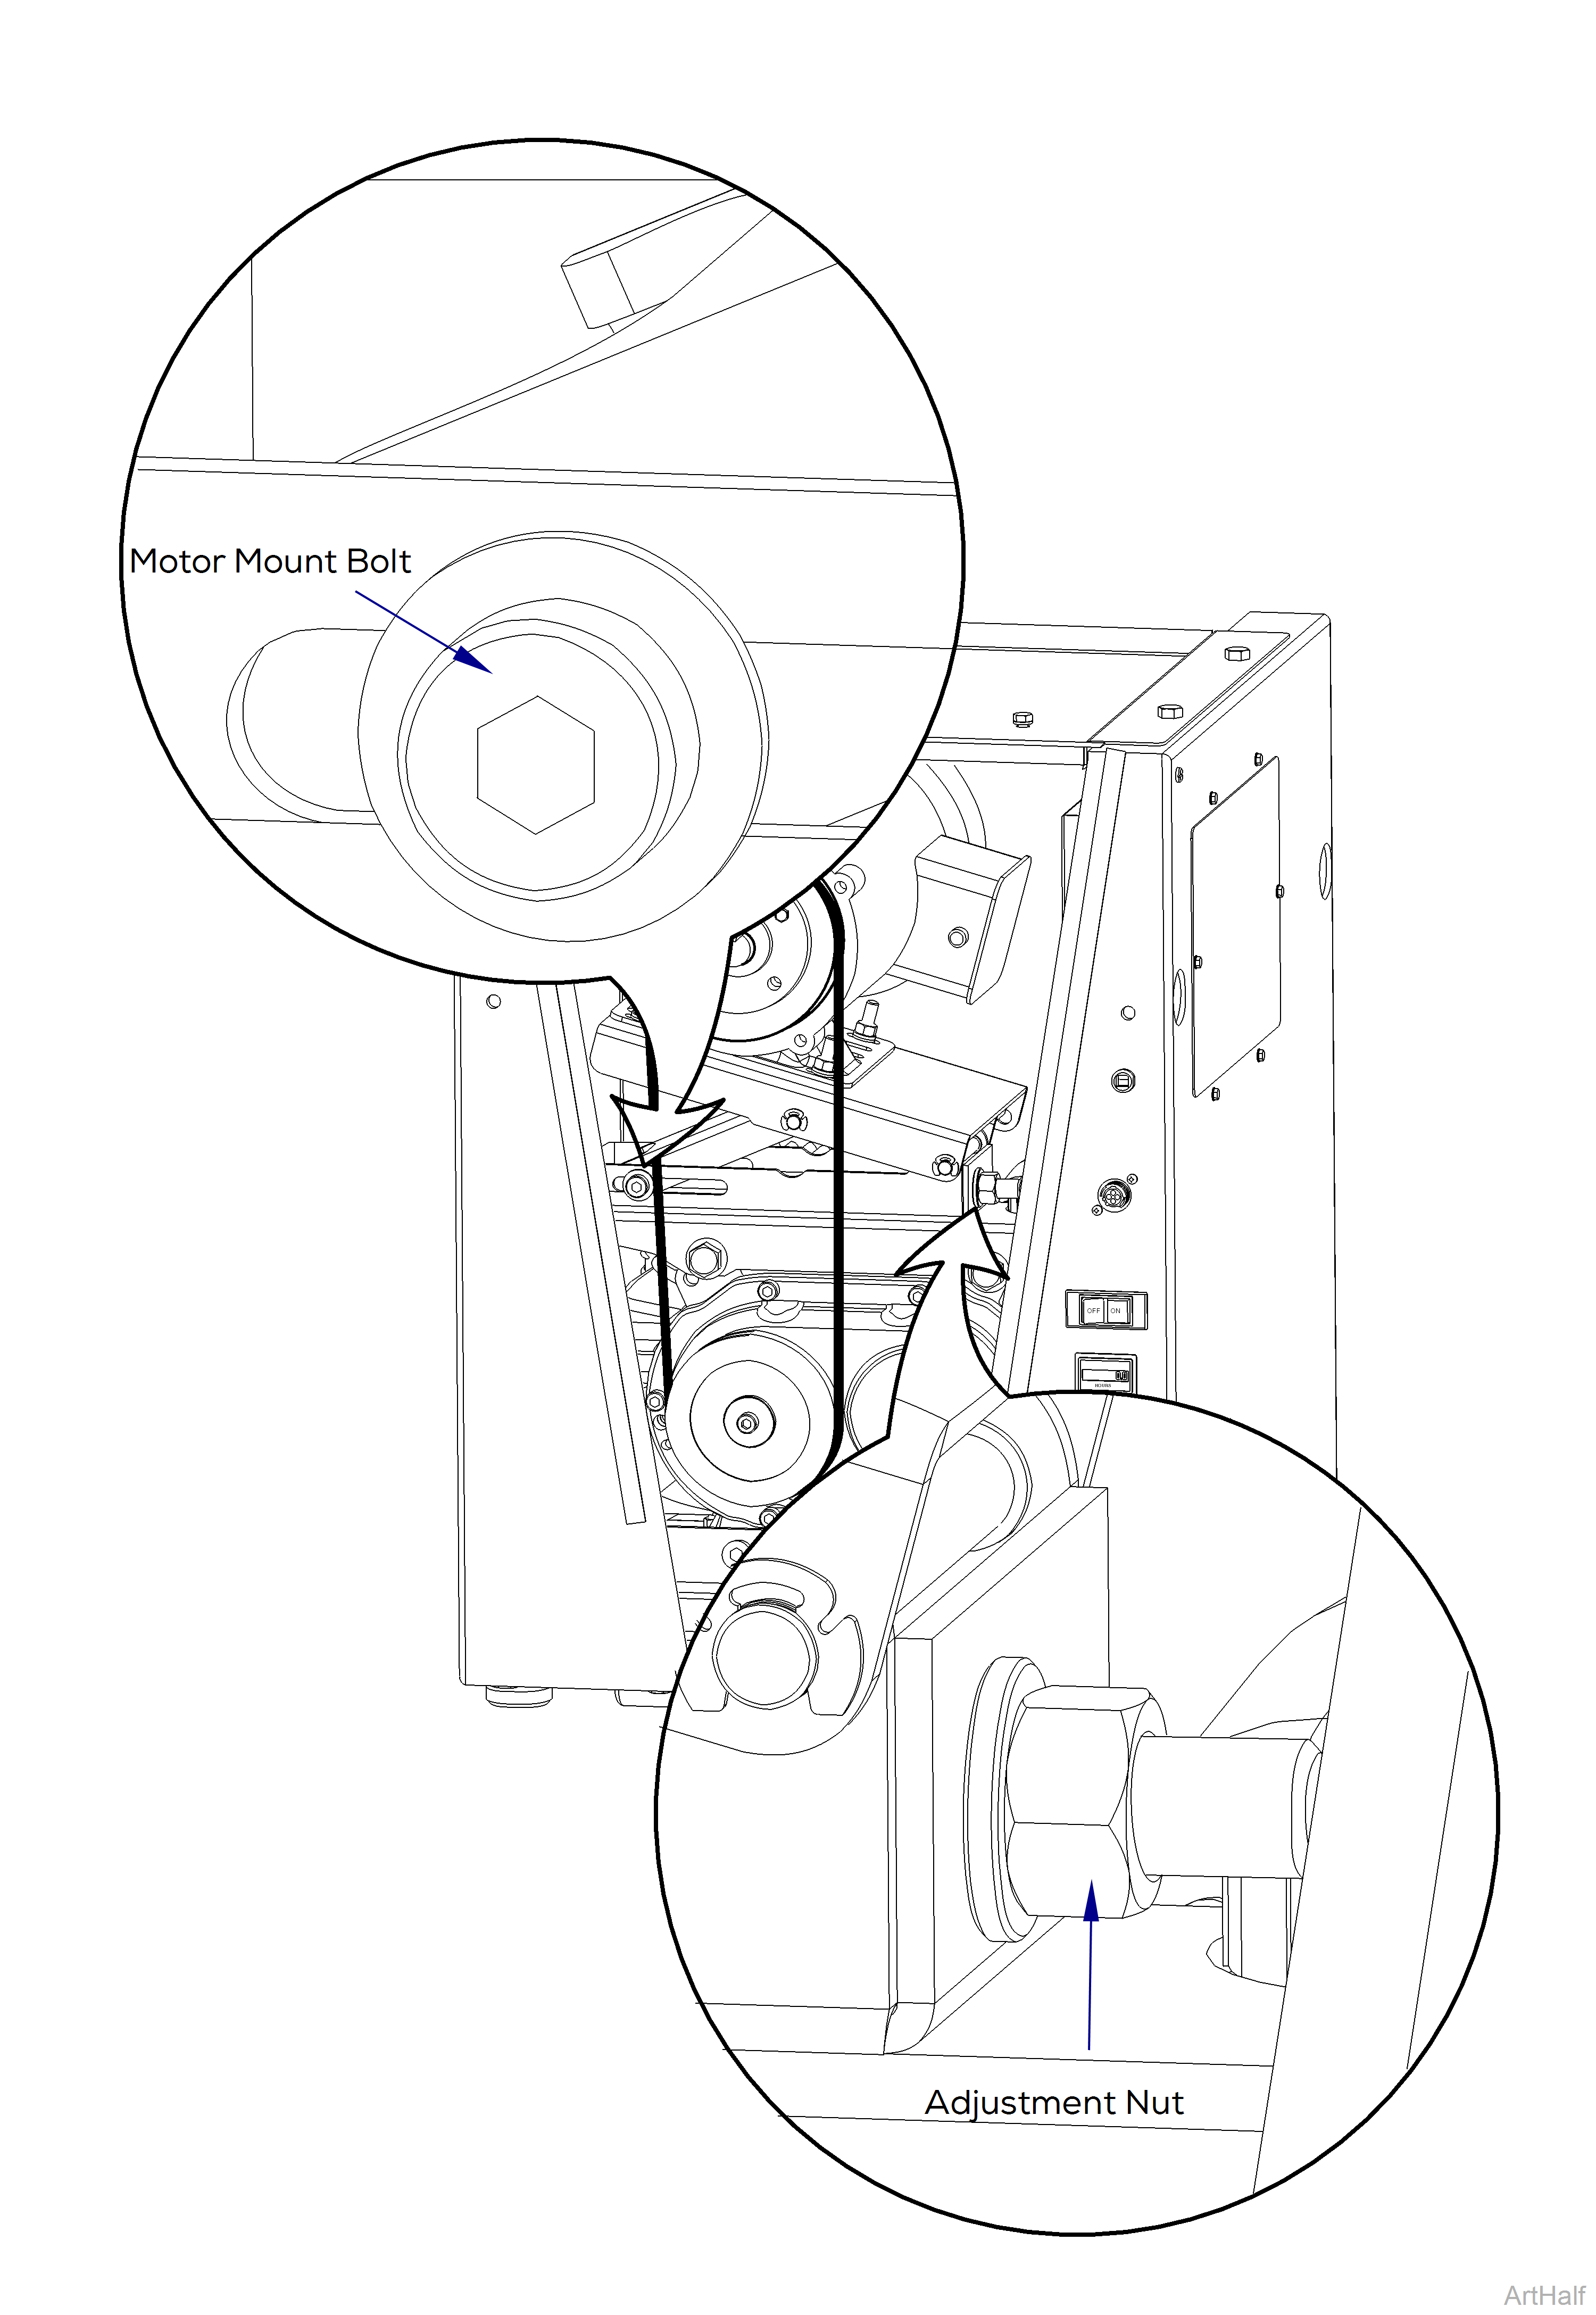
1.Loosen Motor Mount Bolt.
2.Move adjustment nut clockwise to tighten belt.
3.Move adjustment nut counter clockwise to loosen belt
4.Use belt tension checker to recheck deflection reading.
5.Tighten motor mount bolt.
6.Replace front cover.
1.Tighten motor mount bolt.
2.Replace front cover.
1.Disconnect power at on/off switch and main power supply box.
The On/Off switch controls only the secondary circuit power. The main power source must be turned off to remove all power in the control box.
2.Remove front cover. Refer to: Front Cover
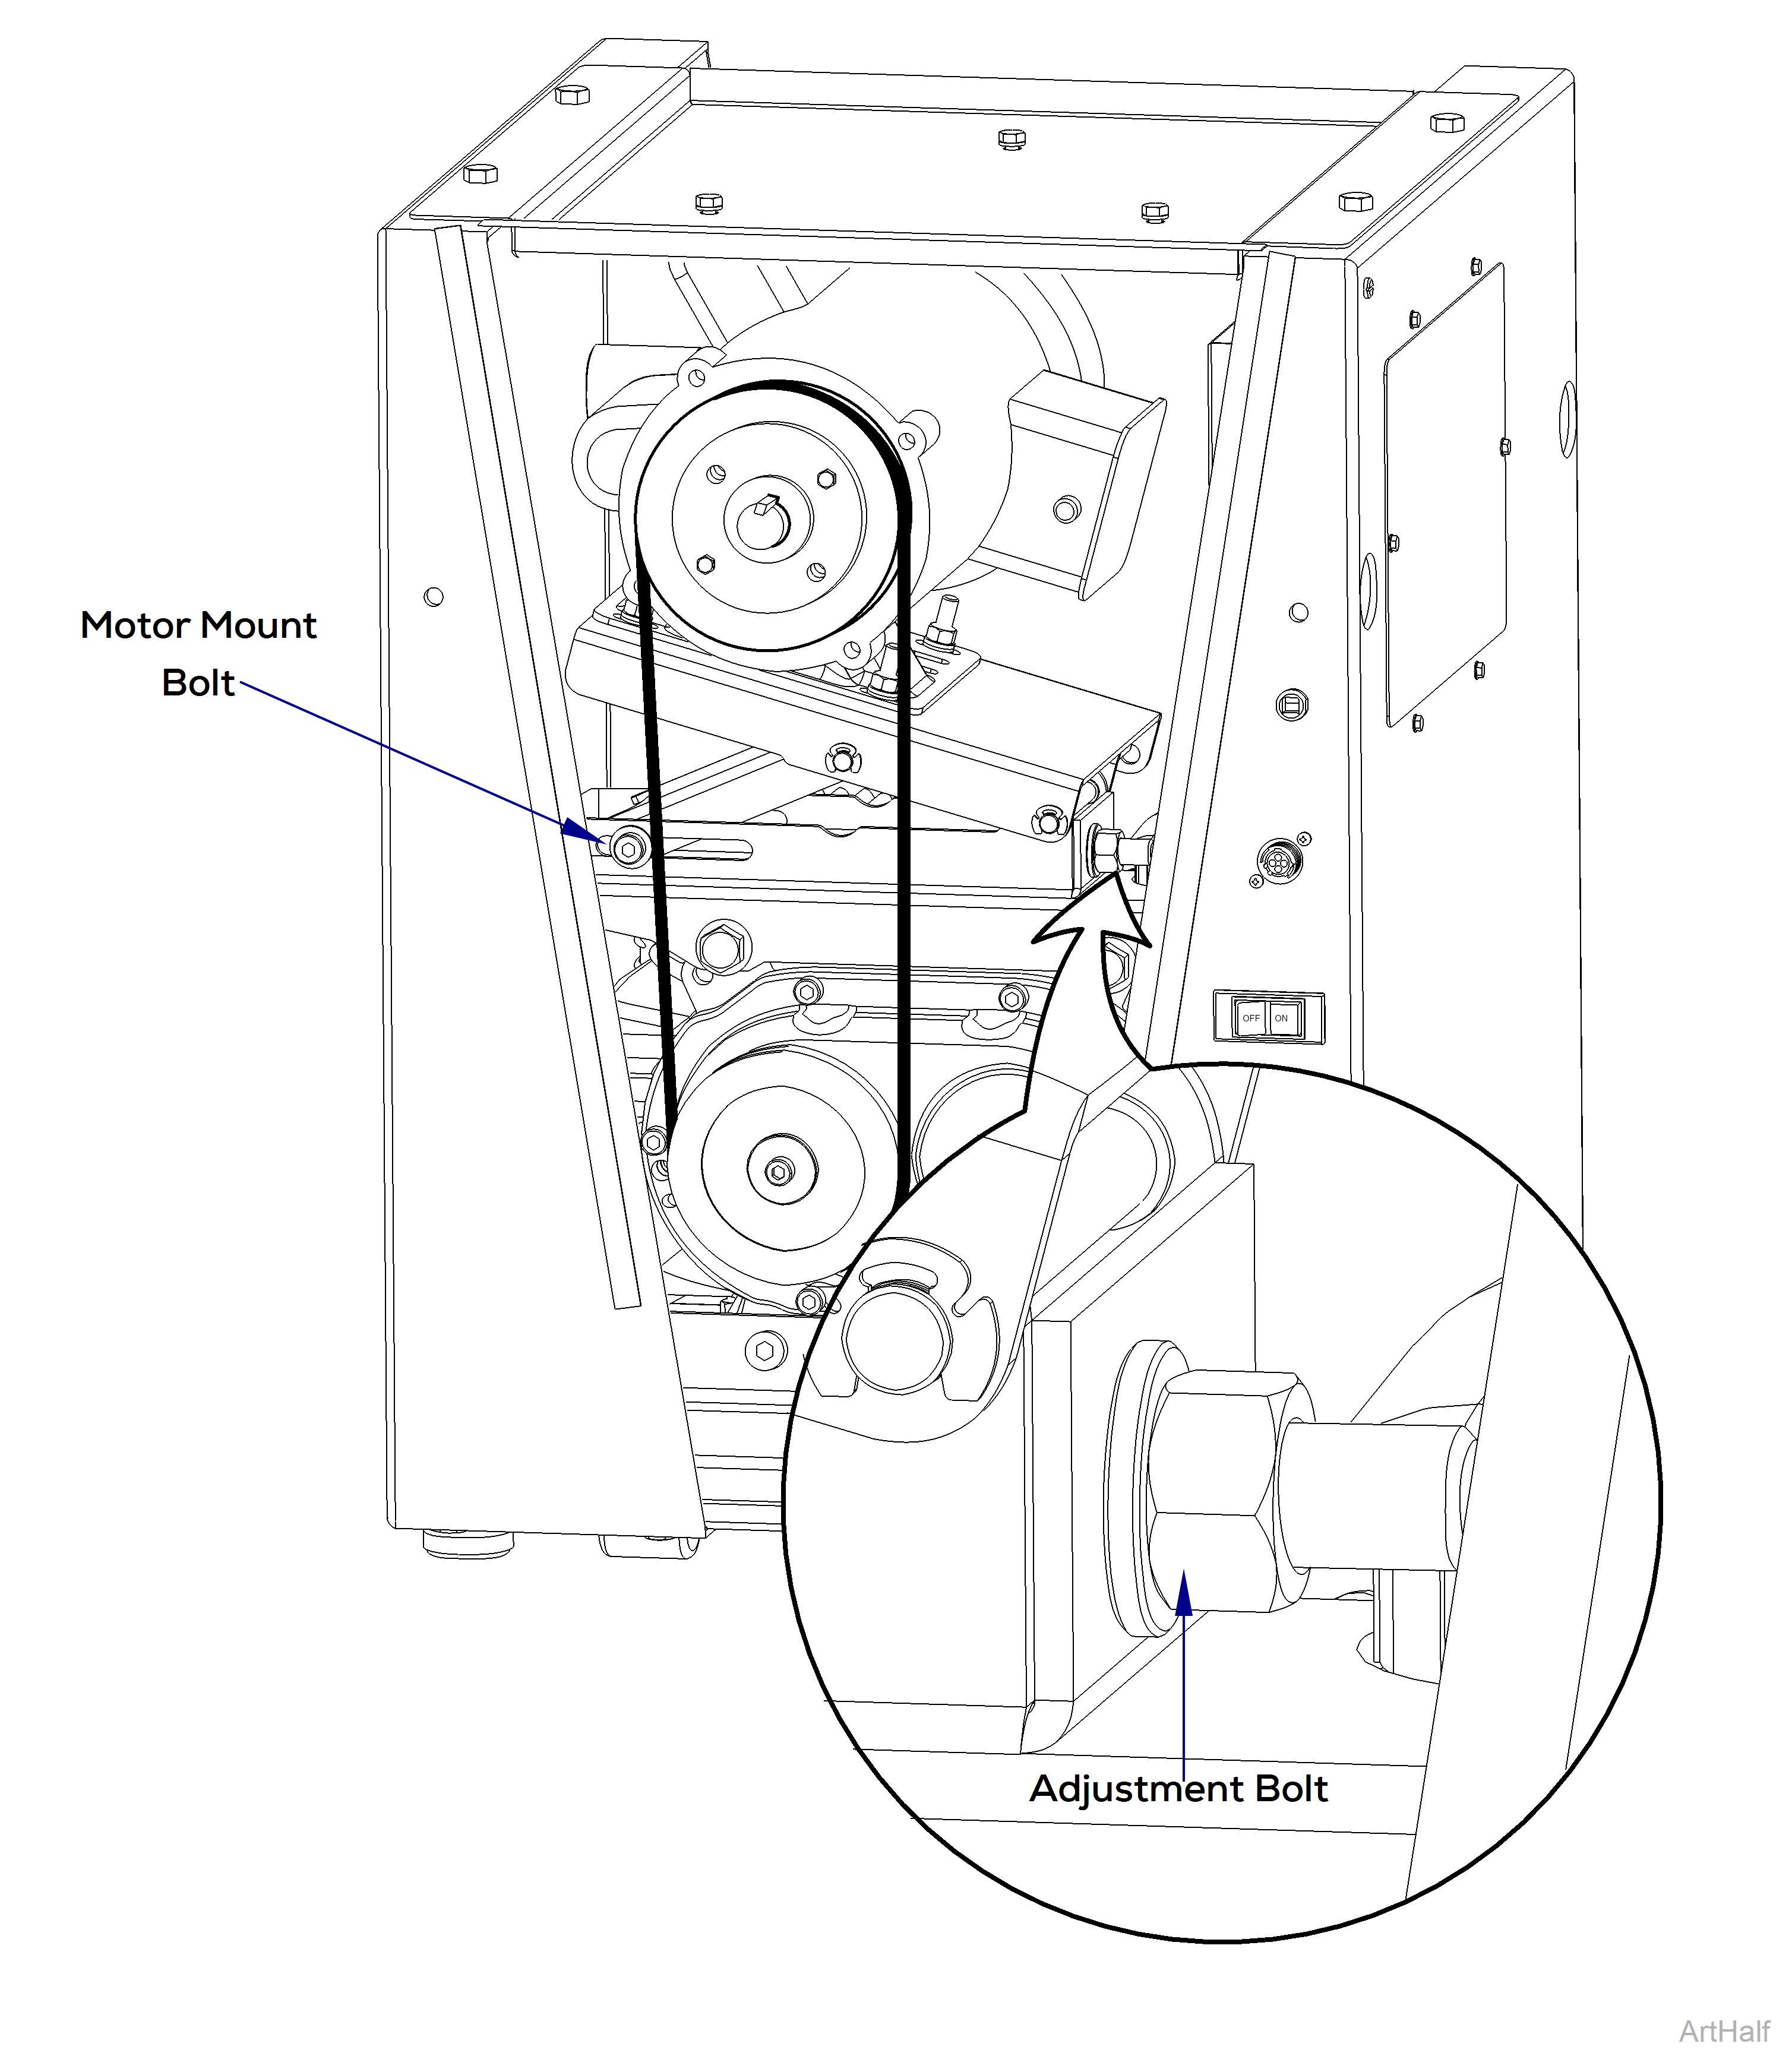
3.Loosen motor mount bolt and adjustment bolt.
4.Remove belt.
5.Replace belt.
6.Tighten adjustment bolt and motor mount bolt.
7.Set belt tension. Refer to: Belt Adjustment section above.
8.Replace front cover.
9.Connect power.

1.Disconnect power at on/off switch and main power supply box.
2.Remove front cover. Refer to: Front Cover
3.Slightly push tension arm up toward the pulley and remove belt with other hand.
4.Slightly push tension arm up toward the pulley and install new belt with other hand.
5.Replace front cover.
