PowerVac® P Check Valve Test and Repair
The Check Valve located in the drain allows the separator to drain upon removal of vacuum pressure. When the pump is not running, the valve opens, allowing liquids to drain. If the pump is running the valve closes to keep air in the drain from back flushing into the system.
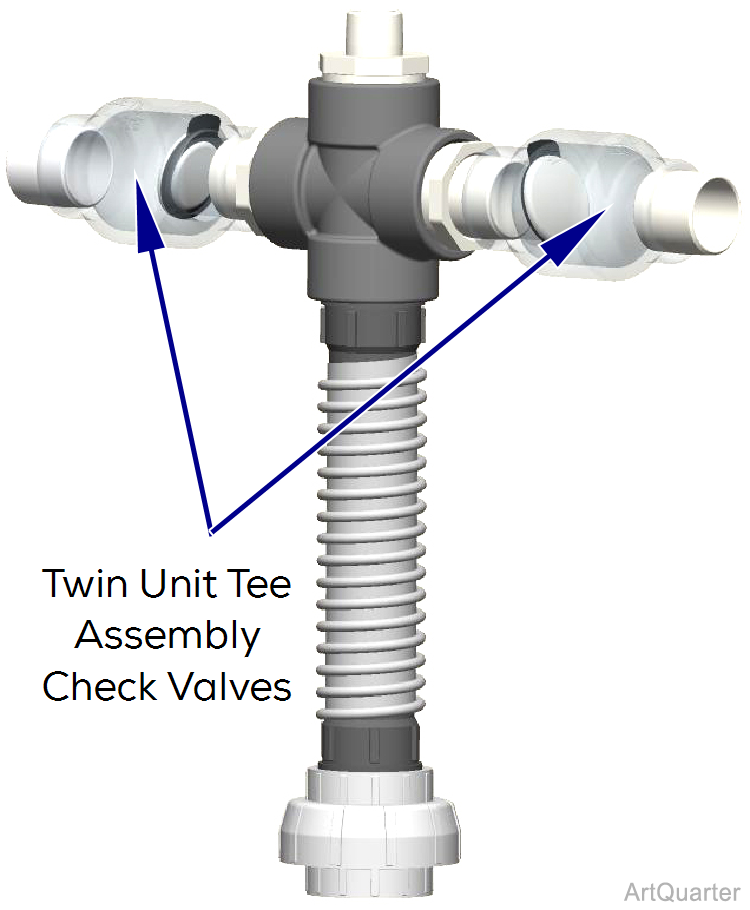
Each vacuum pump in a multiple pump installation requires a check valve to be installed into the intake line. This prevents loss of suction pressure when one pump in the system is turned off. If no check valve is present, flow will be allowed through he “off” pump, creating a loss suction of the rest of the system.

When installing check valve in horizontal position, confirm the hinge for the flapper is on top of the valve.
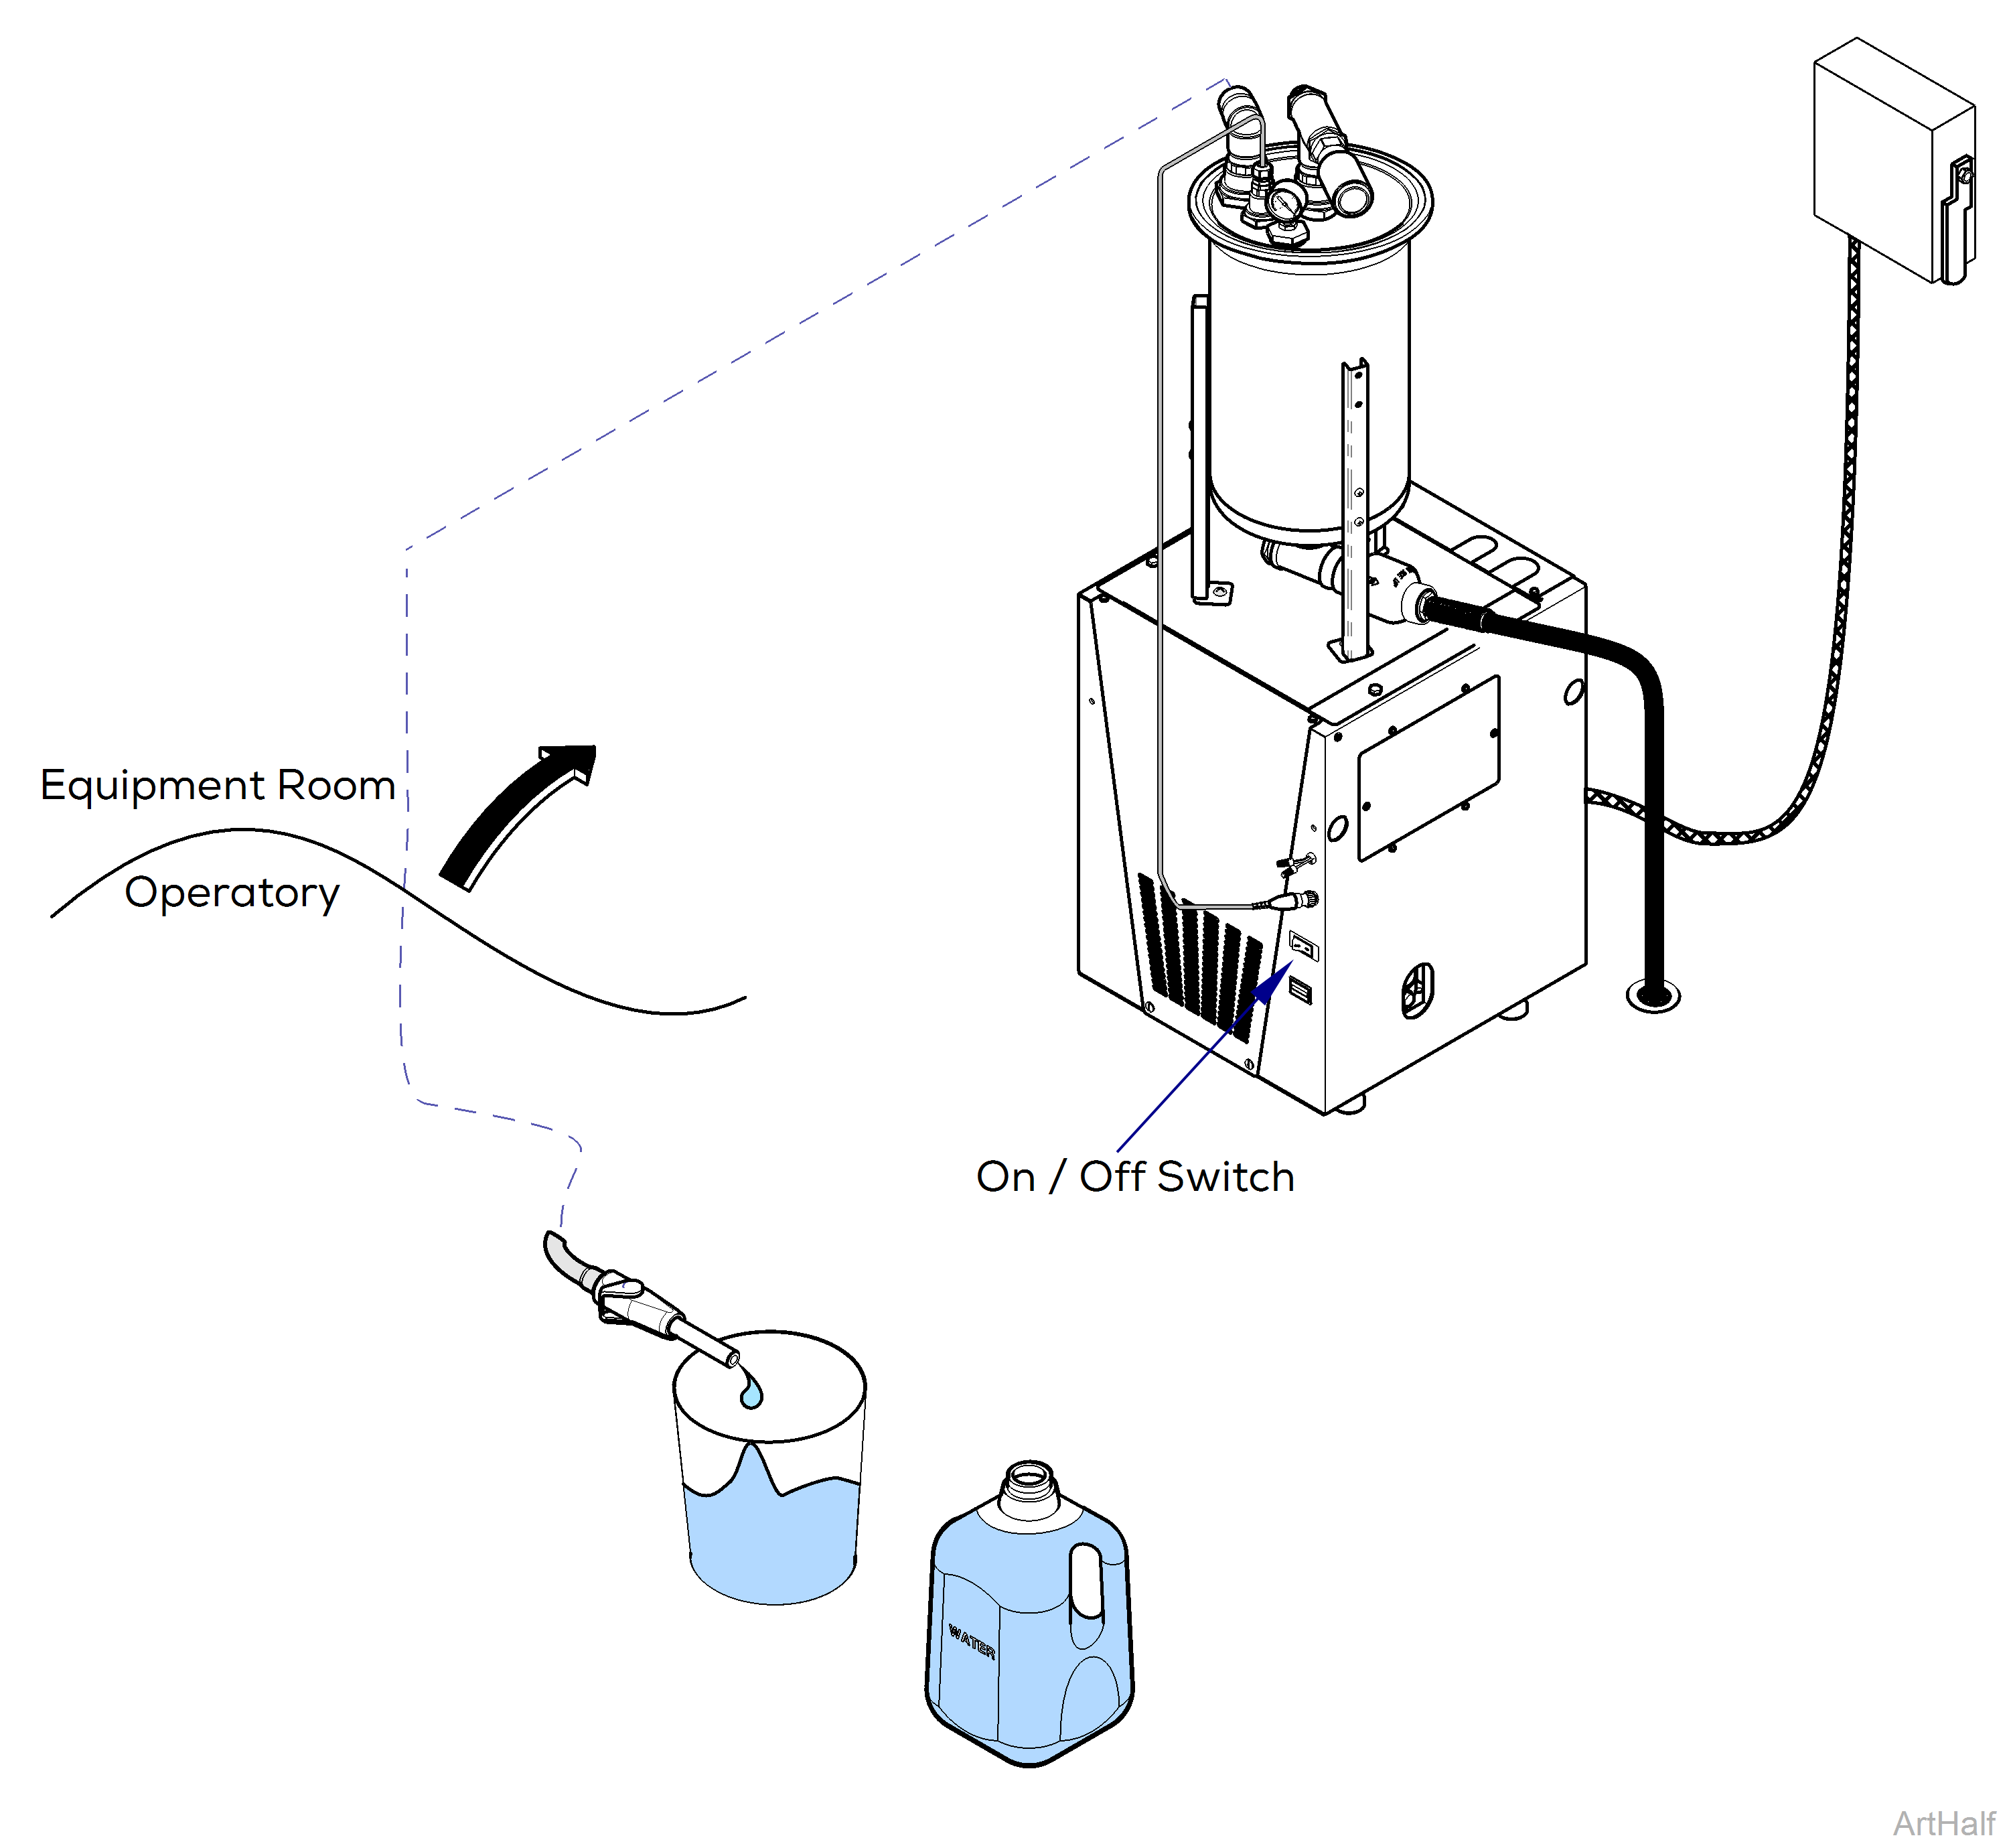
1.Vacuum 1-2 gallons of fresh water into system through operatory lines.
2.Turn vacuum off and ensure that water drains from separator.
If water does not drain out, remove lid and see if valve is clogged. If so, flush and clean tank. If not, replace valve. If water drains out, continue with next test on step 3.
3.Turn power off.
4.Allow unit to drain completely.
5.Pull drain hose out of drain.
6.Turn power on and place hand over end of drain hose.
If you feel suction, check valve is stuck. Proceed to replace check valve. If no suction is felt, then check valve is operating correctly.

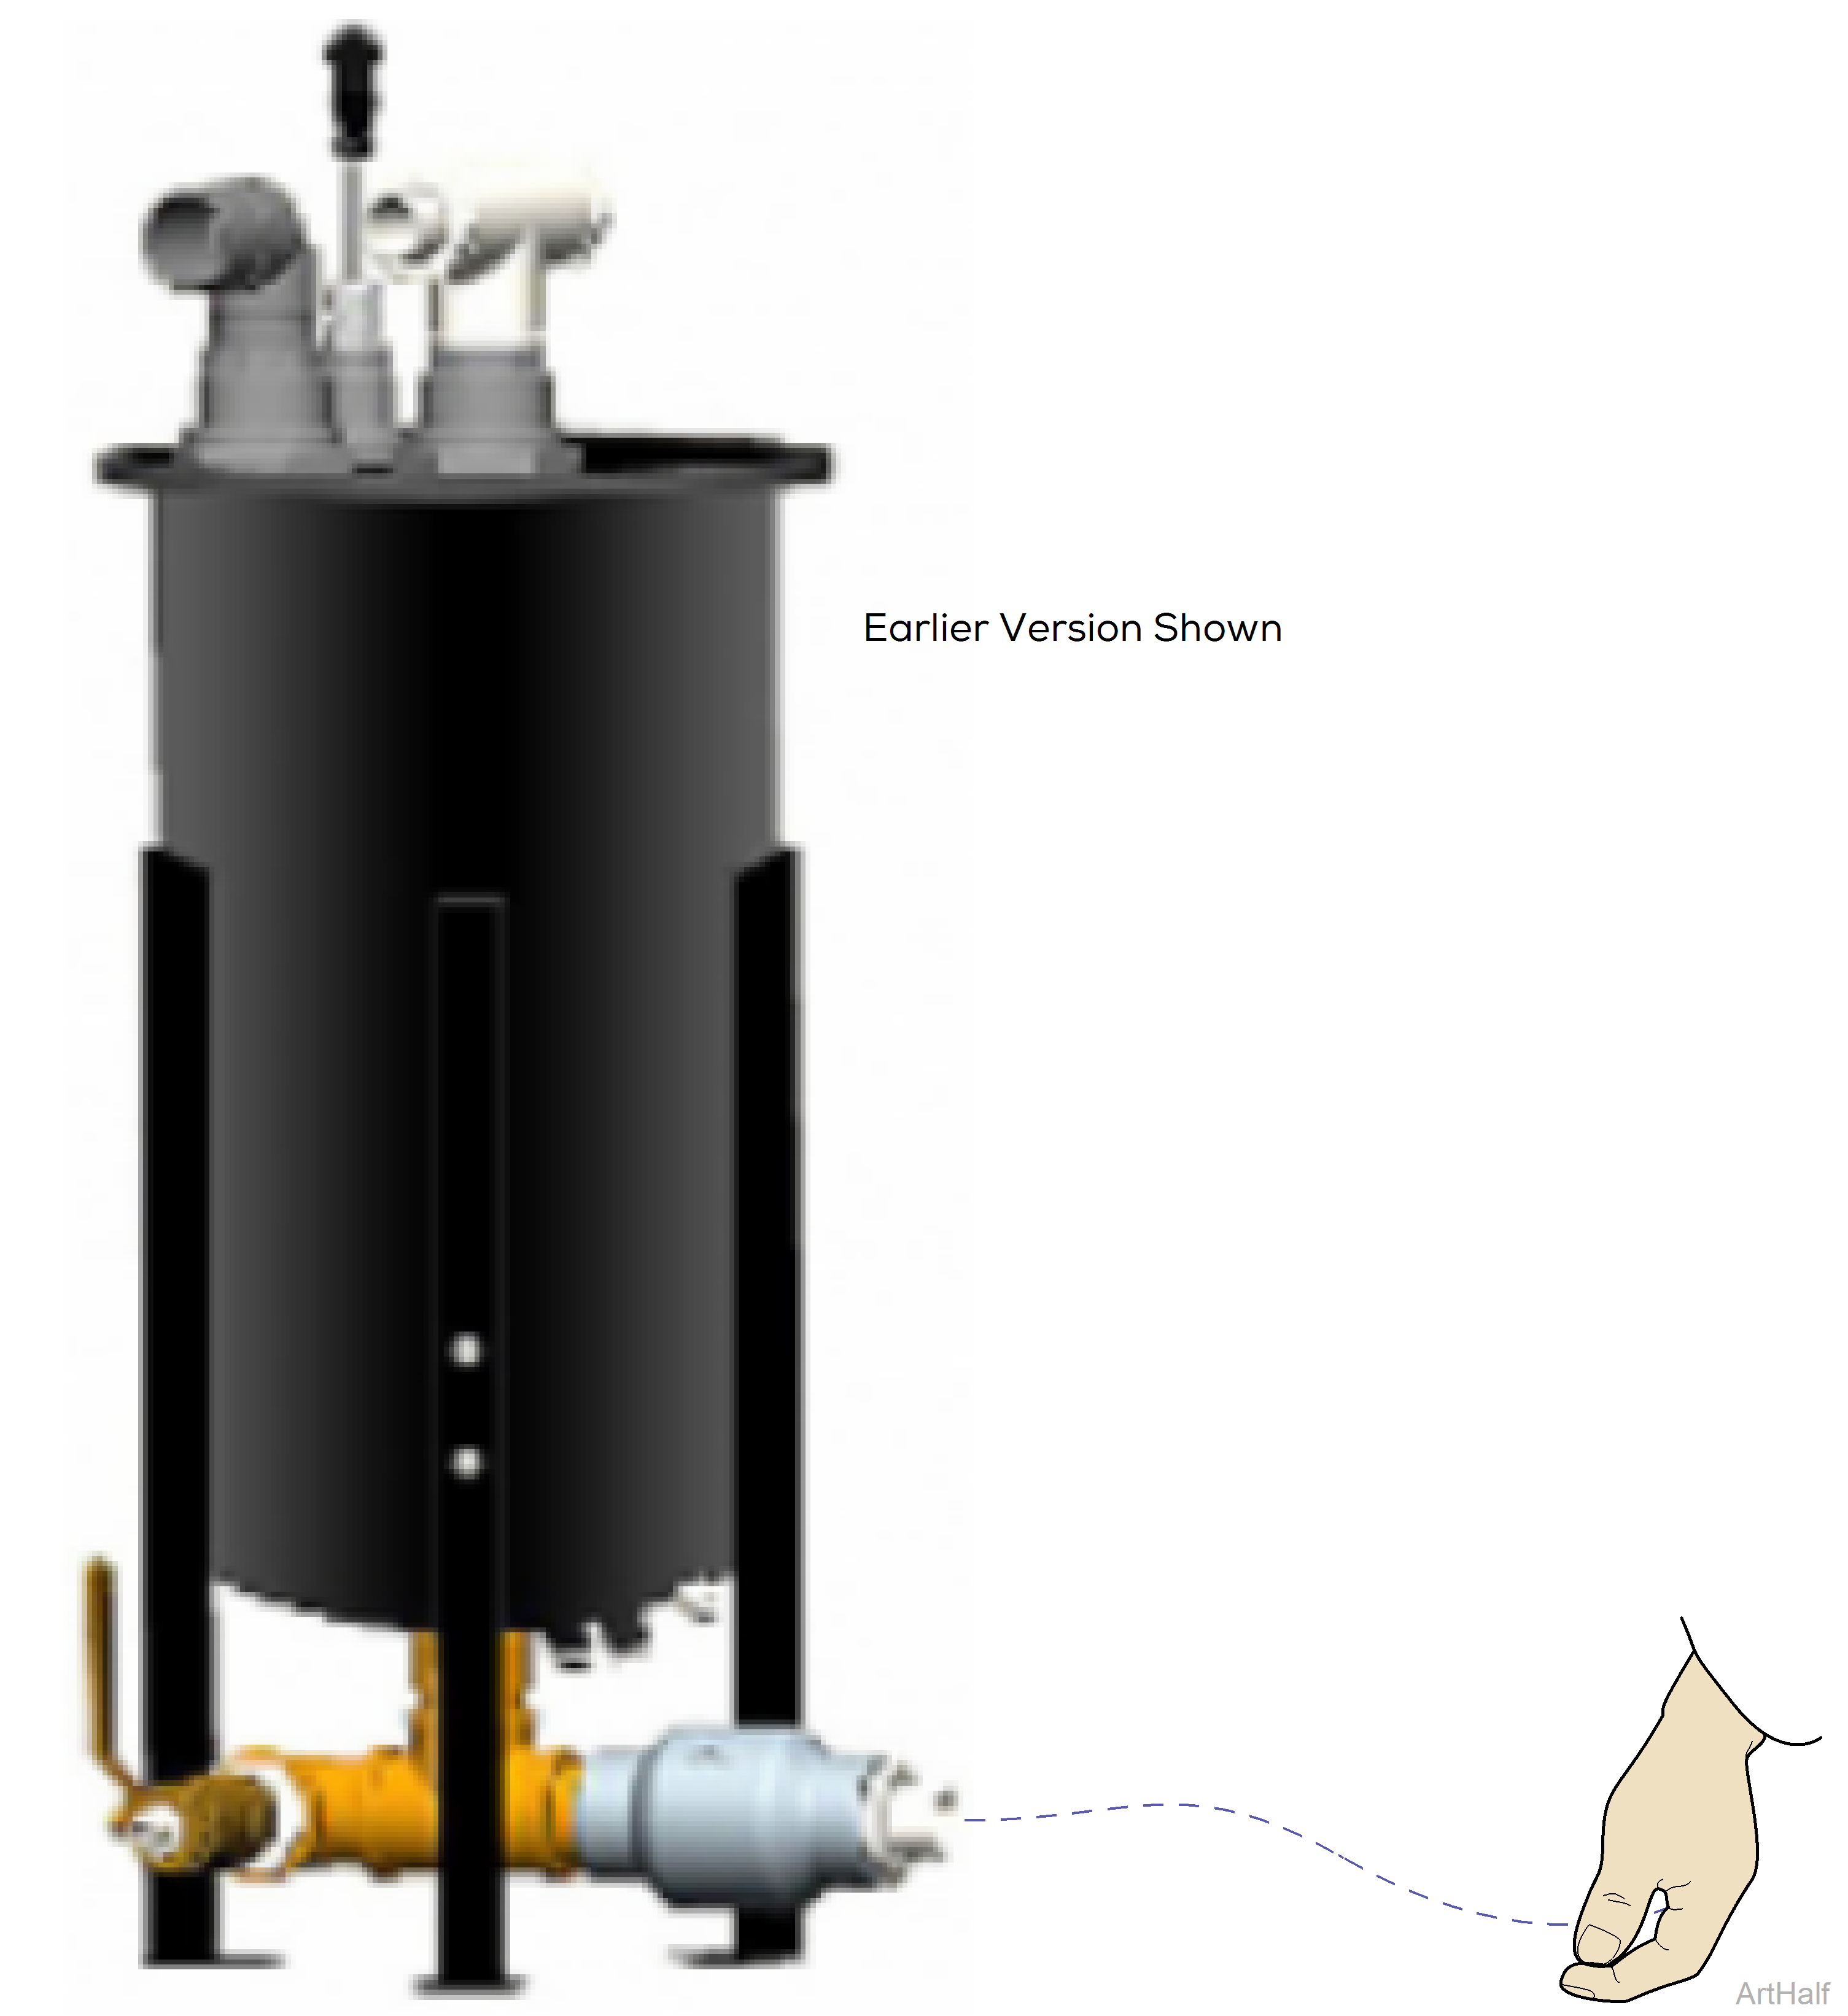
1.Turn power off.
2.Remove drain hose from check valve.
3.Unscrew check valve.
4.Install check valve.
5.Install drain hose to check valve.
6.Turn power on and place hand over end of check valve.
Verify you do not feel any suction.
