PowerVac® P Float Assembly Test and Repair
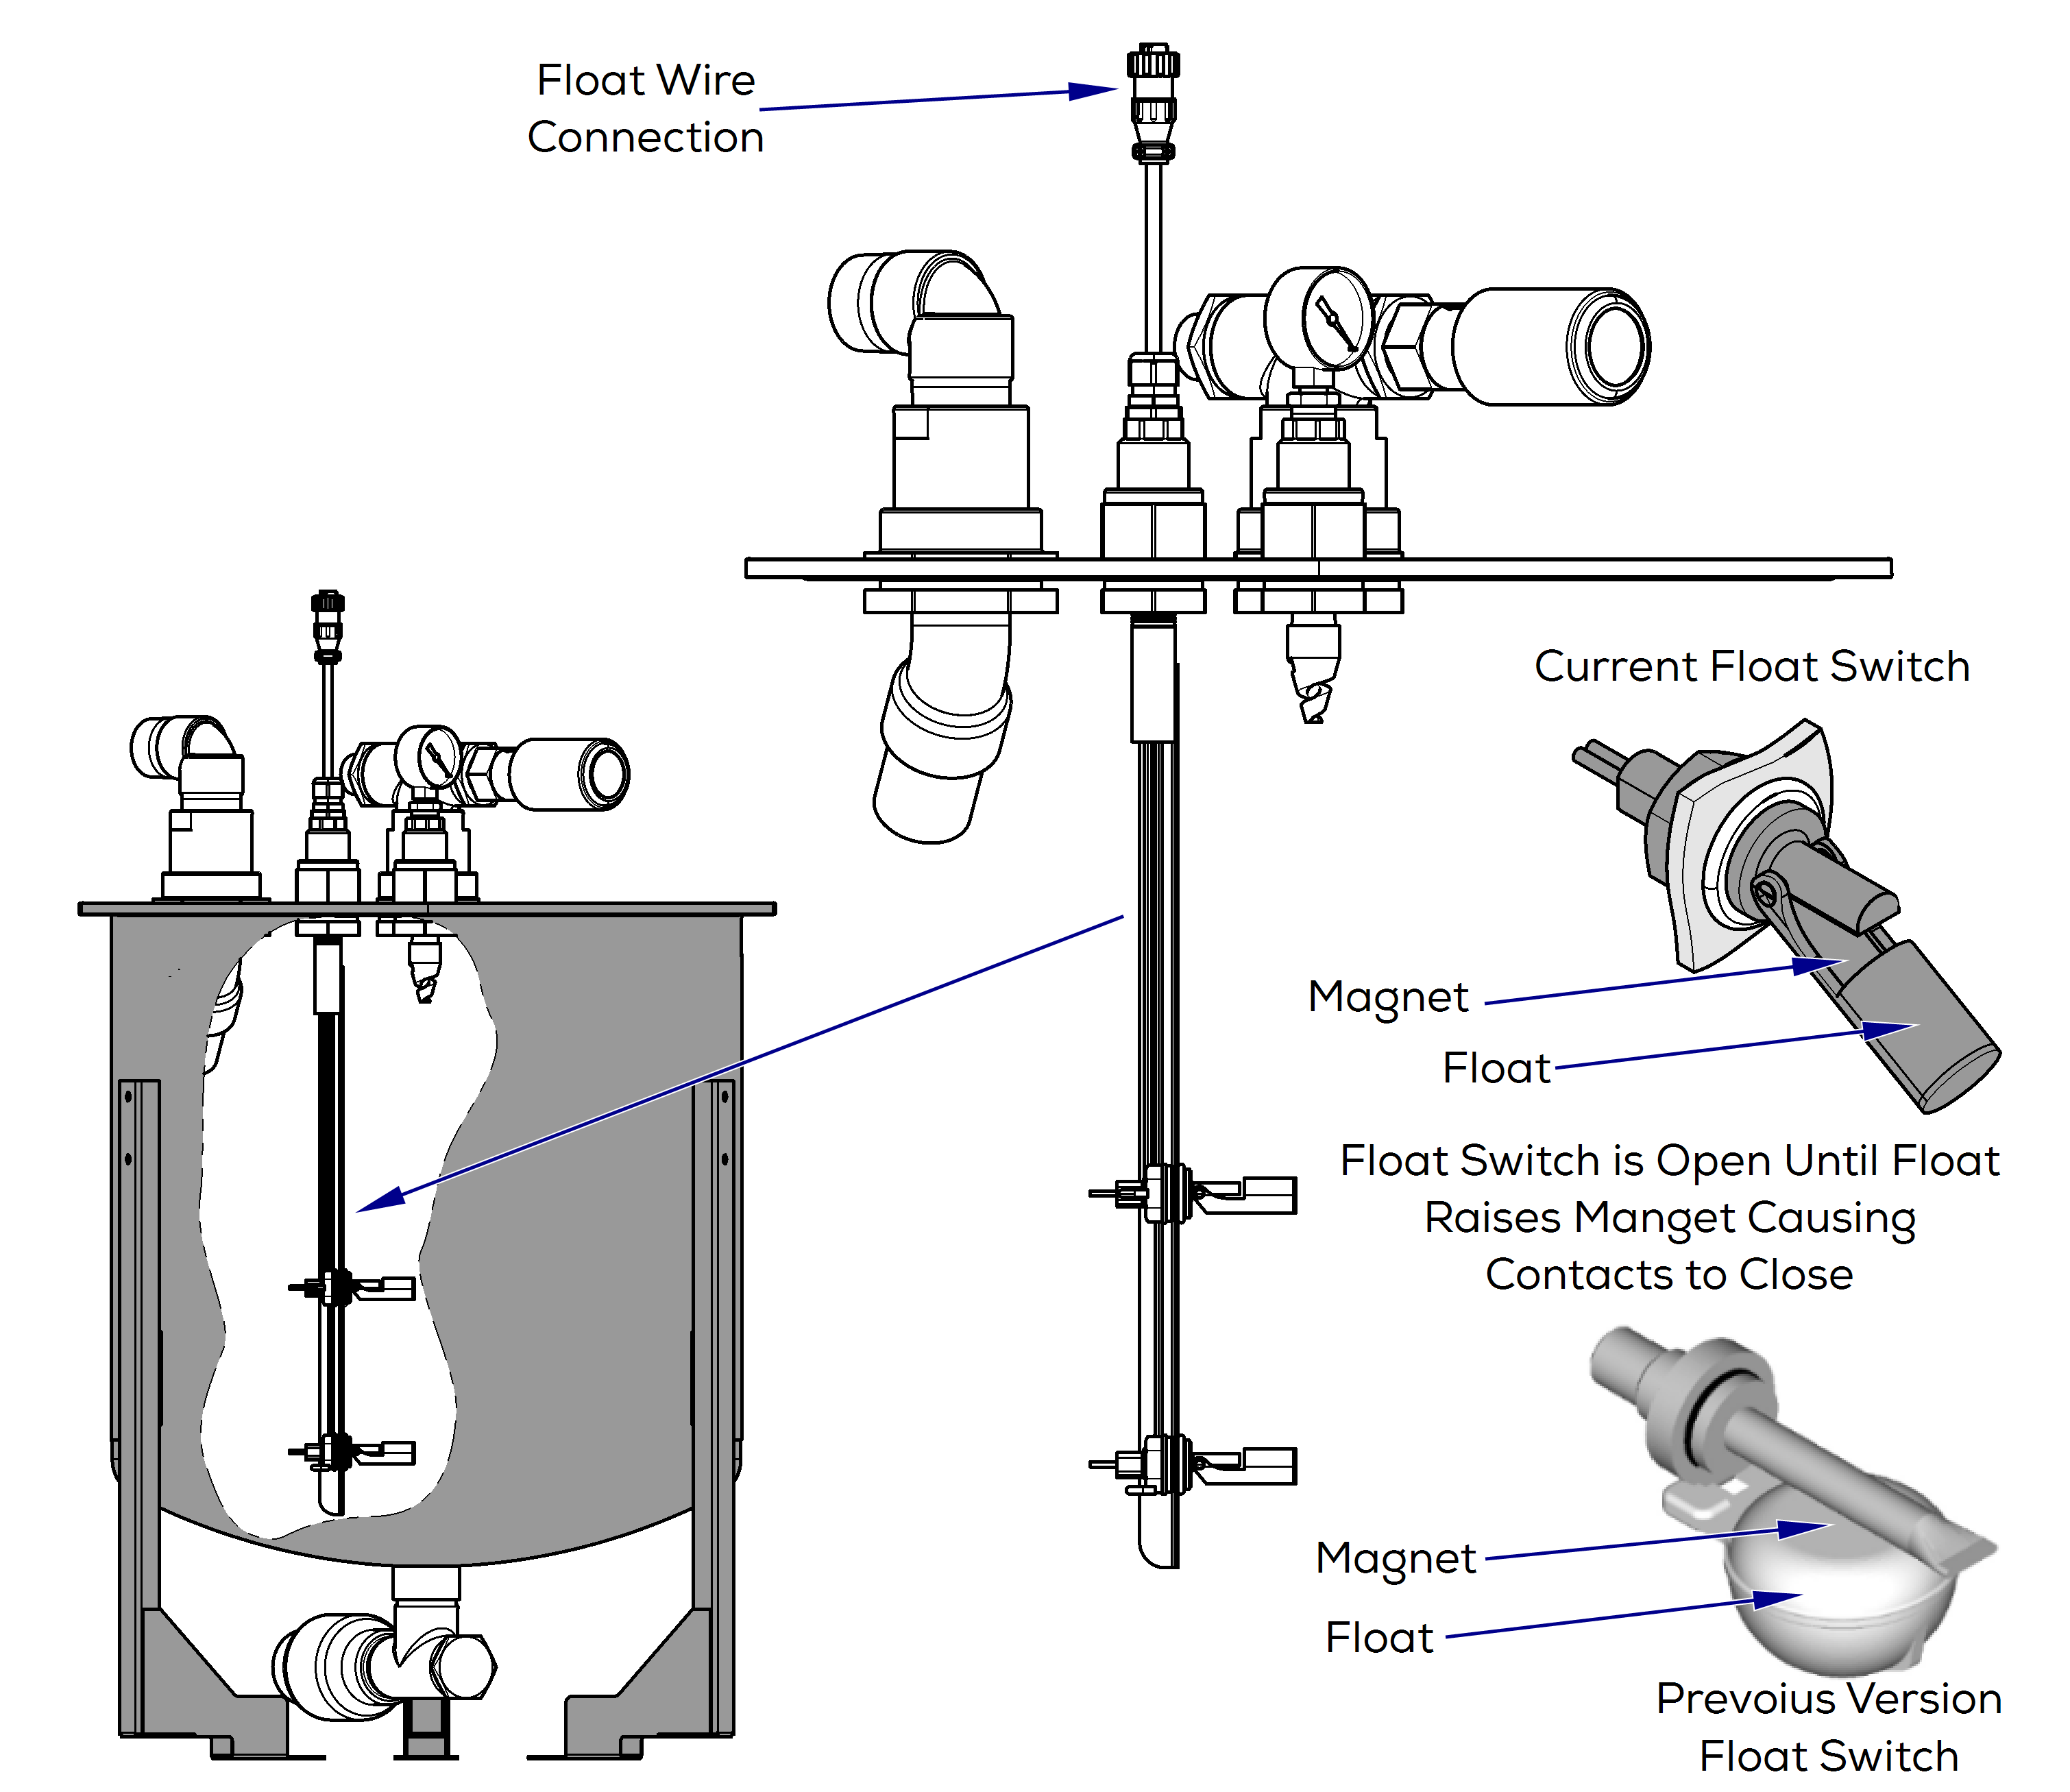
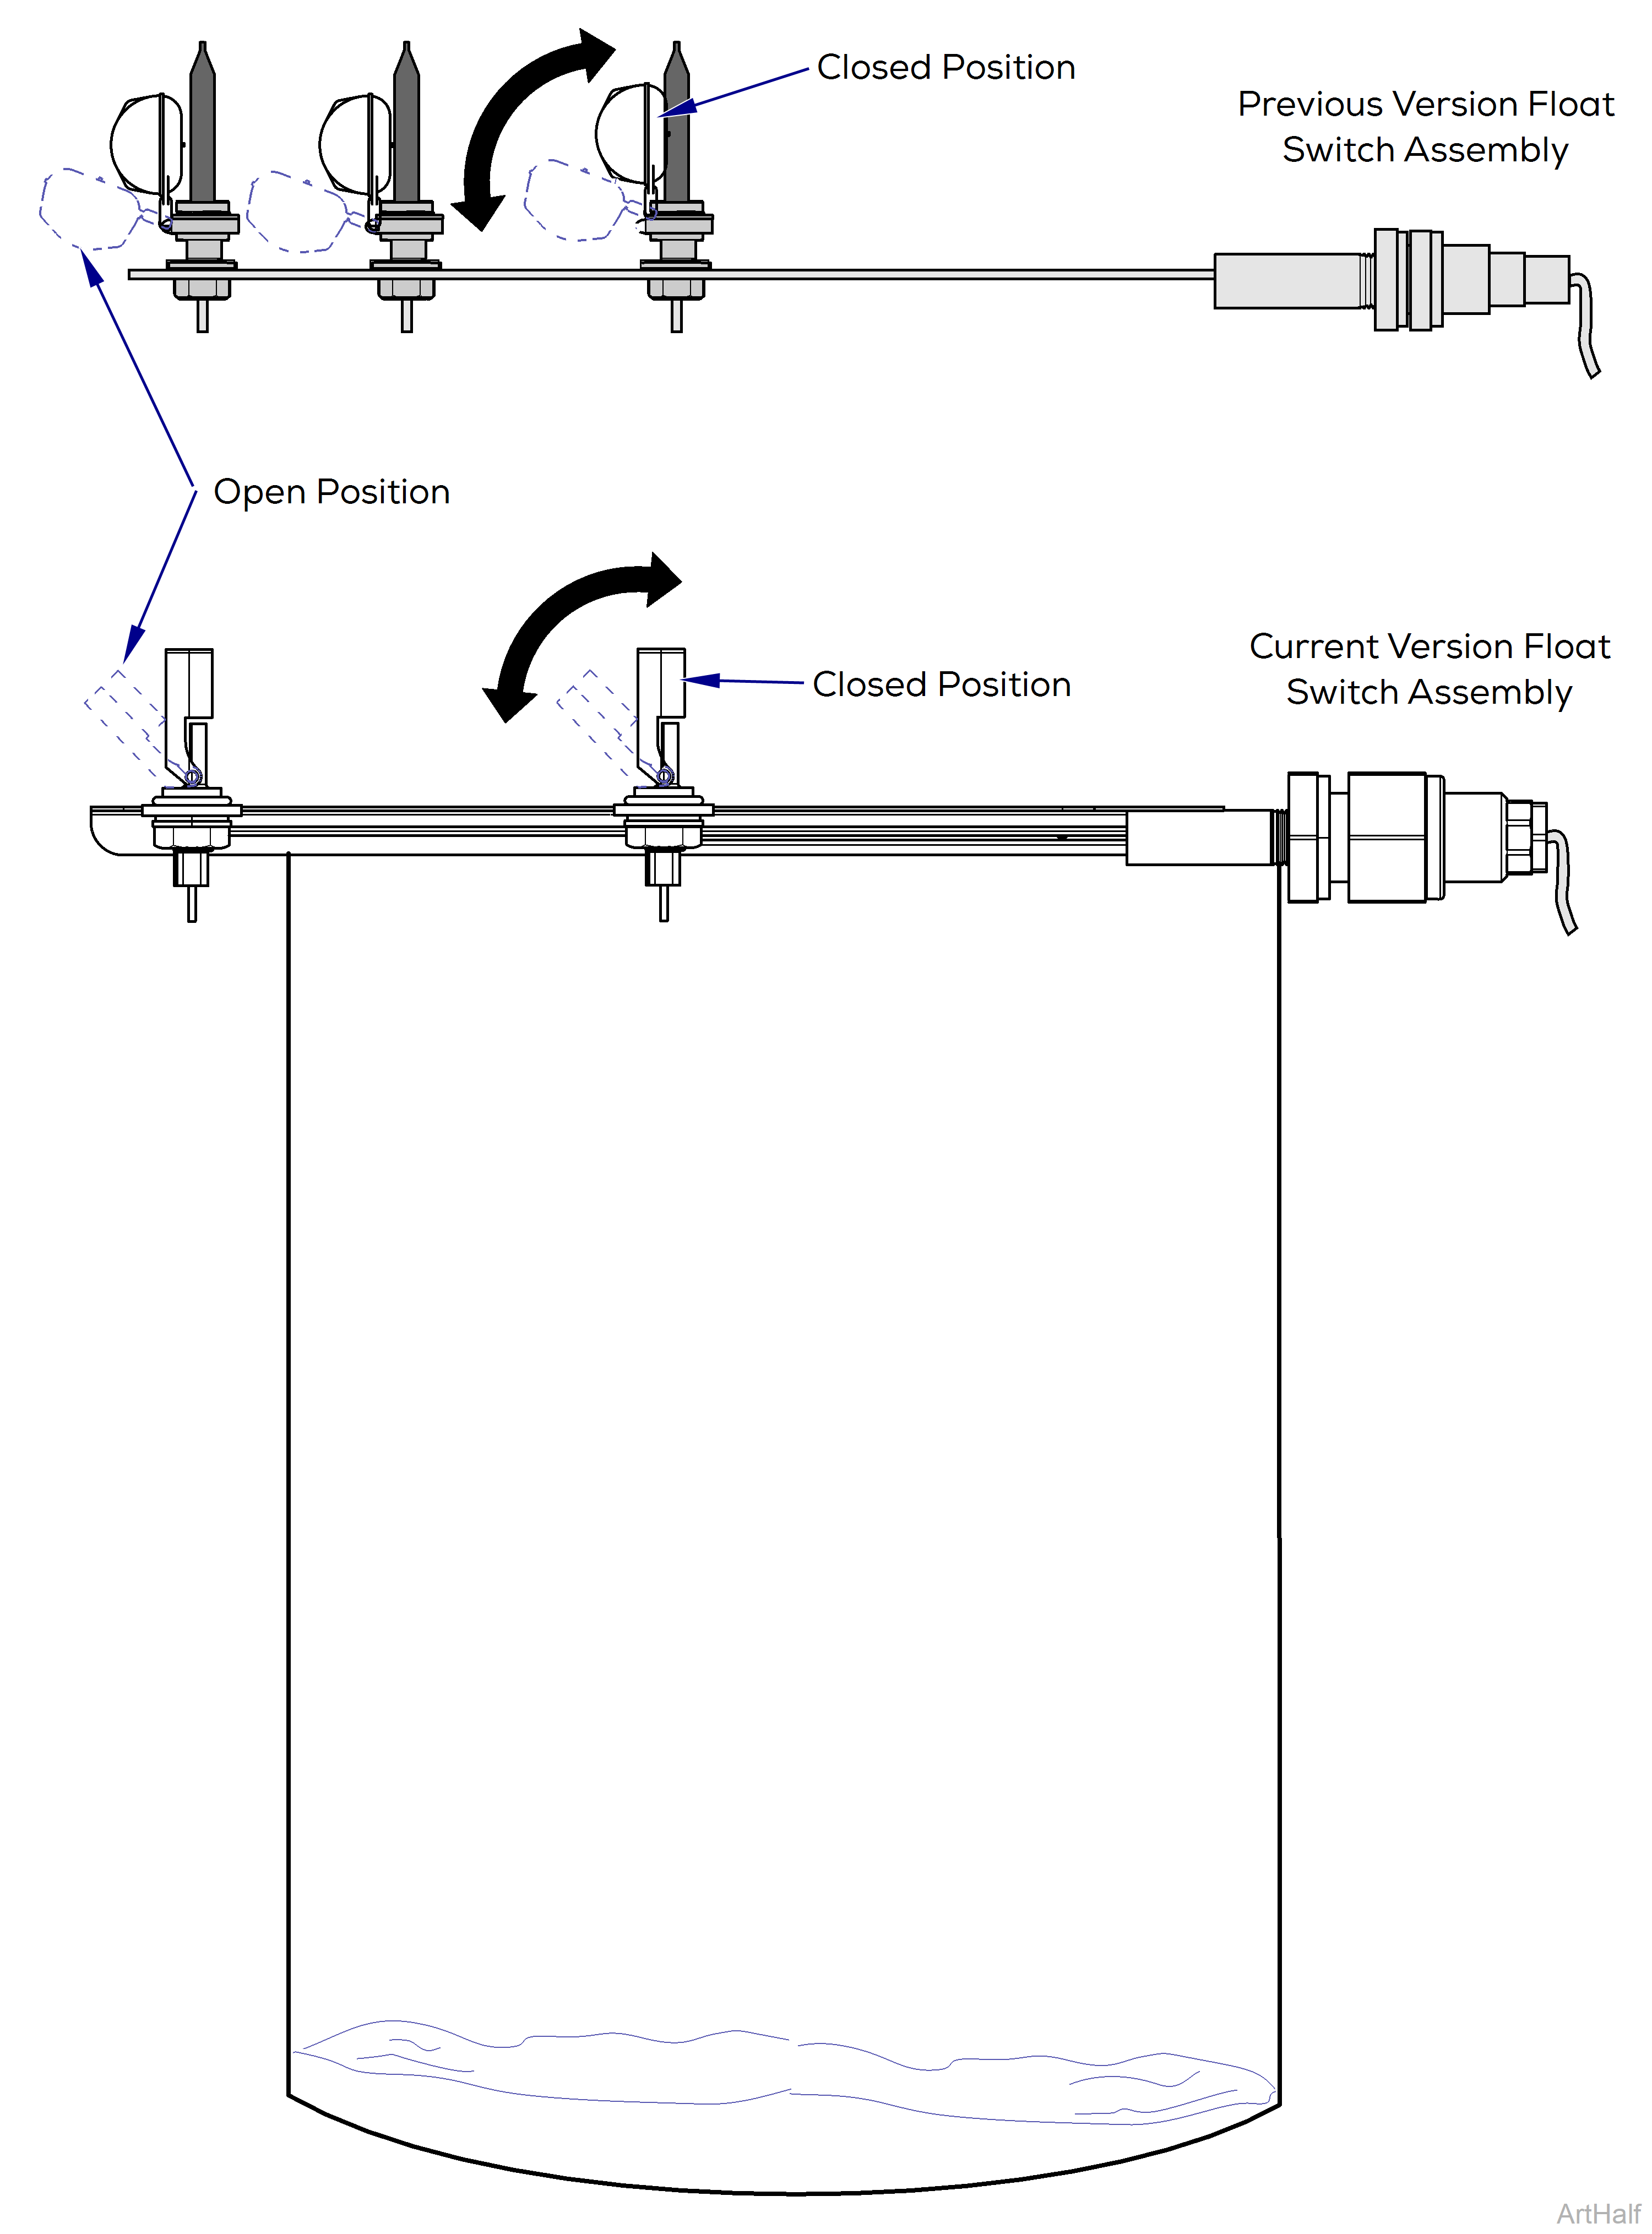
The Float Assembly contains three Float (Reed) Switches mounted on a bracket at different intervals. The Reed Switch has contacts that remain open until the liquid in the separator rises, causing the float to rise until the magnet contacts the Reed Switch. When the magnet contacts the Reed Switch, the open contacts inside the reed close.
When the top float switch closes, the fan, hour meter and vacuum pump stop running until the bottom float opens and the cycle starts again. The upper and lower floats interact as a latching circuit with the internal relay to release upon drain below the bottom float. The magnet in the float is to activate the reed switch within the stem.
If the PowerVac® has a Liquid Evacuation Pump (Accessory) installed, it begins running when the middle float switch closes, avoiding the vacuum pump shut-off that would occur if the liquid level closed the top switch.
Earlier versions had Three Reed Switch Floats. The Middle Float was for the Liquid Evac Pump Option. If you have a Liquid Evac Pump connected to the PowerVac® you must replace Float with a Three Reed Switch Float Assembly. If there is no Evac Pump connected to the PowerVac®, you can replace the Float with a Two Reed Switch Float Assembly.
Earlier production units had three reed switch floats. The middle float was not used and is not installed in current production units.
To check float switches:
If no water in separator, but still runs when unplugged from vacuum base unit, float may be stuck.
If pump is not running, unplug float from base unit. If pump doesn't start running, test relay. If pump starts running, continue with float checks.
1.Turn power off and plug float into base unit.
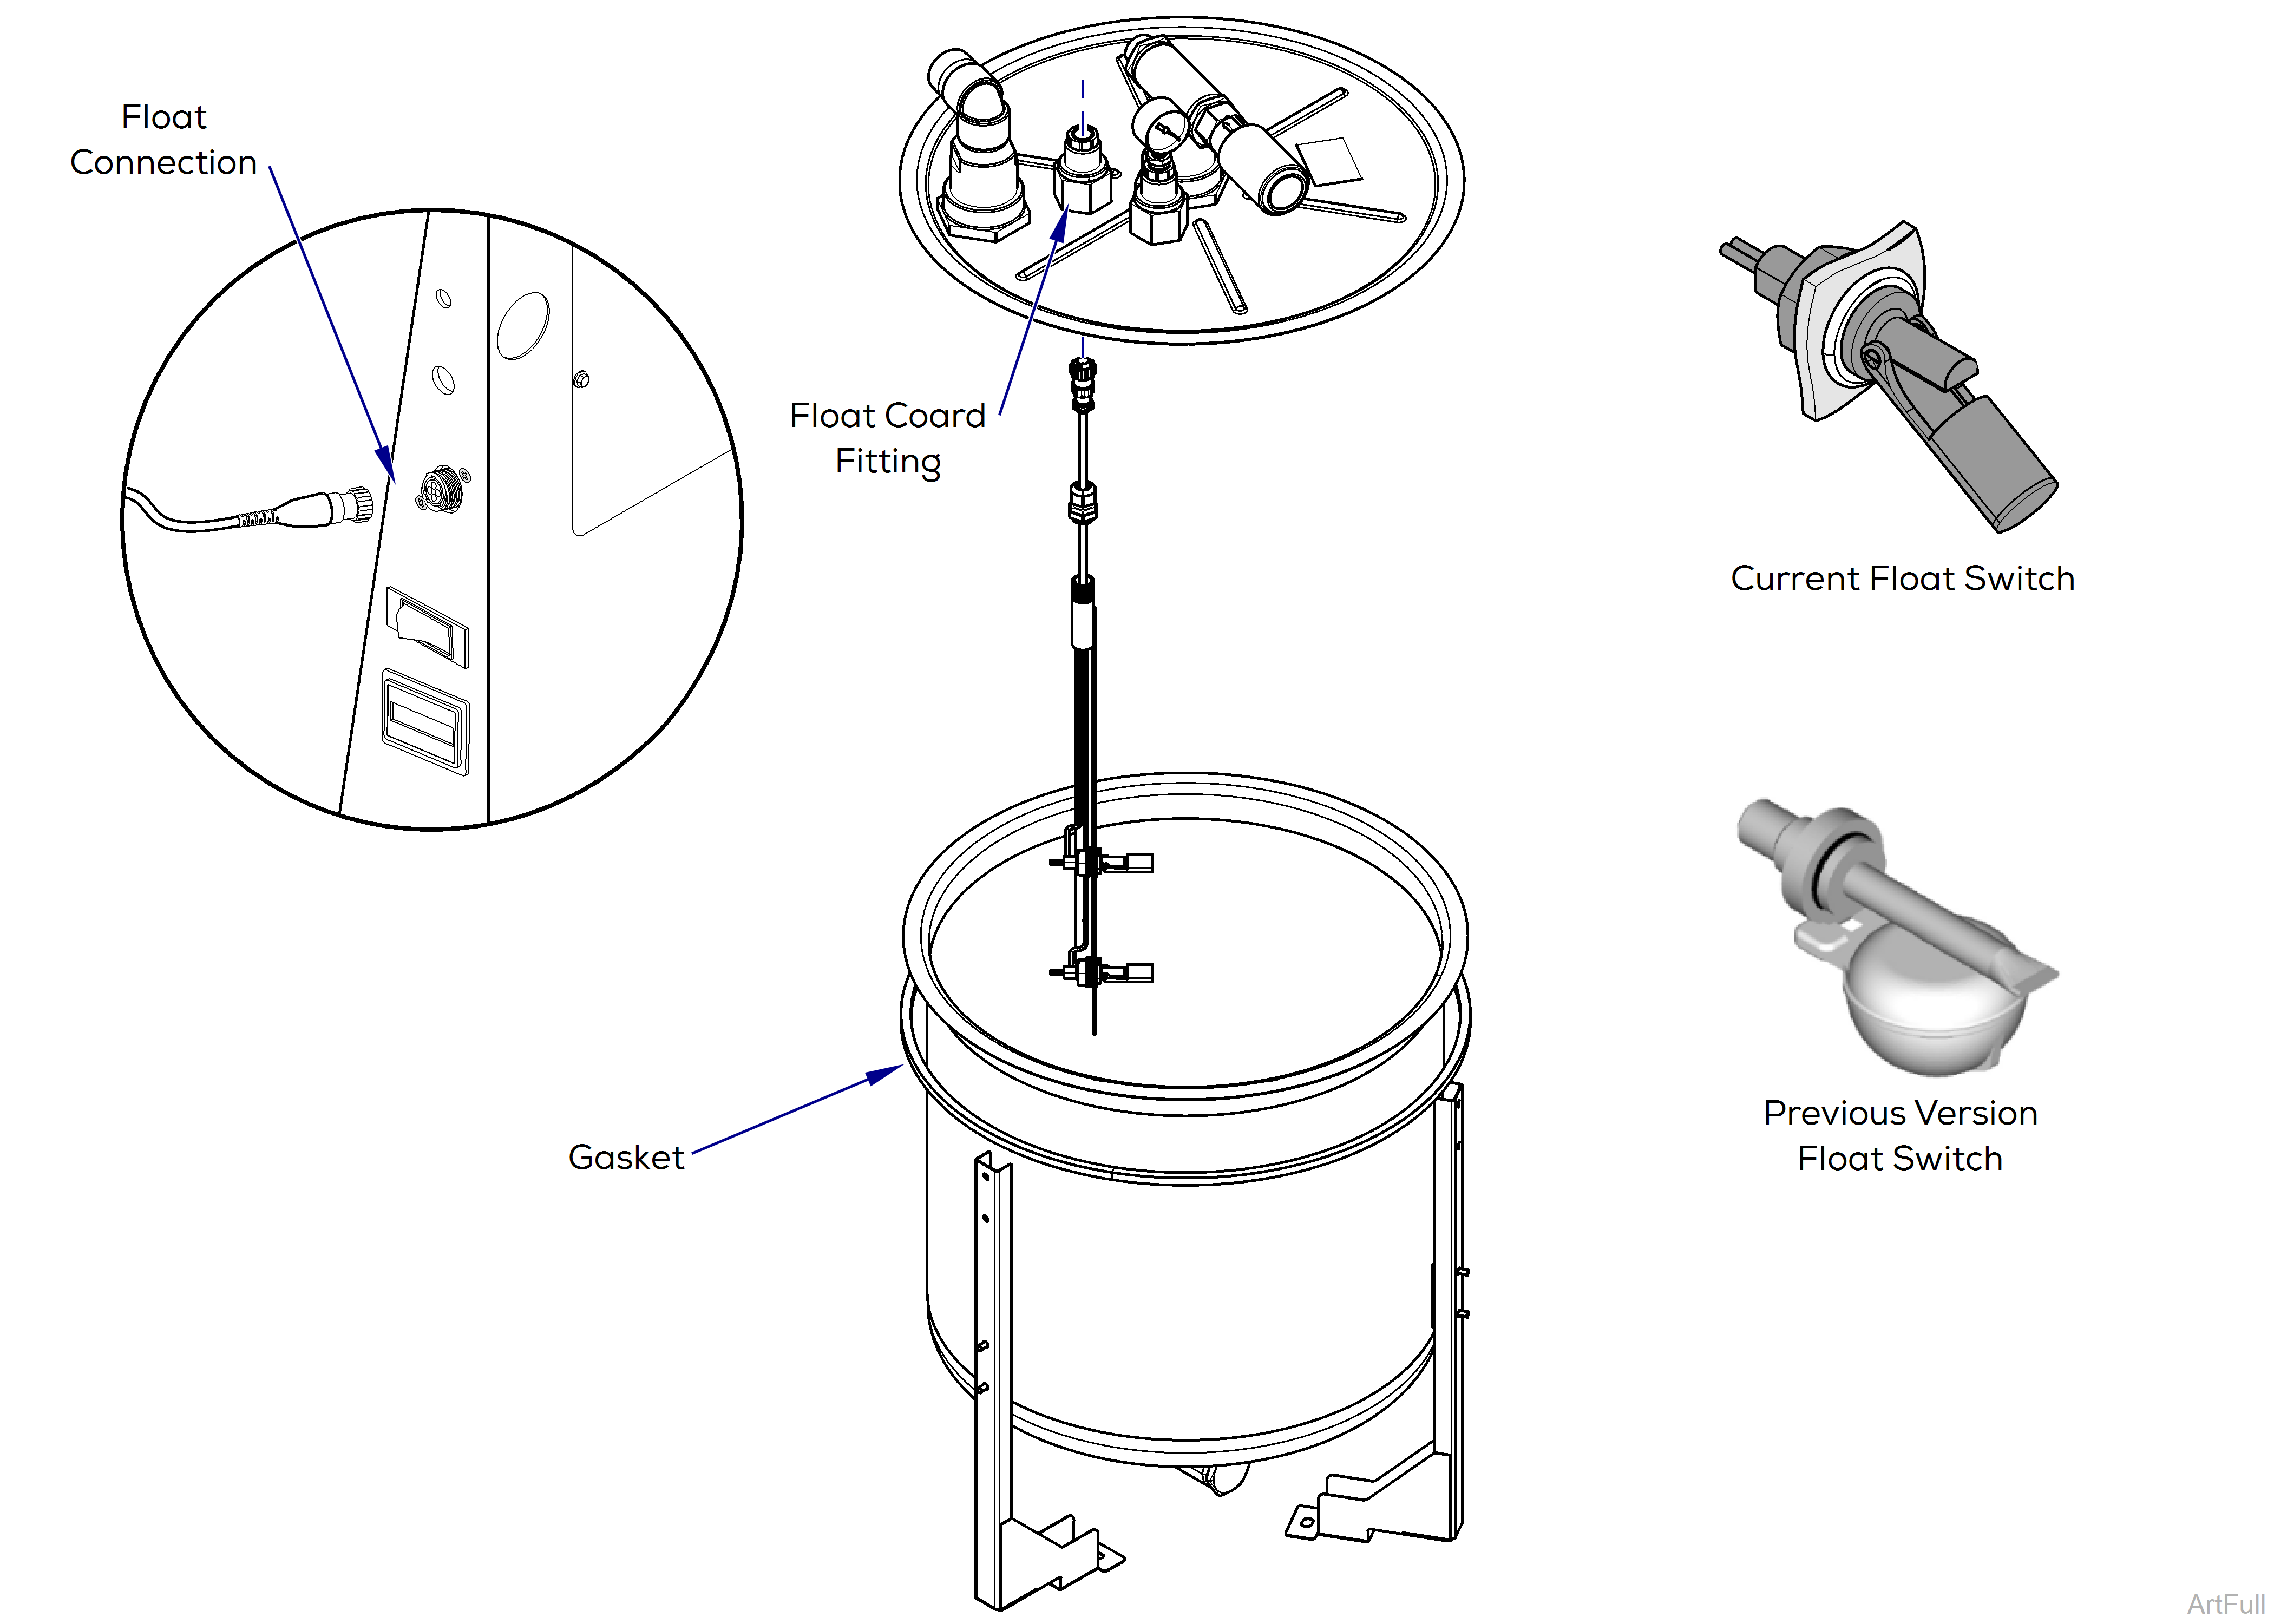
2.Remove gasket on separator lid.
3.Lift lid/float assembly out of tank and lay across top of tank.
4.Turn power on.
5.Move floats to down position.
6.Raise bottom float to reed switch, then raise top float to reed switch. Motor should stop after top switch is raised.
7.Move top float down first, then lay bottom float down. Motor should not start until bottom float is down.
Floats should move freely. If float does not work properly, replace the float assembly.
1.Turn power off and unplug float cord.
2.Pull gasket down off separator lid.
3.Lift separator lid. Hold onto float underneath lid. Loosen float cord fitting on top of separator. Float will come down into your hand.
4.Insert new float assembly up through separator lid. Tighten float cord fitting on top of separator.
5.Set lid on separator. Install gasket.
6.Plug in float cord to vacuum base unit. Turn power on.
