Midmark® Smart G-Vacuum Remote Wall Switch Test and Repair
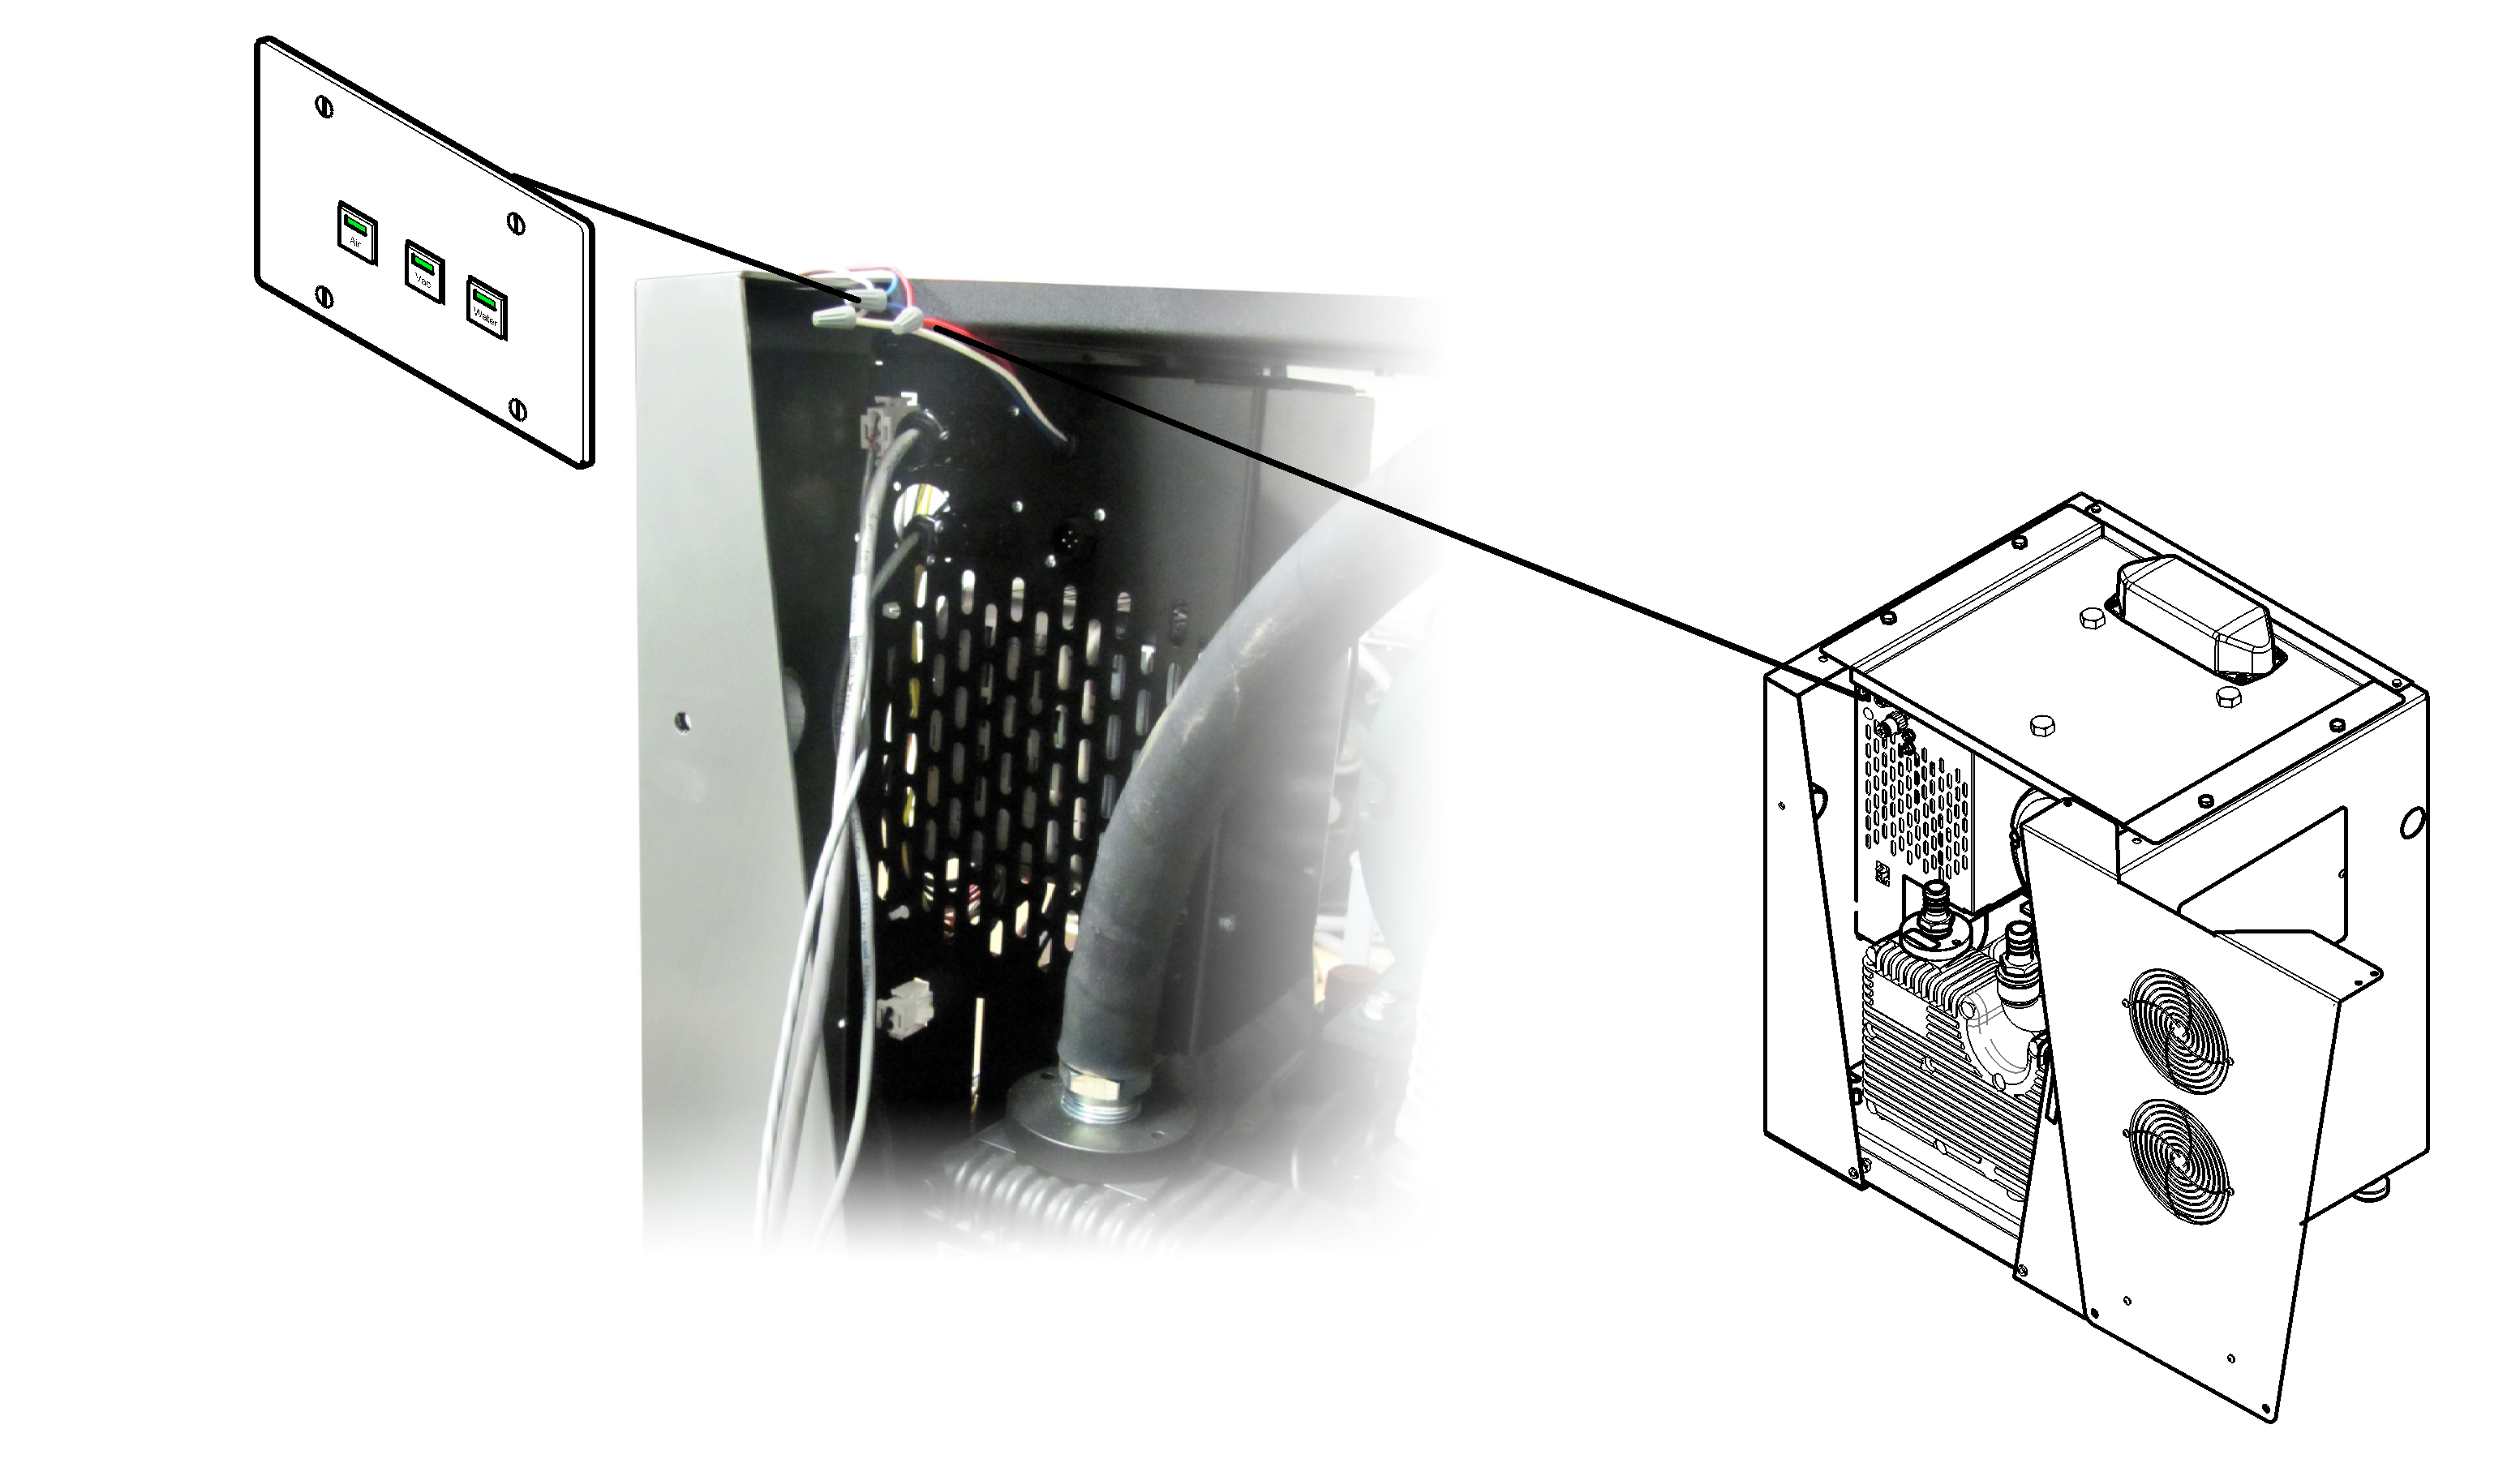
Wiring for remote On/Off switch and Remote Wall Switch is located behind the rear cover on the base unit. Low voltage (24 VDC) wiring provides power for a remote On/Off switch and optional indicator light.
When testing components with power on, use care to prevent electrical shock.
When working on Twin units, unplug parallel harness.
1. Turn power off at front panel switch and main power supply.
2. Ensure remote wall switch for corresponding vacuum is enabled (turned on).
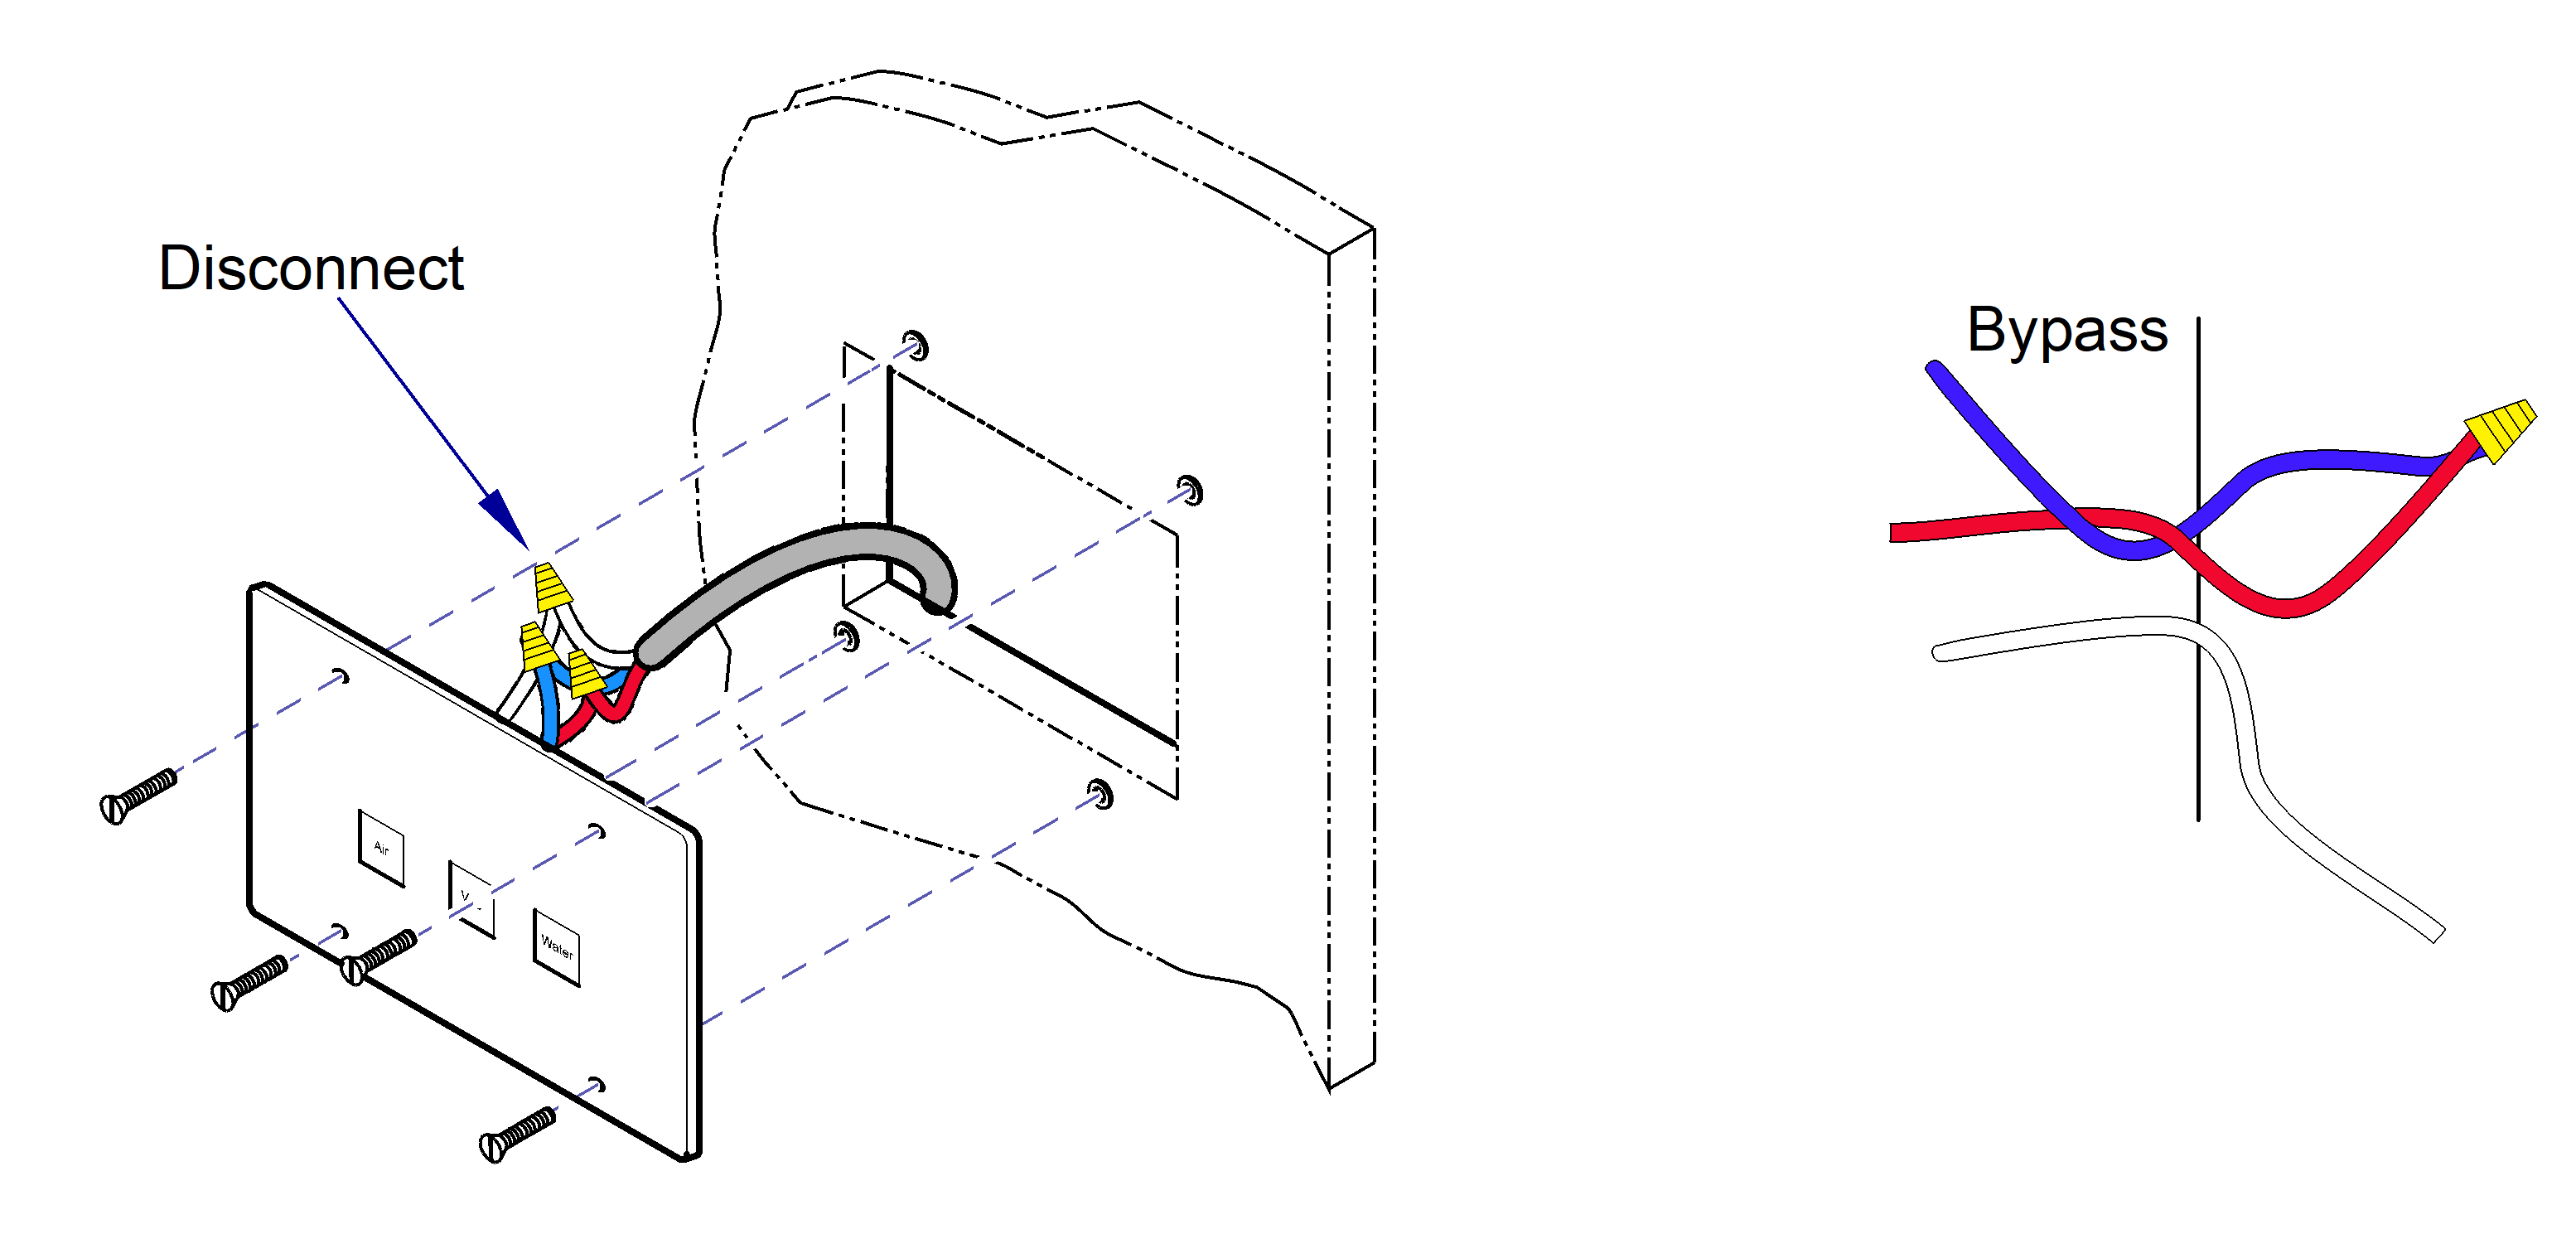
3. Remove electrical cover.
4. Turn power on at front panel switch and main power supply.
5. If LED DS5 (motor enable) is on, then remote switch is ok. If light is off, continue to next step.
6. Turn power off at front panel switch and main power supply.
7. Bypass the remote switch to verify it is not defective. Disconnect the red and blue wires from the remote switch. Connect the blue and red wires together.
8. Connect power to unit.
9. Restore power.
If the hour meter and pump start running then replace the remote wall switch.
