Elevance® Chair Calibration Procedure Test and Repair
Calibration is only required if the chair is not operating at all, or if it is not raising/lowering to the proper extents. Power to the chair must also be cycled after moving the #4 dipswitch to complete the procedure. Calibration should always be performed after replacing a chair’s PC Board, a tilt sensor or any lift mechanism.
Movement of the chair is monitored by sensory devices that keep the chair within the range of motion accommodated by the drive mechanisms controlling the chair.
The Calibration Mode is a programmed routine of chair movements that locates the end of travel points, calculates working values for these points, stores these values in memory and then tests the results of the routine.
To calibrate a chair
1.Unplug the chair from the power supply.
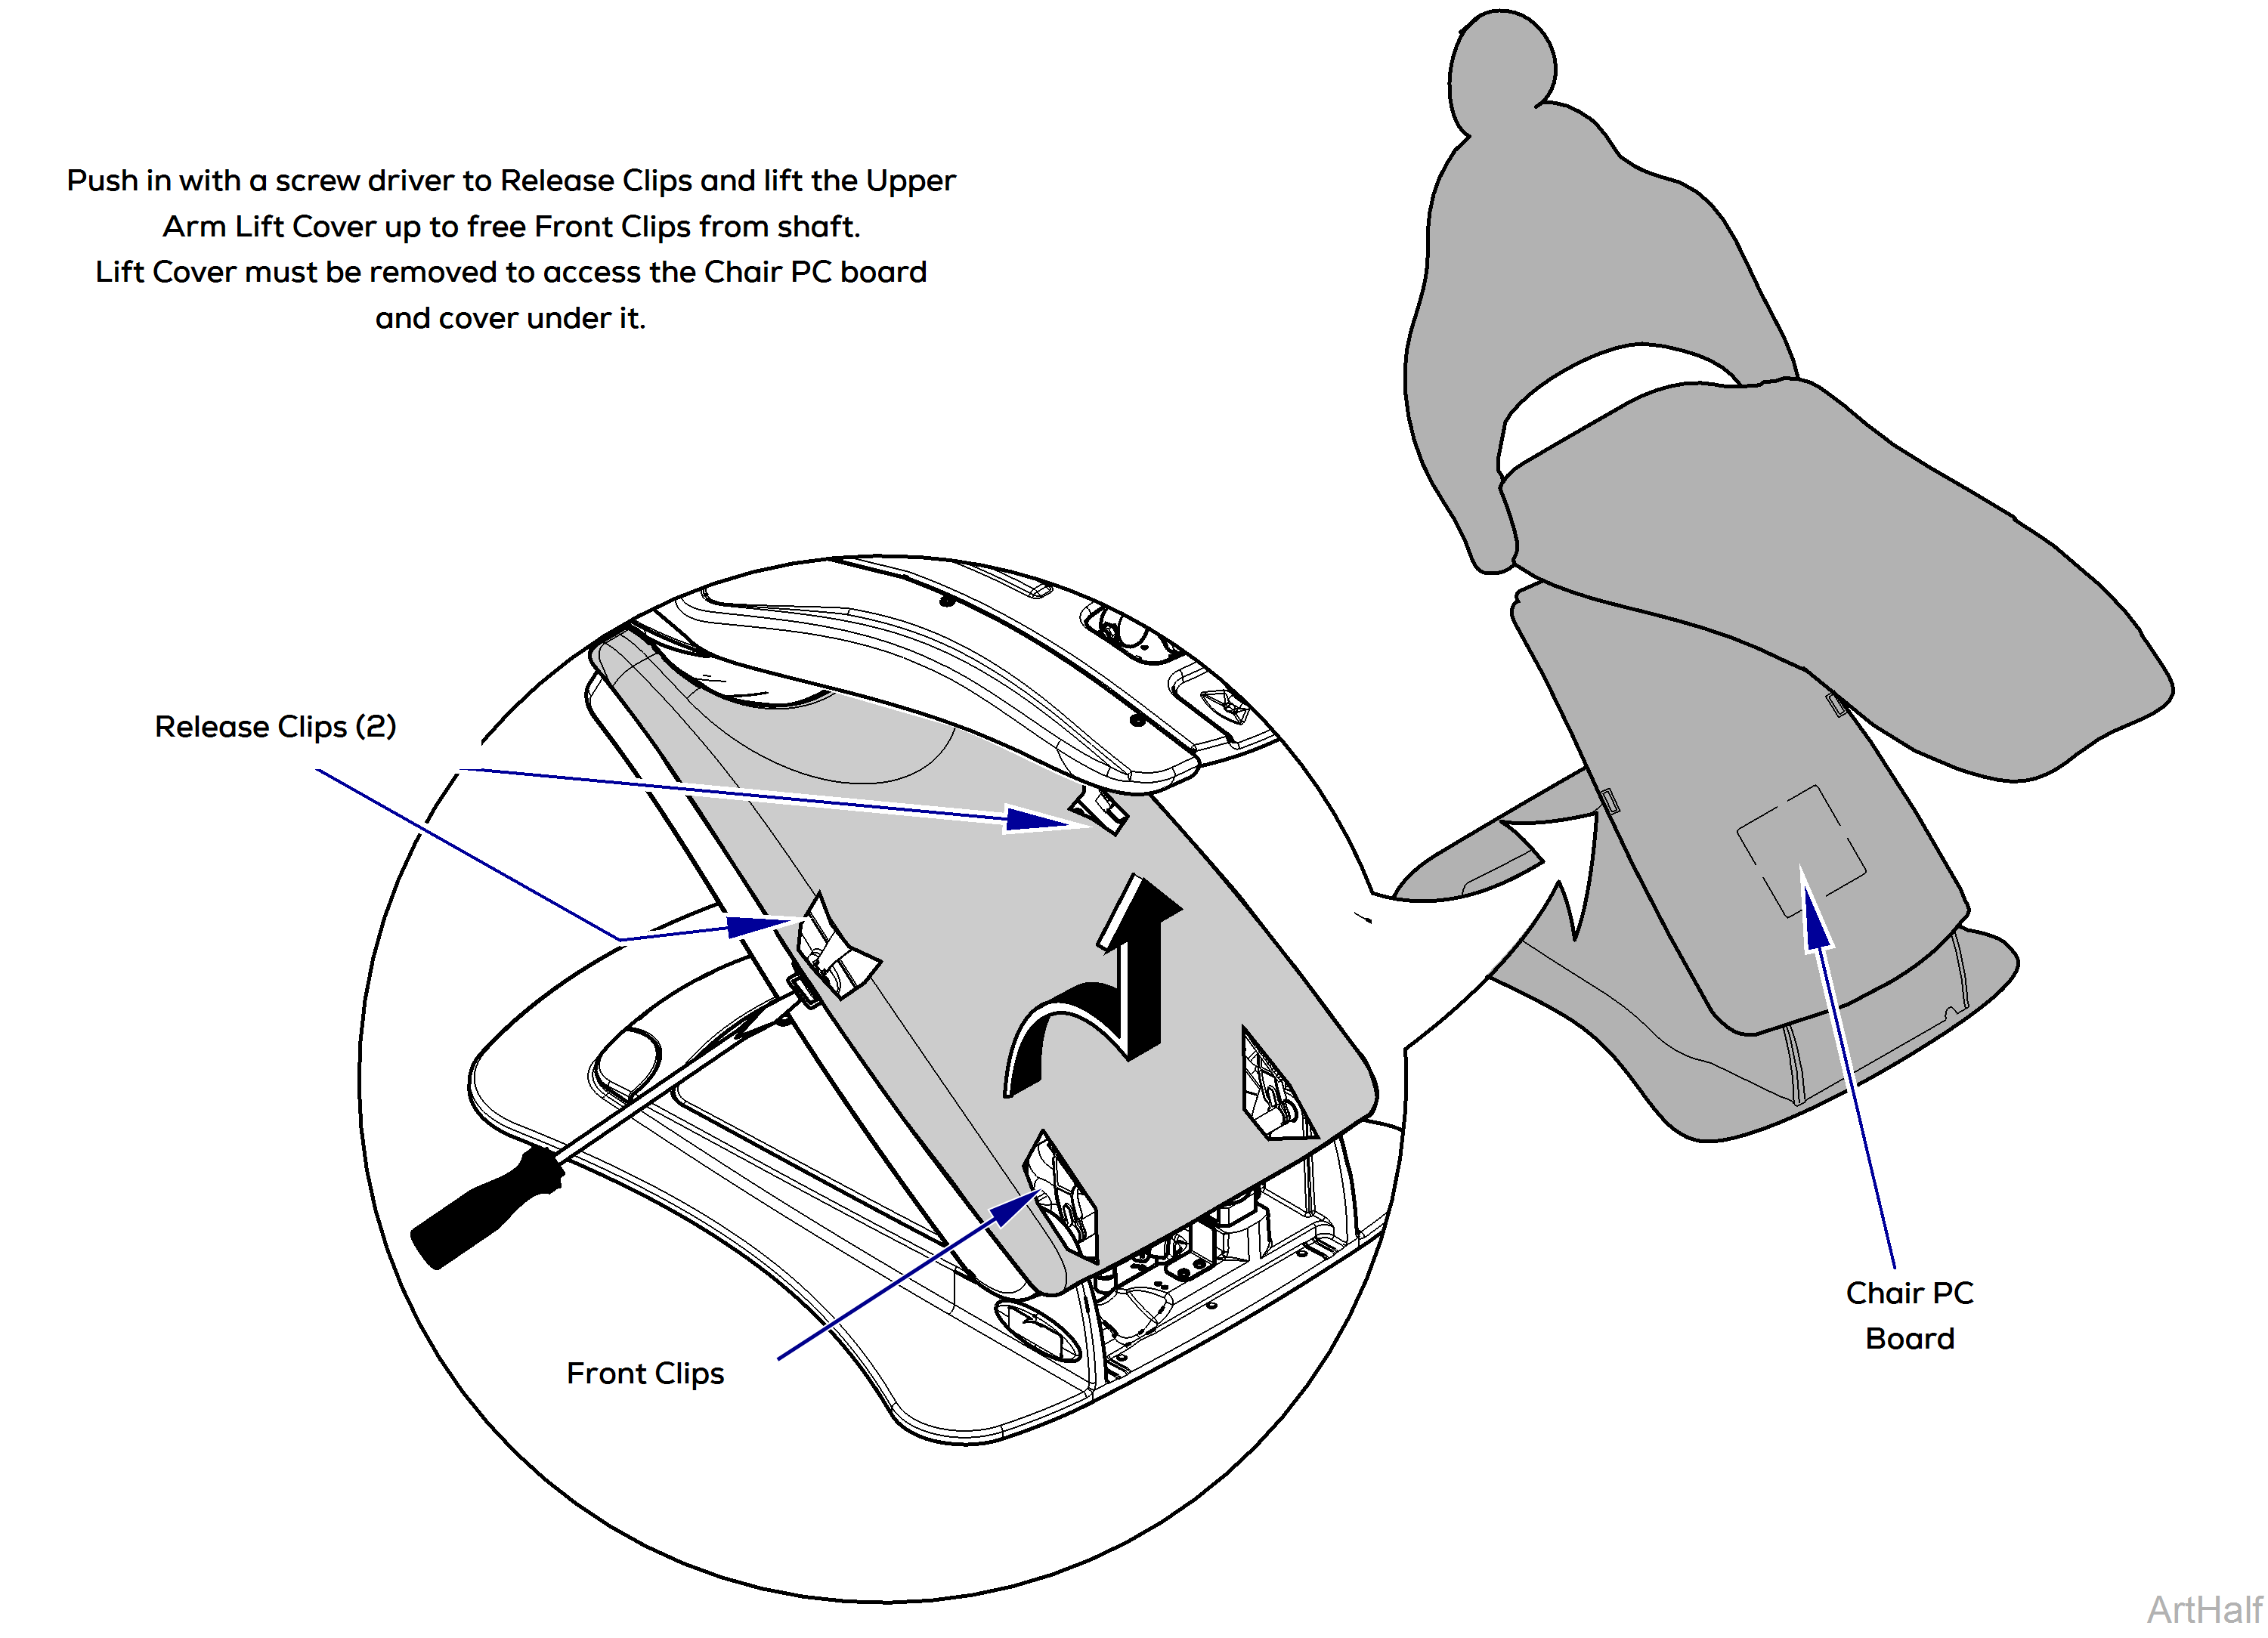
2.Remove the Upper Lift Arm Cover and PC Board cover (2 screws). Locate S1 and S2 switch components on the Chair PC board.
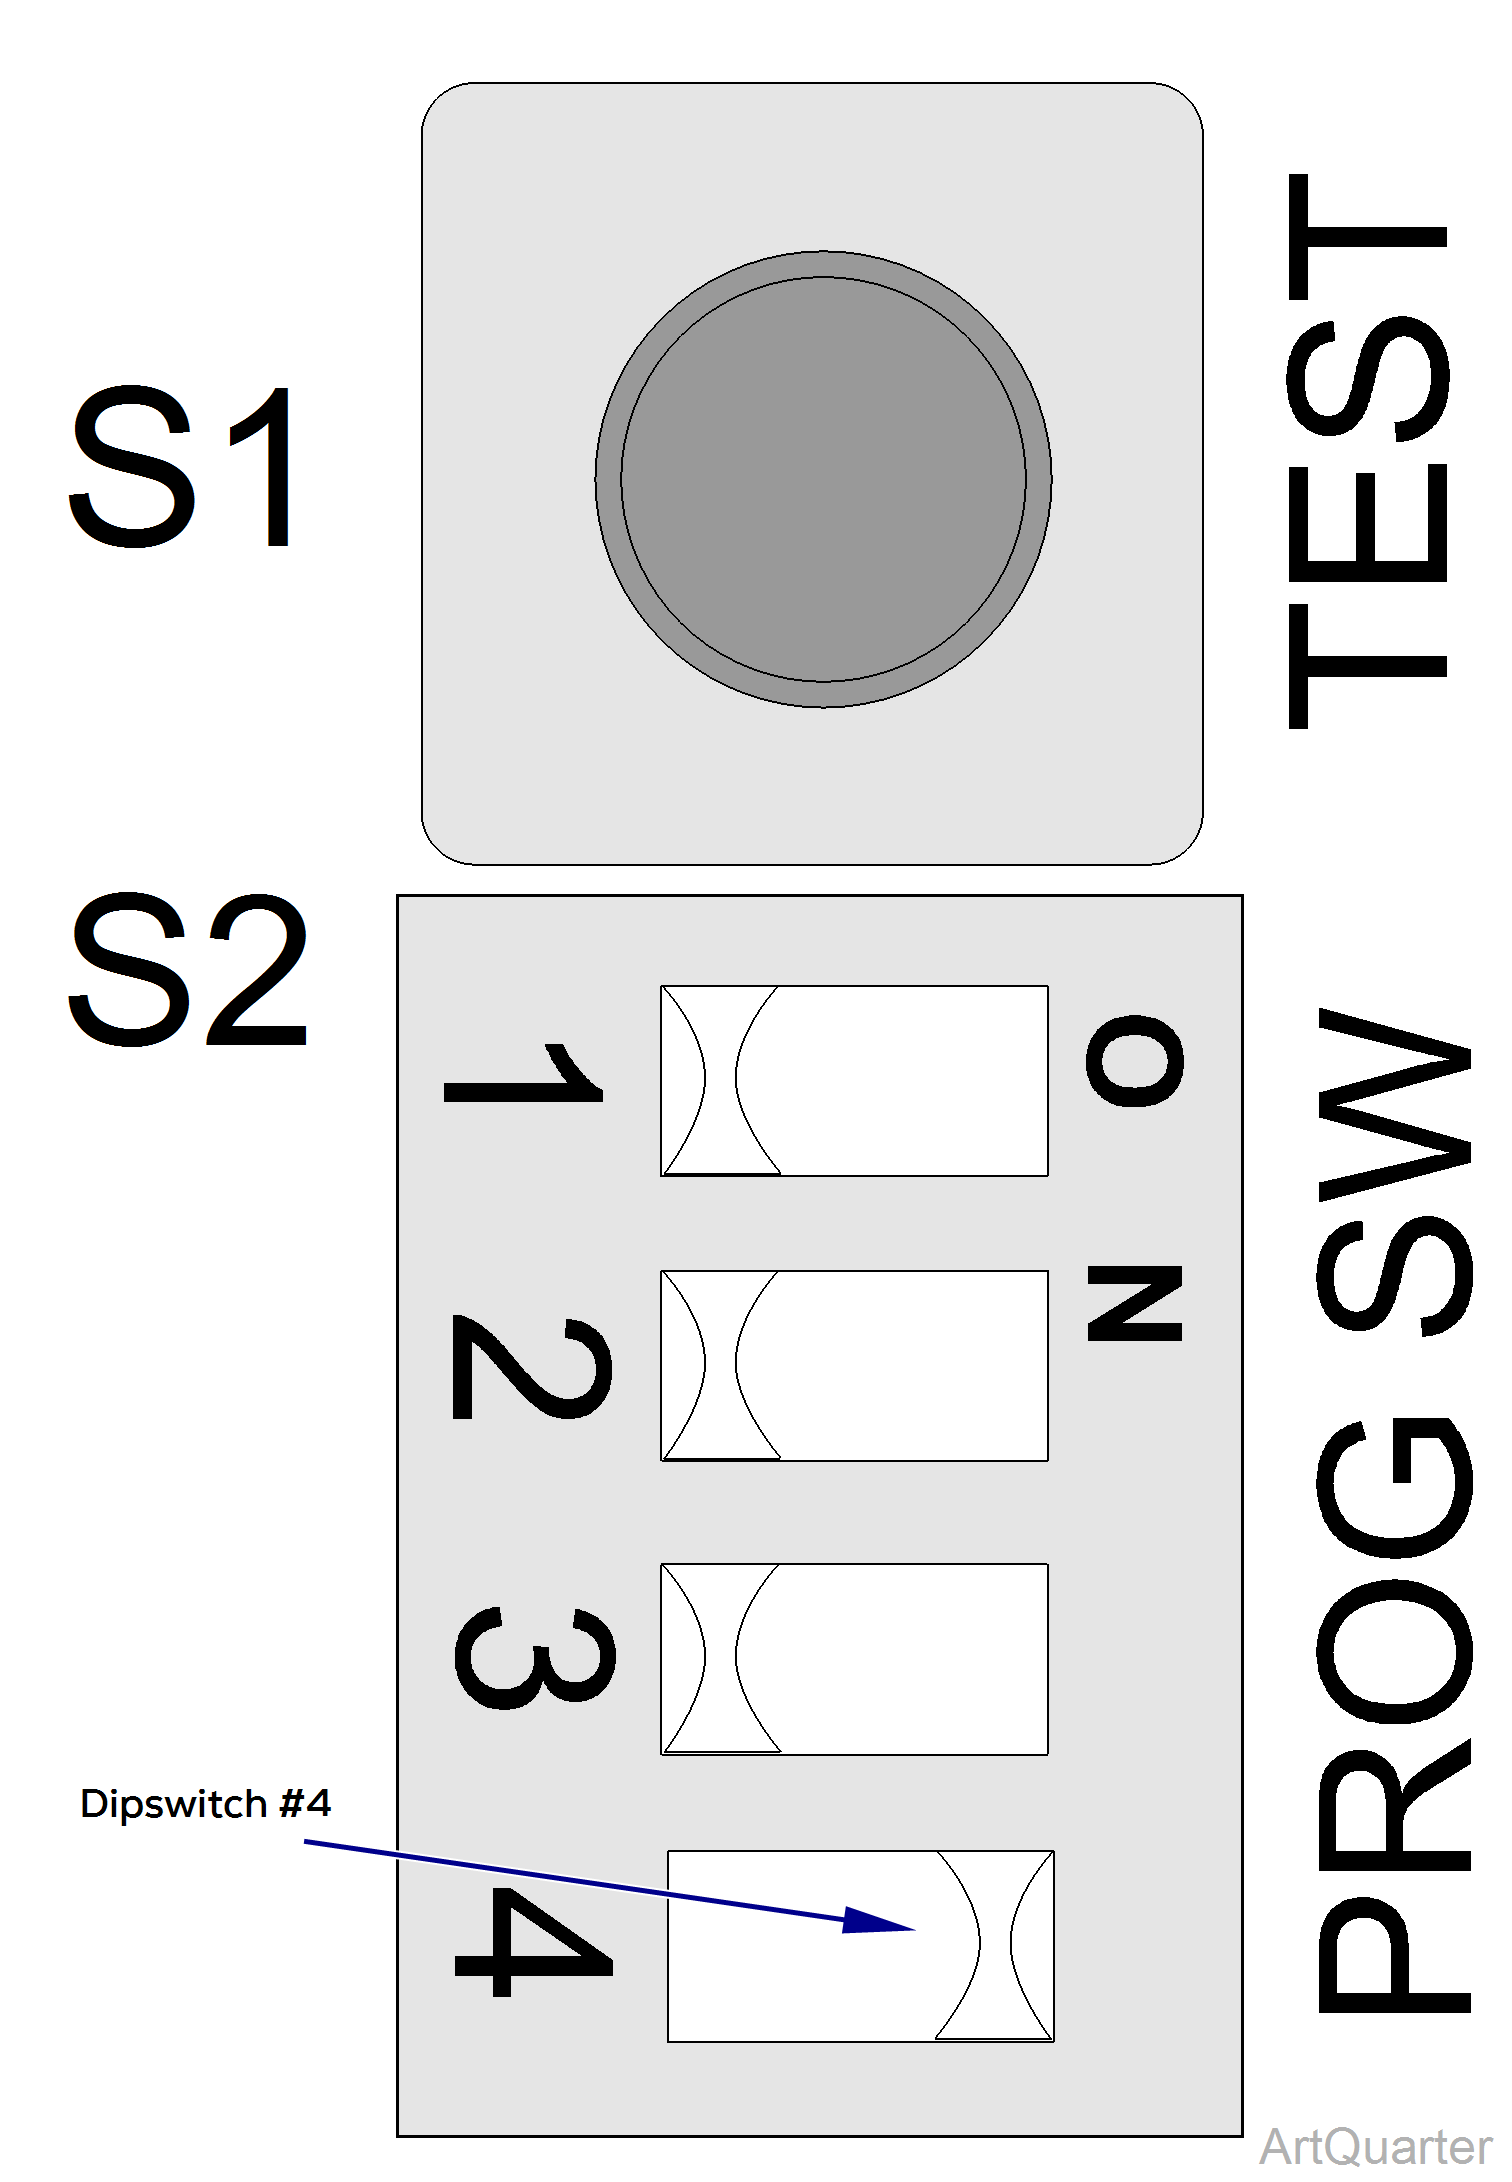
3.Move the #4 dipswitch on the S2 program switch to the Calibration Mode position (ON).
4.Plug chair into power supply and press the TEST button on switch S1.
As soon as the TEST button is pressed, Calibration begins. Step back and allow the chair to complete all 3 up/down cycles of the calibration routine.
The chair emits a short beep every 2 seconds while calibrating. When finished calibrating, the chair emits 3 long confirmation beeps. The Calibration Mode has failed if the chair emits 1 long beep at the end of the calibration mode.
Control buttons do not work normally during a Calibration Mode. Pressing any button including the S1 Test pushbutton will stop the chair movement and end the Calibration Mode.
5.Unplug the Chair and move dipswitch #4 on S2 program switch
6.Install PC Board Cover and Upper Lift Arm Cover.
7.Plug chair back into to power supply.
8.Activate control buttons to test chair operation.
