Ultra Chair Rotational Brake Test and Repair
Rotational Brake
1.Raise chair to highest position.
Unplug chair power cord before removing covers or working on chair. Failure to comply could result in personal injury.
2.Unplug chair power cord, remove safety bail and end covers Refer to: Covers.
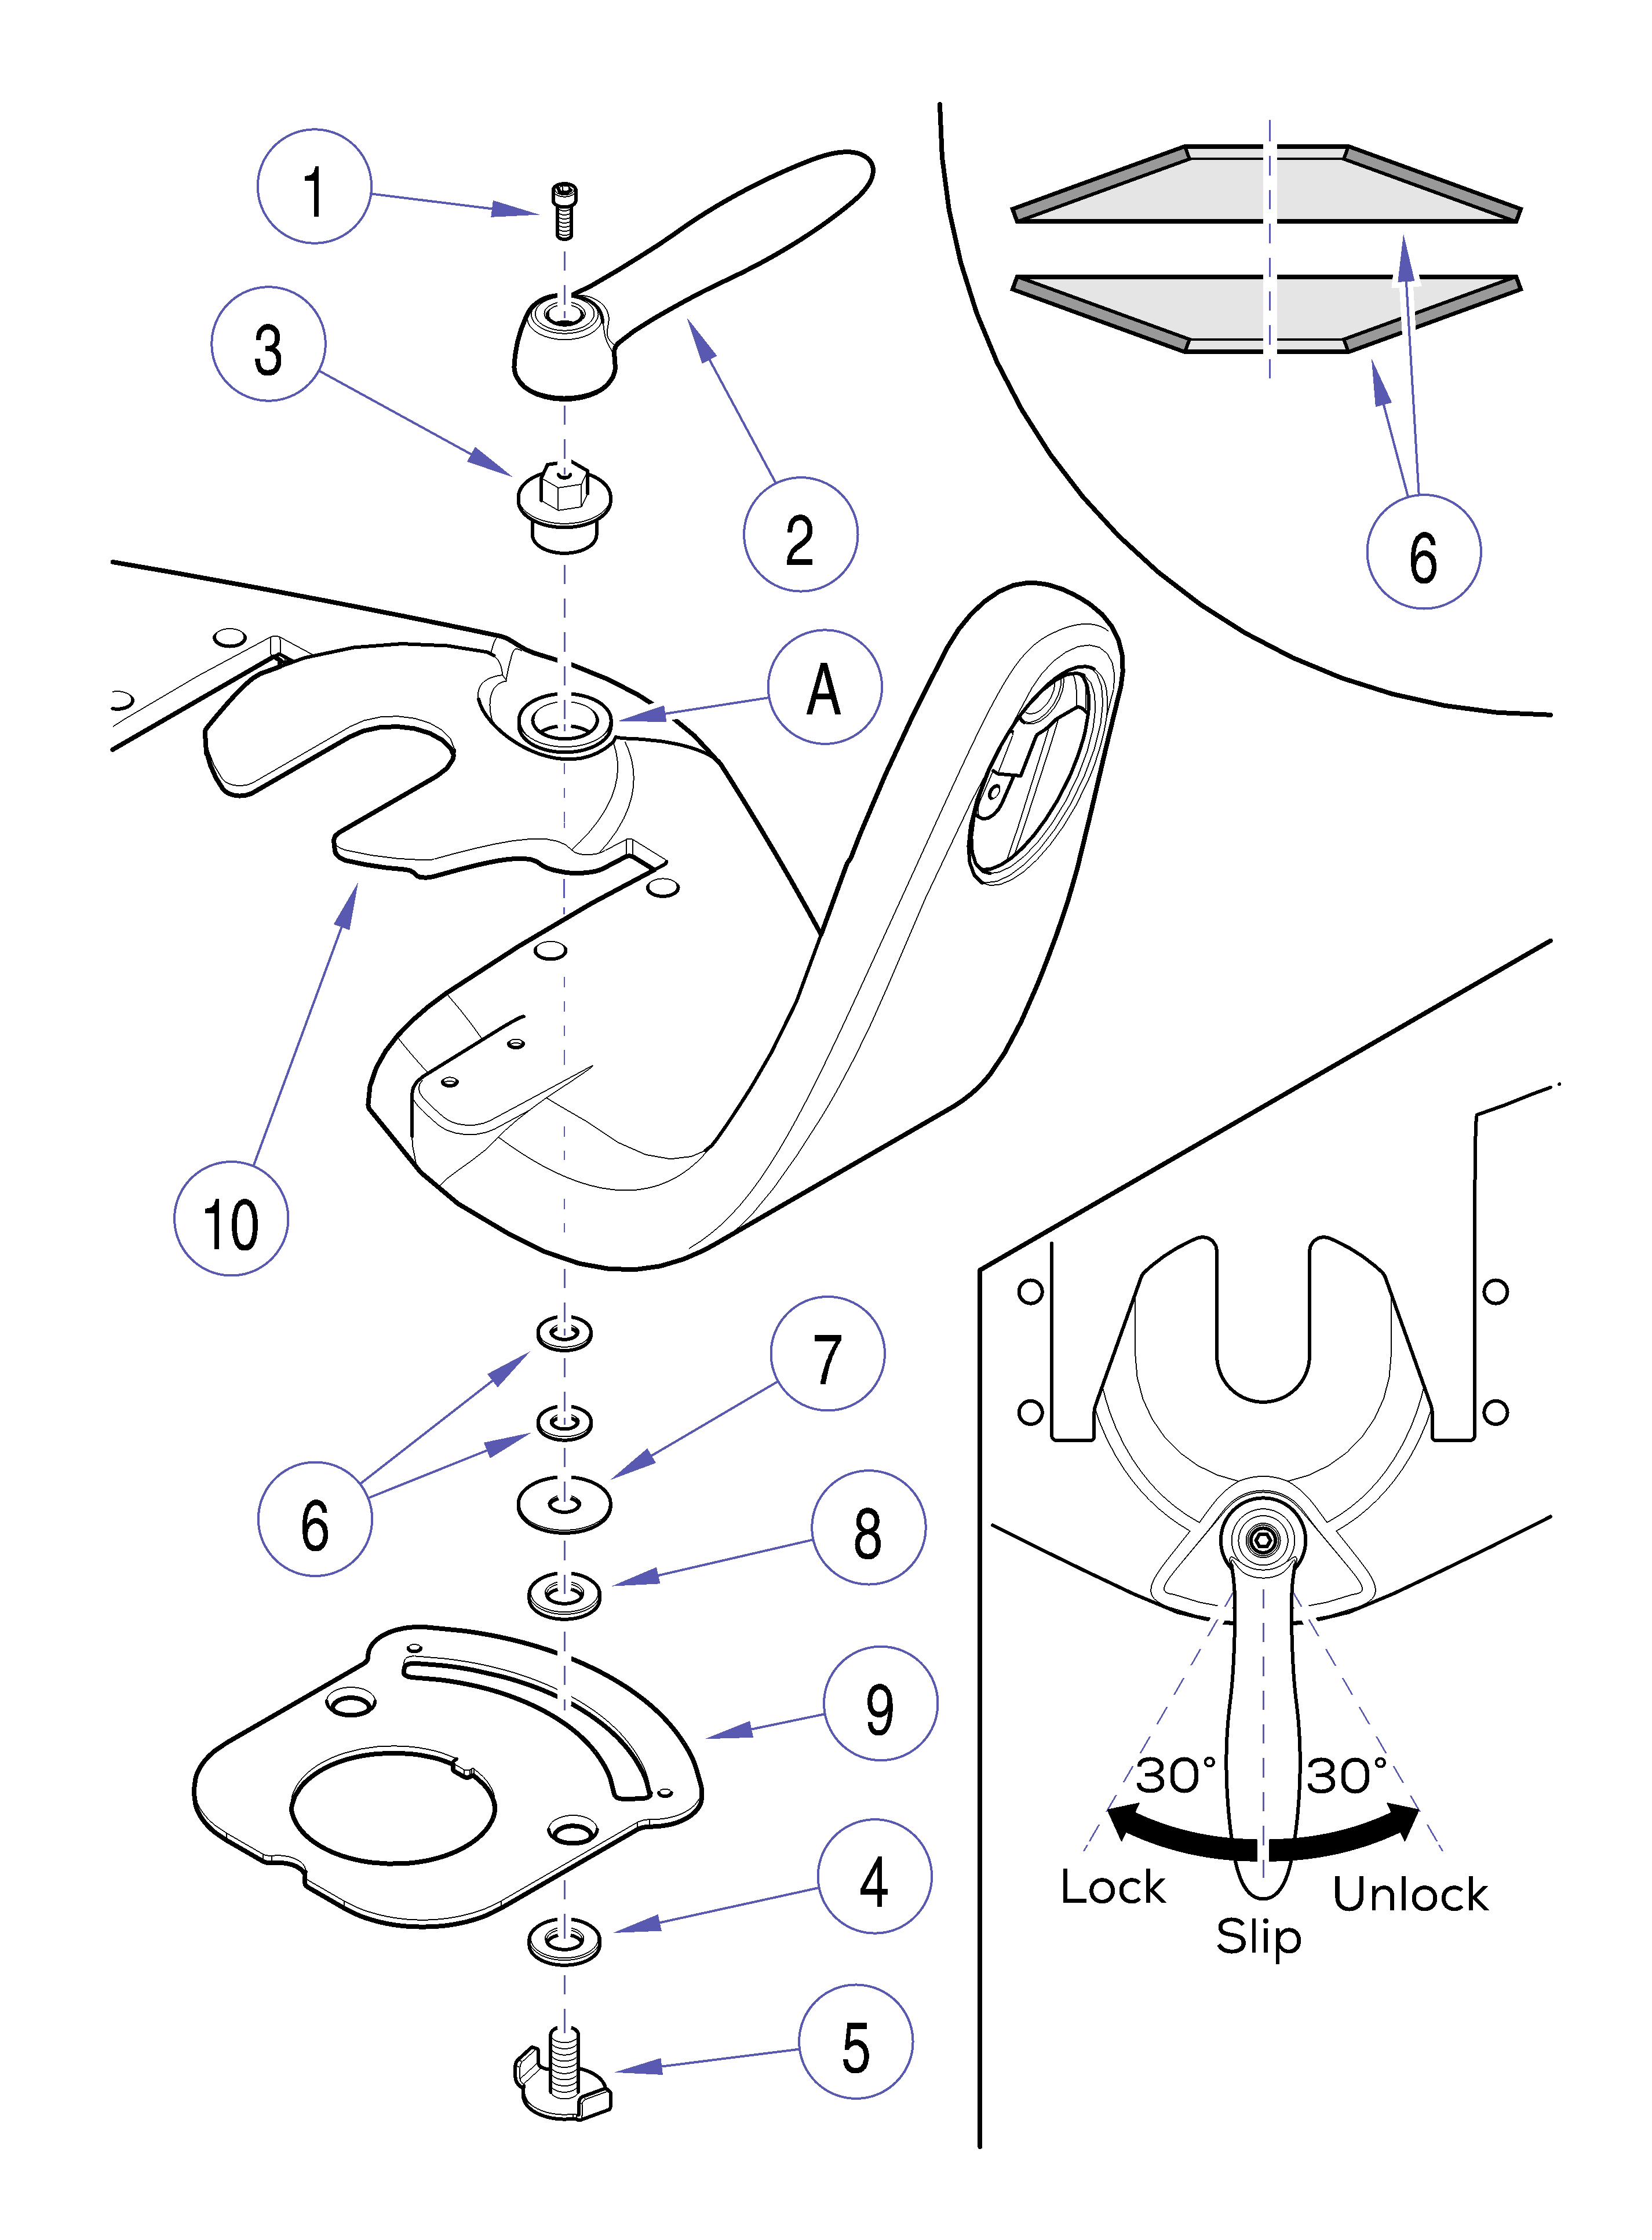
3.Remove Allen screw, Item 1, and handle, Item 2, using a 5/32" Allen wrench.
4.Remove spacer nut, Item 3, lower thrust bearing, Item 4, and rotation stop weldment, Item 5 using a 9/16" wrench.
5.Slide two Belleville washers, Item 6, flat washer, Item 7, and upper thrust bearing, Item 8, out from top of brake plate, Item 9.
6.Inspect both thrust bearings, Items 4 and 8, and replace if necessary.
1.Place flat washer, Item 7, upper thrust bearing, Item 8, and Belleville washers, Item 6, in position on brake plate, Item 9. Center them beneath hole (A) in yoke plate, Item 11.
2.Install lower thrust bearing, Item 4, on rotation stop weldment, Item 5.
The tabs on the rotation stop weldment must match the radius of the brake plate cut-out in order to fit properly.
3.Hold rotation stop weldment, Item 5, in position on bottom side of brake plate, Item 9,) and screw in brake spacer nut, Item 3, until snug.
4.Using handle, Item 2, adjust brake spacer nut, Item 3 until a solid brake condition is observed when handle, Item 2 is rotated to Brake position.
5.Install screw, Item 1, to secure handle, Item 2.
6.Check operation. Readjust if necessary:
a.Center, Slip position, Chair should rotate but have resistance against brake.
b.From center, move handle 30° toward patient’s left side of chair or Lock position. Chair should not move when pressure is applied.
c.From center, move handle 30° toward patient’s right side of chair or Unlock position. Chair should move freely approximately 30° from center each way.
