Ultra Chair Foot Switch Control Test and Repair
The only component on the foot switch control that can be replaced is the cord.
1.Use Base Up button (A) on touchpad, Item 1, to raise chair up.
Unplug chair power cord before removing covers or working on chair. Failure to comply could result in personal injury.
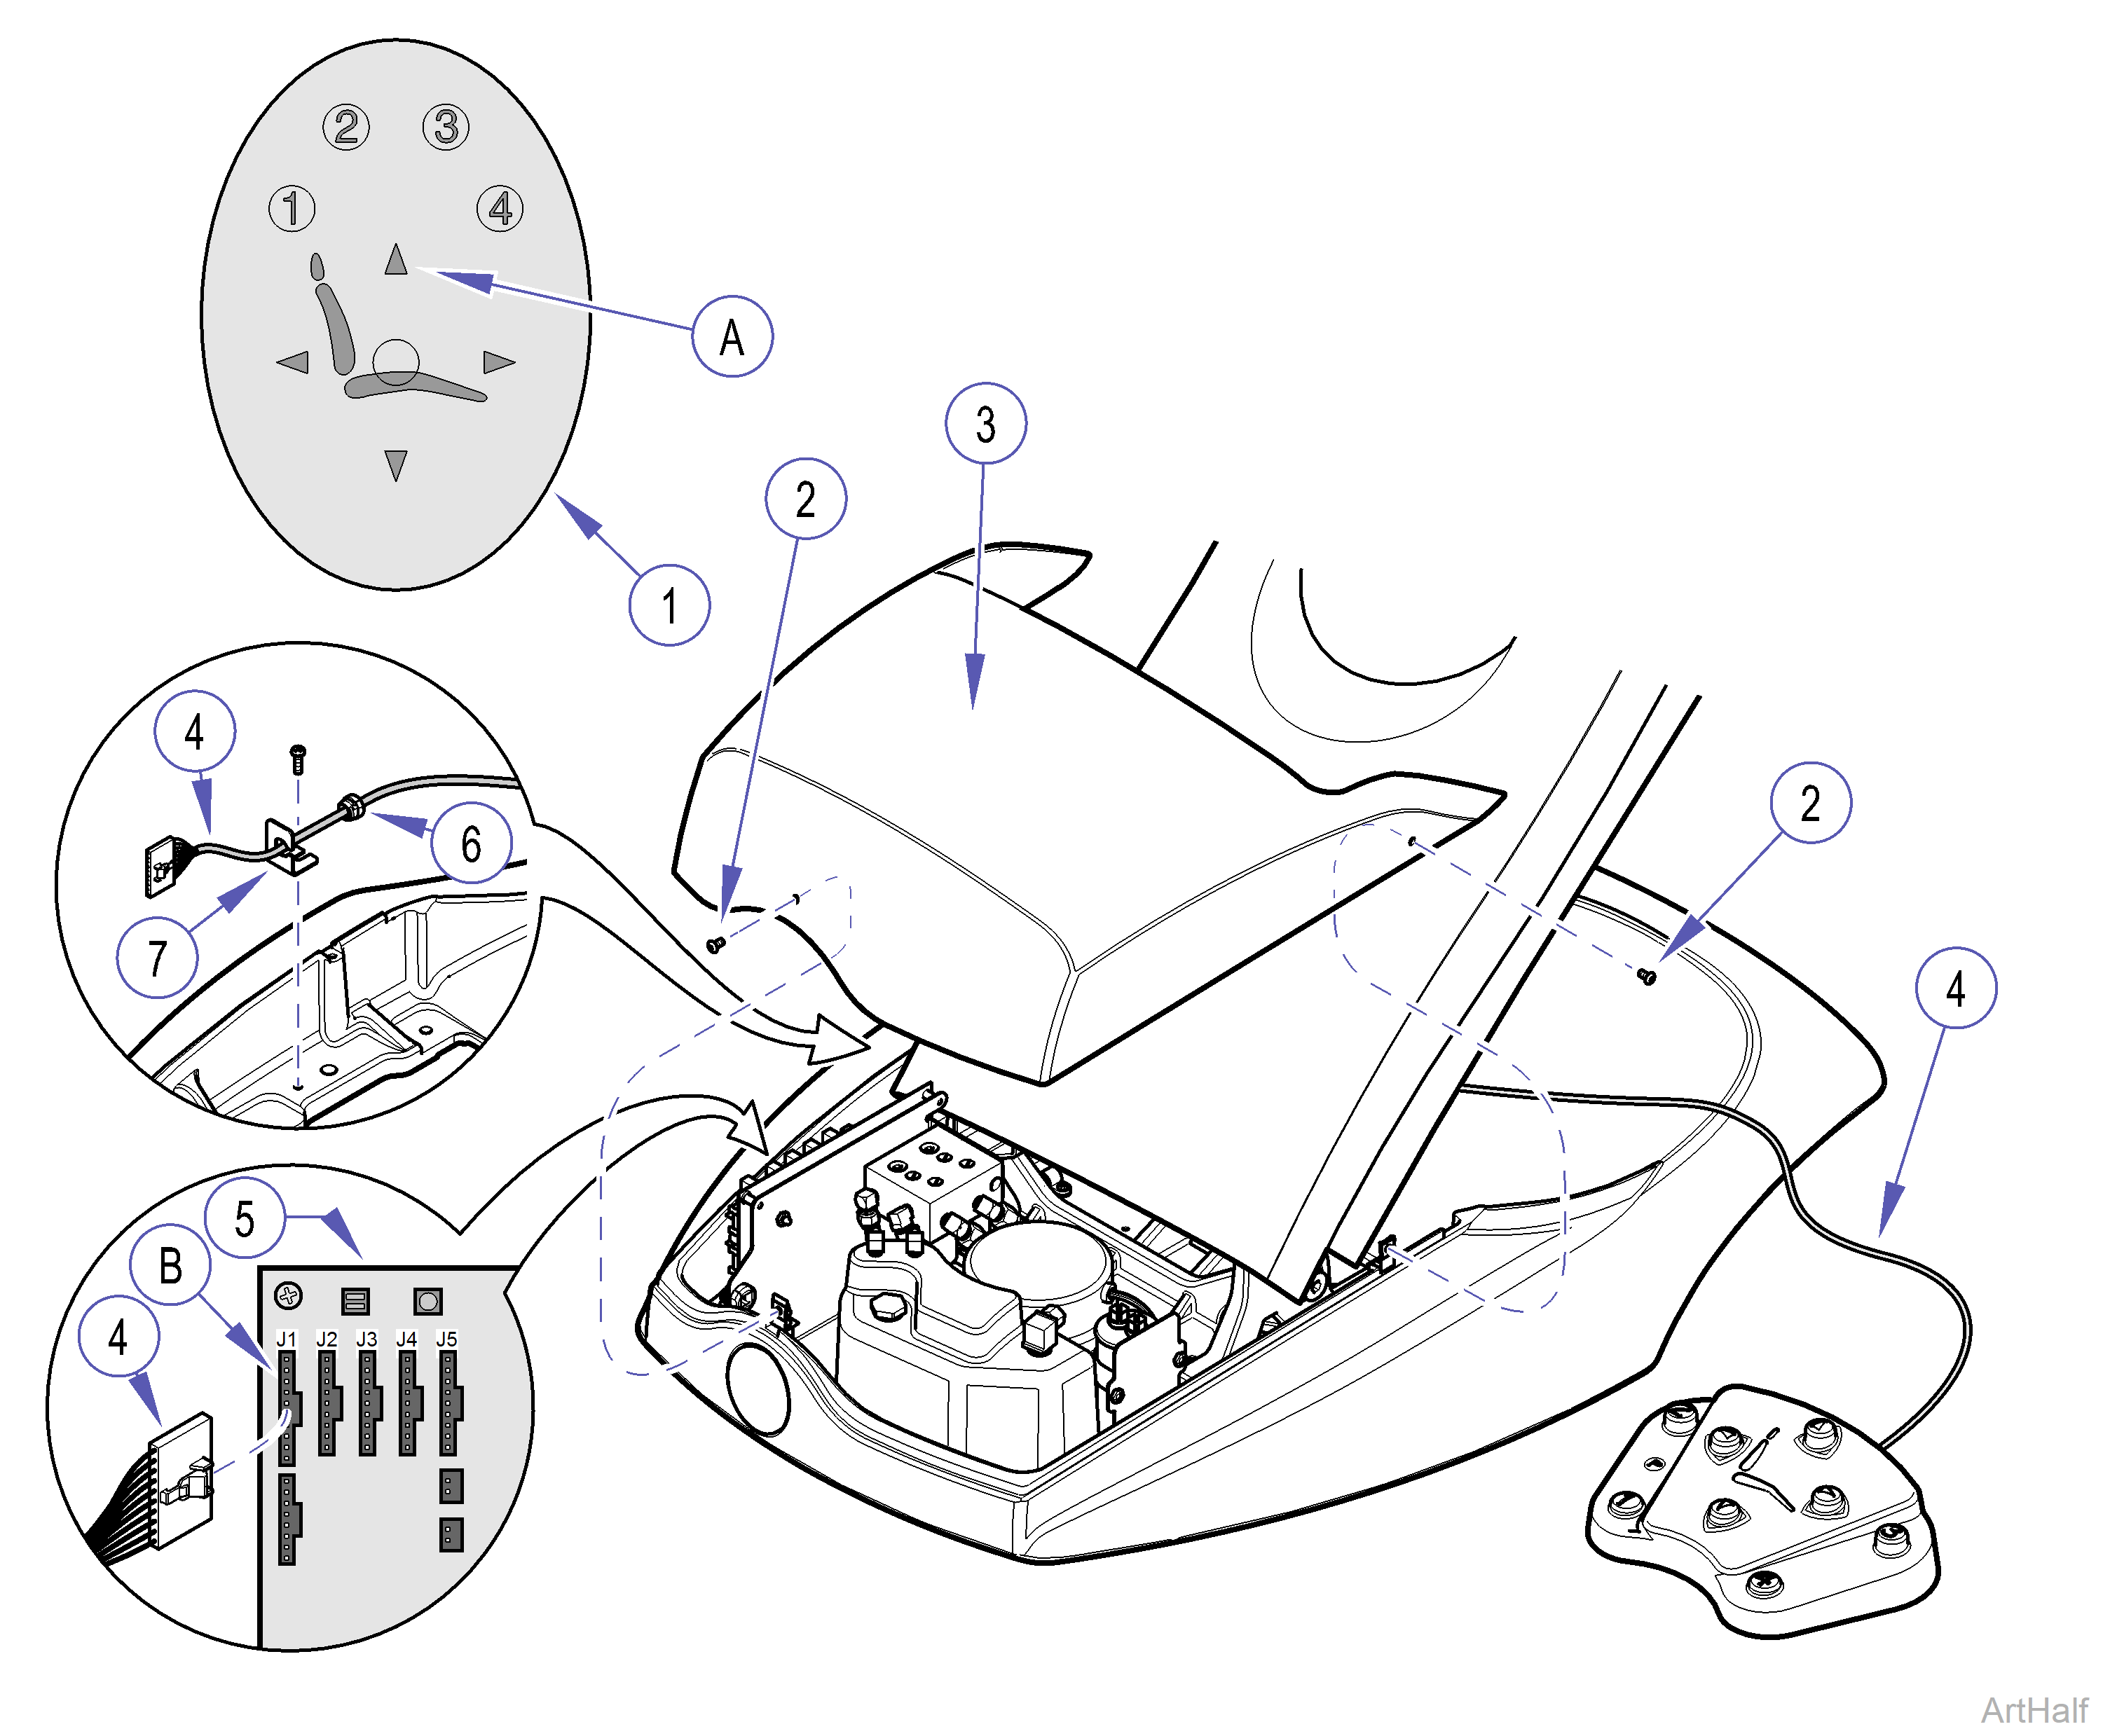
Foot Switch Control
2.Unplug power cord then remove three screws, Item 2, and hydraulic cover, Item 3.
3.Disconnect foot switch control cable, Item 4, from J1 connector (B) on PC. board, Item 5.
Mark position of strain relief bushing (Item 6) before removing from cable, Item 4, for later help in reassembly.
4.Remove restraint bracket, Item 7, from chair base and then remove cable, Item 4, from bracket and strain relief bushing, Item 6.
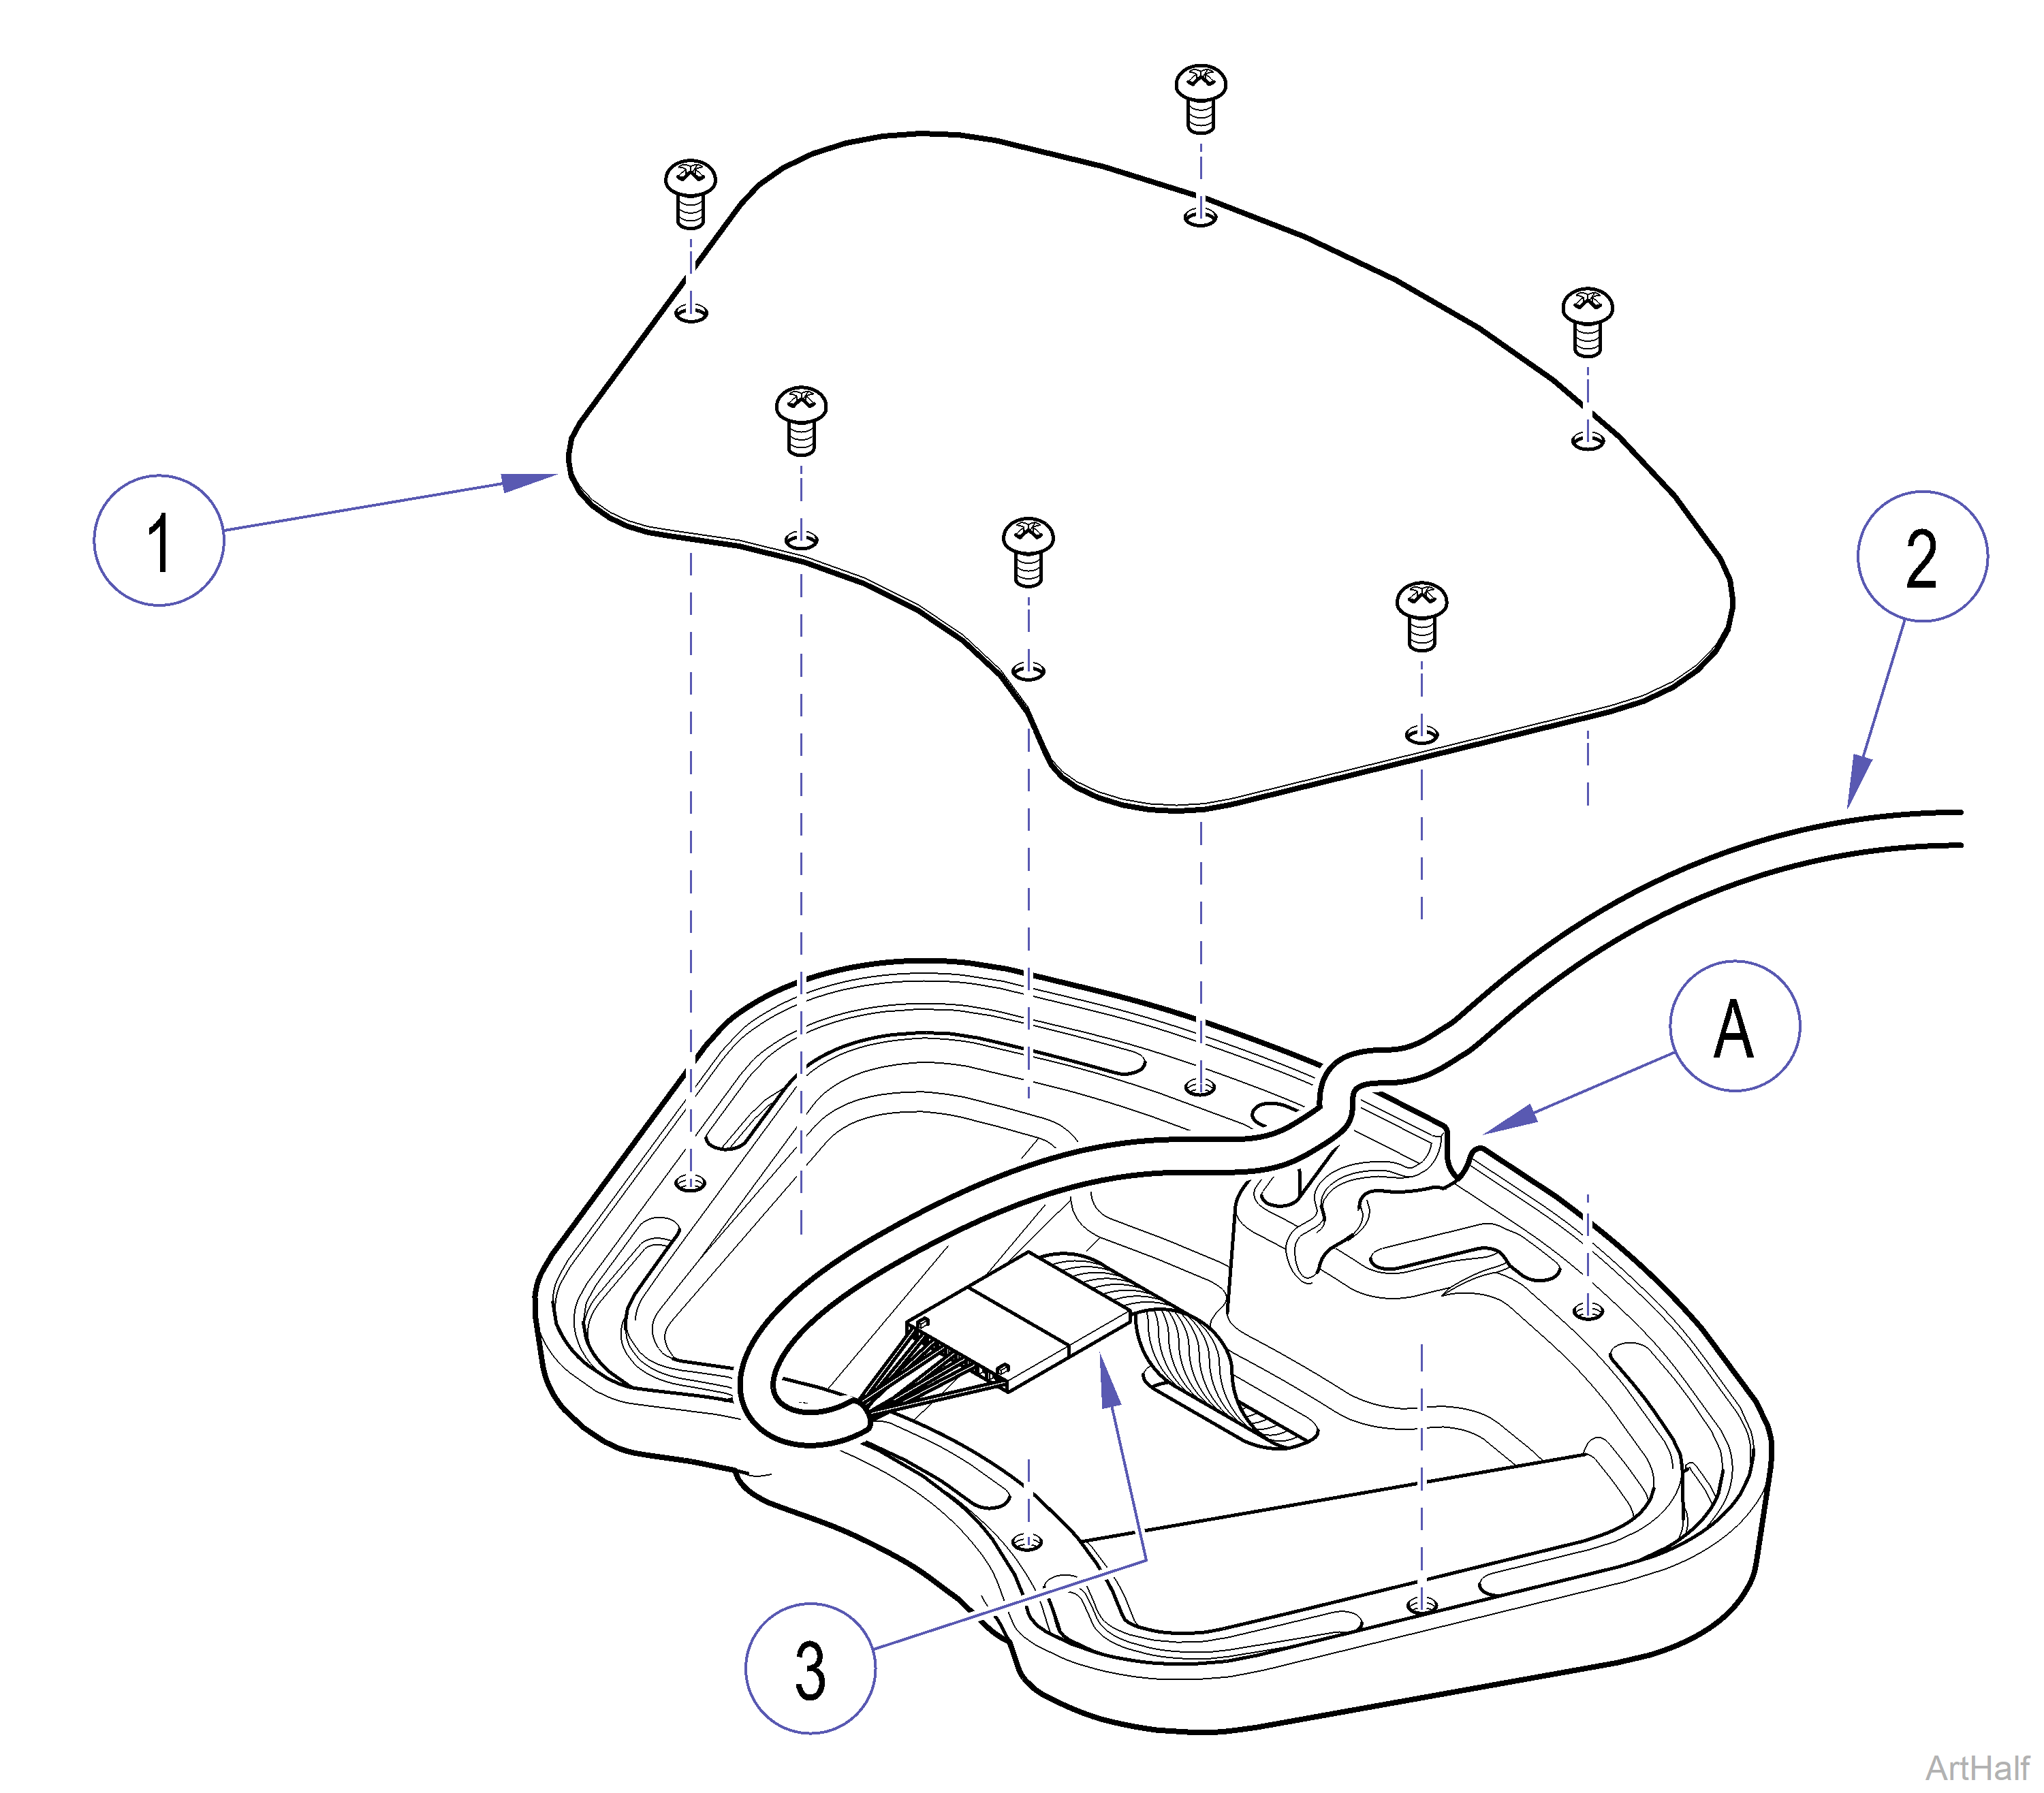
5.Remove bottom plate, Item 1, on footswitch control.
6.Disconnect cable , Item 2, from foot switch connector, Item 3, and remove cable.
1.Connect cable, Item 2,to foot switch connector, Item 3.
Cable must be routed in channel (A) of foot switch casting to prevent stress on connector during use.
Foot Switch Control - 2
2.Route cable, Item 2, in channel (A) of foot switch casting and install bottom plate, Item 1.
Using mark on old cable as measurement, place a mark on replacement cable to show location of strain relief bushing.
3.Install strain relief bushing, Item 6, on to cable, Item 4, and insert cable and strain relief bushing thru hole in restraint bracket, Item 7.
4.Install restraint bracket, Item 7, on chair base.
5.Plug cable , Item 4, into J1 connector, Item 2, on PC board.
6.Install hydraulic cover, see Covers.
7.Plug chair into outlet and check operation.
