Ultra Chair Hydraulic Back Cylinder Test and Repair
Hydraulic Back Cylinder
1.Remove the seat upholstery. Refer to: Upholstery Test and Repair.
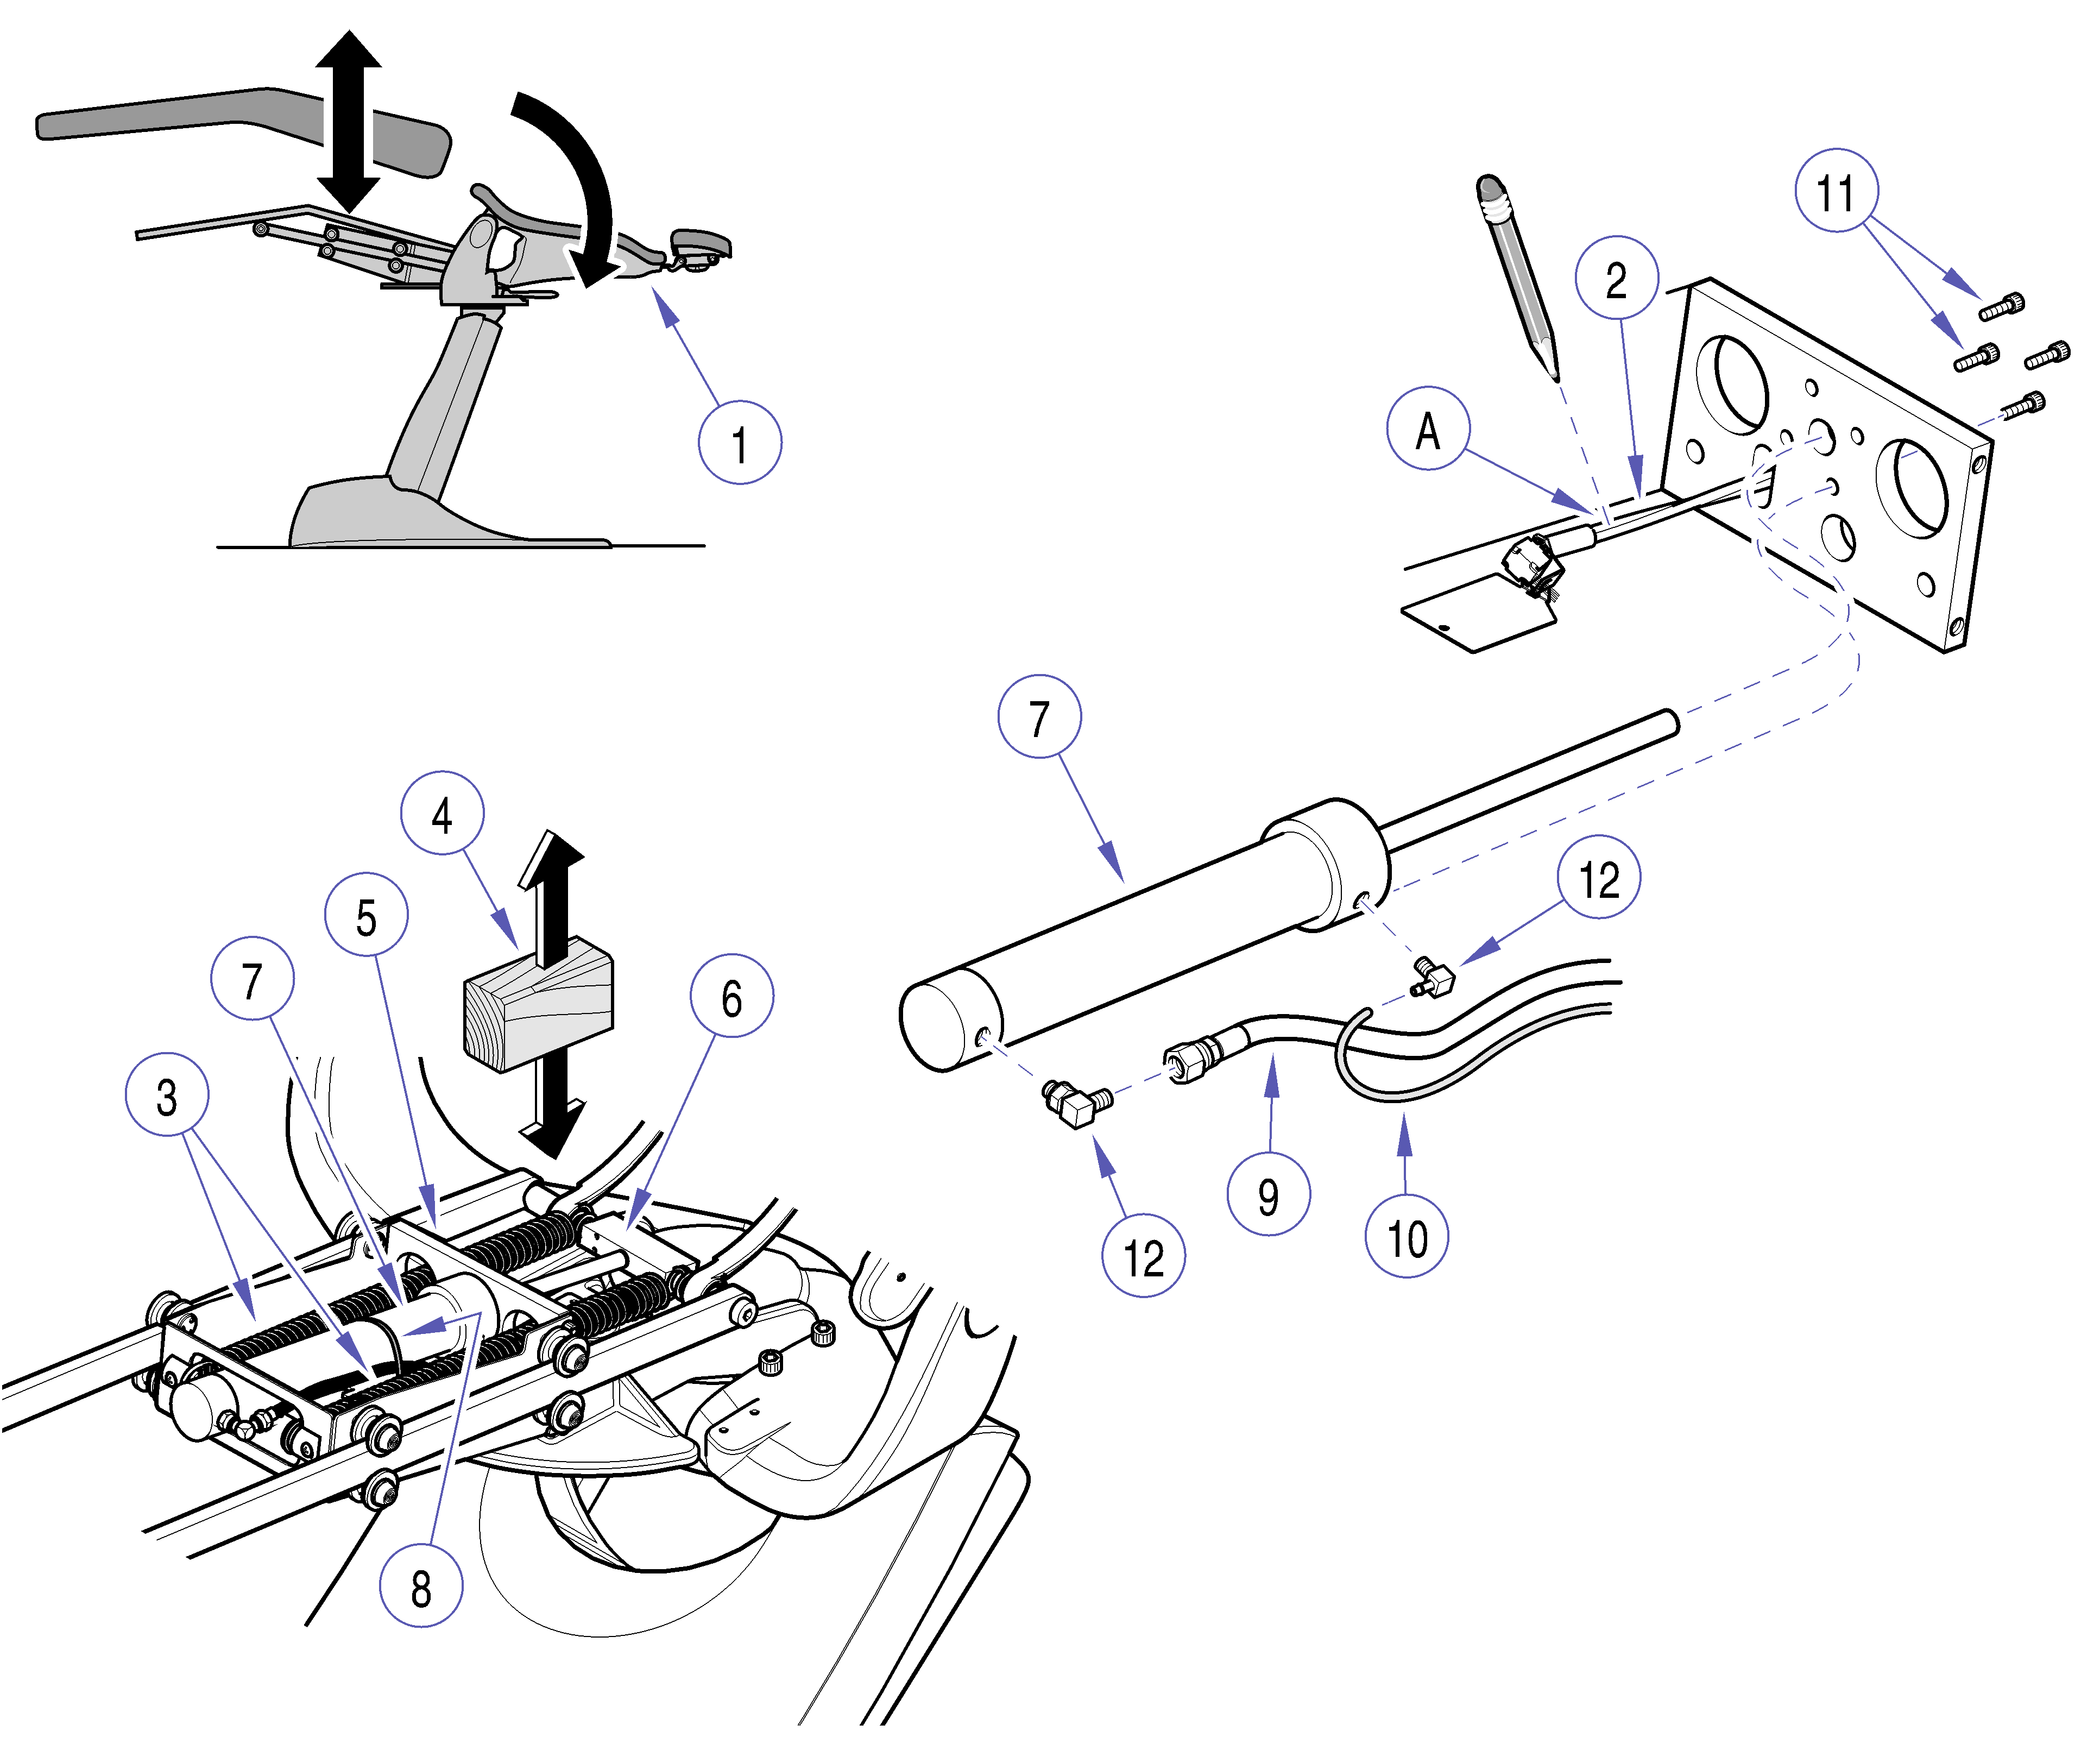
2.Place back, Item 1, in complete down position to remove pressure from cylinder and lines.
Unplug chair power cord before removing covers or working on chair. Failure to comply could result in personal injury.
3.Unplug chair power cord.
The following Equipment Alert and step 4, pertains only to chairs with serial numbers NT1000 thru NT1598, and NZ1000 thru NZ1019.
Do not manually rotate back potentiometer sensor shaft, Item 2, when replacing parts in chassis. After lowering back to complete down position, place a location mark on top of auger shaft for later reference.
4.Place location mark (A) on top of back potentiometer sensor shaft, Item 2.
5.Unhook back springs, Item 3, from foot end of chassis and remove springs.
6.While lifting up back section, Item 1, place a 6" (15 cm) block, Item 4, between face plate, Item 5, and yoke block weldment, Item 6.
7.Place towels beneath hydraulic cylinder, Item 7, to absorb excess fluid, cut cable tie, Item 8, disconnect pressure, Item 9, and vent hoses, Item 10.
8.Remove four screws, Item 11, and hydraulic cylinder, Item 7.
9.Remove fittings, Item 12, from hydraulic cylinder, Item 7.
Failure to use hydraulic sealant on fittings may result in leakage.
Fittings on cylinder must be installed so openings face each other. Rod end fitting, must be turned inward until approximately two threads are visible or springs may rub against fitting.
1.After removing shipping plugs from hydraulic cylinder, Item 7, install fittings, Item 12.
2.Install hydraulic cylinder, Item 7, four mounting screws, Item 11, connect pressure, Item 9, vent, Item 10 hoses, and secure with cable tie, Item 8.
On chairs with serial number N1000 thru NT1598, and NZ1000 thru NZ1019 assure location mark (A) on potentiometer sensor shaft, Item 2, is in same position before hydraulic cylinder was removed.
3.Supporting Back Section, Item 1, remove block, Item 4.
For ease of installation connect springs, Item 3, to Back Section first and then to Seat Section. Assure nylon washers, Item 13, are positioned on both sides of spring hooks when connecting springs to Back Section, Item 1.
4.Connect springs, Item 3.
5.Check hydraulic fluid level then run chair through several functions and check for leaks. Refer to:Hydraulic Fluid Level
6.Plug chair into outlet, run back section up and down while checking for leaks.
7.Install seat upholstery.
