Ultra Chair Hydroglide Assembly Test and Repair
Hydroglide Assembly
1.Place chair back in complete down position.
Unplug chair power cord before removing covers or working on chair. Failure to comply could result in personal injury.
2.Unplug chair power cord.
3.Remove Upholstery.
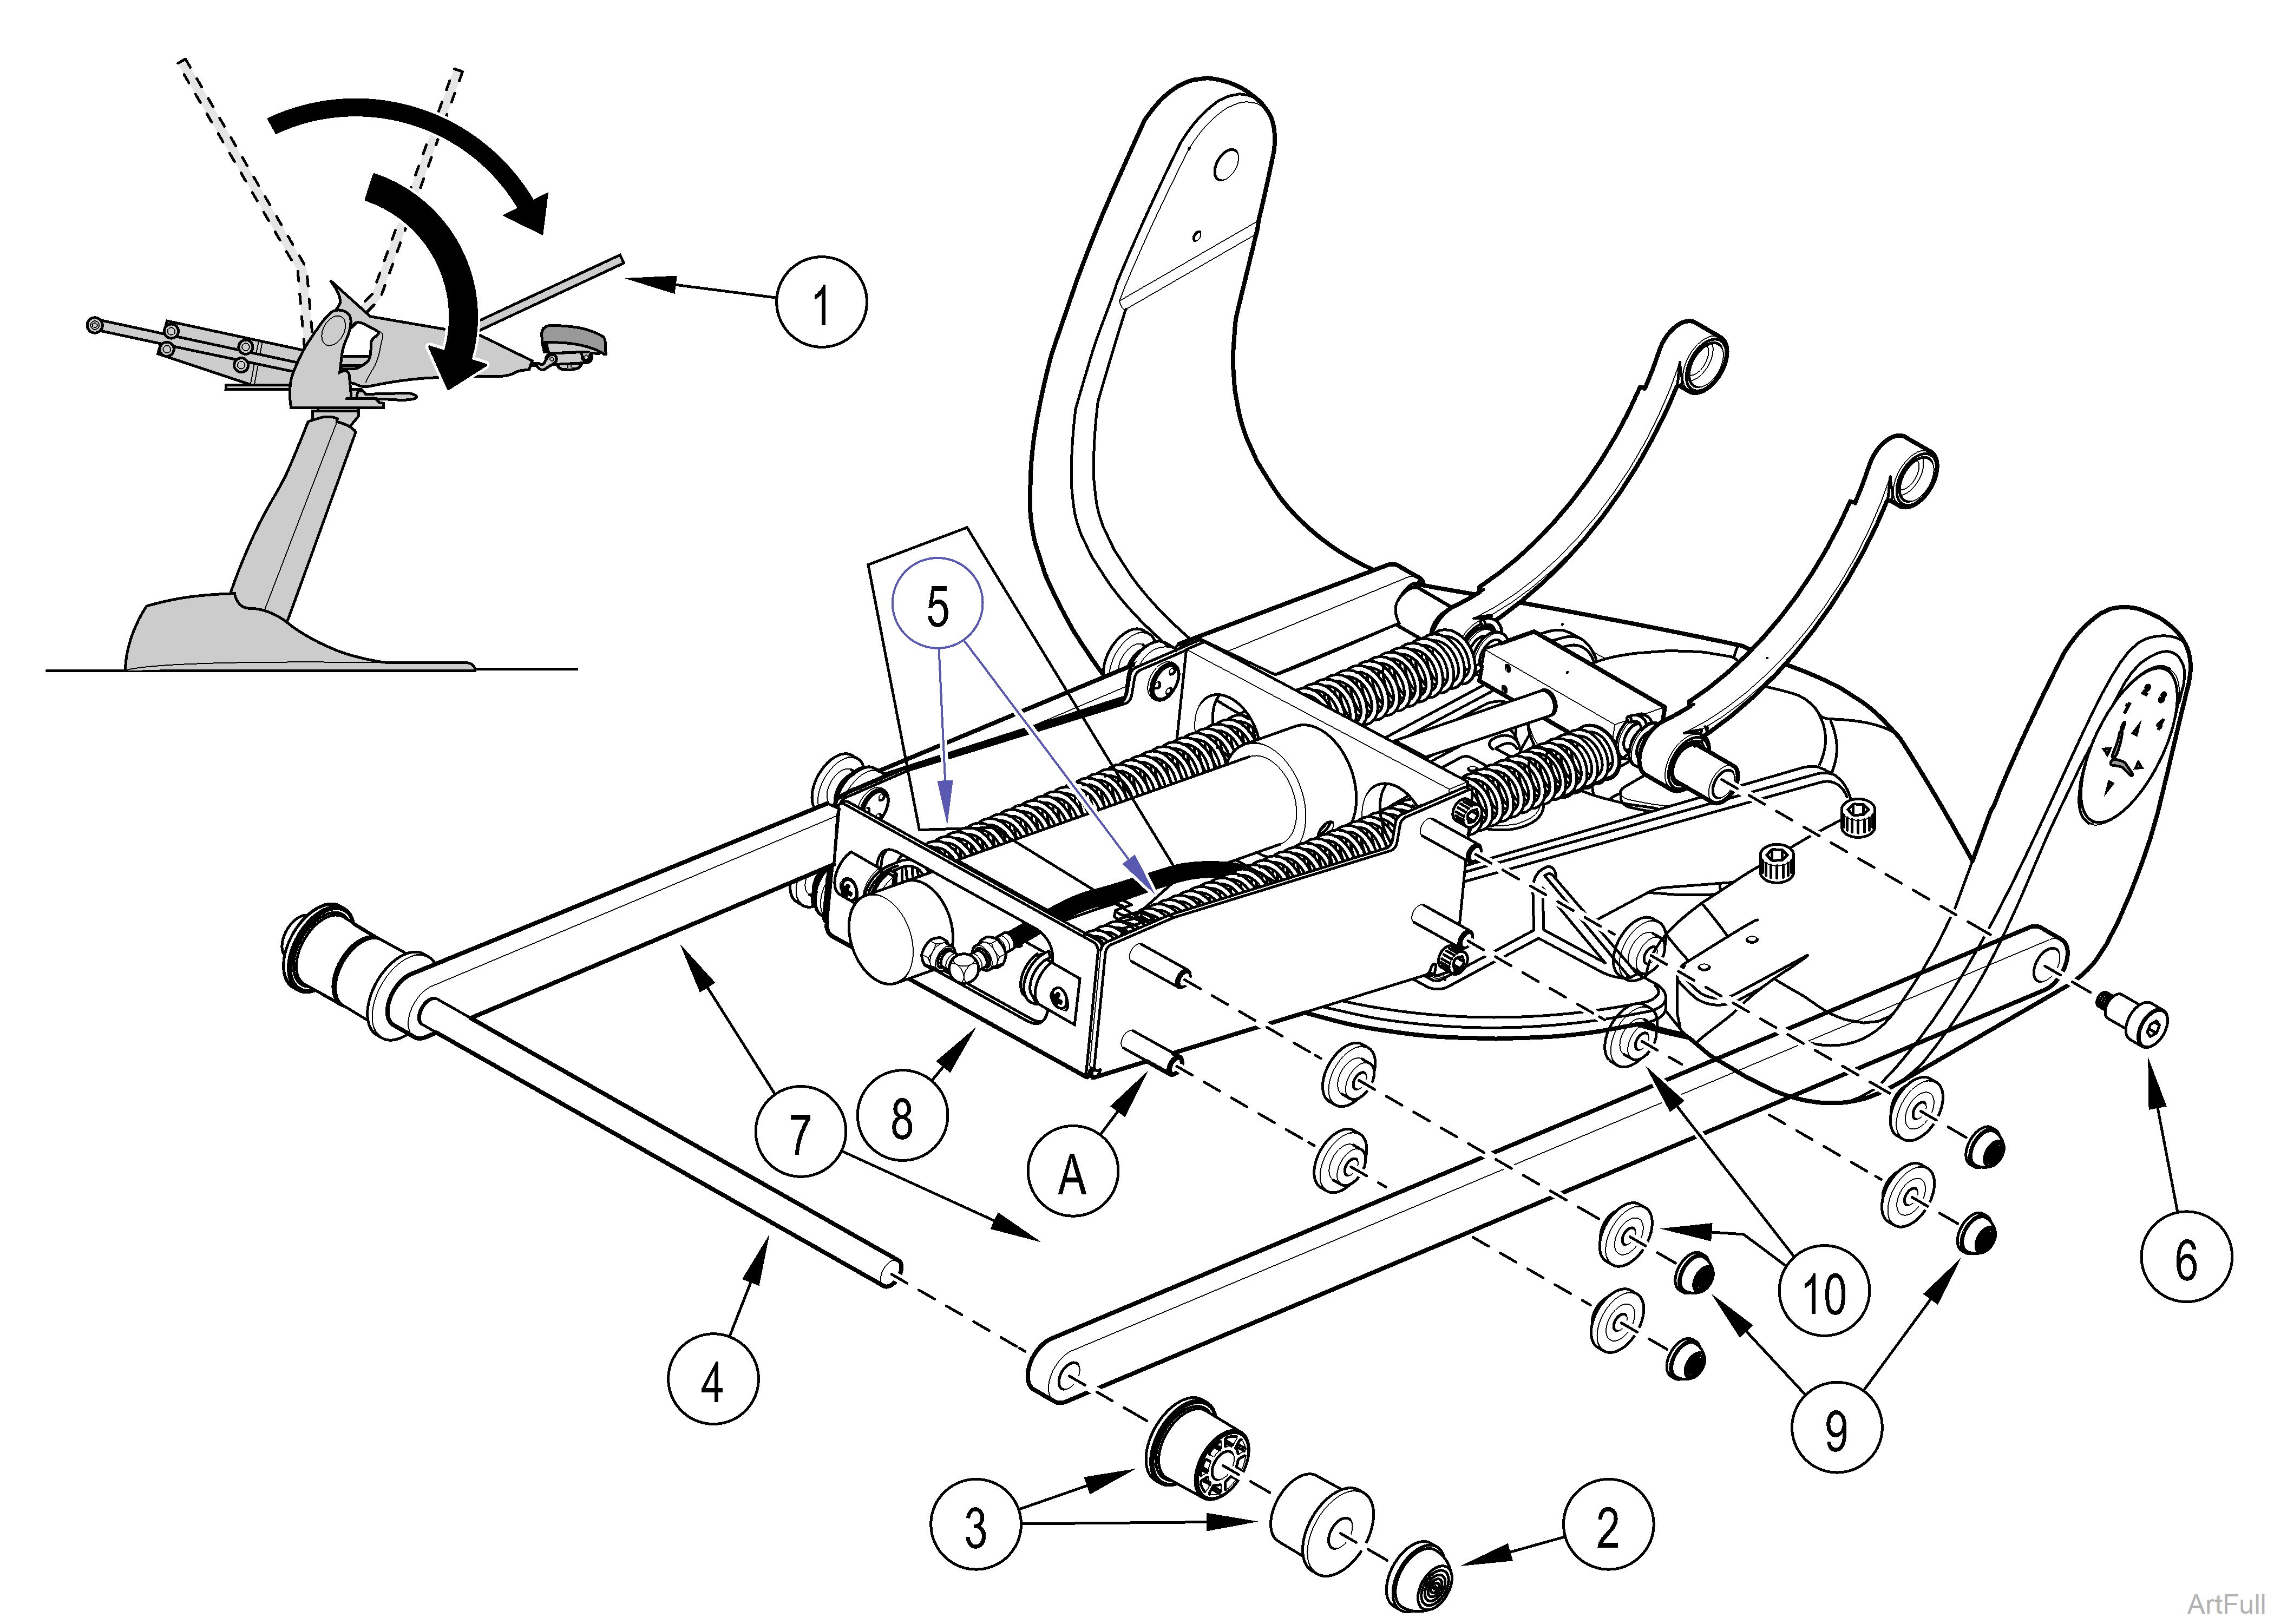
4.Swing chair seat frame, Item 1, up.
Push nuts, Item 2, will be damaged during removal requiring new ones. If chair seat rollers, Item 3, are not damaged, it is not necessary to remove them in order to remove wheel halves. Continue to Step 6.
5.Remove push nuts , Item 2, and chair seat rollers, Item 3, from roller shaft, Item 4. Inspect and replace if necessary
6.Disconnect back springs, Item 5, from foot-end of chassis.
7.Remove shoulder bolts, Item 6, and pull lift bars and roller shaft assembly, Item 7, from hydroglide frame assembly, Item 8.
8.Remove push nut, Item 9, and wheel halves, Item 10. Inspect and replace if necessary.
Remove any nicks or burrs from roller shaft and pins on hydroglide frame assembly before installing rollers and wheel halves.
1.Place a light coating of silicon on hydroglide pins, (A). Install wheel halves, Item 10, and push nuts, Item 9.
2.Place a light coating of silicon on ends of roller shaft, Item 4. Install chairseat rollers, Item 3, and push nuts, Item 2.
3.Insert lift bars and roller shaft assembly, Item 7, between wheel halves, Item 10, of hydroglide frame assembly, Item 8.
Place a small drop of non-permanent thread-lock on threads of shoulder bolts before installation.
4.Install shoulder bolts, Item 6.
5.Lower chair seat frame, Item 1.
6.Install seat Upholstery.
7.Plug chair into outlet and check operation.
