Procenter Systems and Whip Unit, Chair Mounted Coolant Water Flush Valve Test and Repair
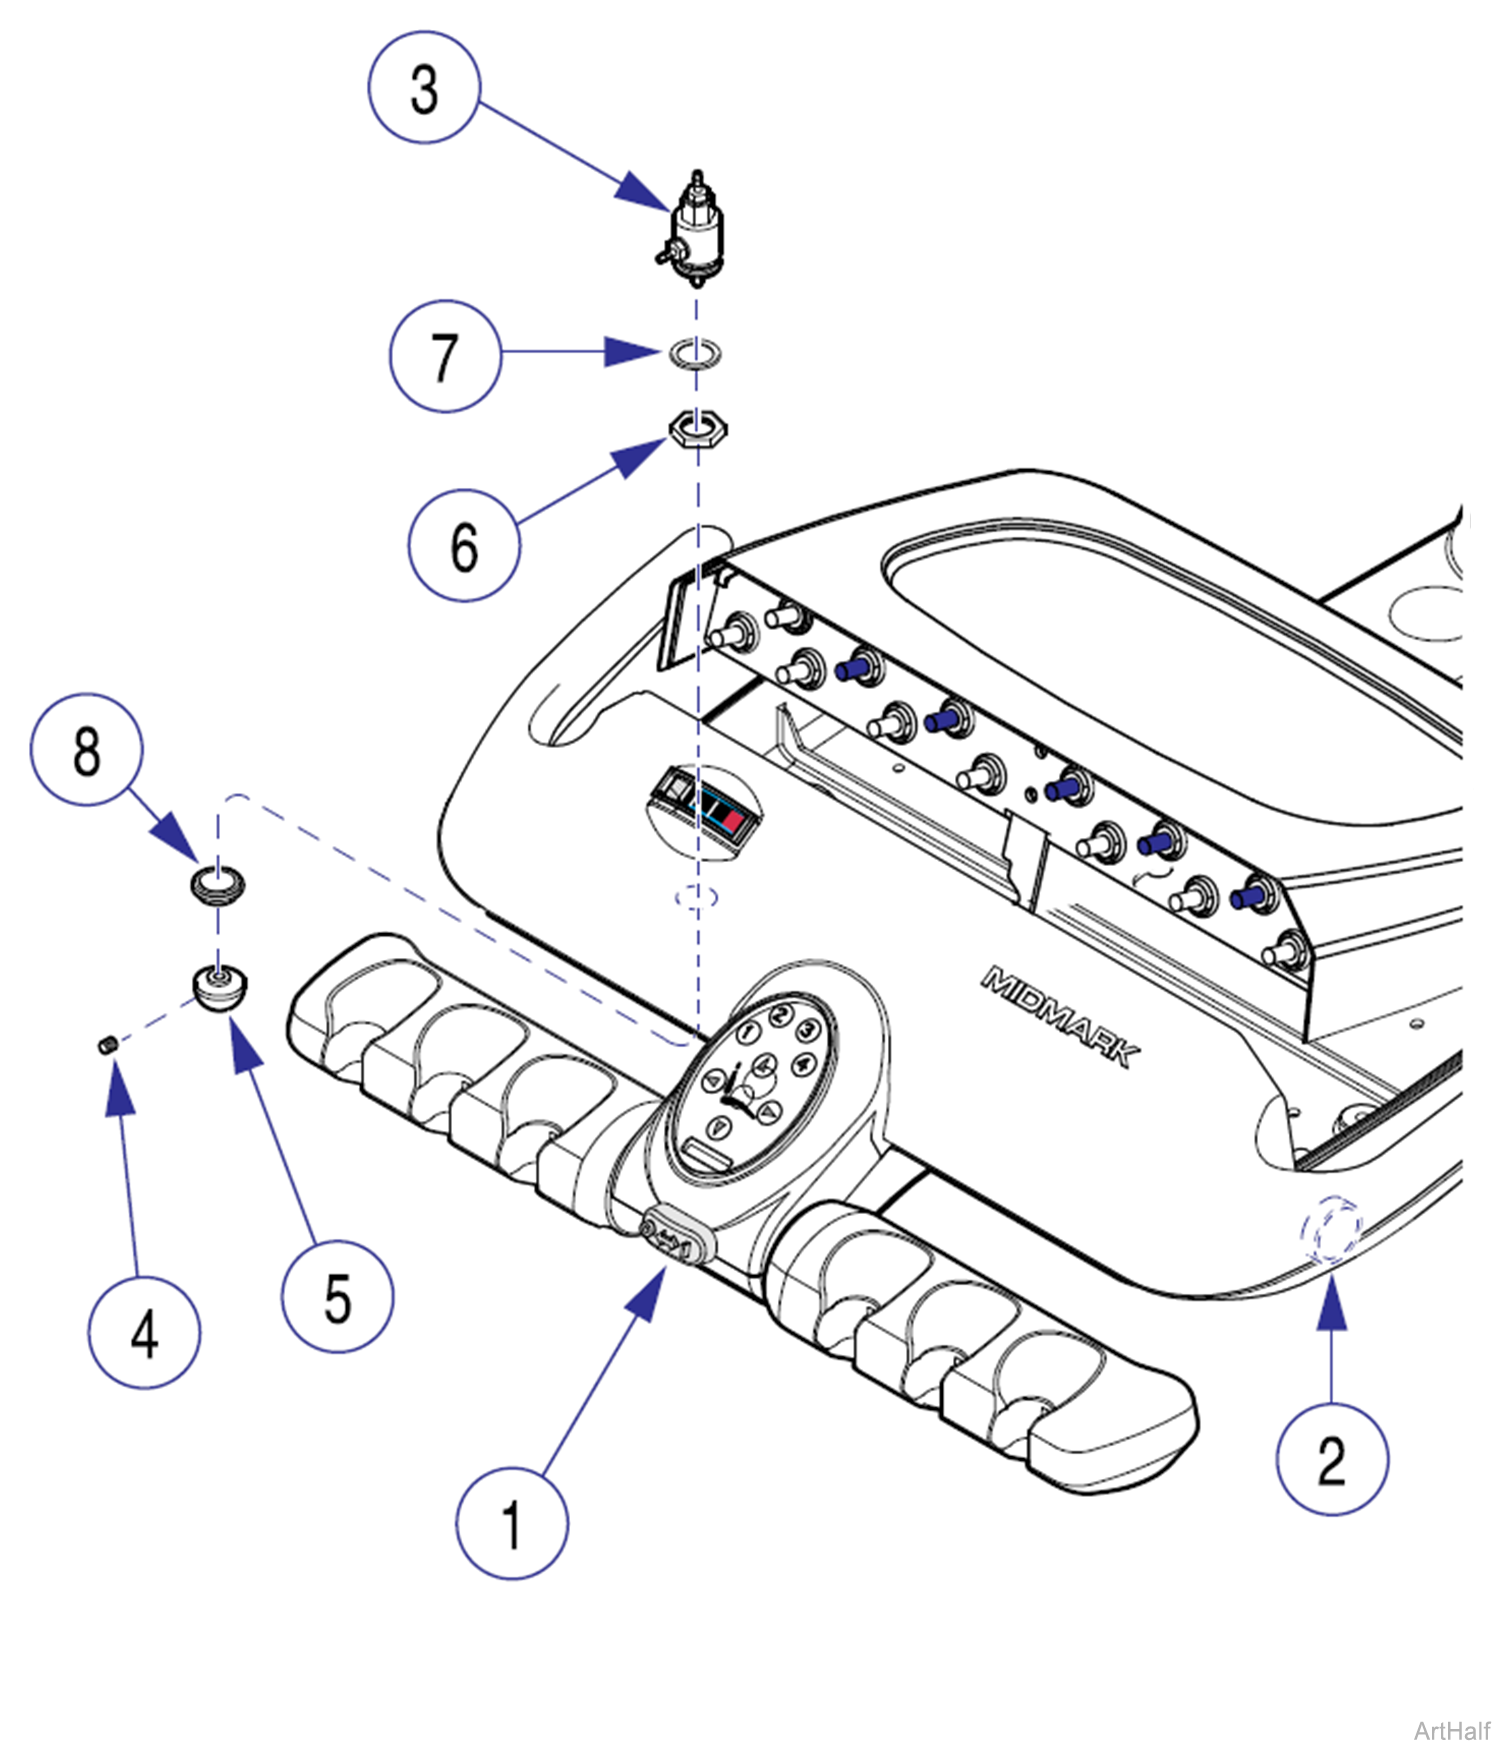
Procenter Systems and Whip Unit, Chair Mounted Coolant Water Flush Valve Removal / Installation
1.Turn master ON/OFF switch (1) OFF.
2.Push panel unlock button (2) to access internal components; use a prop to hold up lid if necessary.
3.Tag and disconnect tubing from flush valve (3).
4.Loosen set screw (4) and remove adjustment knob (5).
5.Unscrew flush valve (3); remove valve, nut (6), washer (7), and trim ring (8) from housing.
1.Insert flush valve (3) through washer (7) and nut (6); then insert valve through hole in housing and secure to with trim ring (8).
2.Secure flush valve (3) with trim ring (8).
3.Install adjustment knob (5); then tighten set screw (4).
4.Connect 1/8 in. yellow (blue) inlet tubing and 1/8 in. orange (white) outlet tubing to proper fittings of flush valve (3).
5.Close upper housing, or install cover on Whip unit; then turn master ON/OFF switch (1) ON and check for proper operation.
