Procenter Systems and Whip Unit Typical Master Pilot Shut-Off Valve Removal / Installation Test and Repair
Procenter Systems and Whip Unit Typical Master Pilot Shut-Off Valve Removal / Installation
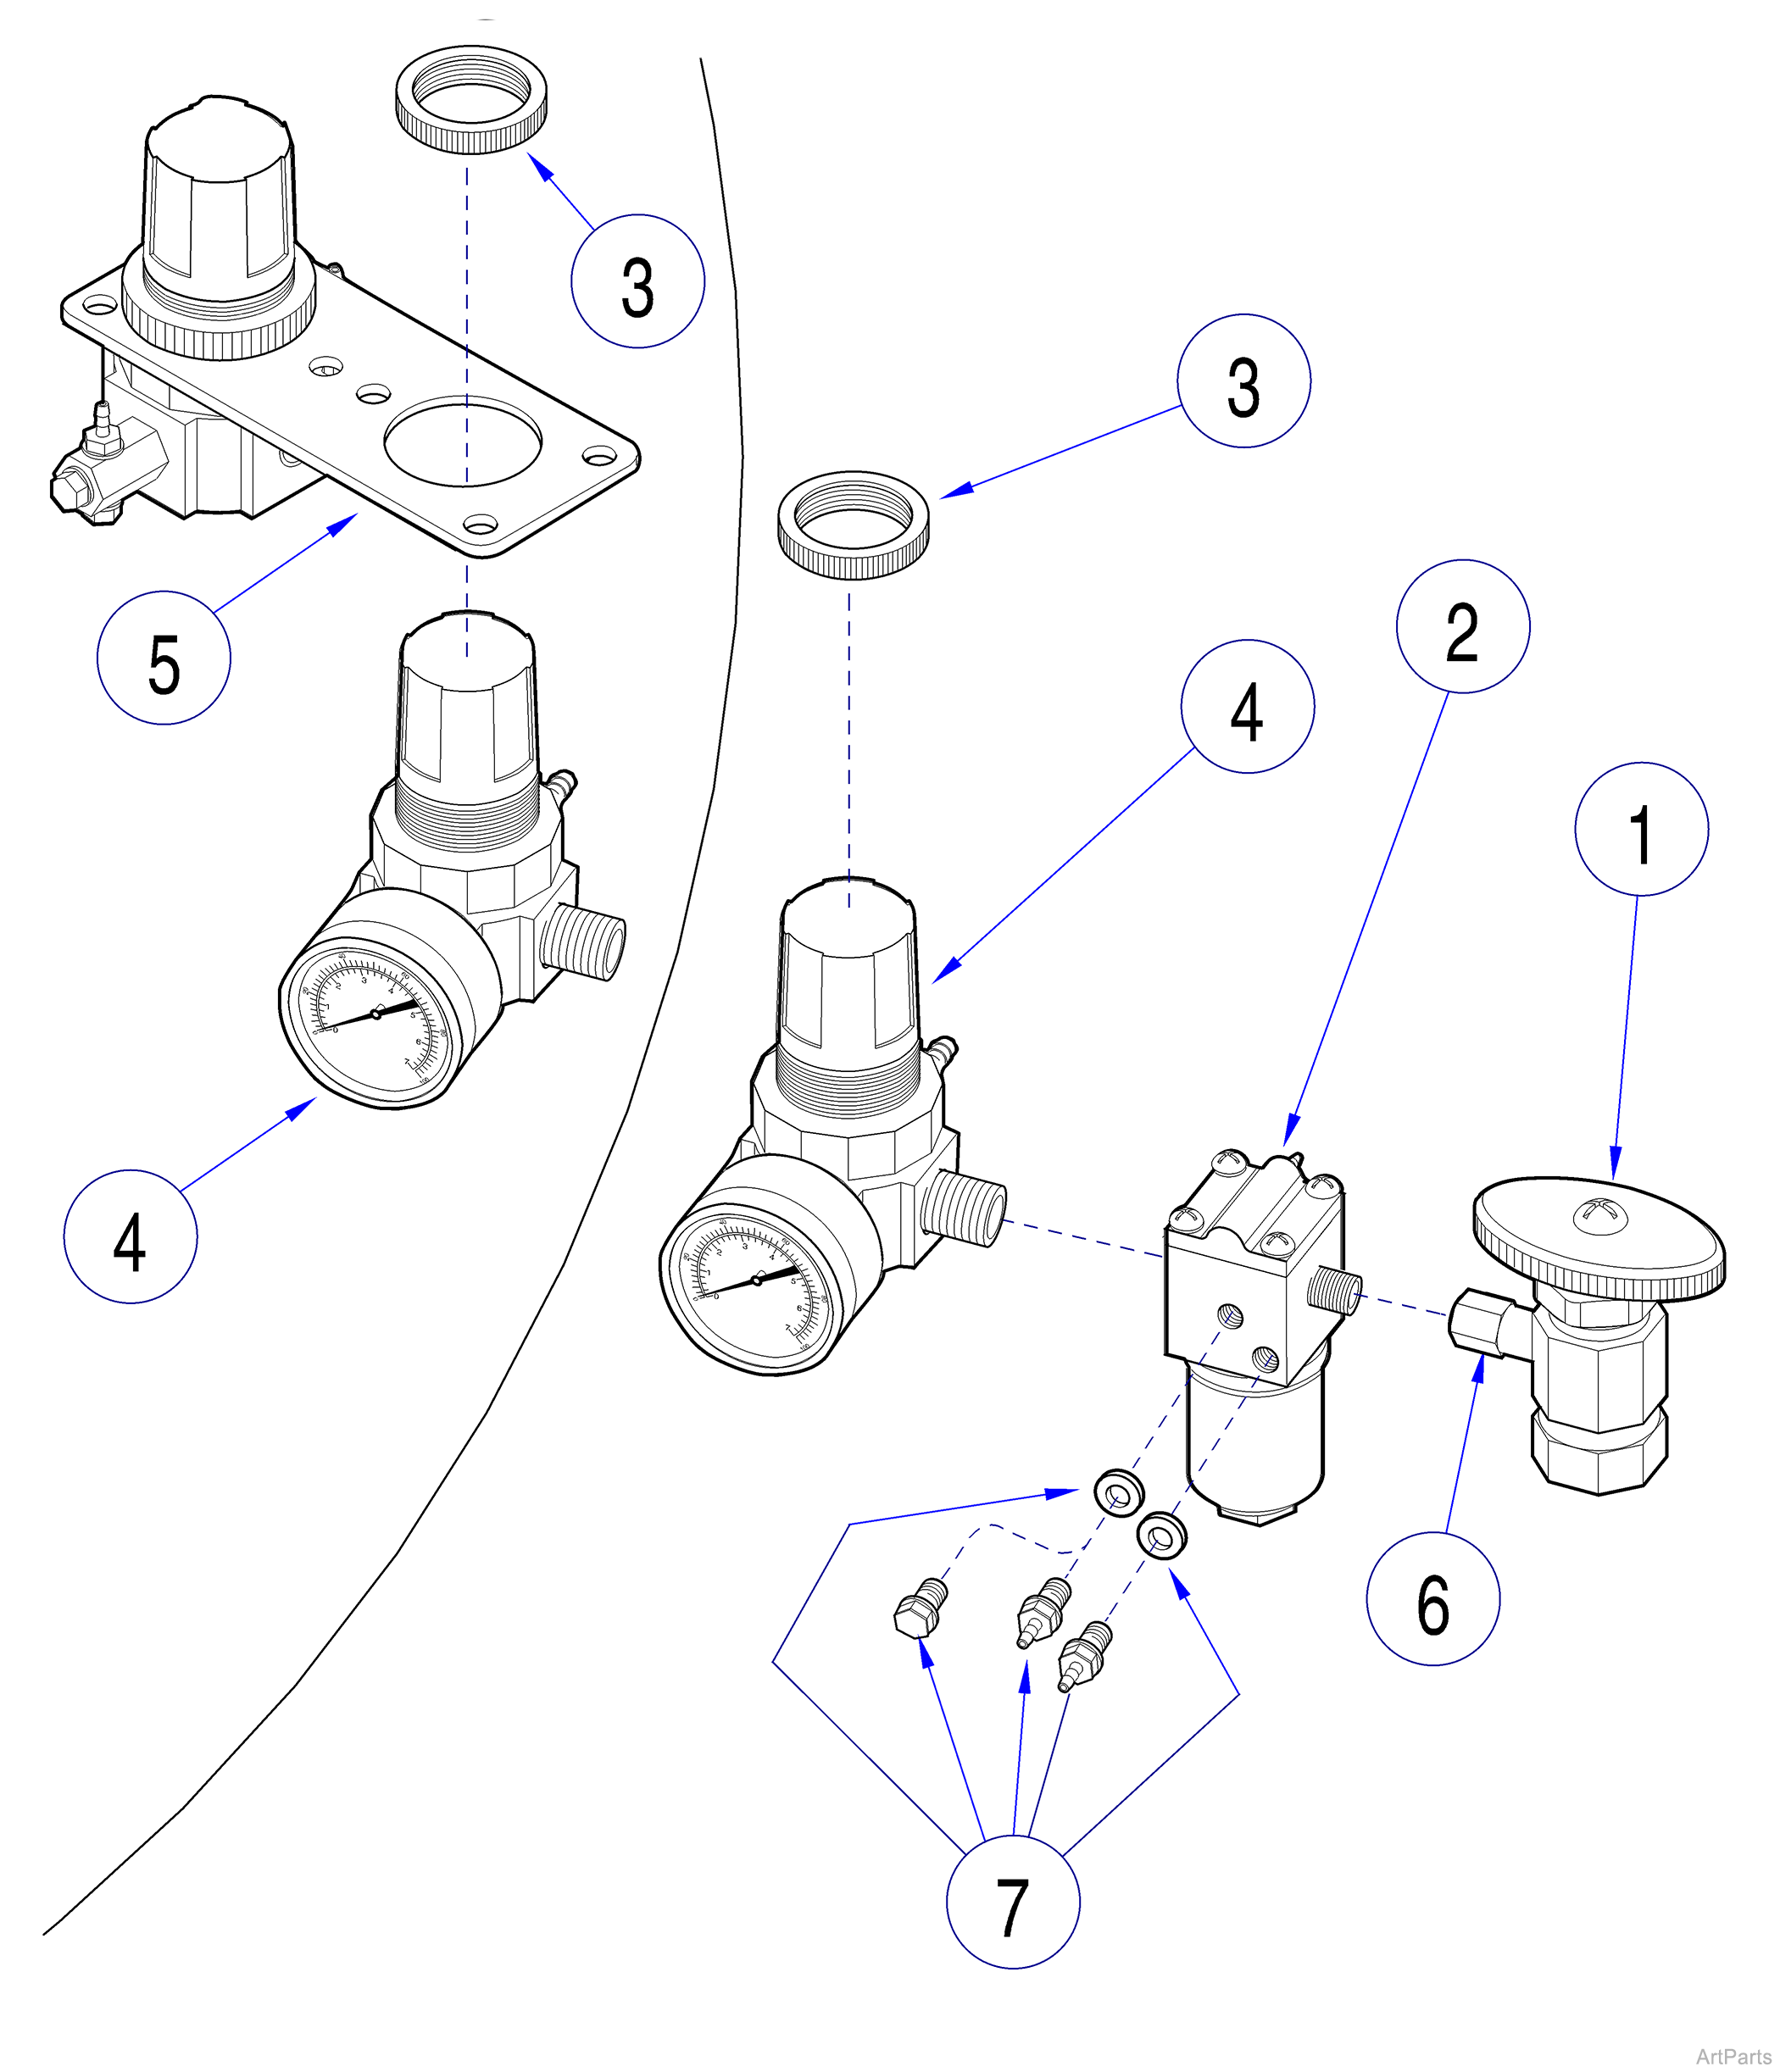
1.Turn air and water manual shut-off valves (1) OFF.
2.Tag and disconnect all tubing connected to master pilot shut-off valve (2).
3.Remove locking ring (3) from regulator (4); then remove mounting plate (5) from regulator.
4.Loosen compression nut (6) and remove master pilot shut-off valve (2) from manual shut-off valve (1).
5.Unscrew master pilot shut-off valve (2) from regulator (4).
6.Remove any fittings/plugs/gaskets (7) from master pilot shut-off valve (2).
1.Install any fittings/plugs/gaskets (7), removed in step 6 of removal procedure, into master pilot shut-off valve (2).
2.Apply removable loctite, then screw master pilot shut-off valve (2) onto fitting of regulator (4).
When performing the following step, it may be necessary to replace the compression sleeve. Failure to do so could cause connection to leak.
3.Insert master pilot shut-off valve (2) into manual shut-off valve (1); then tighten compression nut (6).
4.Place mounting plate (5) over regulator (4); then secure regulator with locking ring (3).
5.Connect tubing to proper fittings of master pilot shut-off valve (2).
6.Turn air and water manual shut-off valves (1) ON and check for proper operation.
