Procenter Systems and Whip Unit Kink Valve Removal / Installation Test and Repair
Procenter Systems Kink Valve
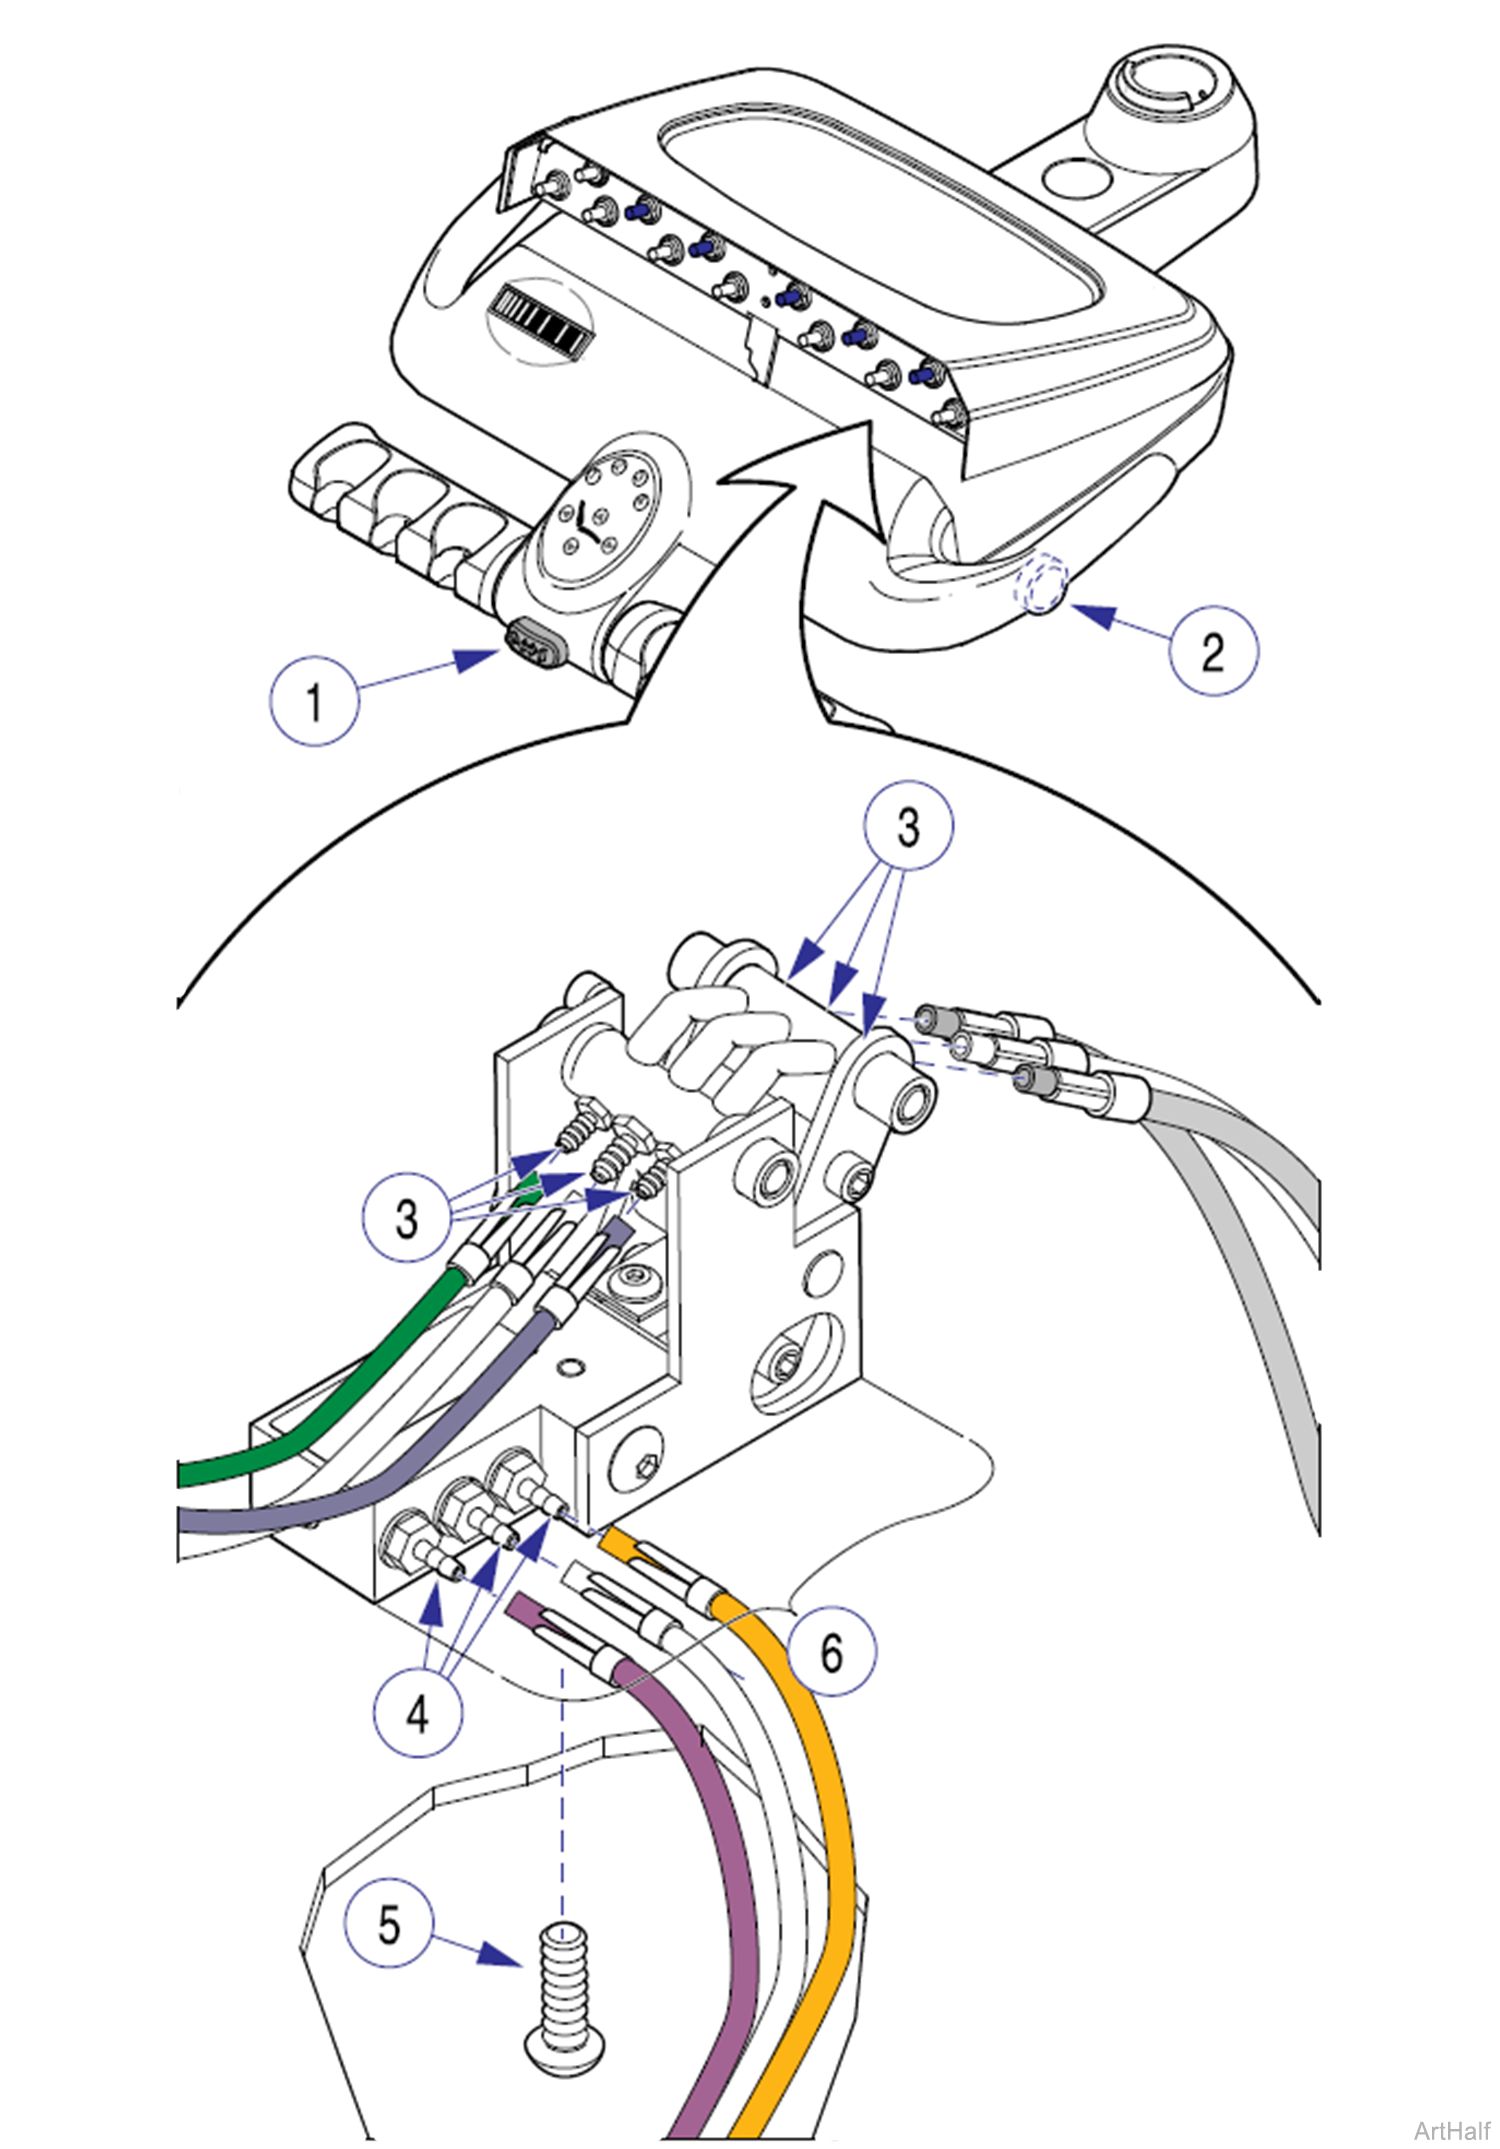
The Procenter Delivery Unit Kink Valve is shown above. The procedure for the Whip Unit and casework mounted units is similar.
1.Turn master ON/OFF switch (1) OFF.
2.Depress Panel Unlock button (2) to access internal components.
3.Tag and disconnect tubing from six kink valve fittings (3) and three kink valve manifold fittings (4).
On Whip Units, the kink valves are mounted to spacer blocks instead of the lower housing. Do not remove the spacer block when replacing the kink valve. Removing the spacer block will release the whip spring.
4.Remove screw (5) and kink valve assembly (6).
1.Connect tubing to proper kink valve fittings (3), and proper kink valve manifold fittings (4).
2.Position kink valve (6) and secure with screw (5).
3.Turn master ON/OFF switch (1) ON, and check for proper operation.
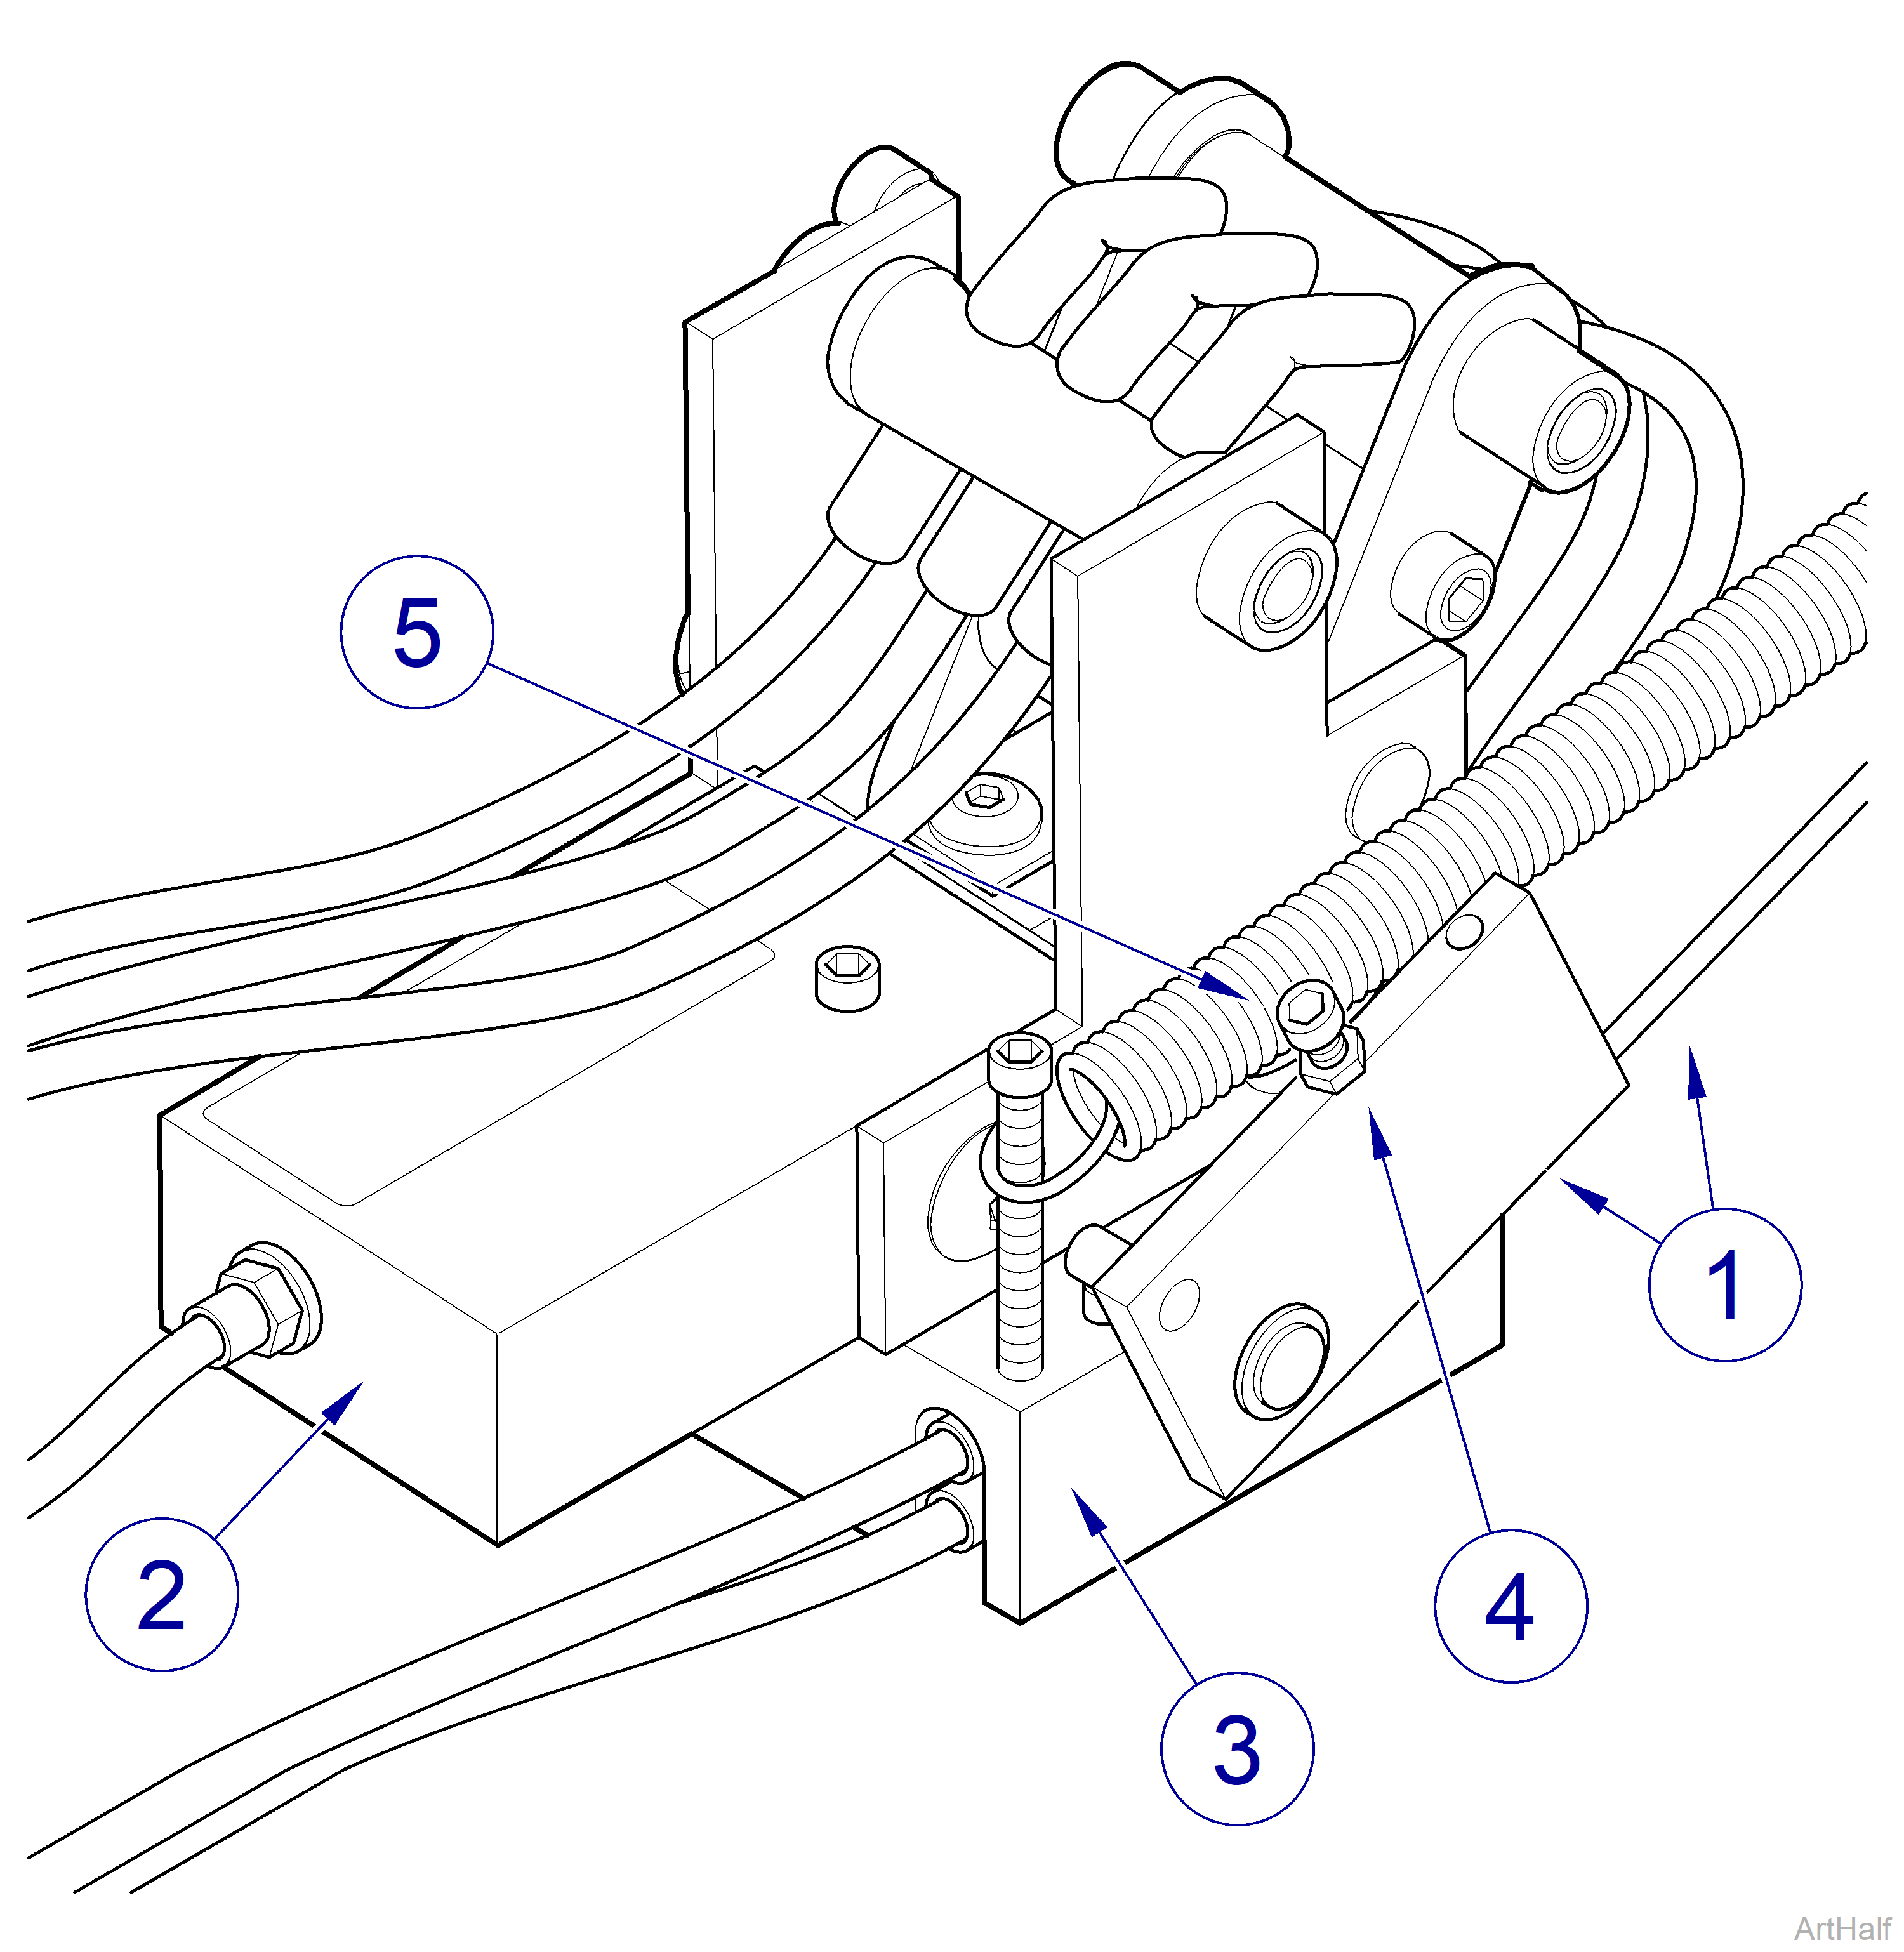
Kink Valve Adjustment for Whip Units Only
Whip Unit deliveries use an actuator assembly (1) attached to the kink valve (2). The actuator contains a normally closed On/Off Valve (3) that opens, supplying pilot air to the kink valve, when the instrument is lifted from the instrument pad. The actuator can be adjusted.
1.Remove delivery unit cover.
2.To adjust the actuator (1), loosen the jam nut (4) and turn the adjustment screw (5) inward to open the valve or outward to close the valve.
3.Check operation.
