Procenter Systems Delivery Unit Typical Adjustment Valve Removal / Installation Test and Repair
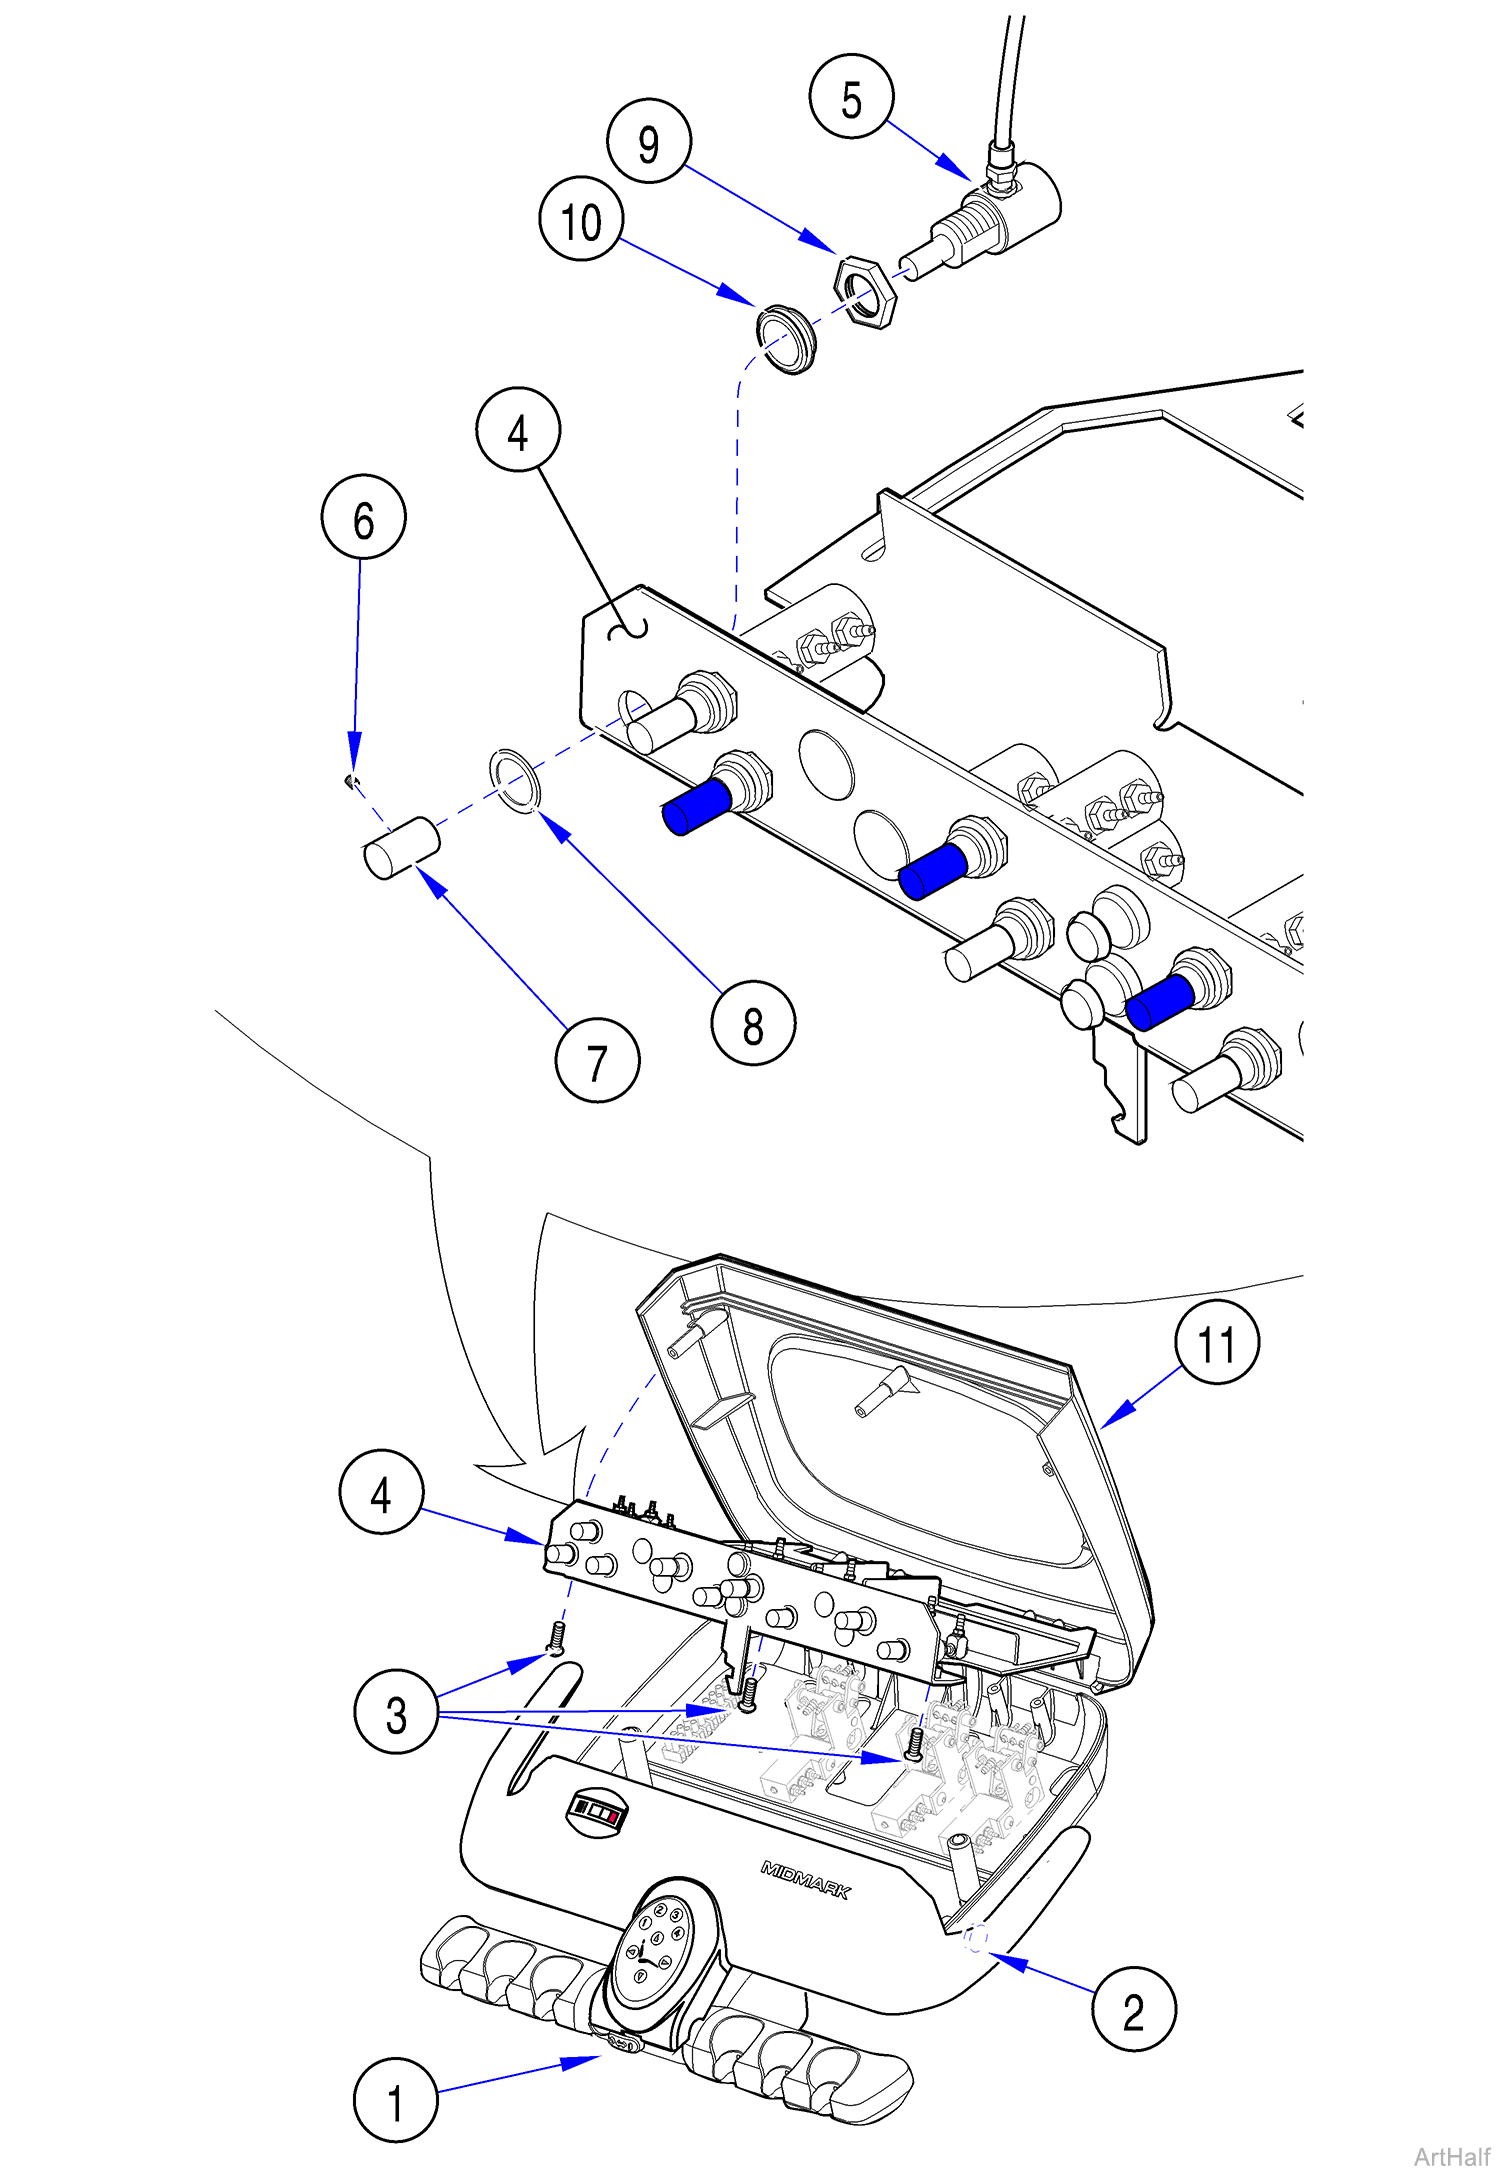
Chair/Console Mounted Procenter Systems Delivery Unit Adjustmant Valve
1.Turn master ON/OFF switch (1) OFF.
Steps 2 and 3 do not apply to casework mounted delivery systems. Go to step 4.
2.Push panel unlock button (2) to access internal components.
3.Remove three screws (3); then lower lid cover (4) to access adjustment valve (5).
4.Tag and disconnect all tubing connected to adjustment valve (5).
5.Loosen set screw (6) and remove adjustment knob (7).
6.Hold trim ring (8) in place, then unscrew adjustment valve (5).
7.Remove adjustment valve (5), nut (9), washer (10), and trim ring (8) from lid cover (4).
1.Insert adjustment valve (5) through nut (9), washer (10), and lid cover (4).
2.Secure adjustment valve (5) with trim ring (8).
3.Turn valve stem clockwise as far as it will go; then install adjustment knob (7) and tighten set screw (6).
4.Connect all tubing to proper fittings of adjustment valve (5).
5.Raise lid cover (4); then secure to upper housing (11) with three screws (3).
6.Close upper housing; then turn master ON/OFF switch (1) ON and check for proper operation.
