Procenter Systems LR Mounted Units Water Selector Valve Removal / Installation Test and Repair

Procenter Systems, LR Mounted Units Water Selector Valve
1.Turn master ON/OFF switch on delivery unit OFF.
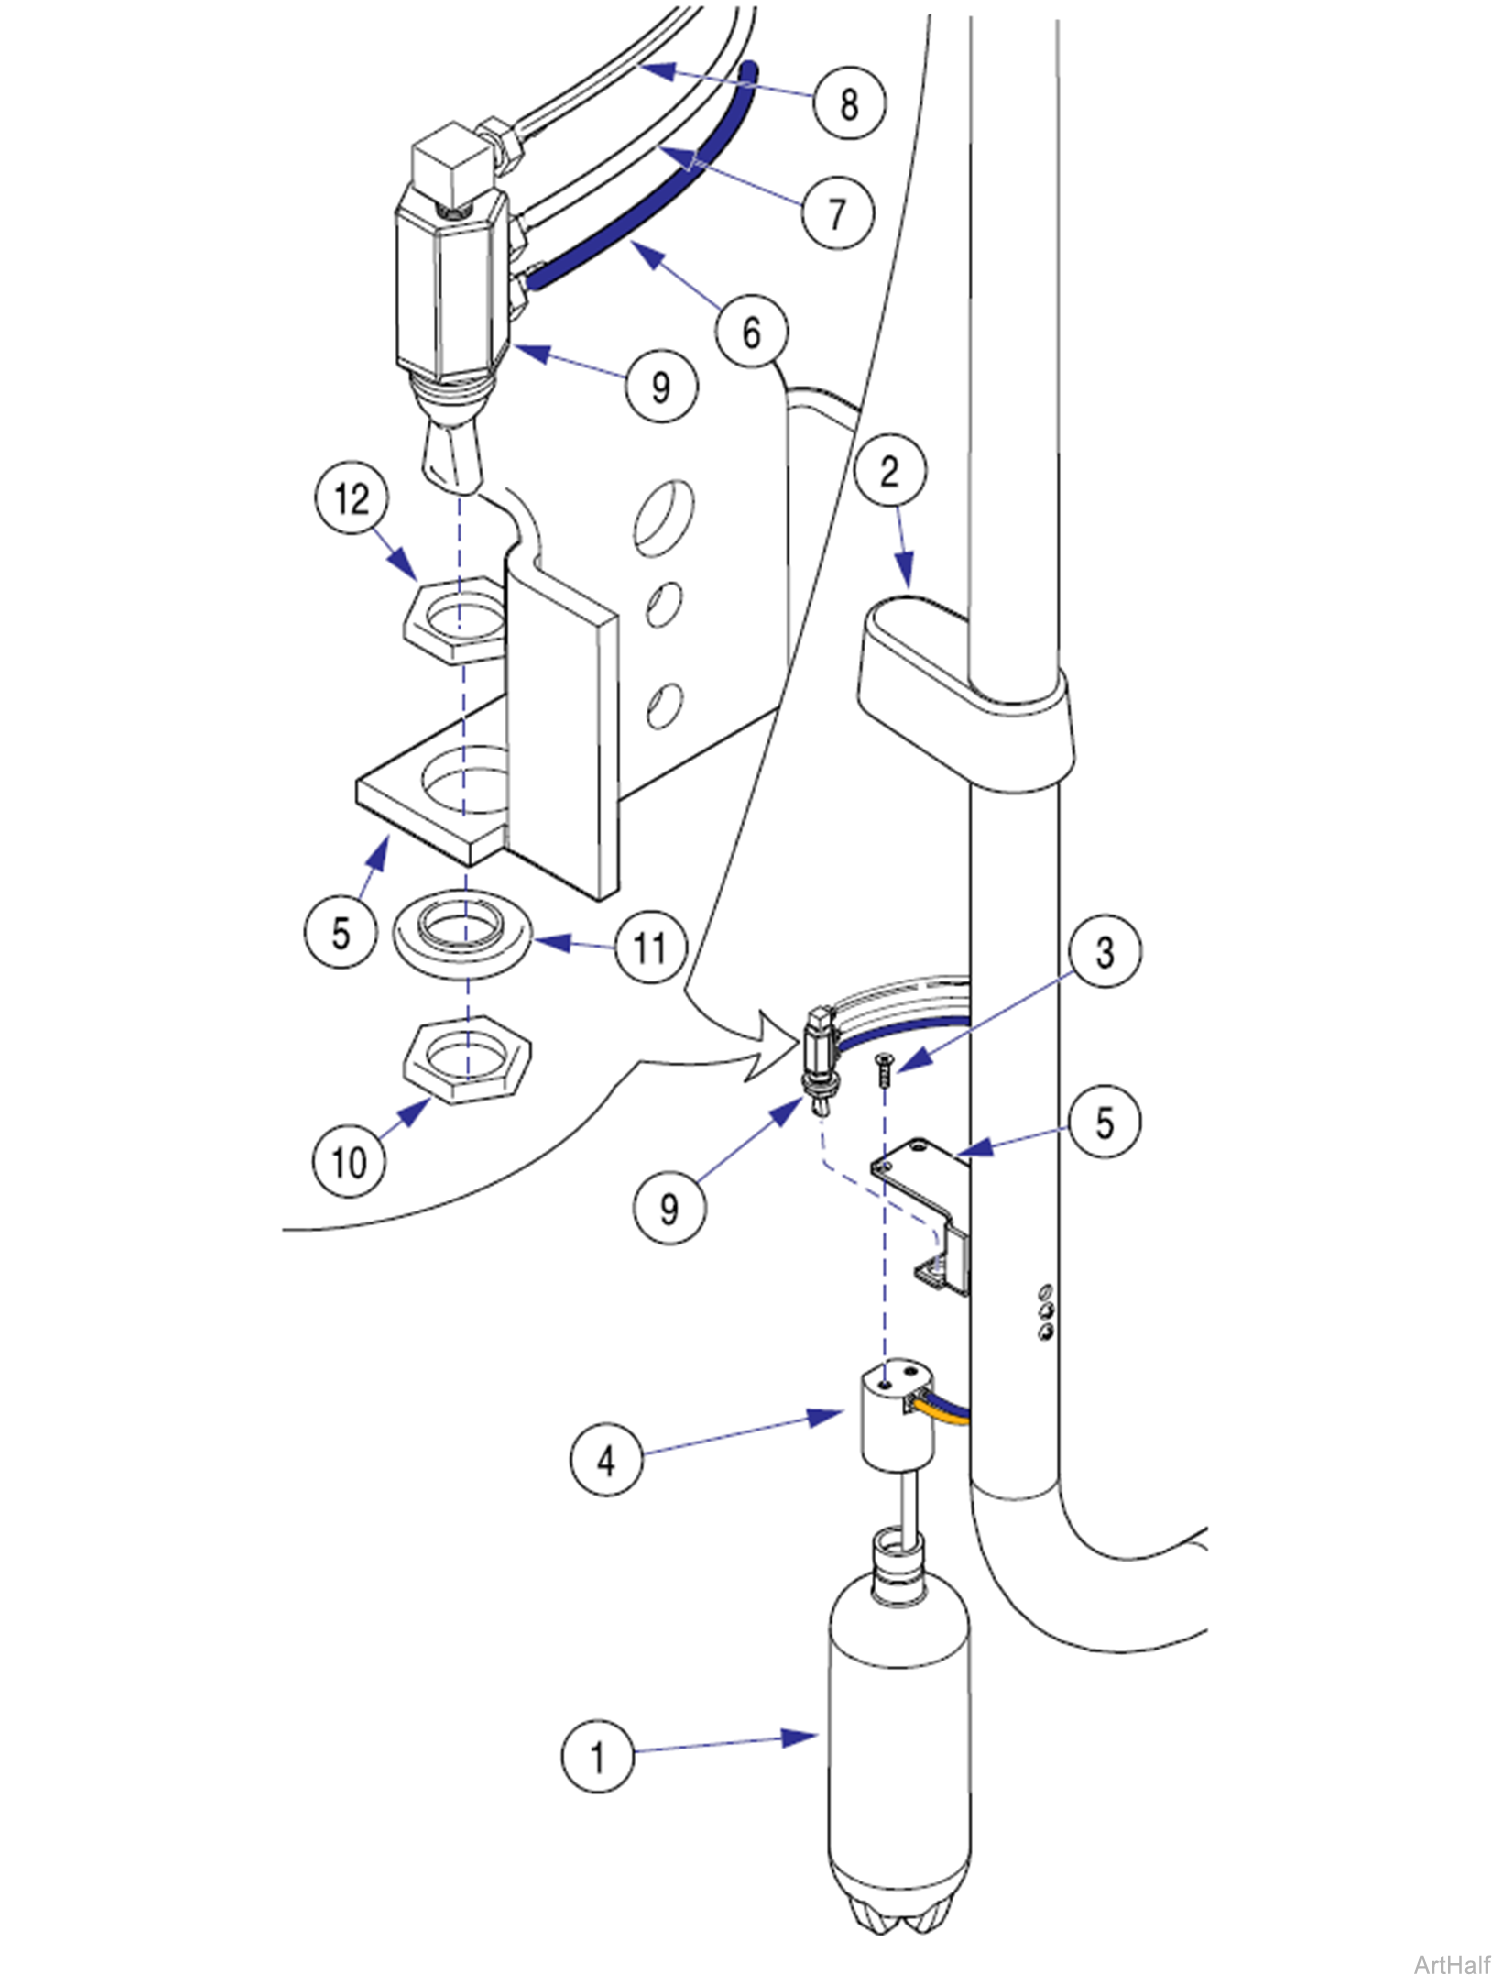
2.Remove water bottle (1).
3.Lift cover (2); then remove two screws (3) and separate bottle cap (4) from bracket (5).
Residual water pressure in tubing will result in leaks when tubing is removed in the following step. With the toggle switch in “City” position, depress the water button of syringe(s) until all water pressure is removed from the system.
4.Tag and disconnect 1/8 in. blue tubing (6), 1/8 in. grey tubing w/o rib (7), and 1/8 in. grey tubing w/ rib (8) from valve (9).
5.Remove nut (10), washer (11), valve (9) and jam nut (12) from bracket (5).
1.Install jam nut (12) onto valve (9); then position valve in bracket (5).
2.Connect 1/8 in. grey tubing w/rib (8), 1/8 in. grey tubing w/o rib (7), and 1/8 in. blue tubing (6) to proper fittings of valve (9).
3.Secure valve (9) to bracket (5) with washer (11) and nut (10).
4.Secure bottle cap (4) to bracket (5) with two screws (3).
5.Install water bottle (1); then lower cover (2).

