Midmark® Dental Halogen Light Operational Test and Repair
|
Mounted To |
Ceiling, Chair, Track, Universal and Wall/Cabinet |
| Serial Number | NW, RE and V Serial Number Prefixes |
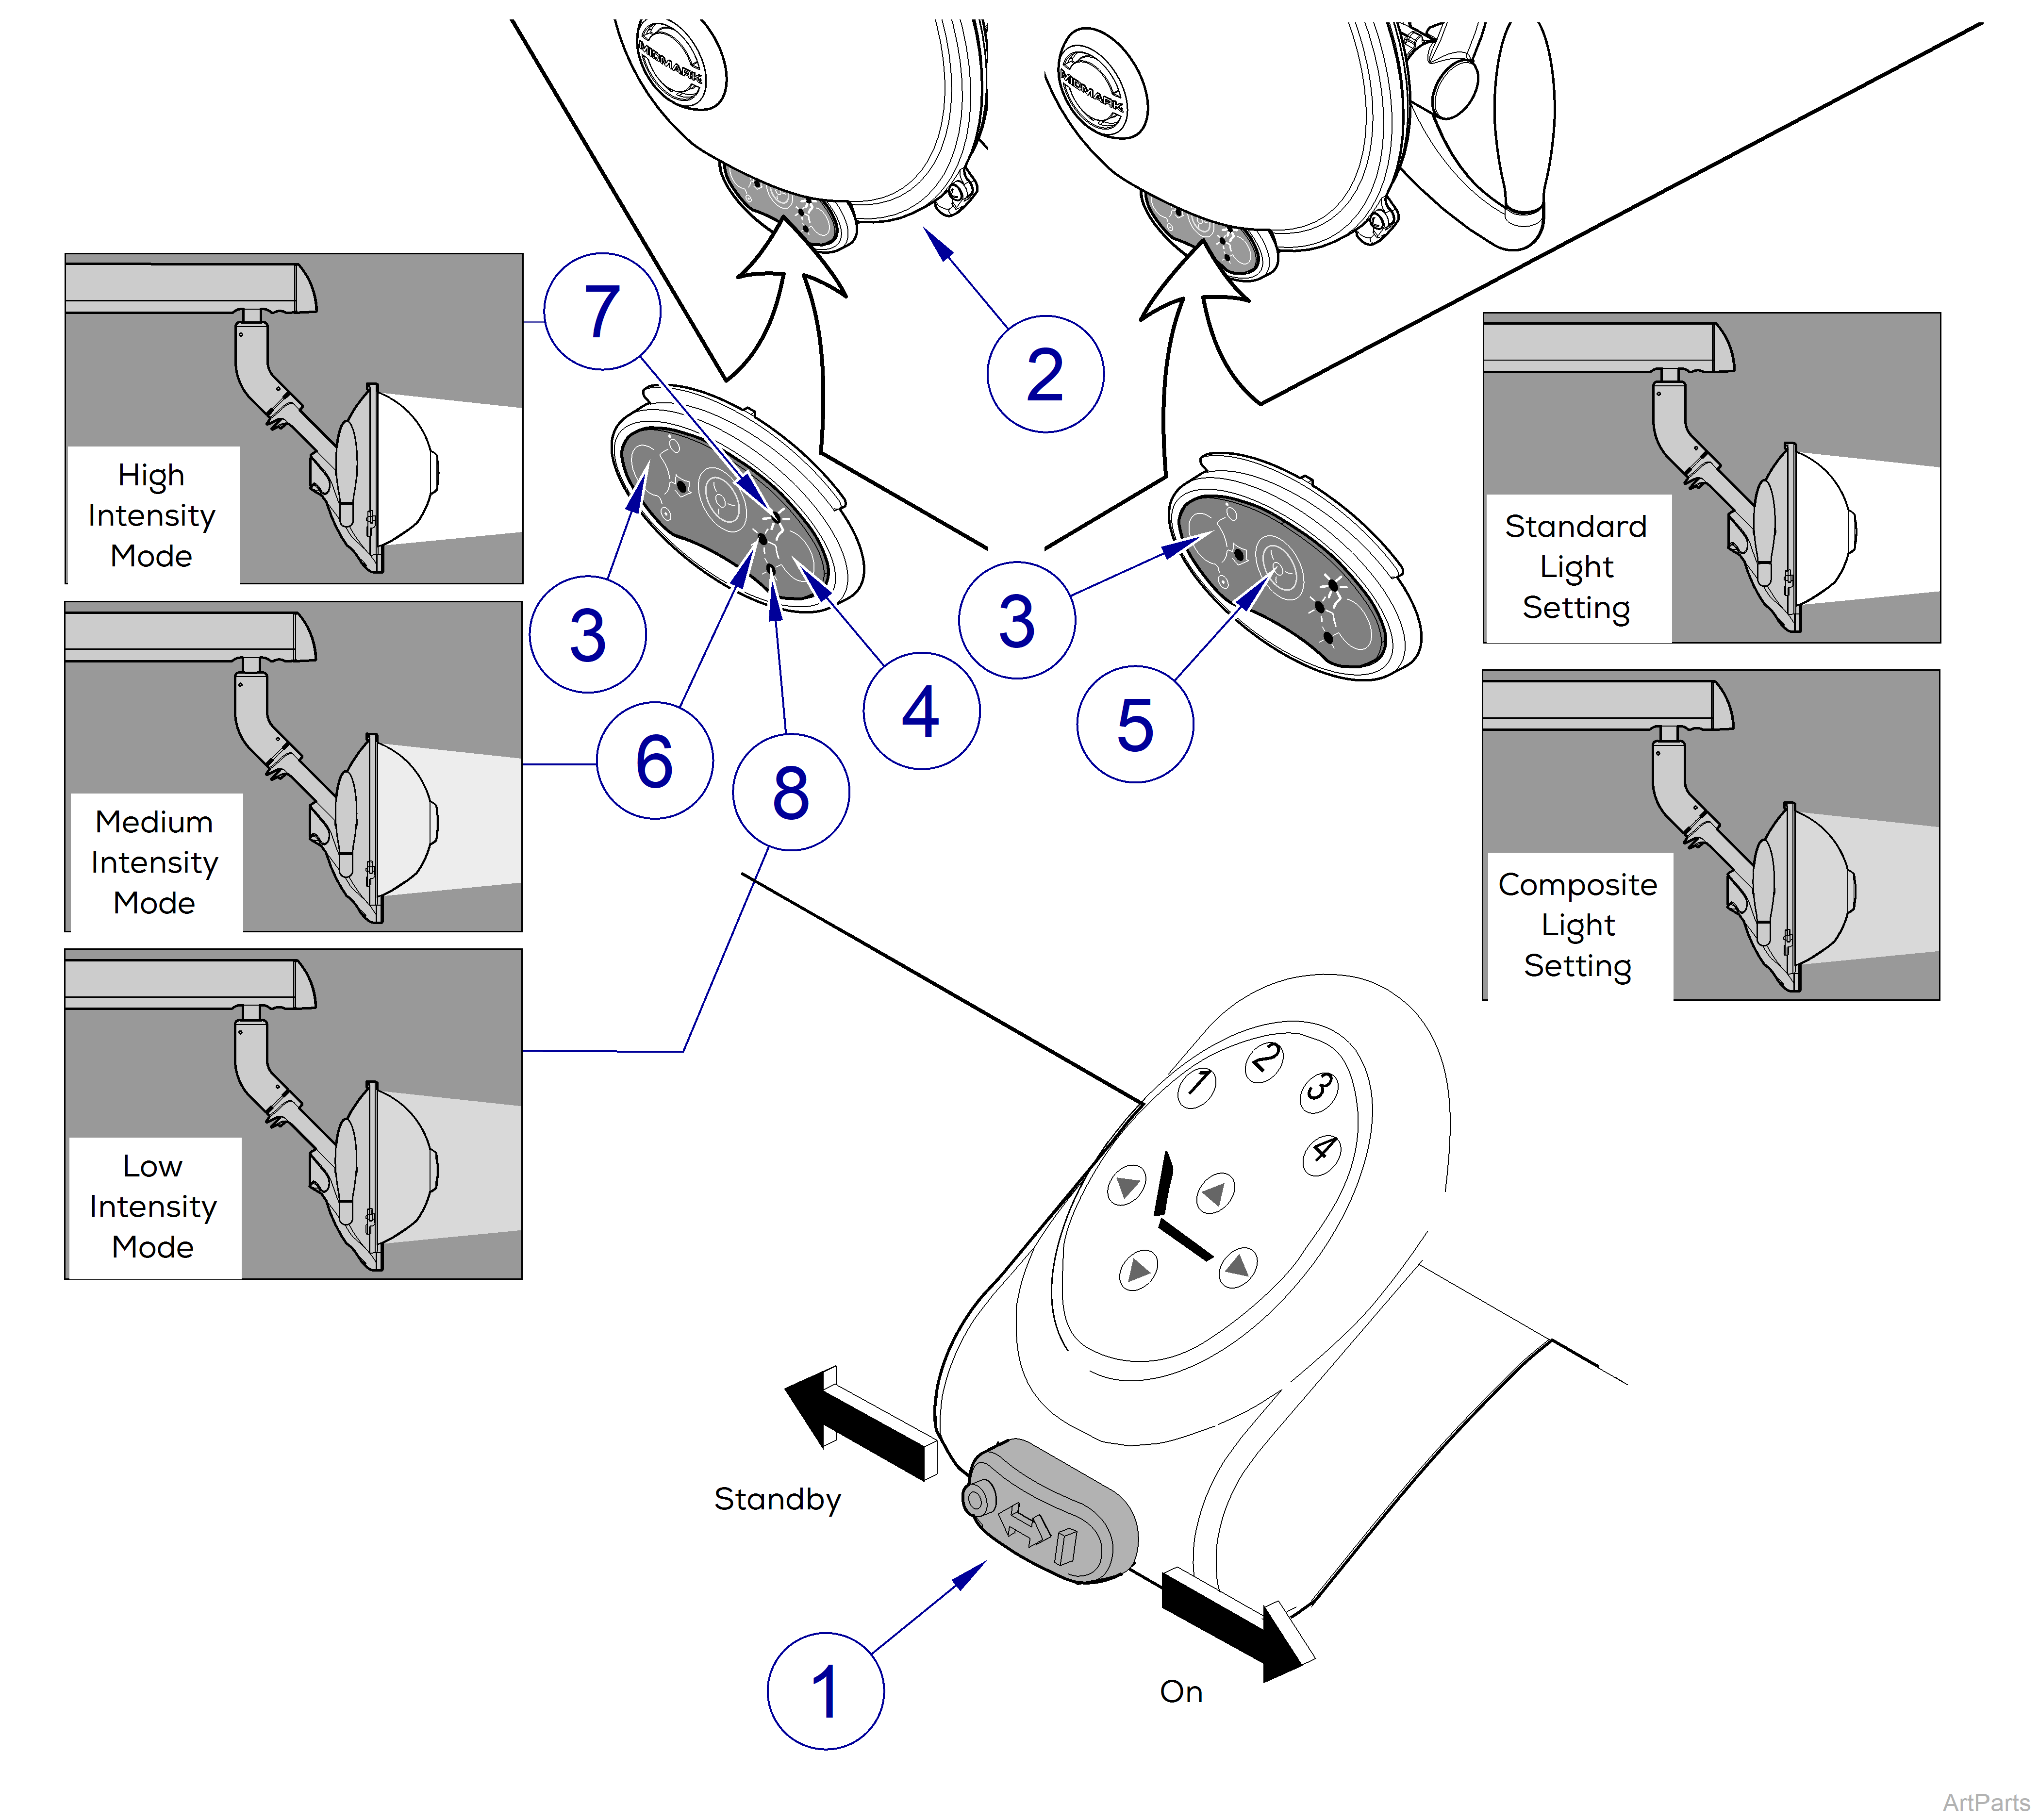
Figure 2-1
Refer to: Midmark Dental Light User Guide for complete instructions on operating the light. Failure to do so could result in personal injury.
The Operational Test, for the most part, only describes what should happen when light is operated. If the light does something other than described, a problem has been discovered. Refer to Troubleshooting Guide to determine cause of problem and its correction.
When performing various checks with light plugged in and covers off use extreme care to prevent accidental electrical shock. Failure to comply could cause severe injury.
1.If light is part of an operatory, turn MASTER ON / OFF switch (1, Figure 2-1) to ON. Observe. The lighthead (2, Figure 2-1) should not illuminate.
2.Press POWER button (3, Figure 2-1). Observe. The lighthead (2, Figure 2-1) should illuminate.
3.Press INTENSITY button (4, Figure 2-1) while watching light intensity of lighthead. Wait two to three seconds and repeat. Repeat a third time.
4.Observe. Each time INTENSITY button (4, Figure 2-1) is pressed, lighthead (2, Figure 2-1) should toggle between Medium (6, Figure 2-1), High (7, Figure 2-1), and Low (8, Figure 2-1) intensity modes. Also, associated indicator lamp (6, 7, or 8) should illuminate to indicate currently selected intensity mode.
The light intensity of lighthead at three intensity modes should be:
Low Setting - 1700 fc (18,299 lux)
Medium Setting - 2500 fc (26,910 lux)
High Setting - 3300 fc (35,521 lux)
5.Press COMPOSITE button (5, Figure 2-1). Observe. The light intensity of lighthead (2, Figure 2-1) should decrease significantly. The light intensity of lighthead in Composite mode should be 700 fc (7,535 lux).
6.Press the COMPOSITE button (5, Figure 2-1) again to return to standard light setting (normal mode).

Figure 2-2
7.Press POWER button (1, Figure 2-2). Observe. The AUTO ON indicator lamp (2, Figure 2-2) should illuminate, indicating the light is in AUTO ON mode. Raise and lower lighthead (3, Figure 2-2) while observing.
8.Observe. When flex arm (4, Figure 2-2) of light is lowered below horizontal plane (6, Figure 2-2), lighthead should automatically turn ON. When flex arm (4, Figure 2-2) of light is raised above the horizontal plane (7, Figure 2-2), lighthead should automatically turn OFF.
9.Press Power button (1, Figure 2-2). Observe. The AUTO ON indicator lamp (2, Figure 2-2) should go out, indicating the light is in OFF mode. The lighthead should not be illuminating.
10.Press Power button (1, Figure 2-2) to turn lighthead ON and then press Intensity button (5, Figure 2-2) until intensity is set to High mode (8, Figure 2-2).
The factory suggested setting is to adjust the focus at a range of 27 in. (68.6 cm). The light comes factory adjusted at this focus range. The allowable adjustment range is 21 to 39 in. (53.3 to 99.0 cm) to allow for user preference.

Figure 2-3
11.Position shield (1, Figure 2-3) of lighthead at user’s desired focus range (2, Figure 2-3) [21 to 39 in. (53.3 to 90.0 cm)] from a target (3, Figure 2-3) (wall, chair, or back).
12.Observe. At user’s desired focus range (2, Figure 2-3), light pattern (4, Figure 2-3) should be a 3 x 8 in. (8 x 20 cm) pattern which is oval in shape with feathered edges.
13.If light is part of an operatory, turn Master ON / OFF switch (1, Figure 2-1) to OFF. Then, press Power button (3, Figure 2-1). Observe. Lighthead (2, Figure 2-1) should not illuminate. Nothing should happen.
14.Using lighthead handles, rotate lighthead, flex arm, and light arm thru their full range of motions as shown in dimensions / range of motions illustrations. Then, move, release, and observe lighthead at various positions in its range of motion.
15.Observe. The lighthead and arms should be able to be positioned easily through their entire range of motion, without using excessive force. When released, lighthead or arms should not drift down or sideways on their own.
