M9/M11 Sterilizer High-Limit Thermostats Replacement Test and Repair
To prevent risk of shock always disconnect power before removing covers or performing any service procedure.
Do not overtighten nuts! Torque must not exceed 25 ft/lbs (34 N•m).
Thermostats must be tight against chamber wall when assembled.
|
Model |
M9M11 -020 thru -022, -033, -034 |
| Serial Number | All |

1.Drain water from reservoir.
2.Disconnect wires from heating element and thermostats.
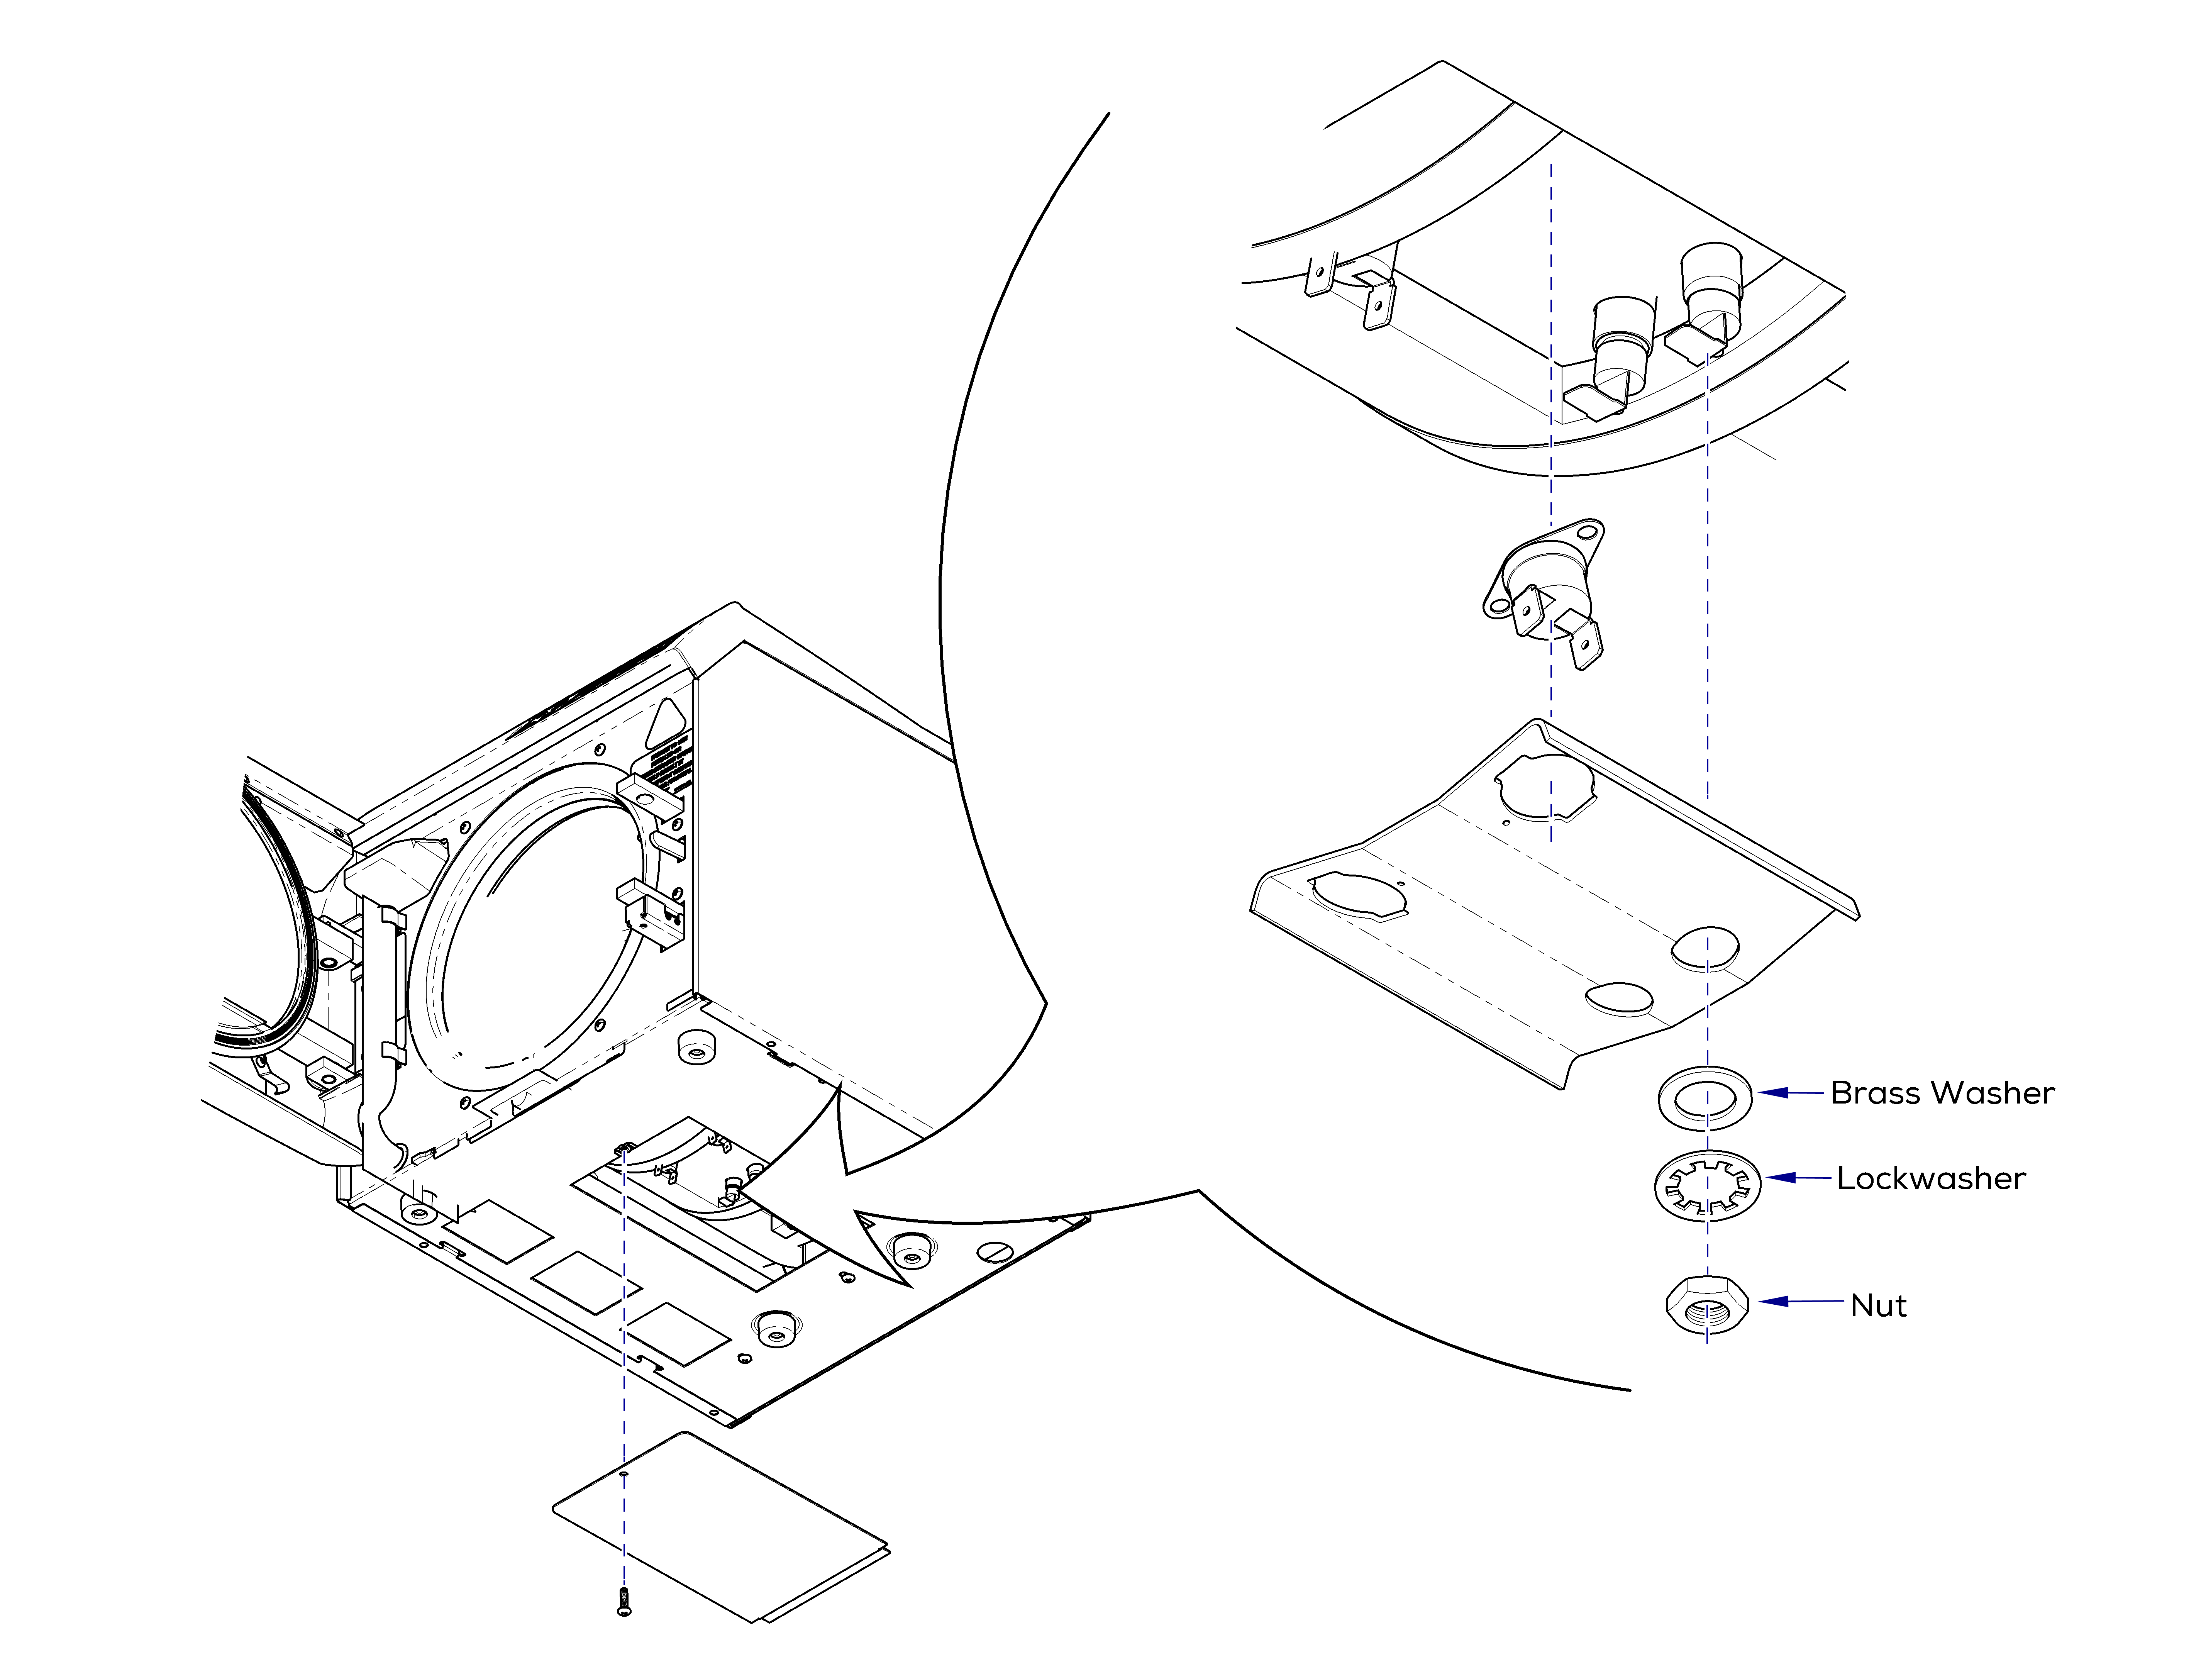
3.Remove nuts, lockwashers, and brass washers.
4.Remove bracket and thermostats.
1.Inspect heating element gaskets for damage. Replace gaskets if necessary.
2.Place thermostats and bracket in position.
3.Install brass washers, lockwashers, and nuts.
4.Connect wires to thermostats and heating element.
| Wire Connections | |
|---|---|
|
White jumper |
Between Thermostats |
|
Yellow wire |
Thermostat |
|
Red wire |
Thermostat |
|
Brown wire |
Heating Element |
|
Brown / White wire |
Heating Element |
|
Model |
M9M11 -040 thru -043 |
| Serial Number | All |

1.Drain water from reservoir.
2.Disconnect wires from heating element and thermostats.
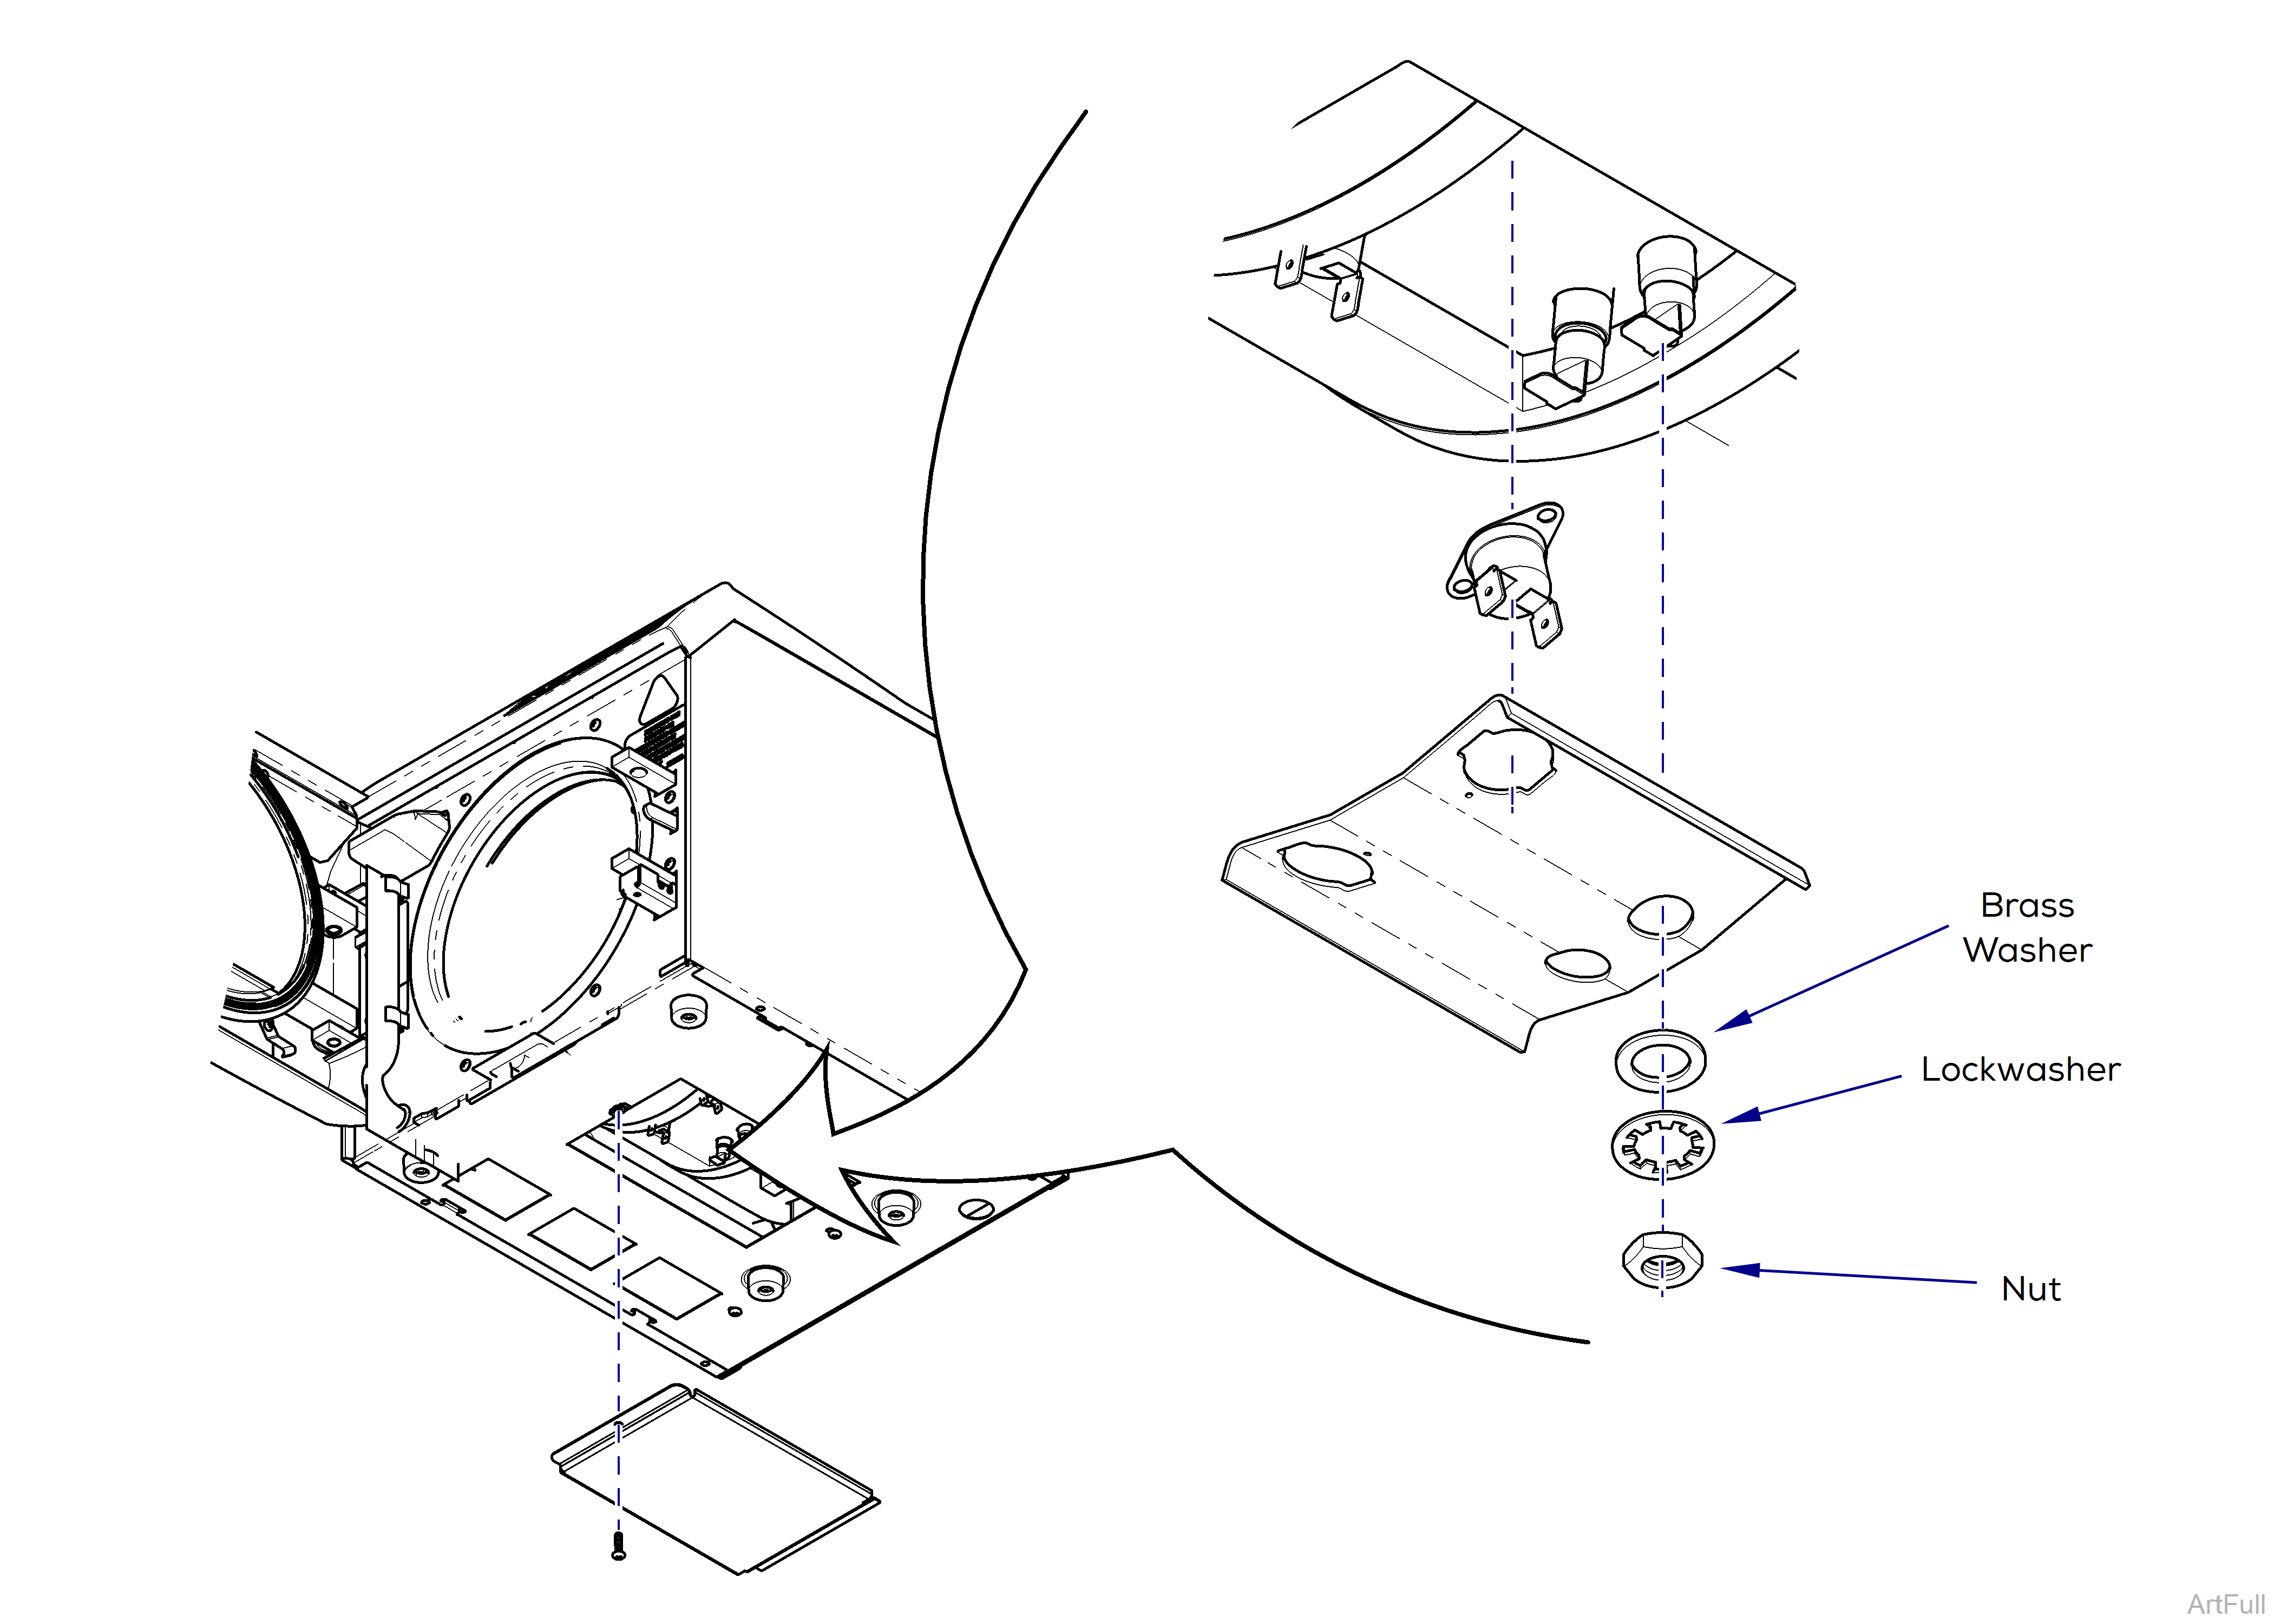
3.Remove nuts, lockwashers, and brass washers.
4.Remove bracket and thermostats.
1.Inspect heating element gaskets for damage. Replace gaskets if necessary.
2.Place thermostats and bracket in position.
3.Install brass washers, lockwashers, and nuts.
4.Connect wires to thermostats and heating element.
| Wire Connections | |
|---|---|
|
White jumper |
Between Thermostats |
|
Yellow wire |
Thermostat |
|
Red wire |
Thermostat |
|
Brown wire |
Heating Element |
|
Brown / White wire |
Heating Element |

