M9/M11 Sterilizer Touch Pad / Display Panel Replacement Test and Repair
To prevent risk of shock always disconnect power before removing covers or performing any service procedure.
|
Model |
M9M11 -020 thru -022, -033, -034 |
| Serial Number | All |

Remove adhesive residue w/ citrus-based solvent that is safe for use on plastics.
1.Remove top cover.
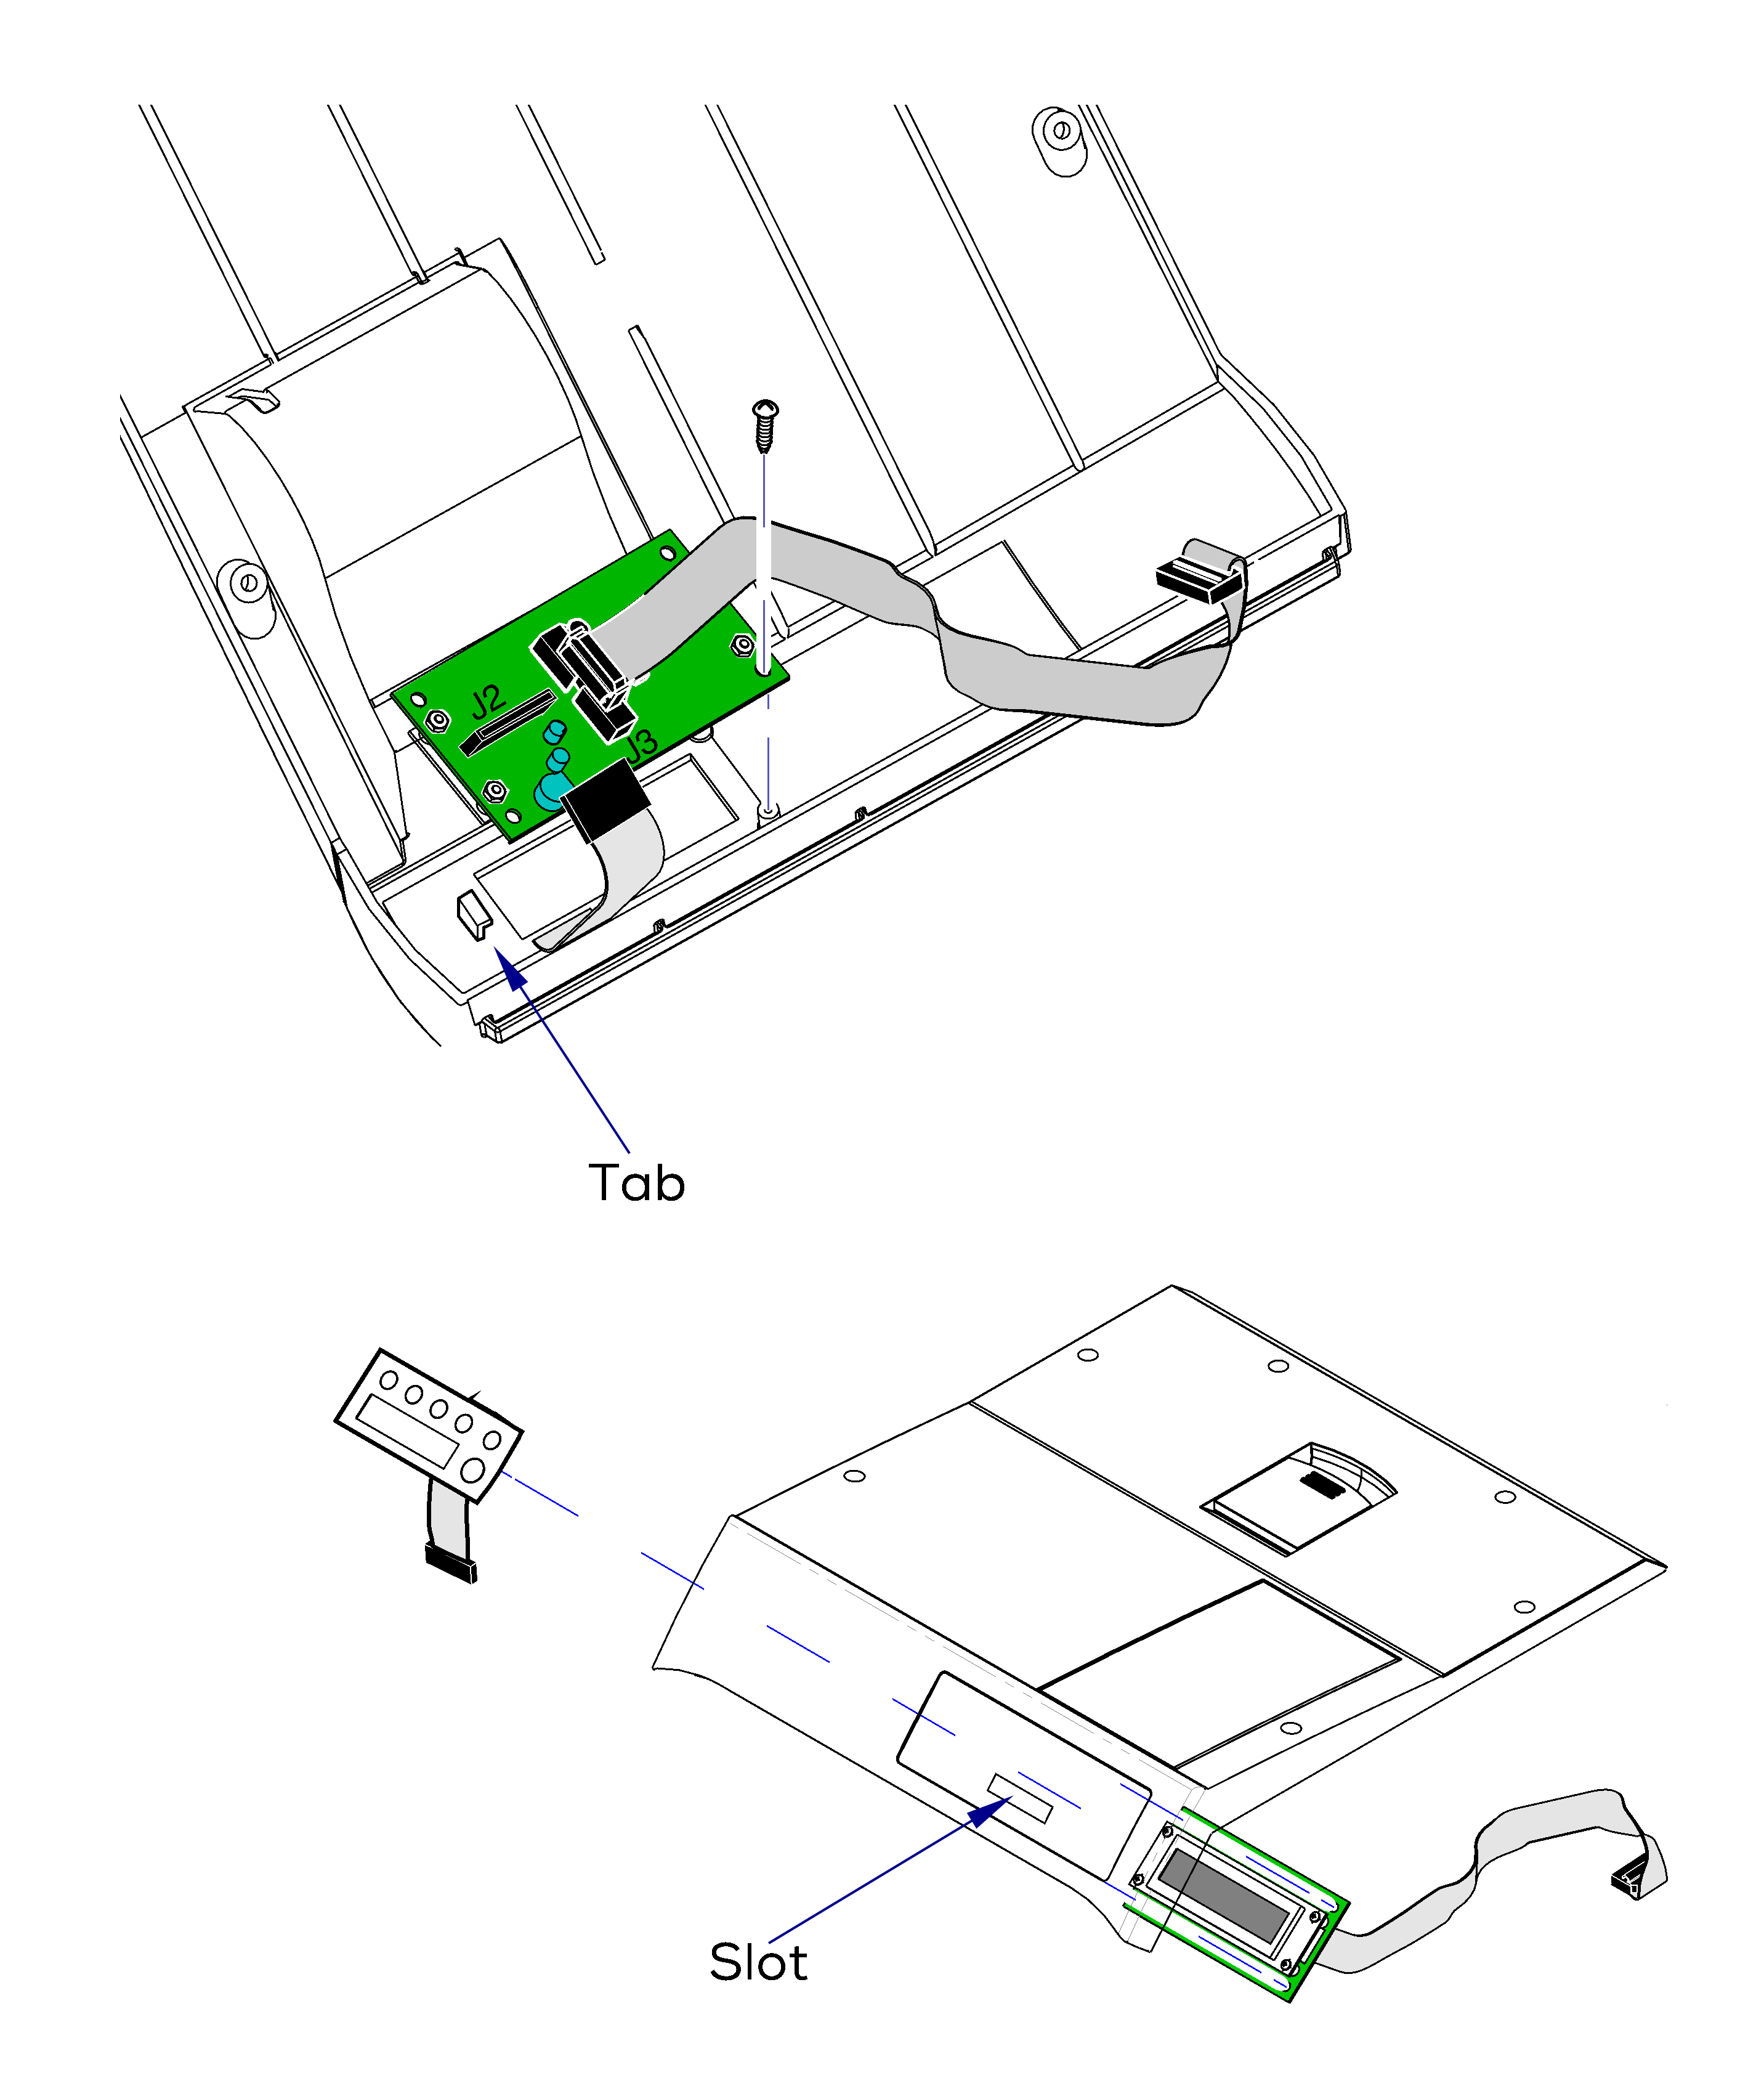
2.Disconnect ribbon harnesses from display panelJ2 and J3.
3.Remove two screws.
4.Slide display panel out from under tab.
5.Peel touch pad off of top cover.
Be sure the arrow on the display panel points UP when installing panel.
1.Peel backing from touch pad.
2.Feed ribbon harness thru slot.
3.Position touch pad on top cover.
4.Slide display panel under tab, secure with two screws.
5.Connect ribbon harnesses to display panel J2 and J3.
6.Install top cover.
|
Model |
M9M11 -040 thru -043 |
| Serial Number | All |

Remove adhesive residue w/ citrus-based solvent that is safe for use on plastics.
1.Remove top cover.
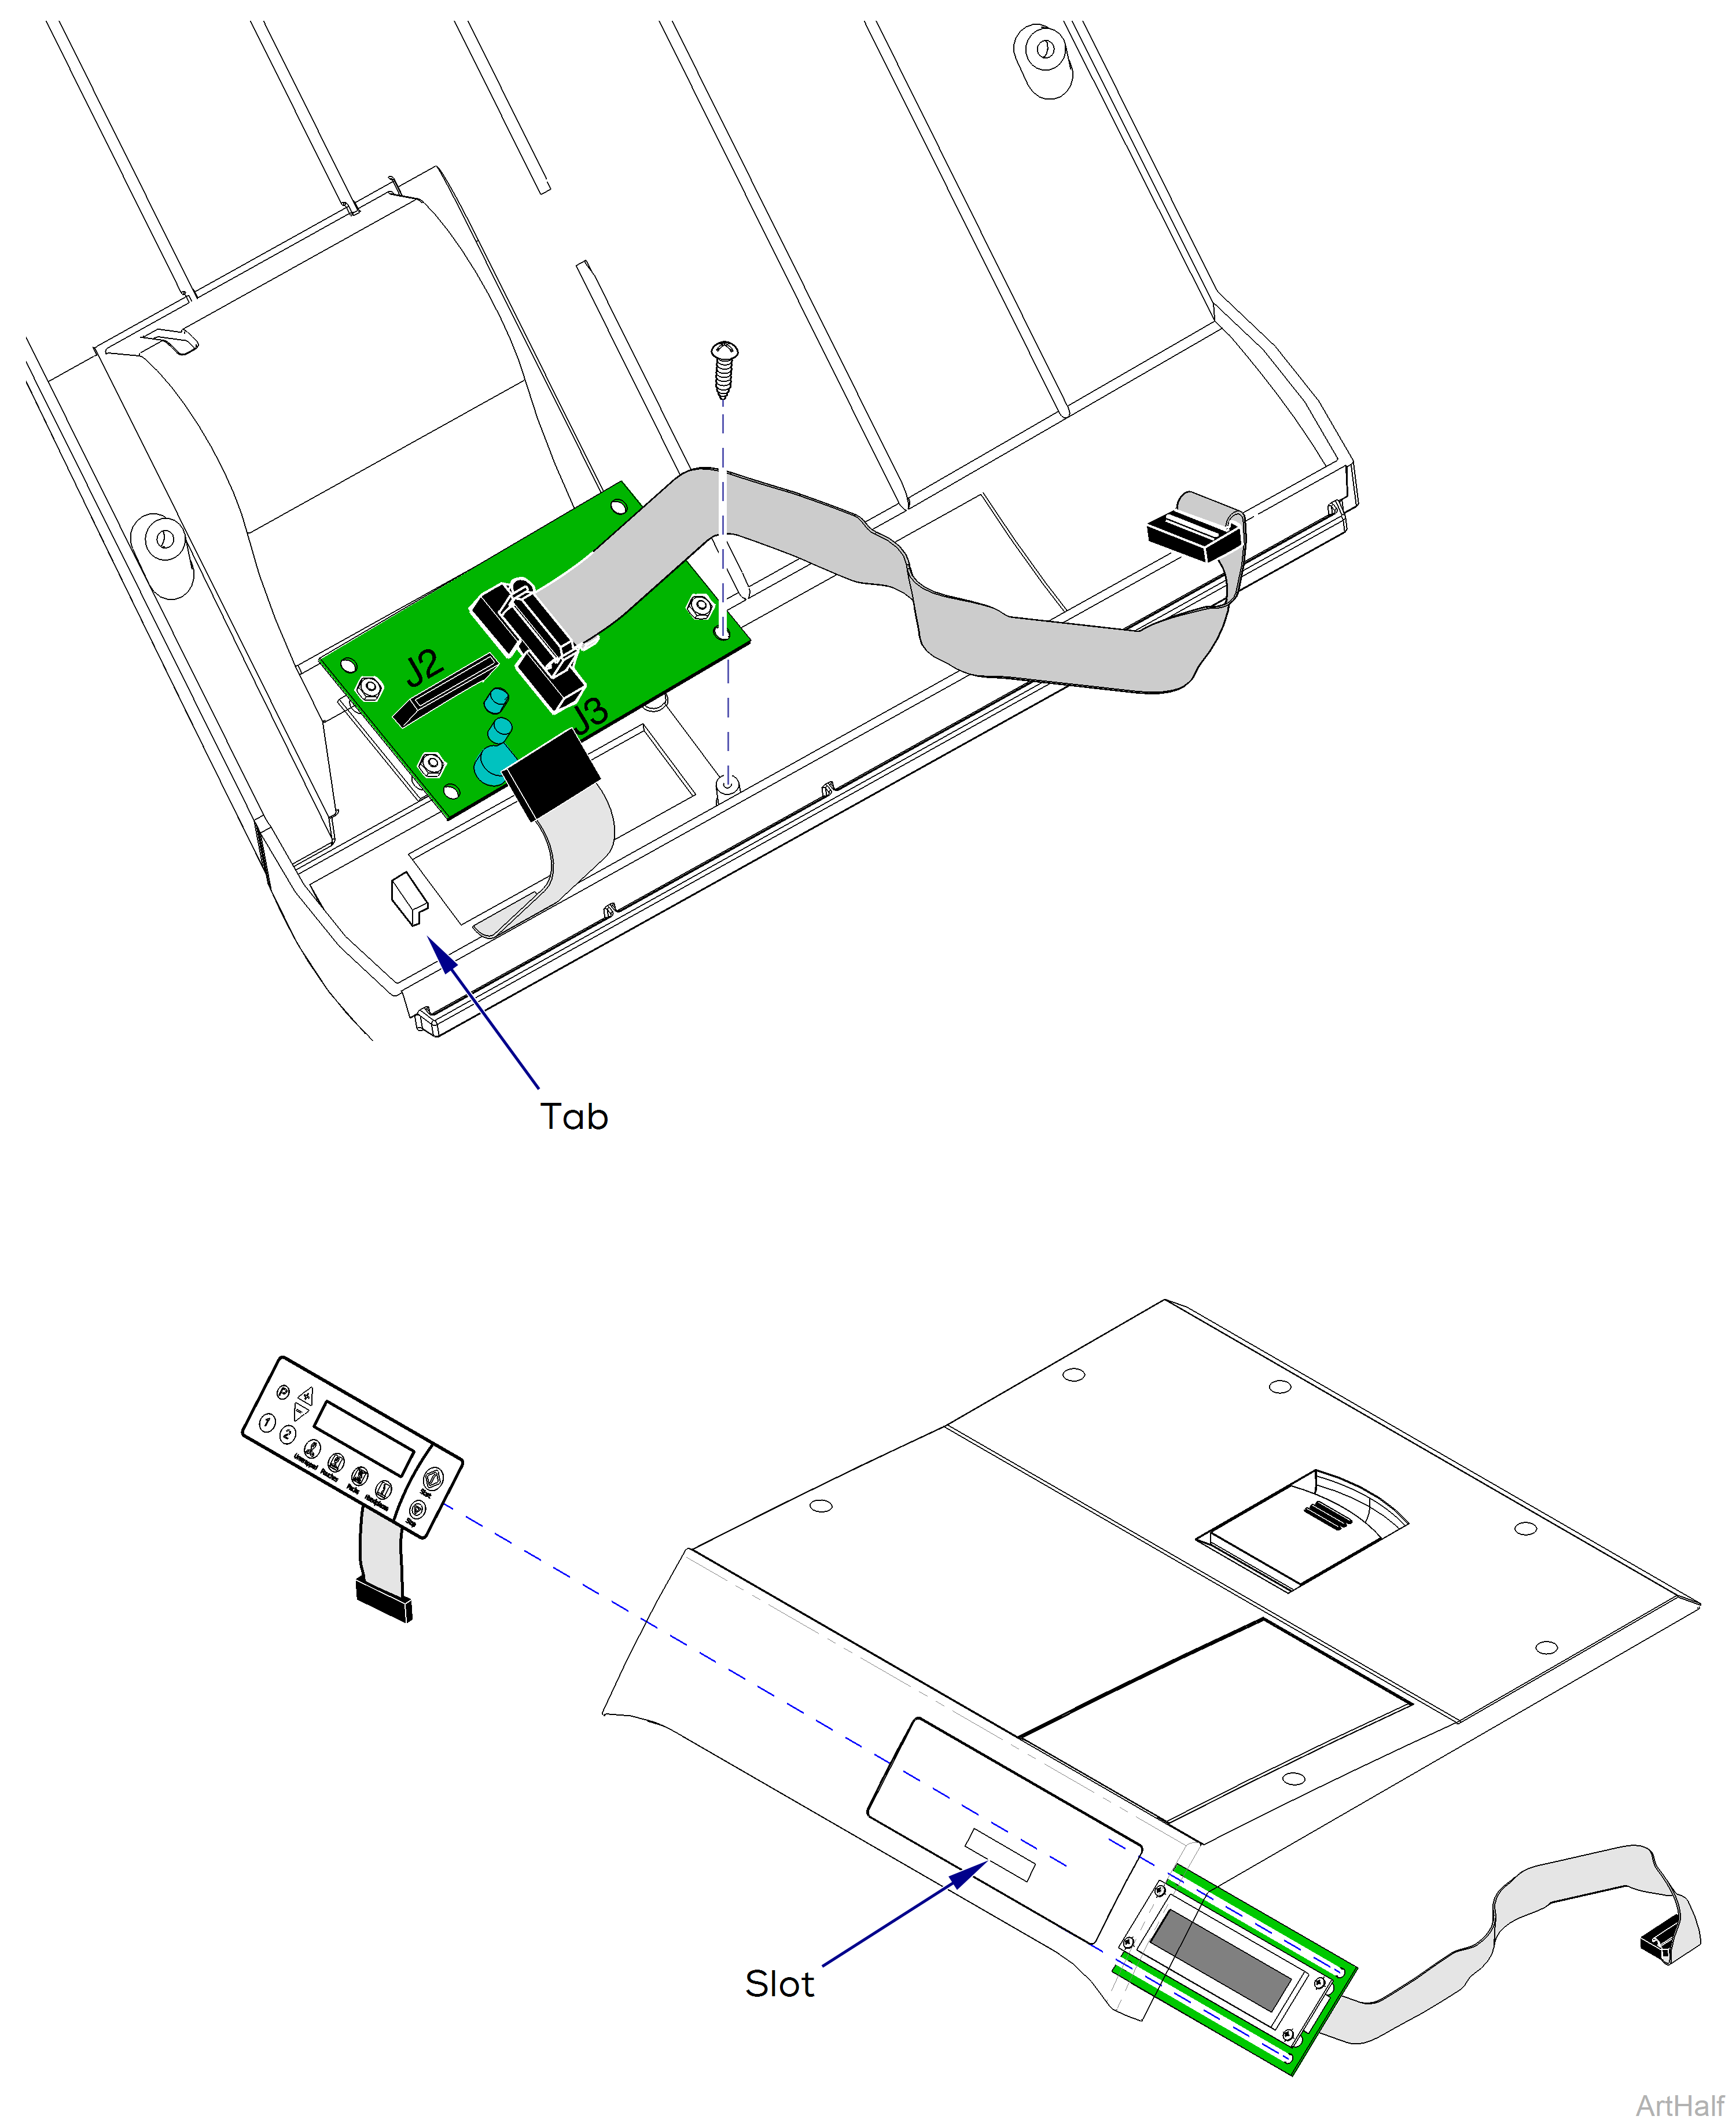
2.Disconnect ribbon harnesses from display panel J2 and J3.
3.Remove two screws.
4.Slide display panel out from under tab.
5.Peel touch pad off of top cover.
Be sure the arrow on the display panel points UP when installing panel.
1.Peel backing from touch pad.
2.Feed ribbon harness thru slot.
3.Position touch pad on top cover.
4.Slide display panel under tab, secure with two screws.
5.Connect ribbon harnesses to display panel J2 and J3.
6.Install top cover.

