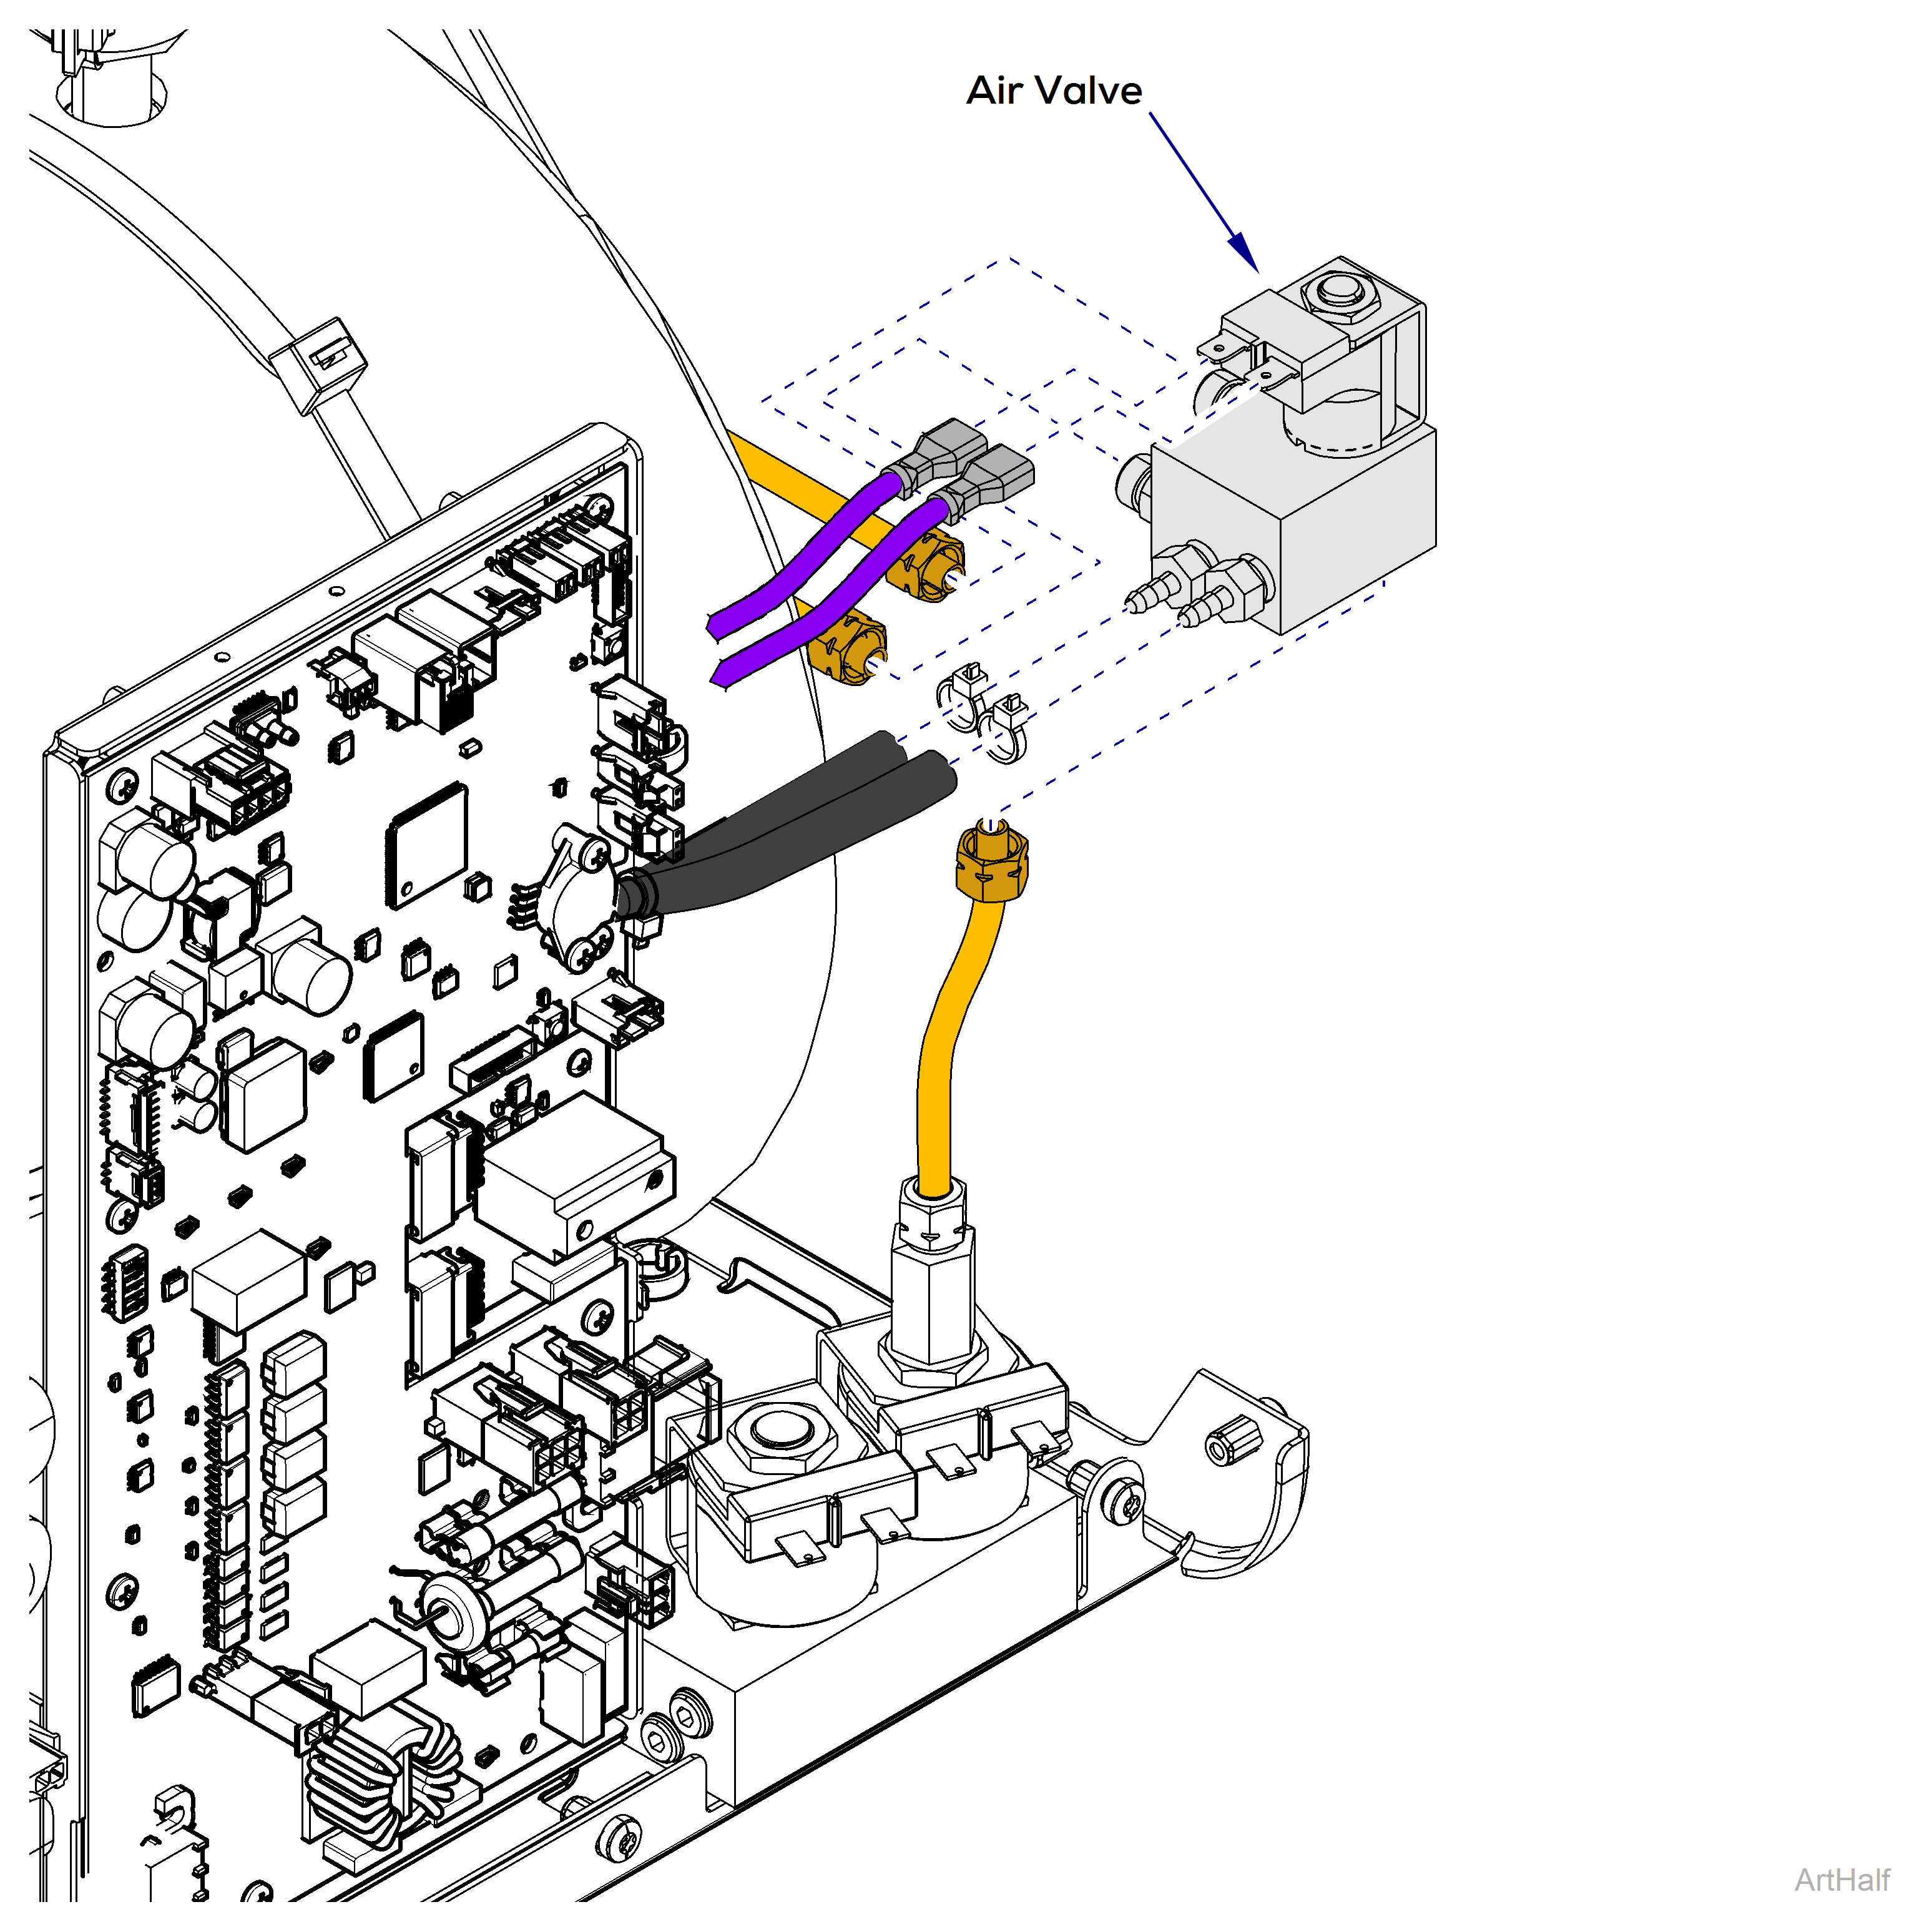
Midmark M9® -05x / M11® -05x Sterilizer Air Valve Replacement and Cleaning Test and Repair
To prevent risk of shock always disconnect power before removing covers or performing any service procedure.
Some procedures require power to be connected with covers removed. Line voltage is present. Use extreme caution to prevent electric shock.
Sterilizer or components may be hot or become hot. Wait until the sterilizer or components are cool to the touch before continuing service.
|
Model |
M9 -050, -053 | M11 -050, -051, -053 |
| Serial Number | All | All |

To clean air valve:
1.Remove 9/16-inch nut holding coil onto valve stem.
2.Remove coil.
3.Use spanner wrench to remove spanner nut from manifold and then remove:
• Valve stem
• Spring
• Plunger
4.Clean ports in air valve manifold.
5.Reassemble valve components.s

Refer to the Repair kit instructions for detailed replacement instructions.
To remove air valve:
1.Disconnect power from sterilizer.
2.Remove right side and back covers.
3.Remove wiring spade connectors from solenoid valve coil.
4.Cut zip ties and disconnect black hoses from side of the air valve manifold.
5.Remove copper tubes from air valve manifold.
6.Remove air valve manifold.
To install air valve:
1.Install copper tubes on air valve manifold.
2.Connect black hoses to side of the air valve manifold and secure with zip ties.
3.Install wiring spade connectors to valve coil.
4.Install right side and back covers.
5.Connect power to sterilizer.

