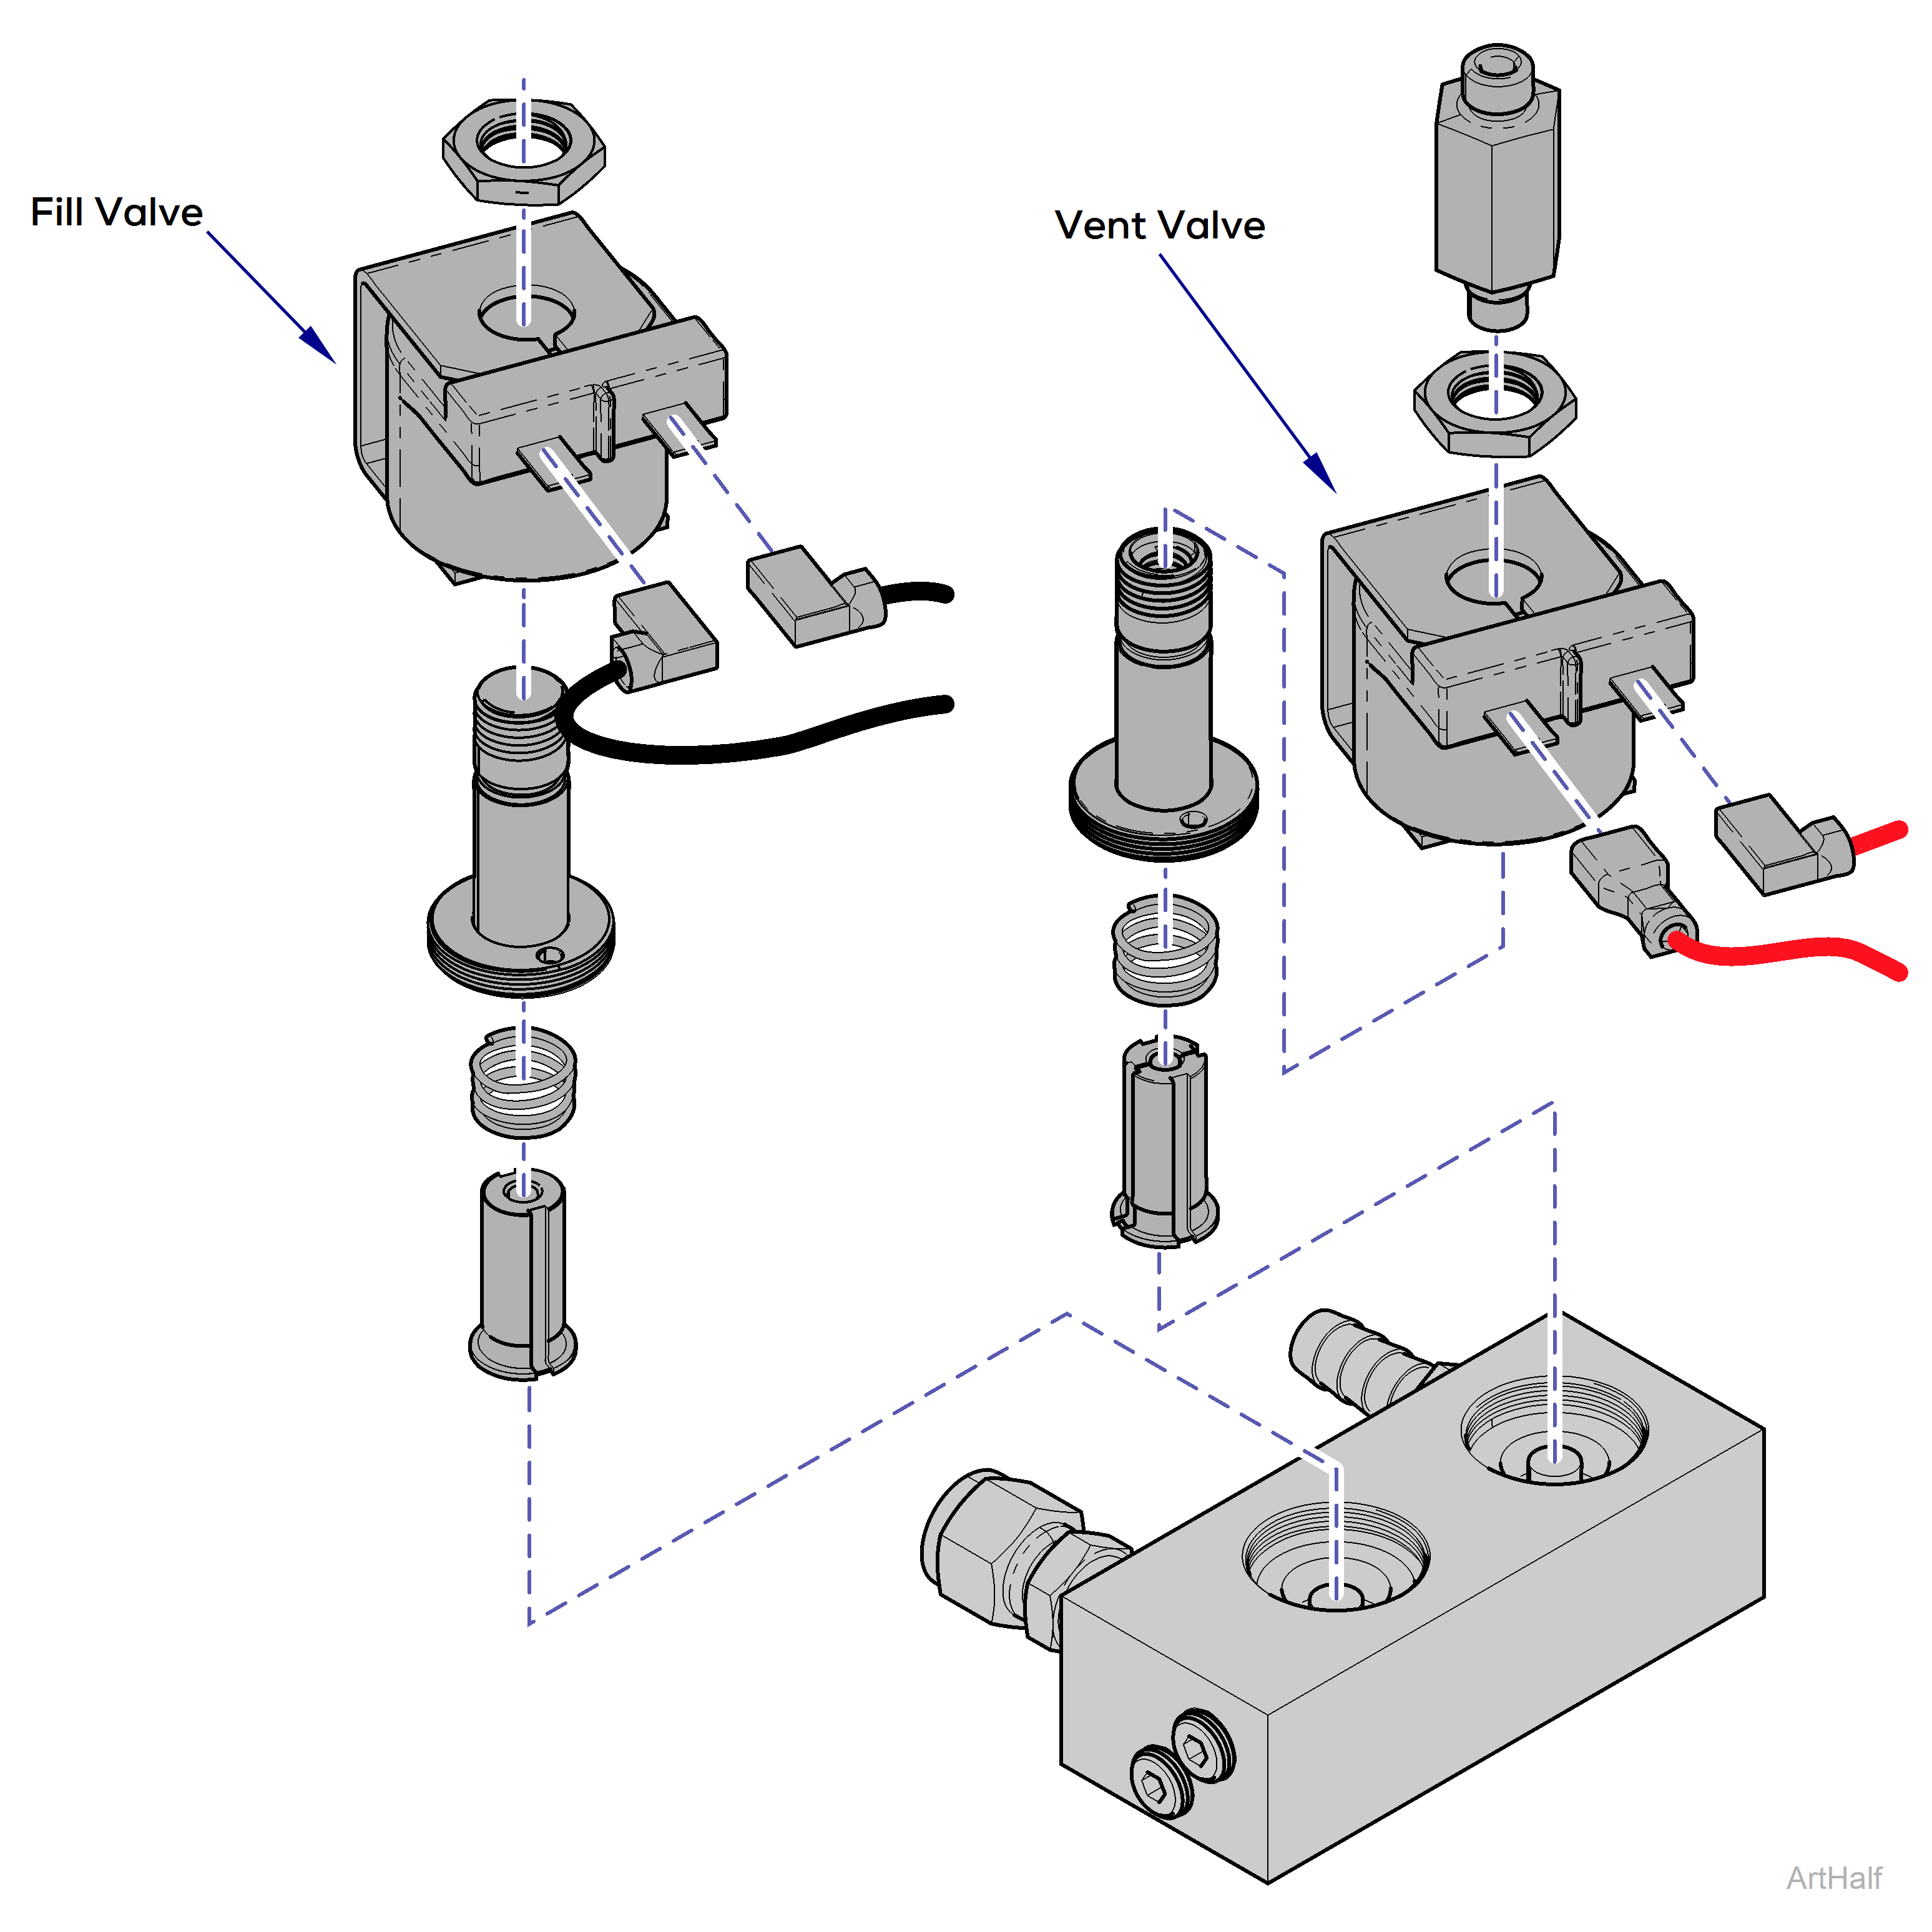
Midmark M9® -05x / M11® -05x Sterilizer Vent/Fill Valve Replacement and Cleaning Test and Repair
To prevent risk of shock always disconnect power before removing covers or performing any service procedure.
Sterilizer or components may be hot or become hot. Wait until the sterilizer or components are cool to the touch before continuing service.
|
Model |
M9 -050, -053 | M11 -050, -051, -053 |
| Serial Number | All | All |

1.Drain water from reservoir.
2.(Vent valve only) Disconnect compression fitting.
3.Disconnect wires from valve terminals.
4.Disassemble the Fill and/or Vent valve.
5.Inspect O-rings; remove any debris.
6.Assemble the valve.
7.Connect wires to valve terminals.
8.(Vent valve only) Connect compression fitting.
9.Refill reservoir with distilled water
10.Run test cycle / check for leaks.
To remove valve manifold assembly:
1.Remove power from sterilizer.
2.Drain water from sterilizer.
3.Remove right side and back covers.
4.Remove wiring spade connectors from solenoid valve coils.
5.Disconnect copper tube from top of vent valve using a 1/2-inch wrench.
6.Disconnect copper tube from left side of manifold block using 11/16- and 5/8-inch wrenches.
7.On right side of manifold, disconnect reservoir hose from barb fitting.
8.On bottom of sterilizer, remove screw holding manifold in place and remove manifold.
To install new valve manifold assembly:
1.Align valve manifold and connect copper tube from left side of manifold block using 11/16- and 5/8-inch wrenches.
2.On right side of manifold, connect reservoir hose from barb fitting.
3.On bottom of sterilizer, install screw holding manifold in place.
4.Connect copper tube from top of vent valve using a 1/2-inch wrench.
5.Install wiring spade connectors to solenoid valve coils.
6.Install covers.
7.Connect power to sterilizer.
8.Add water to sterilizer.

