Midmark M9® -05x / M11® -05x Sterilizer Main PC Board Replacement Test and Repair
To prevent risk of shock always disconnect power before removing covers or performing any service procedure.
|
Model |
M9 -050, -053 | M11 -050, -051, -053 |
| Serial Number | All | All |

Refer to the Repair kit instructions for detailed replacement instructions.
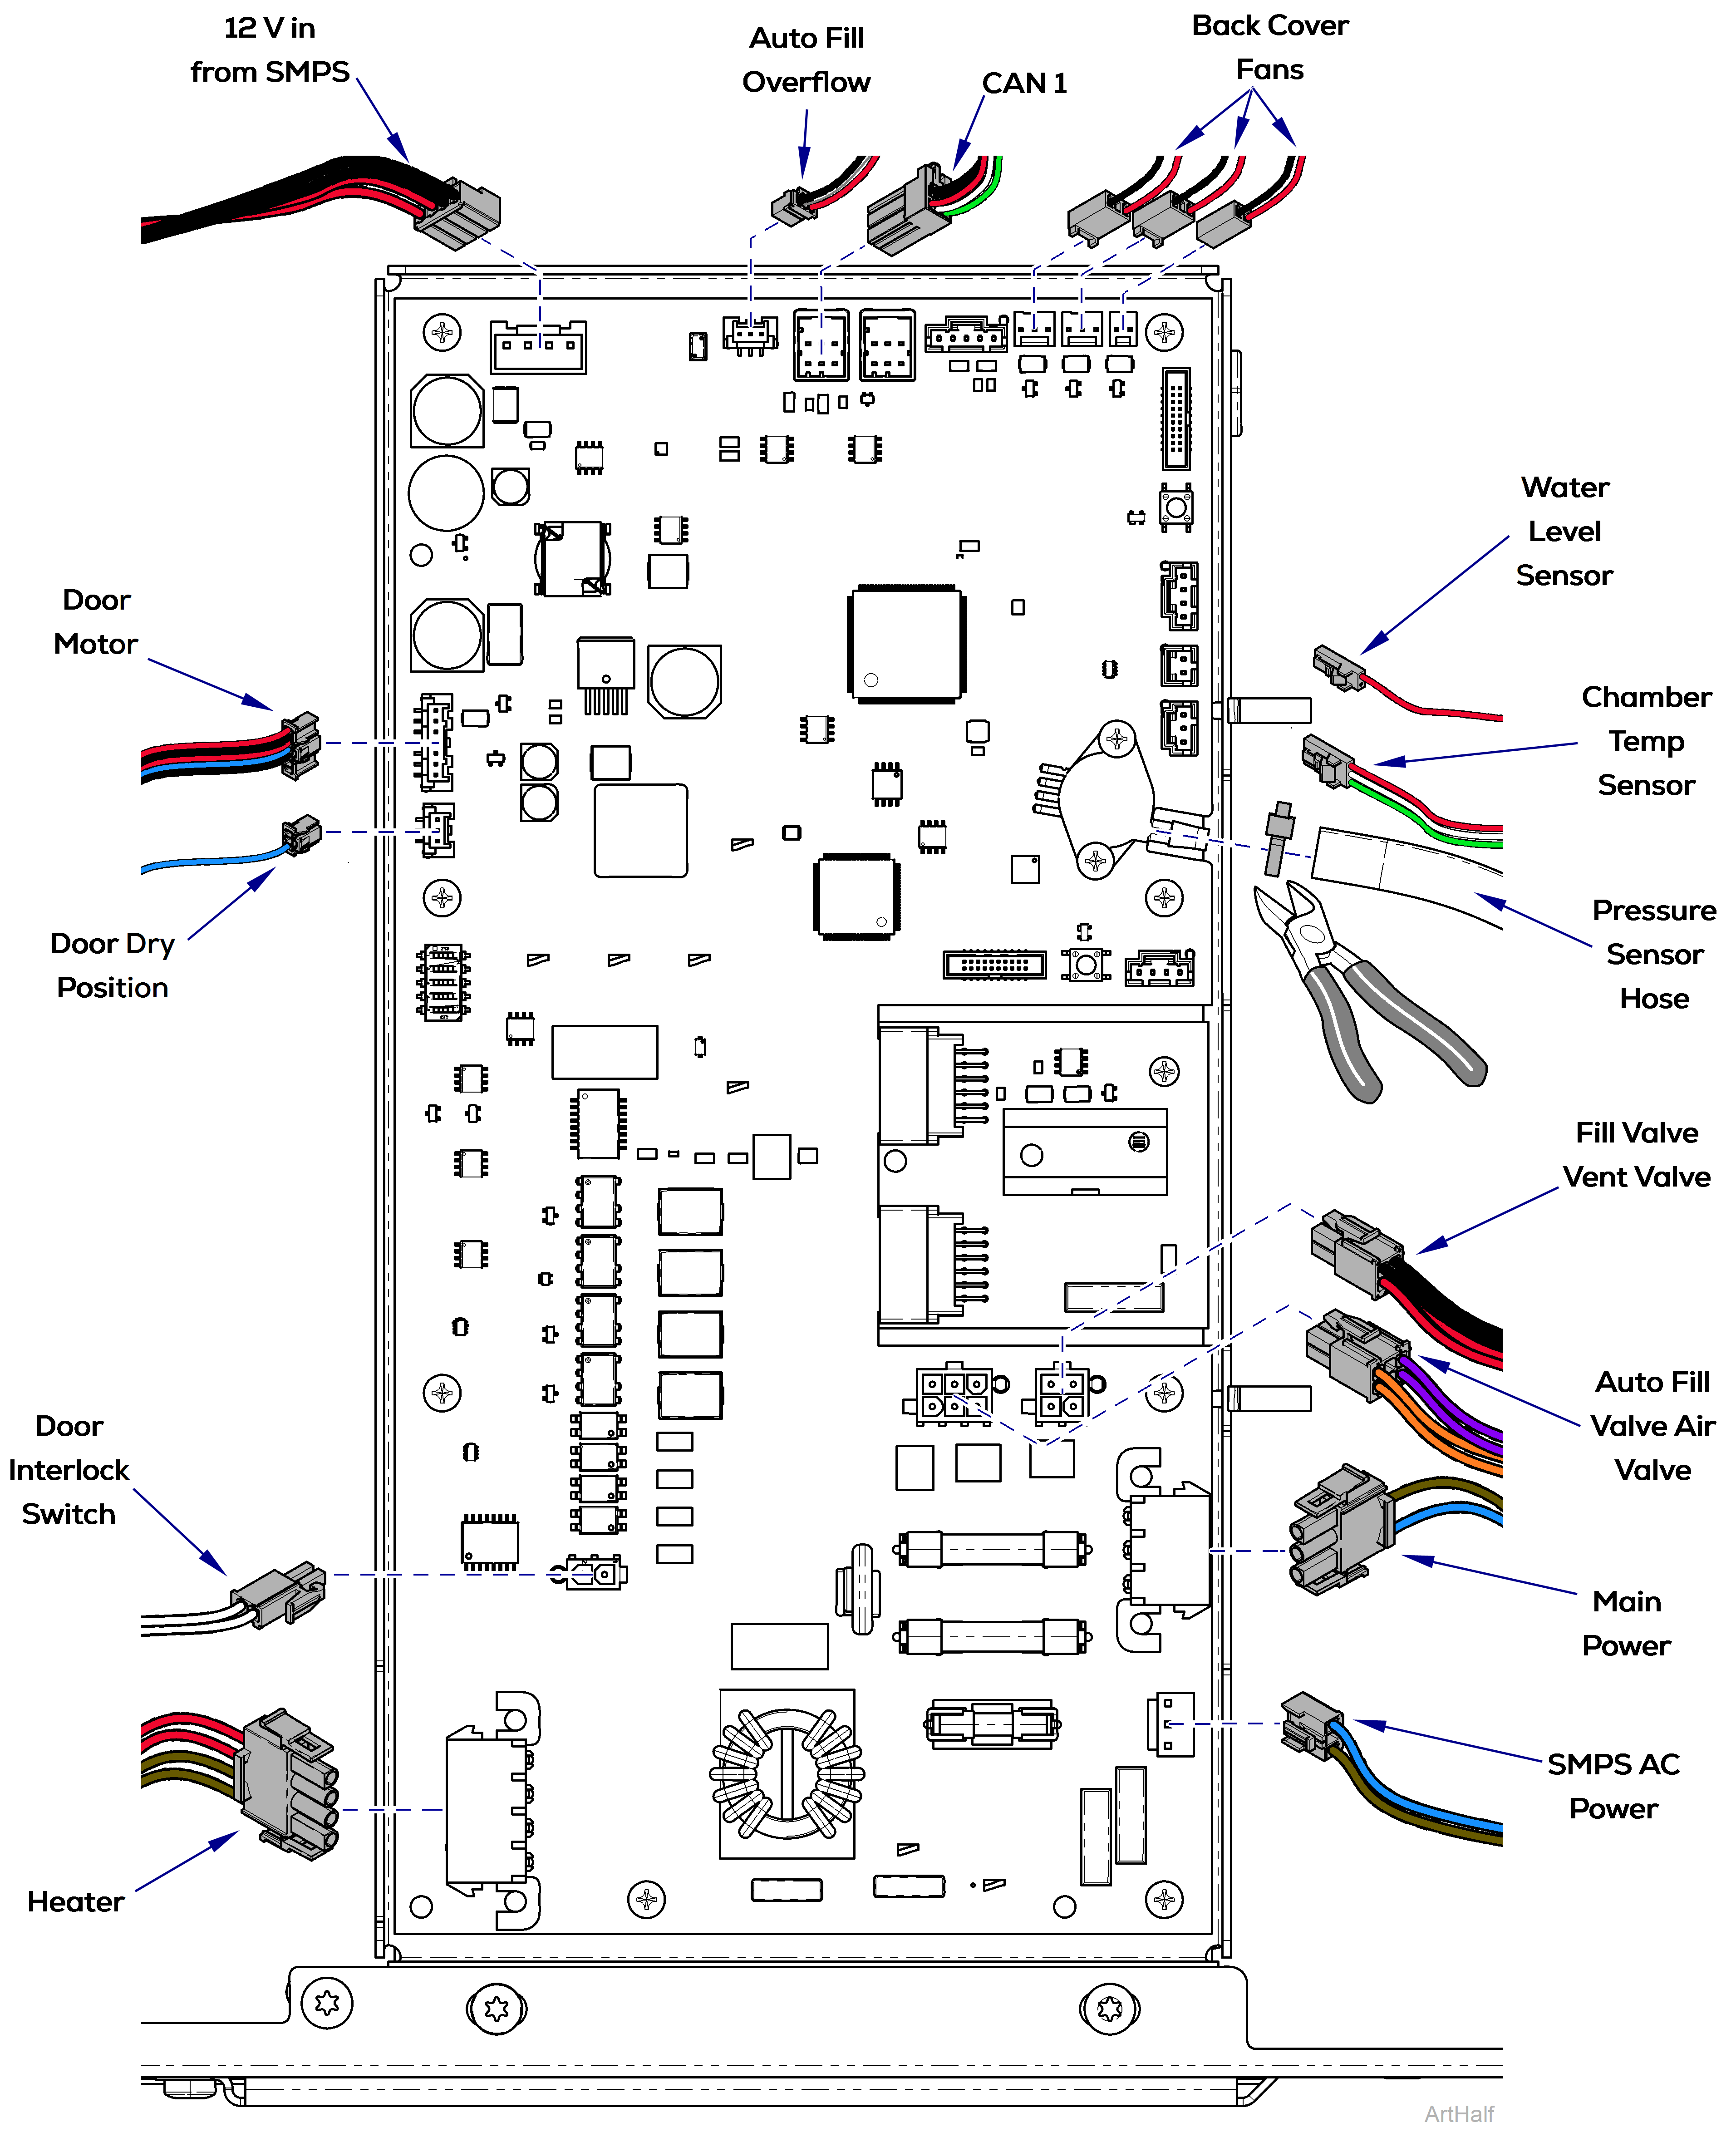
1.Remove wiring connectors from main PC board.
2.Cut zip tie and remove pressure sensor hose.


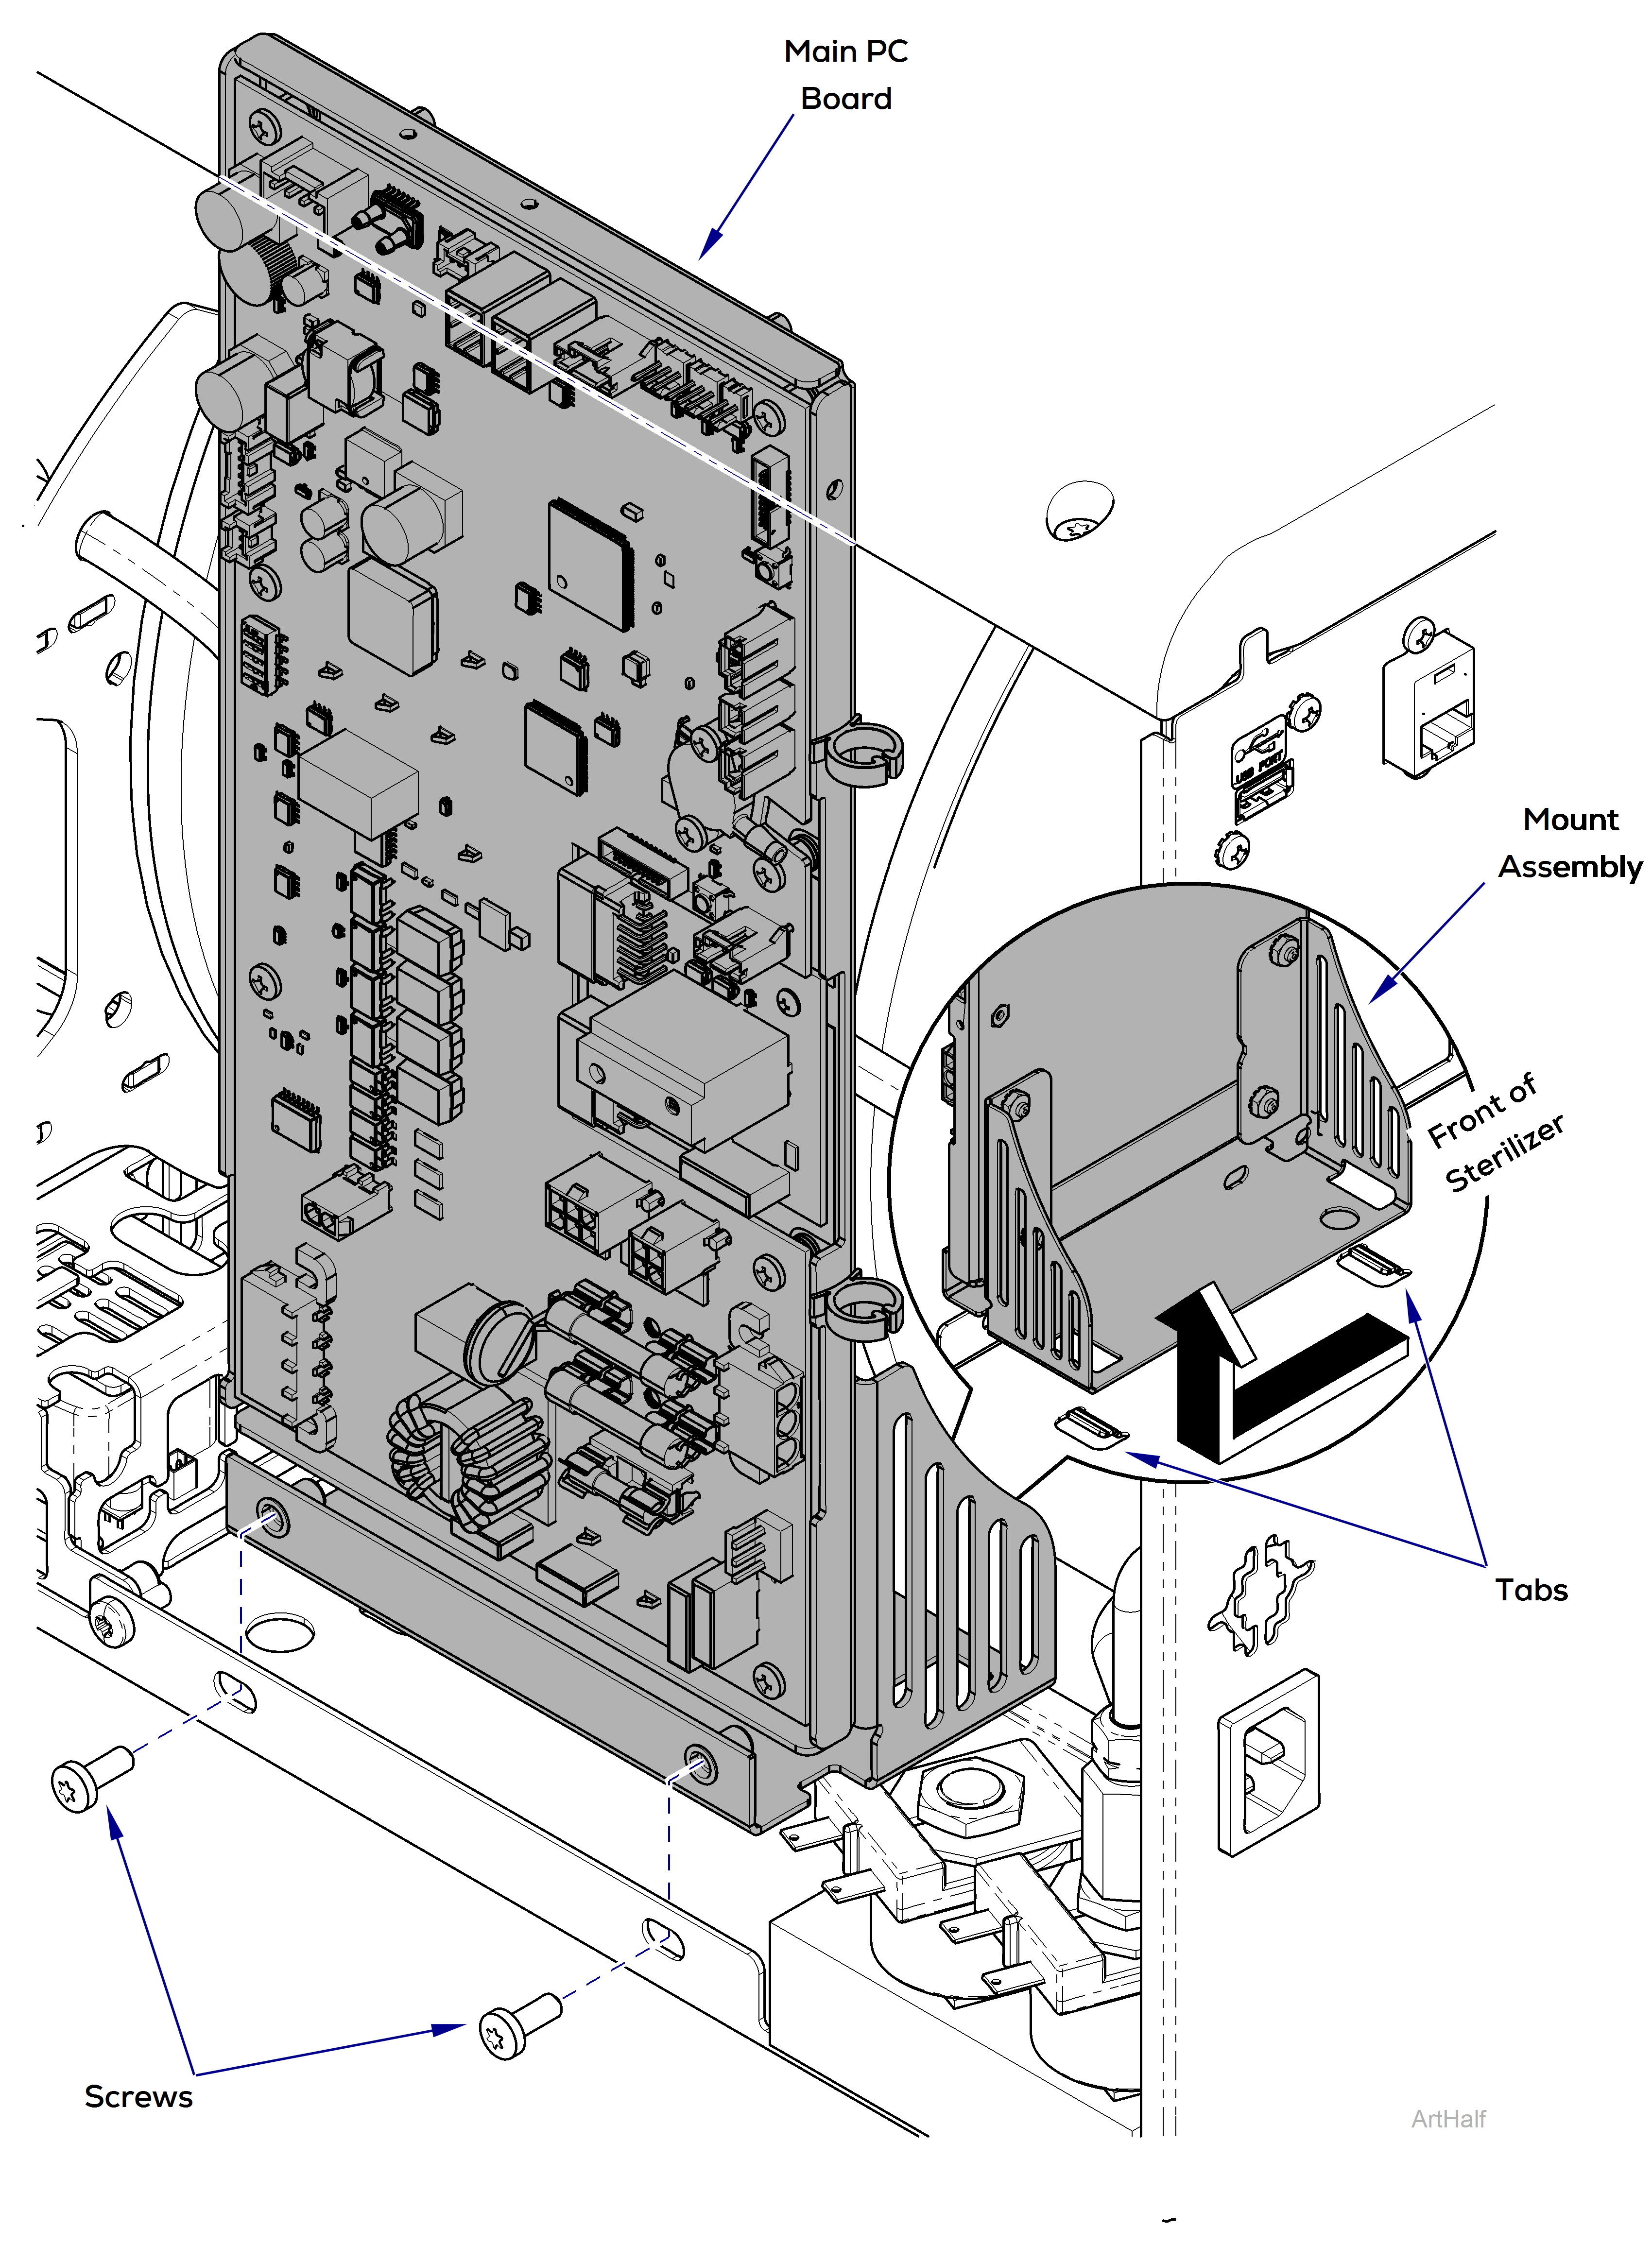
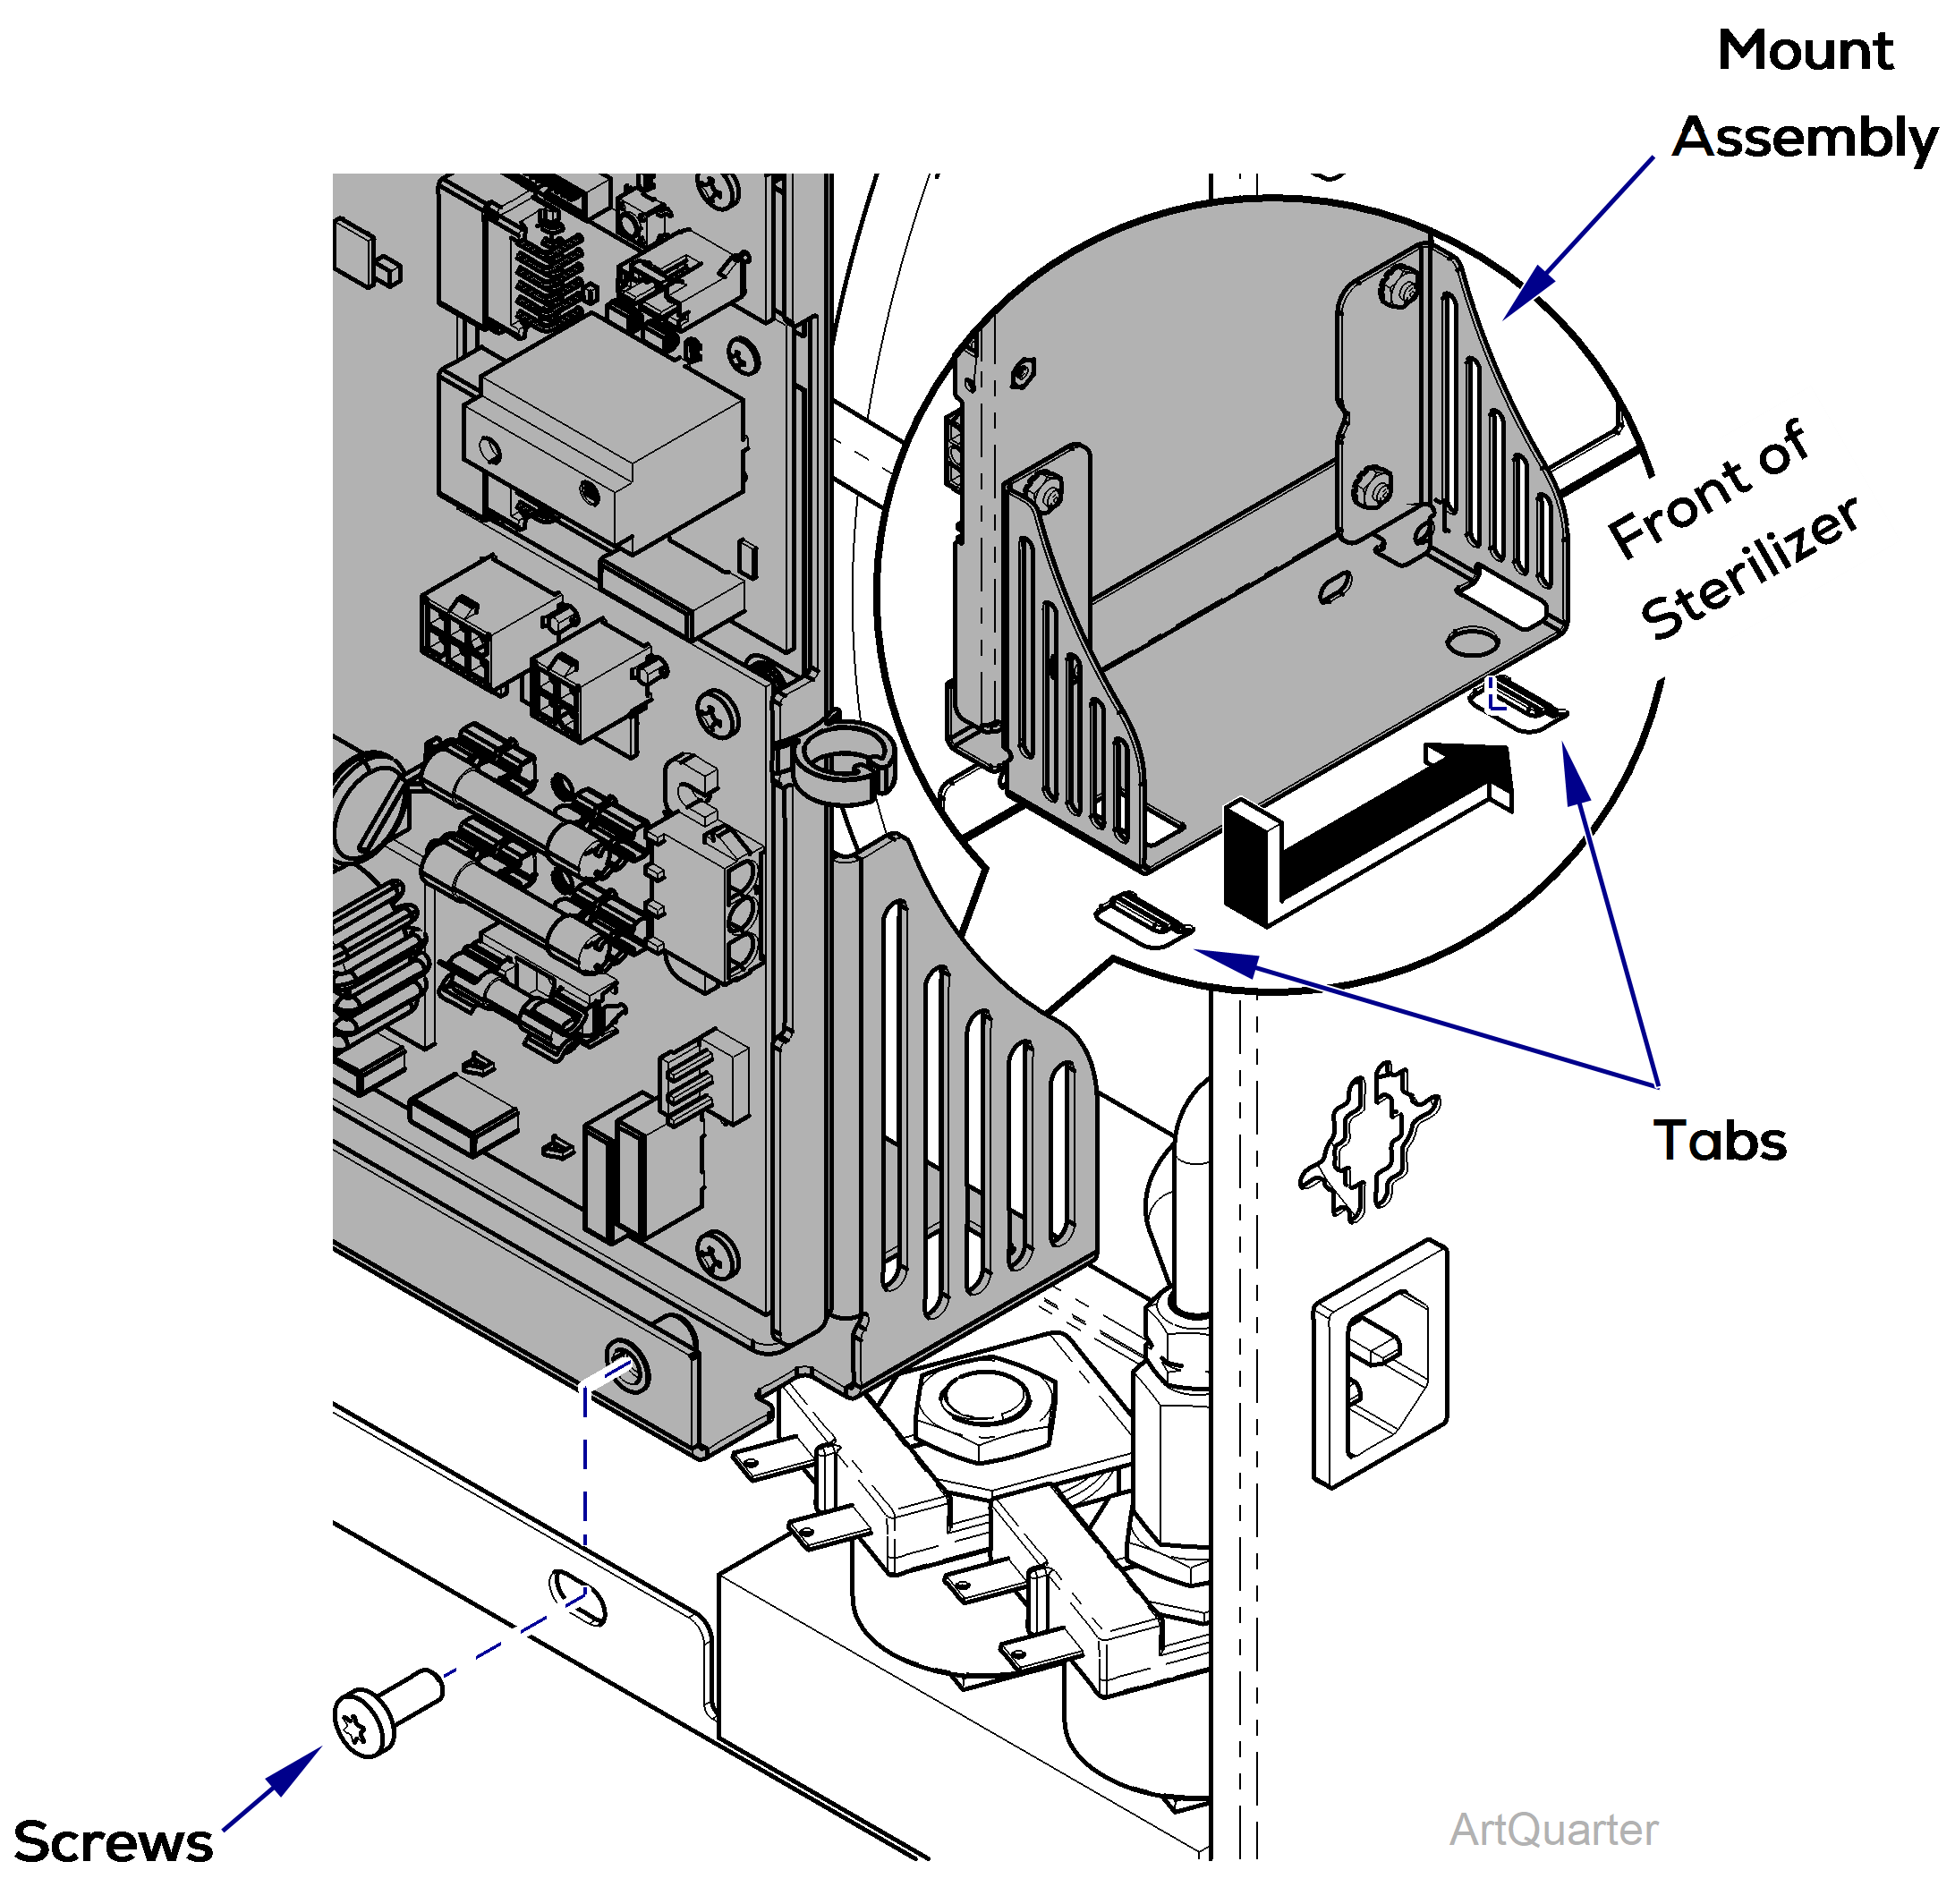
1.Orient main PC board by lining up slots in main PC board mounting assembly with tabs in base of sterilizer.
2.Slide main PC board mounting assembly towards front engaging tabs in base of sterilizer.
3.Secure main PC board to base of sterilizer with two screws.
4.Connect wiring connectors to main PC board.
5.Attach pressure sensor hose and secure with high-temp cable tie.

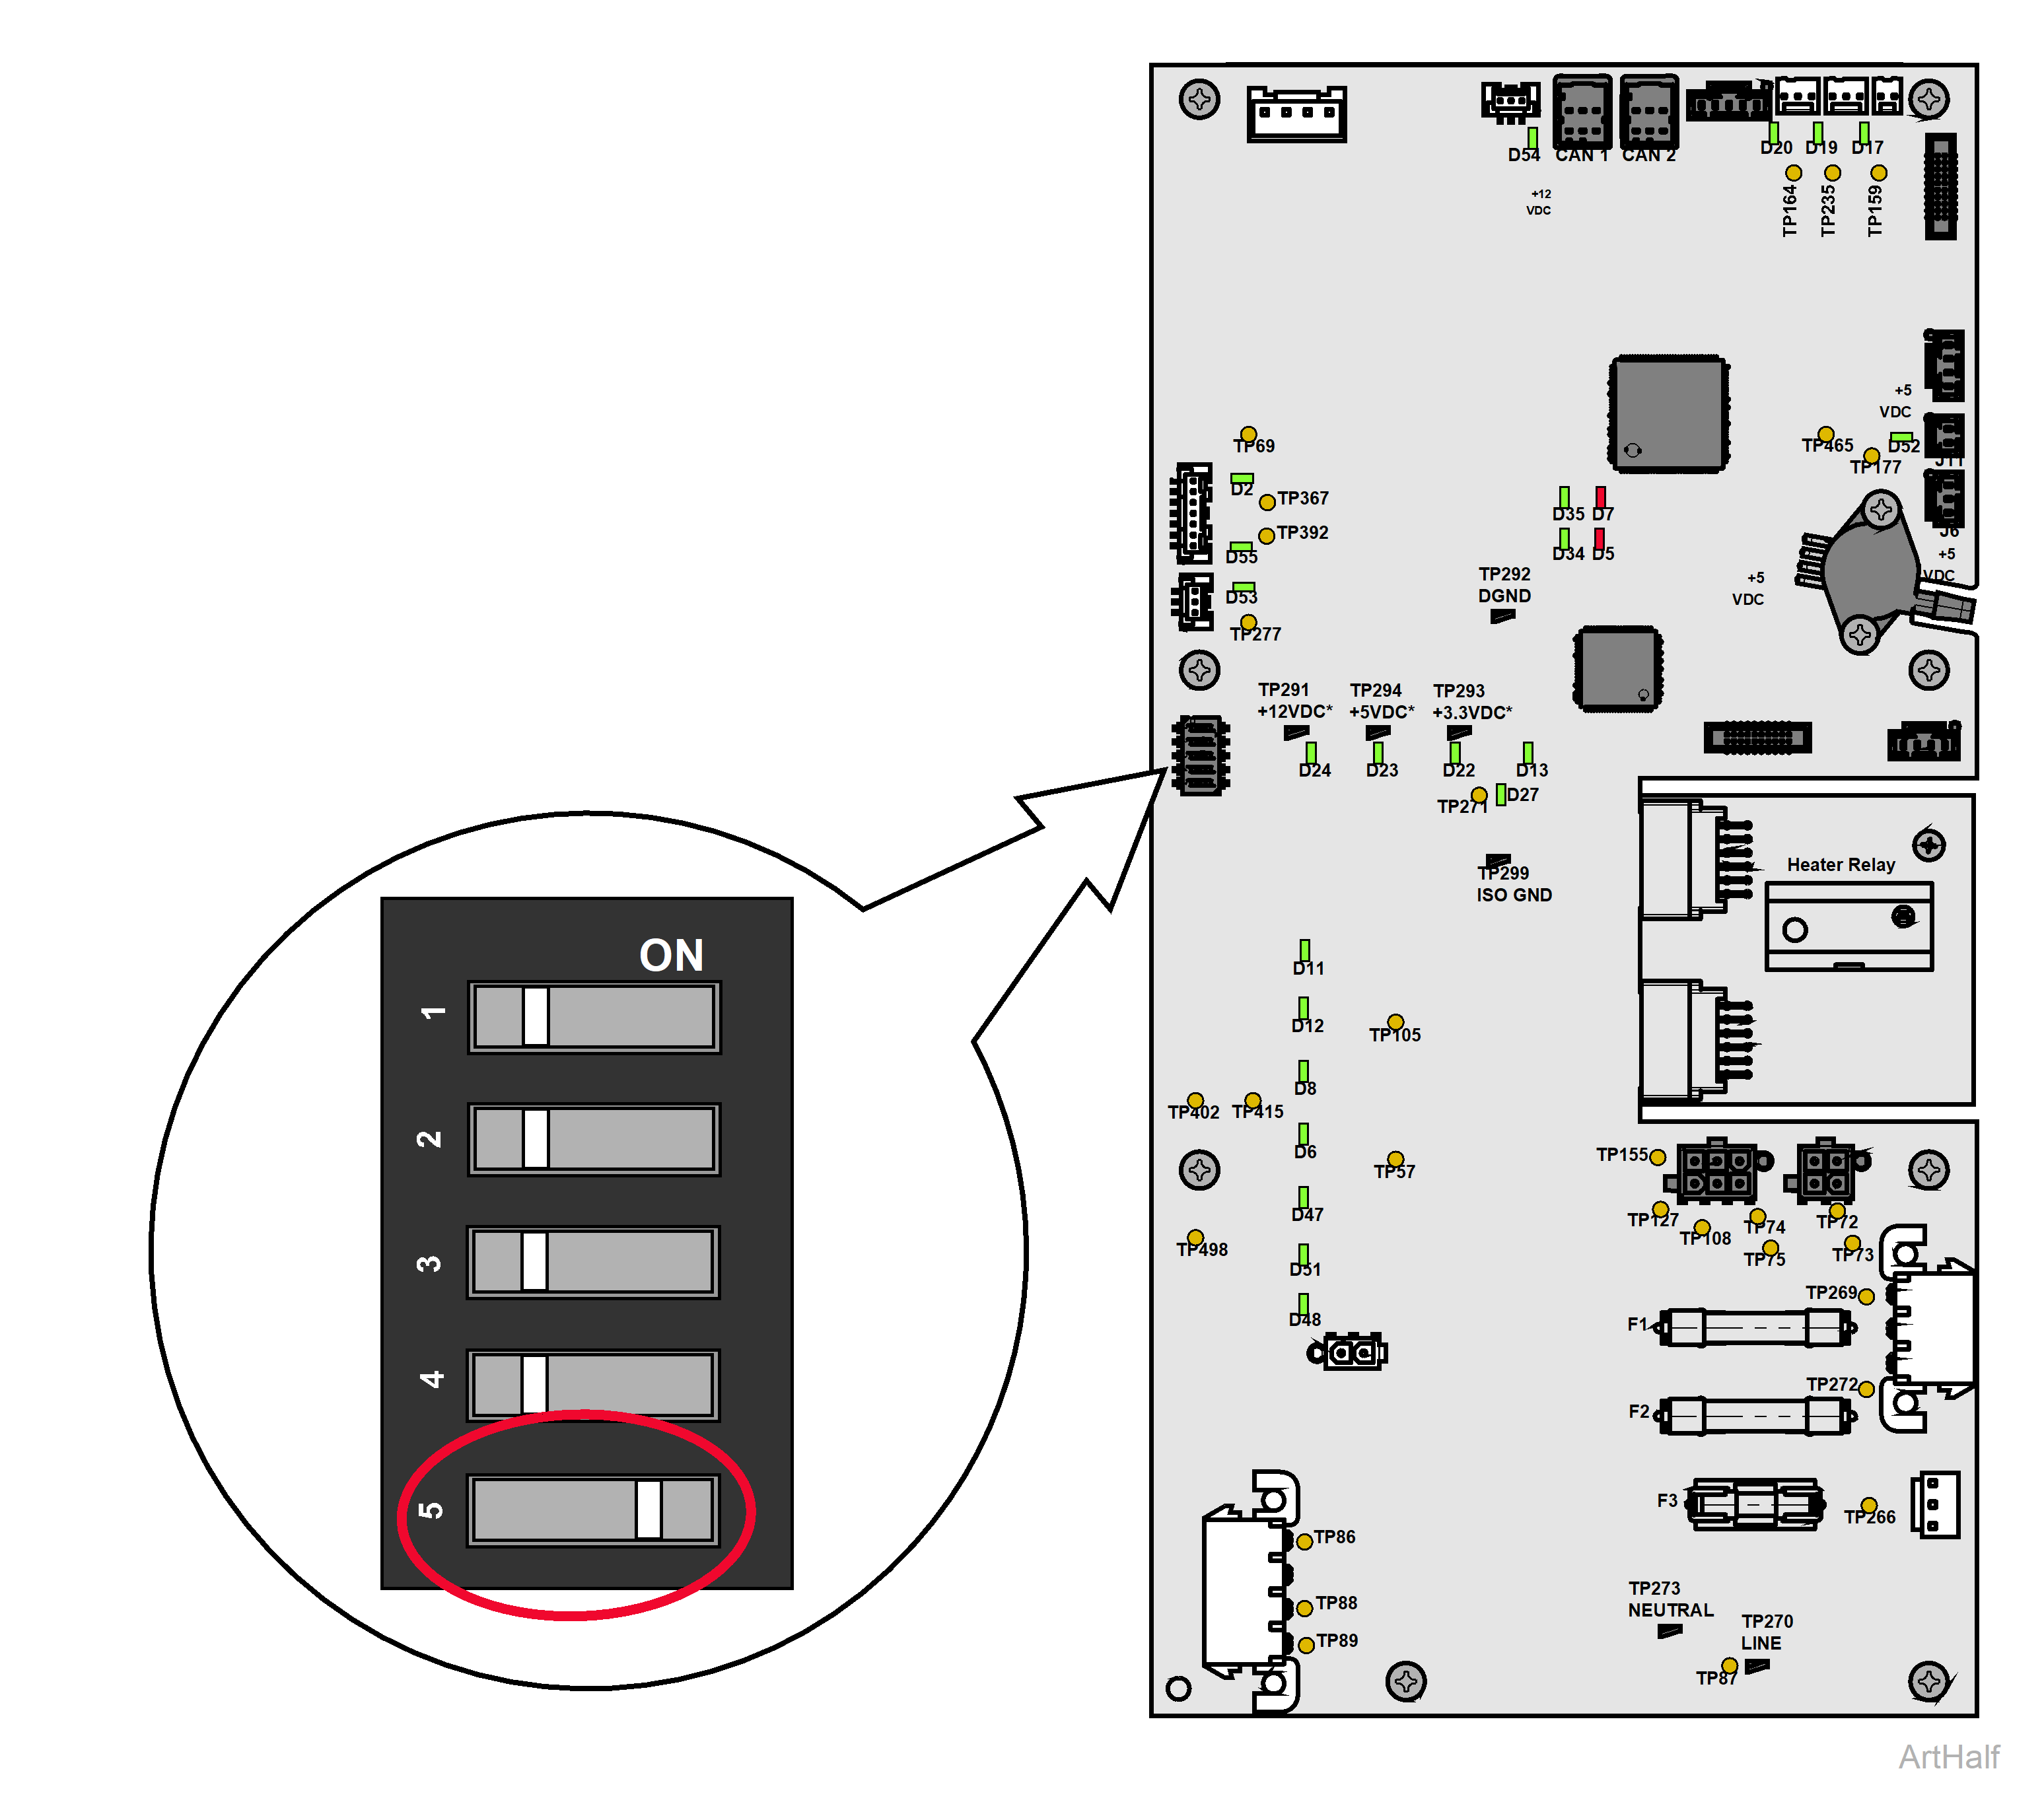
1.On the new PC board, move switch #5 to ON (as shown in the figure above).
2.Reconnect power to sterilizer.
3.On the Select Model and Chamber screen display, refer to back label to select and save the correct model and chamber size.
4.On the Control Board Information screen display, do the following:
— Refer to back label to verify Serial Number and re-enter if needed.
— Enter the Last Cycle Number if available.
— Select Done.
5.Disconnect power to sterilizer.
6.Move switch #5 to OFF.
7.Install right side cover.
8.Run a test cycle and check for proper operation.

