Canis Major Water Sensor Test and Repair
|
Model |
CMDT | CMDT-WS 45 and 60 |
| Serial Number | All | All |
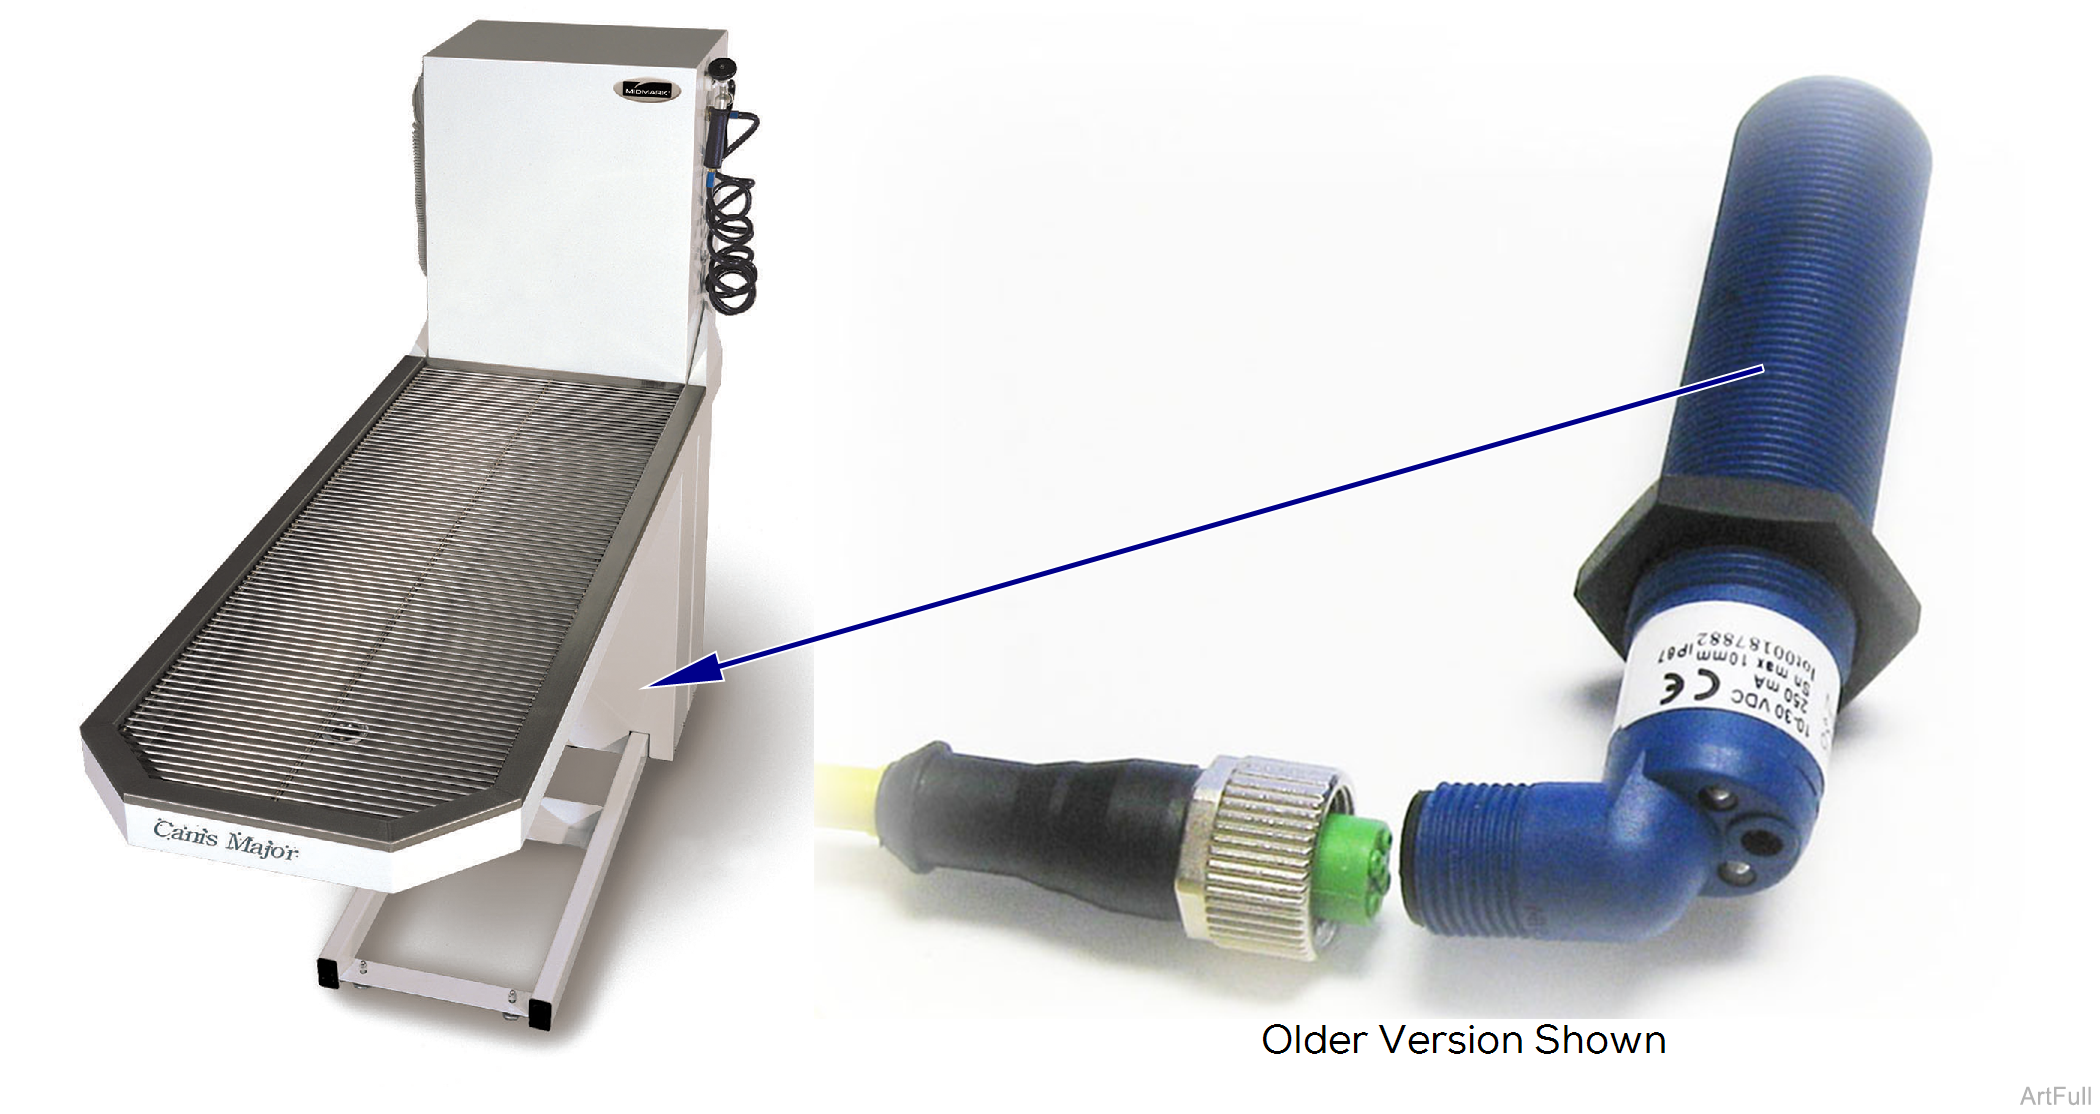
The water sensor is located at the rear of the table prior to the inlet of the pump. As water flows down through the drain hose, it activates the water sensor, which starts the pump. Whenever the sensor monitors water running past it, the pump will remain activated.
1.Remove back panel from column. Refer to: Back Panel
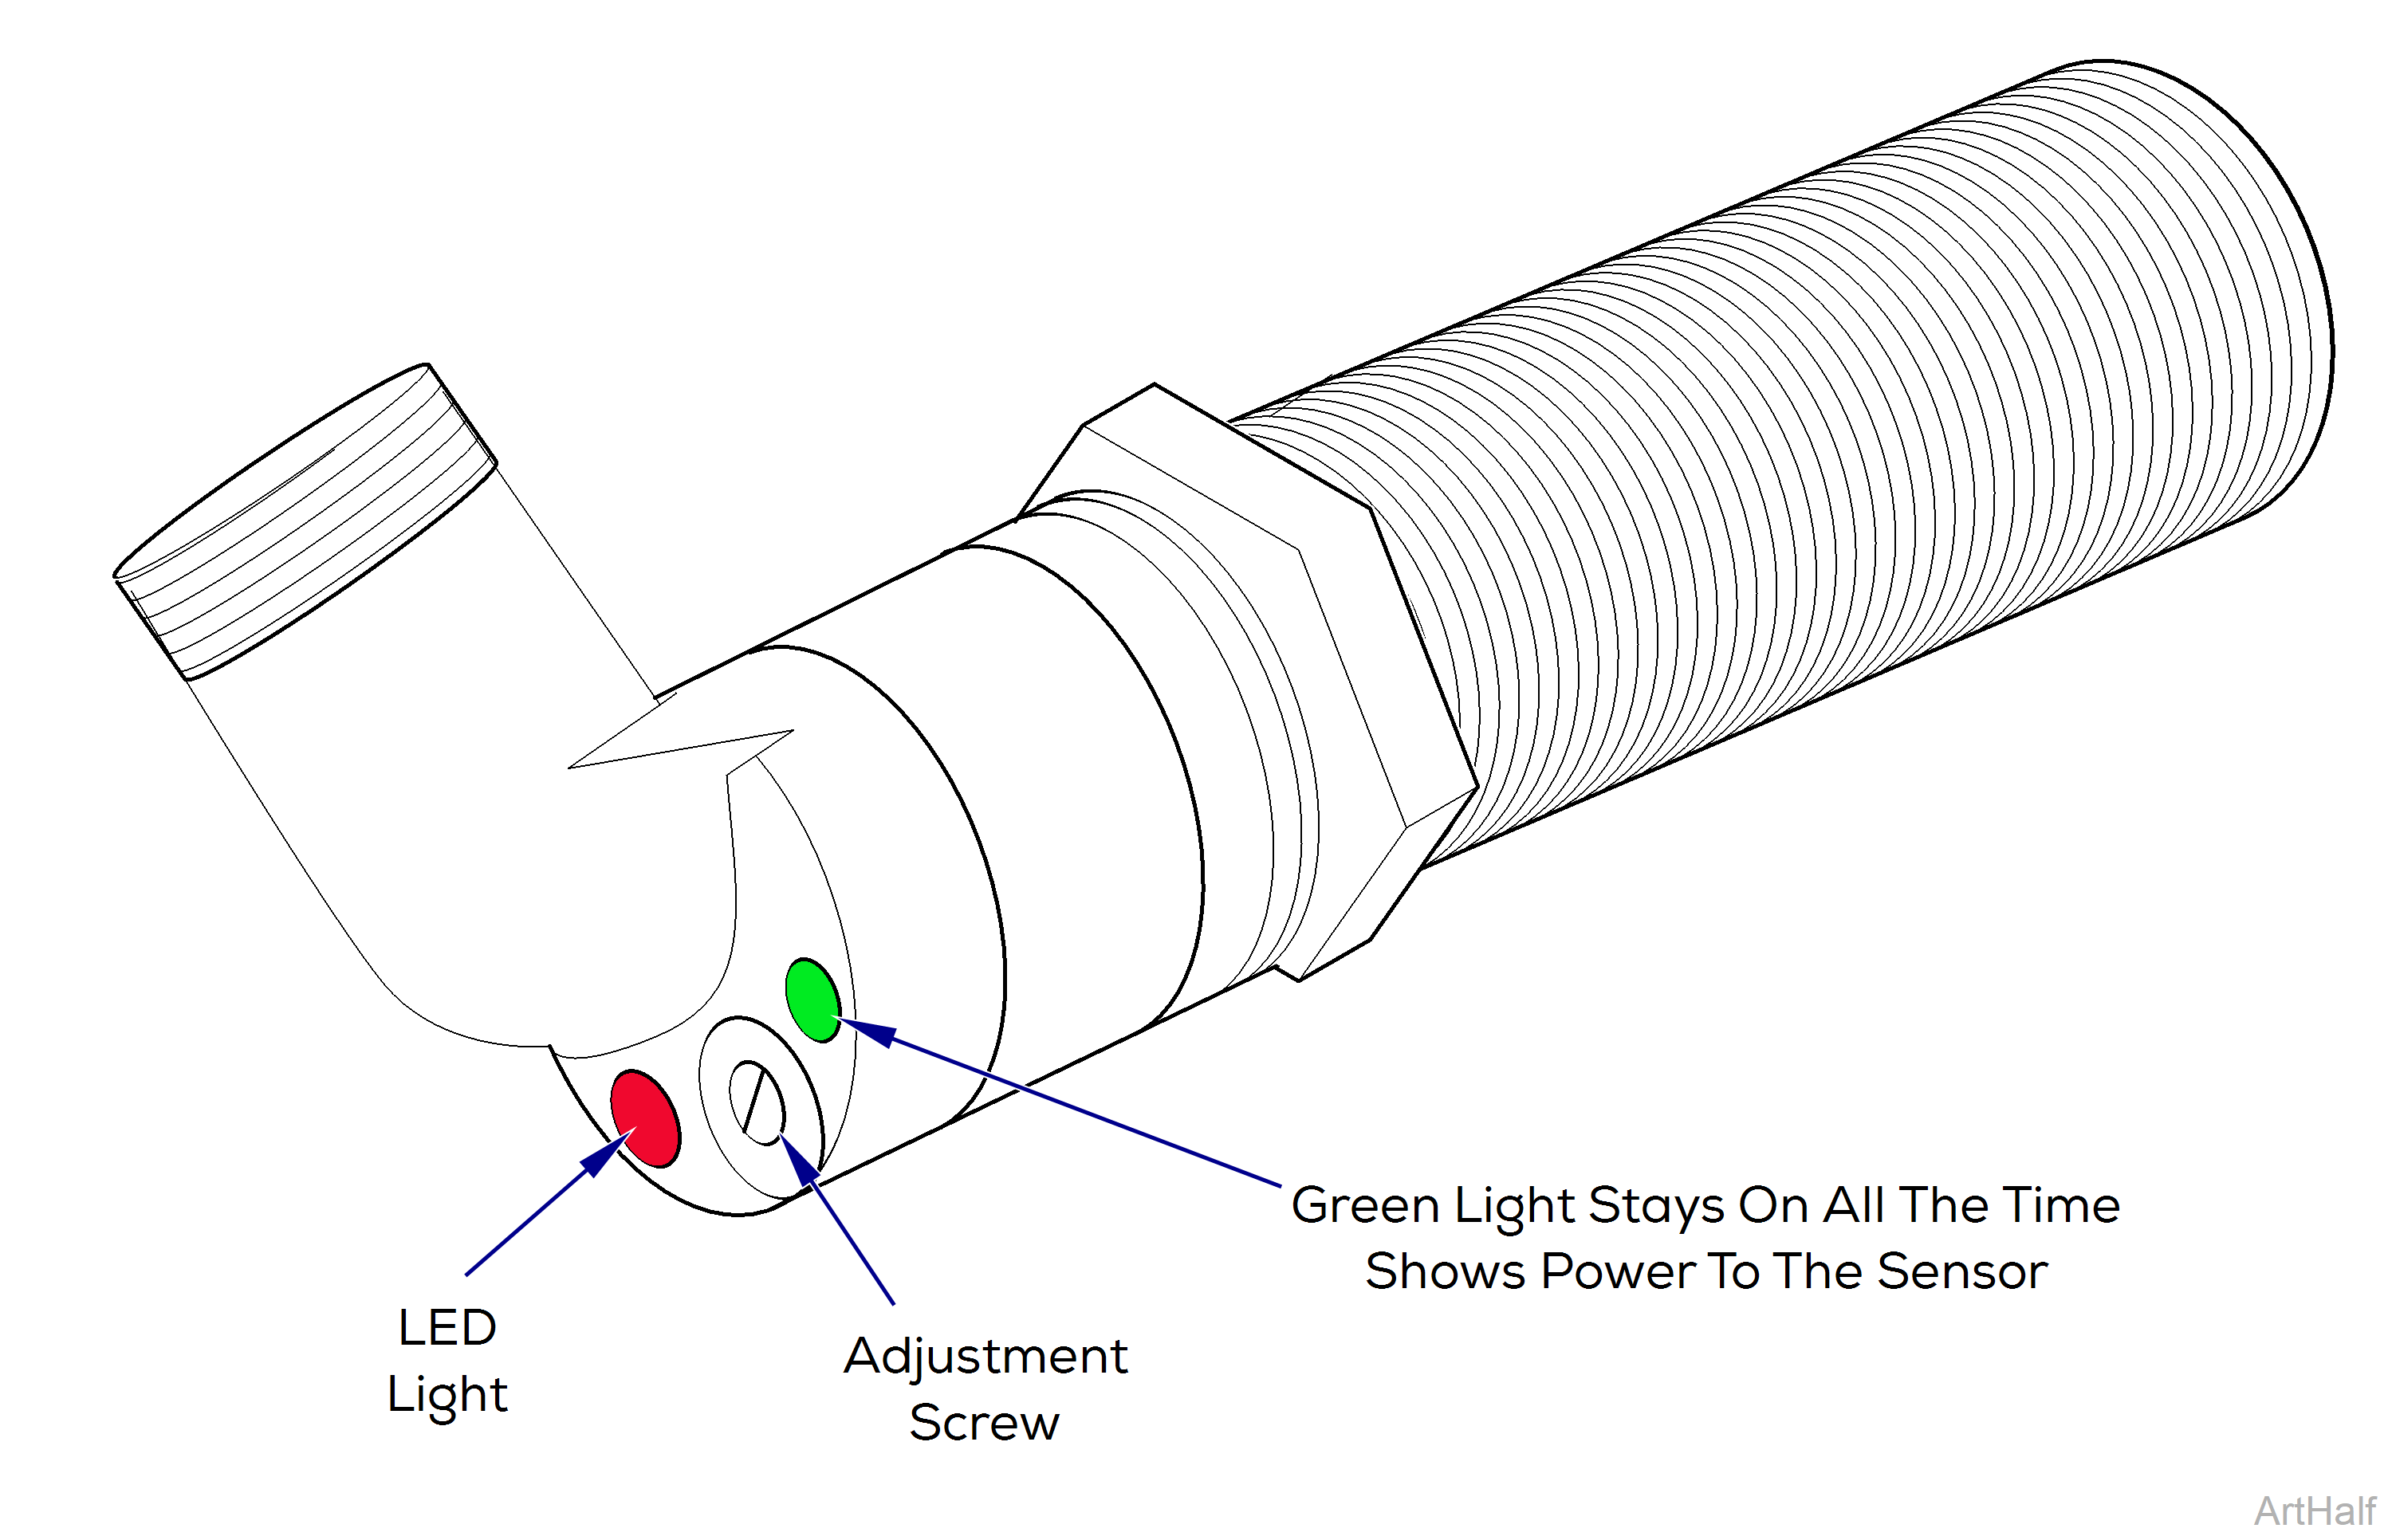
2.Look for the LED light on water sensor. Water sensor light comes on when it detects water movement.
3.Turn the adjustment screw clockwise until the LED light and pump turn on.
4.Slowly continue turning the adjustment screw counterclockwise for two to three additional turns after the light turns off.
5.Run some water into the pump. It should cycle on and off as the water is drained. If not, try re-adjusting the sensor. If it still isn't working, replace the water sensor.
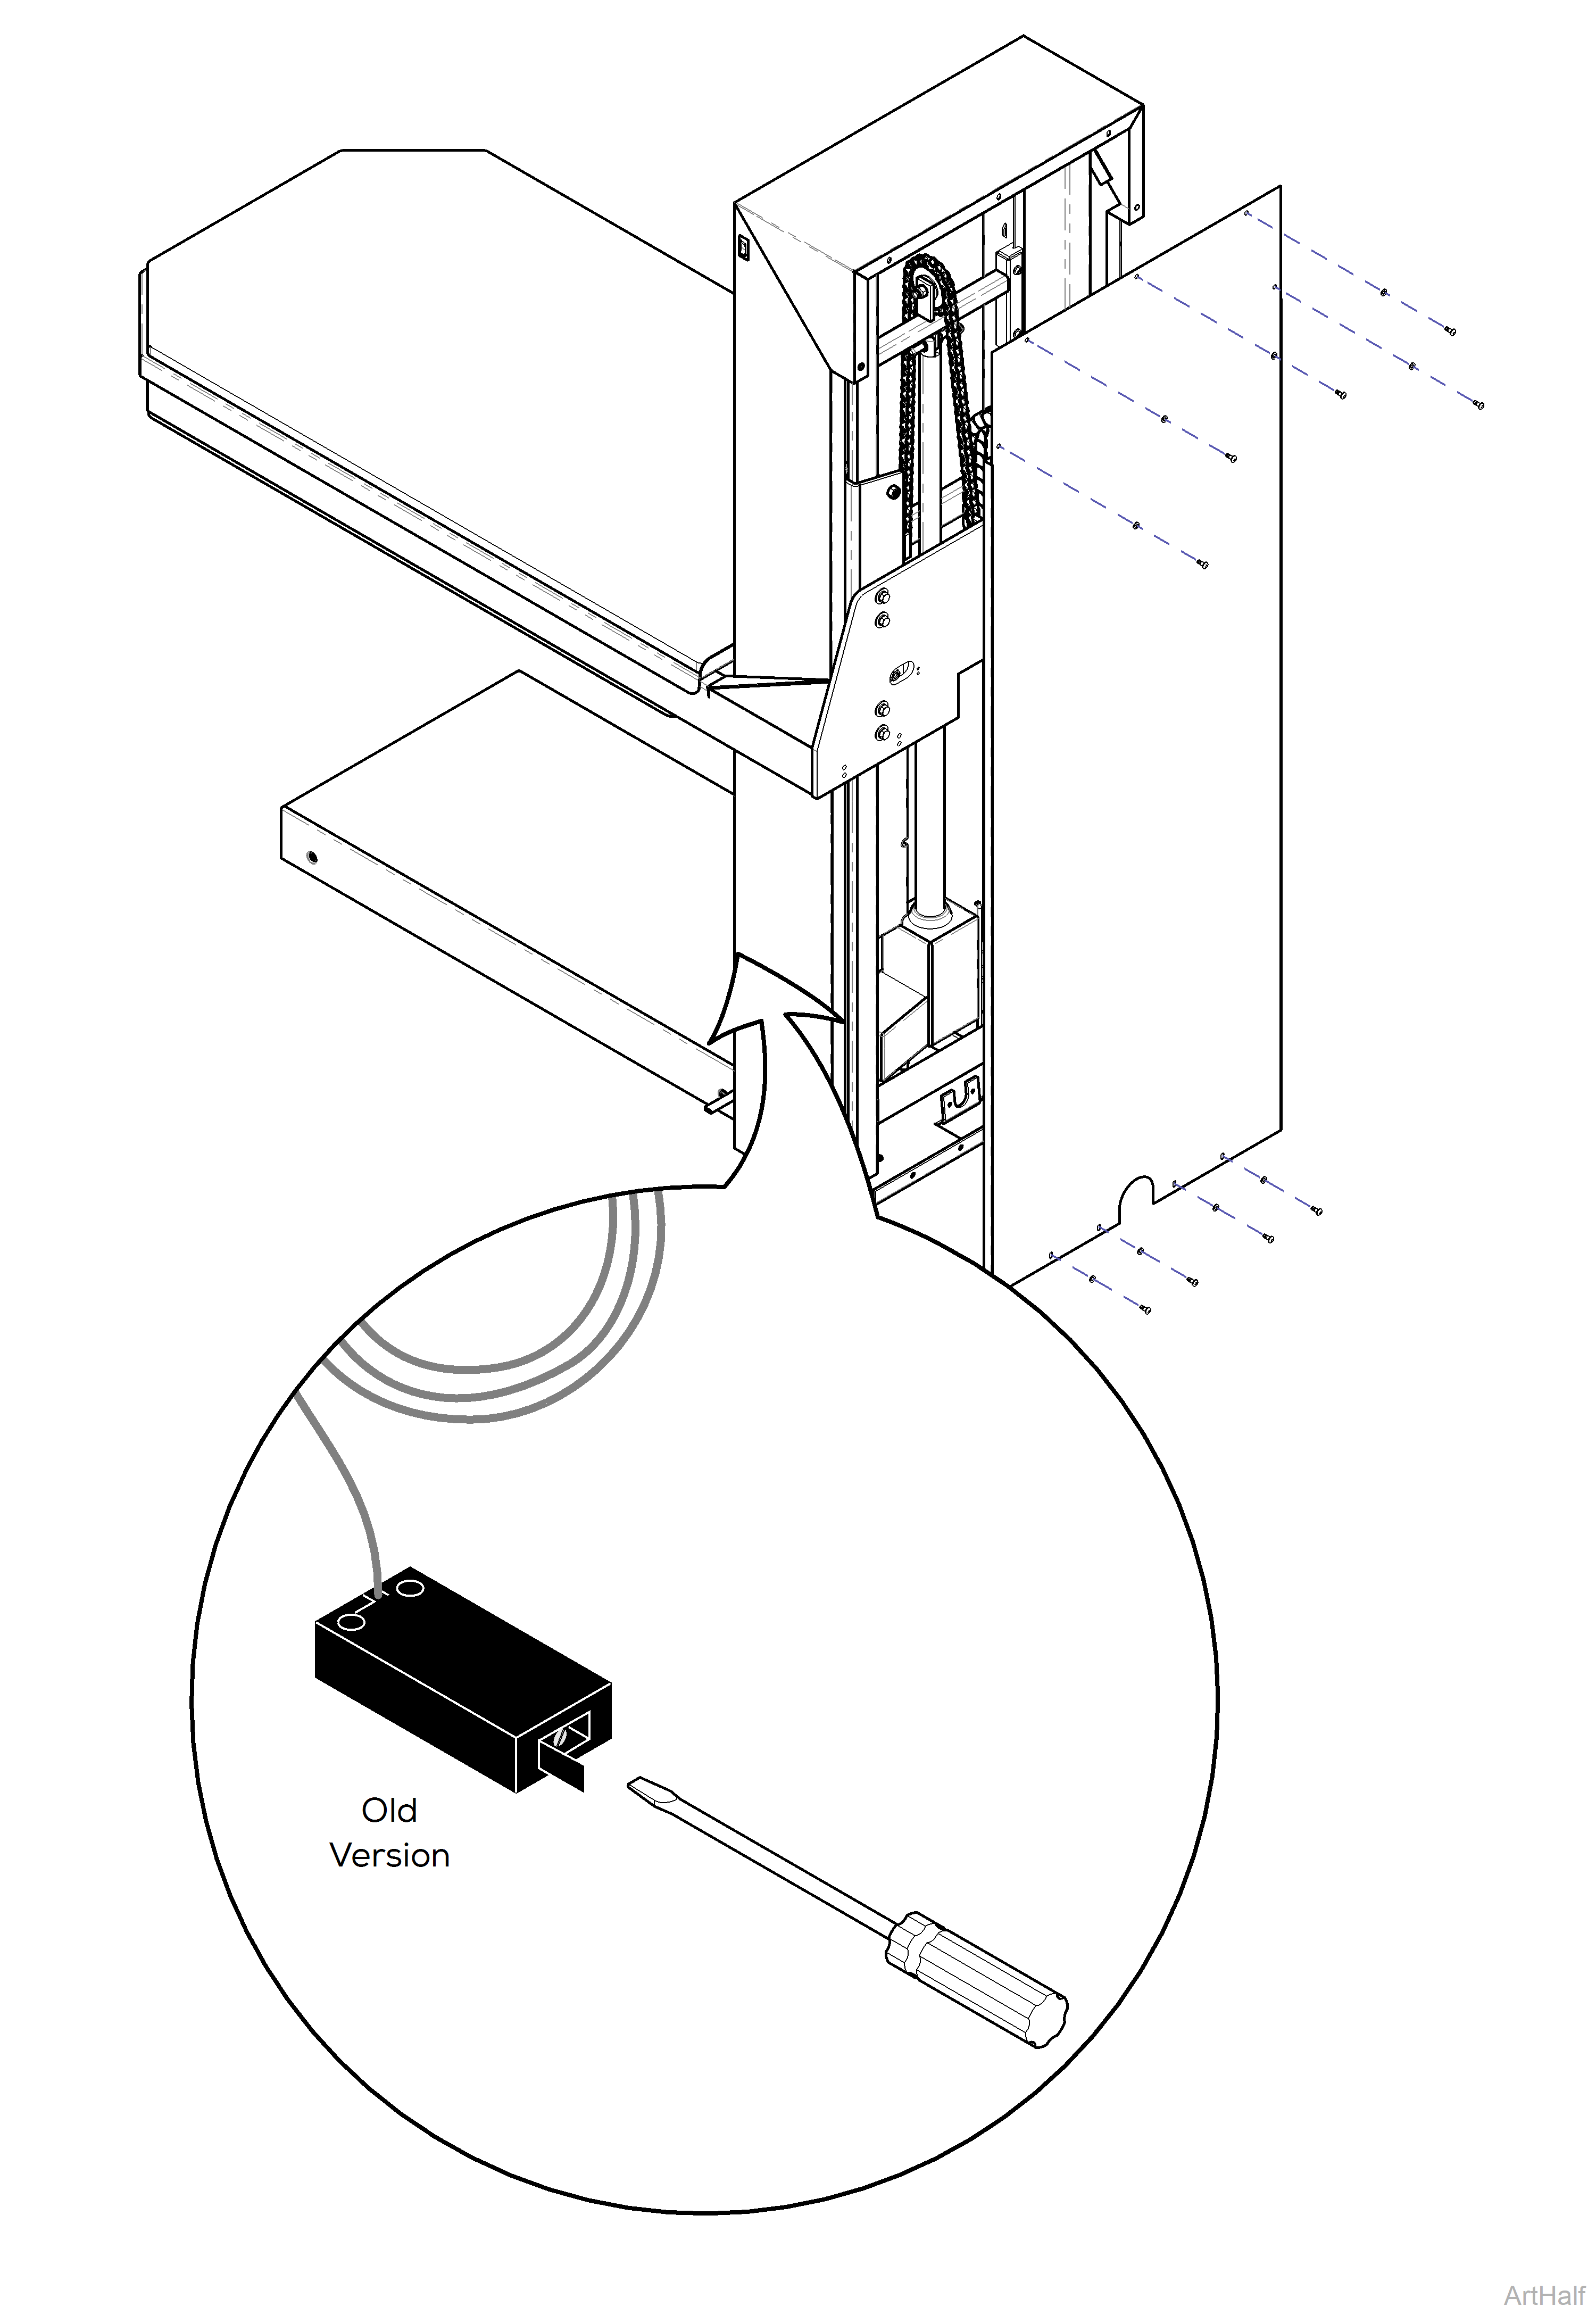
1.Remove back panel from column. Refer to: Back Panel
2.Open small door on water sensor to access adjustment screw.
3.Adjust Sensor.
a.Older Version - Open small door on water sensor to access adjustment screw. Adjust counterclockwise to decrease sensitivity and clockwise to increase sensitivity.
b.New Version - Use one of the following methods to set up water sensor:
▪To have sensor learn empty environment where no target/water present: Press push button greater 3 seconds until LEDs are flashing one time per second. The background is calibrated when push button is released between 3 and 6 seconds.
▪To have sensor learn object in environment where target/water is present: Press push button greater 6 seconds until LEDs are flashing two times per second. The background is calibrated when push button is released between 6 and 9 seconds. Release push button after 12 sec. returns sensor to factory settings.
4.Run some water into the pump. It should cycle on and off as the water is drained. If not, try re-adjusting the sensor. If it still isn't working, replace the water sensor.
|
Model |
CMDT | CMDT-WS 45 and 60 |
| Serial Number | All | All |
The water sensor is located at the rear of the table prior to the inlet of the pump. As water flows down through the drain hose, it activates the water sensor, which starts the pump. Whenever the sensor monitors water running past it, the pump will remain activated.
1.Remove back panel from column. Refer to: Back Panel
2.Look for the LED light on water sensor. Water sensor light comes on when it detects water movement.
3.Turn the adjustment screw clockwise until the LED light and pump turn on.
4.Slowly continue turning the adjustment screw counterclockwise for two to three additional turns after the light turns off.
5.Run some water into the pump. It should cycle on and off as the water is drained. If not, try re-adjusting the sensor. If it still isn't working, replace the water sensor.
1.Remove back panel from column. Refer to: Back Panel
2.Open small door on water sensor to access adjustment screw.
3.Adjust Sensor.
a.Older Version - Open small door on water sensor to access adjustment screw. Adjust counterclockwise to decrease sensitivity and clockwise to increase sensitivity.
b.New Version - Use one of the following methods to set up water sensor:
▪To have sensor learn empty environment where no target/water present: Press push button greater 3 seconds until LEDs are flashing one time per second. The background is calibrated when push button is released between 3 and 6 seconds.
▪To have sensor learn object in environment where target/water is present: Press push button greater 6 seconds until LEDs are flashing two times per second. The background is calibrated when push button is released between 6 and 9 seconds. Release push button after 12 sec. returns sensor to factory settings.
4.Run some water into the pump. It should cycle on and off as the water is drained. If not, try re-adjusting the sensor. If it still isn't working, replace the water sensor.
