QuickClean™ Ultrasonic Cleaners Transducer Test and Repair
To prevent risk of shock always disconnect power before removing covers or performing any service procedure.
1.Turn power off and unplug main power socket at the rear of the unit.
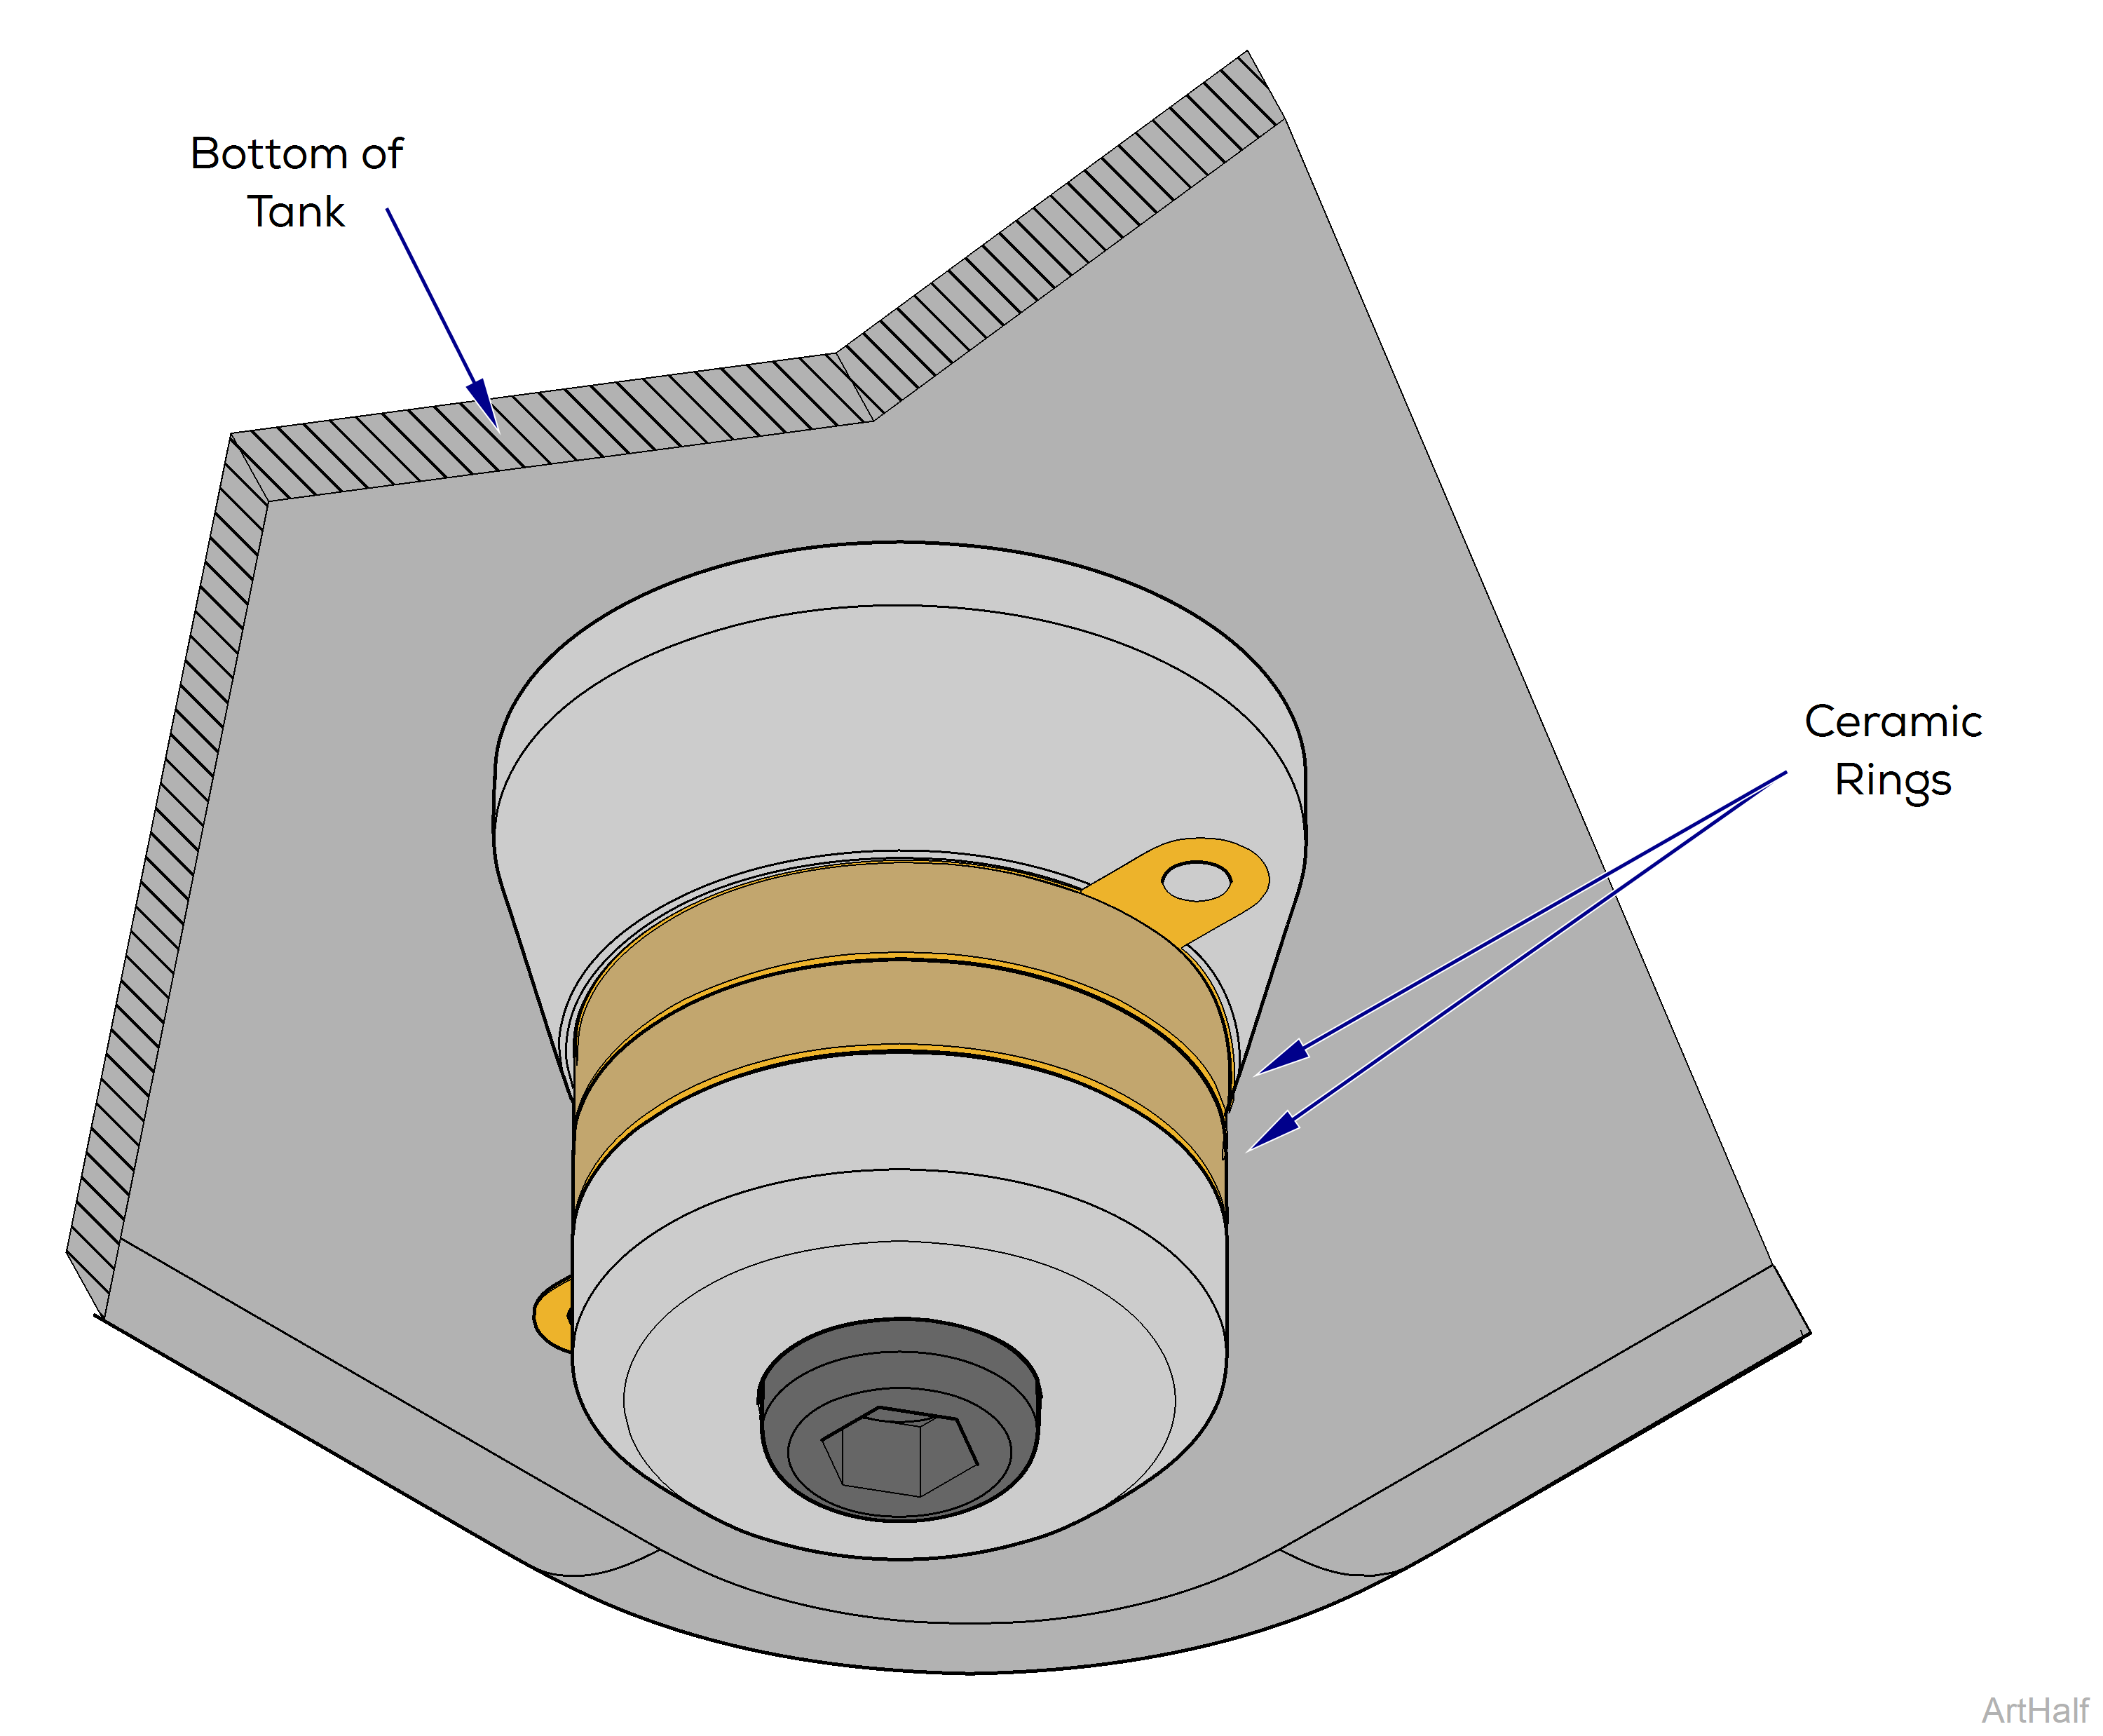
2.Remove bottom cover. Visually inspect the Ceramic Rings on each transducer for cracks or missing pieces.
3.If all transducers are not in good condition Contact Midmark’s Technical Service.
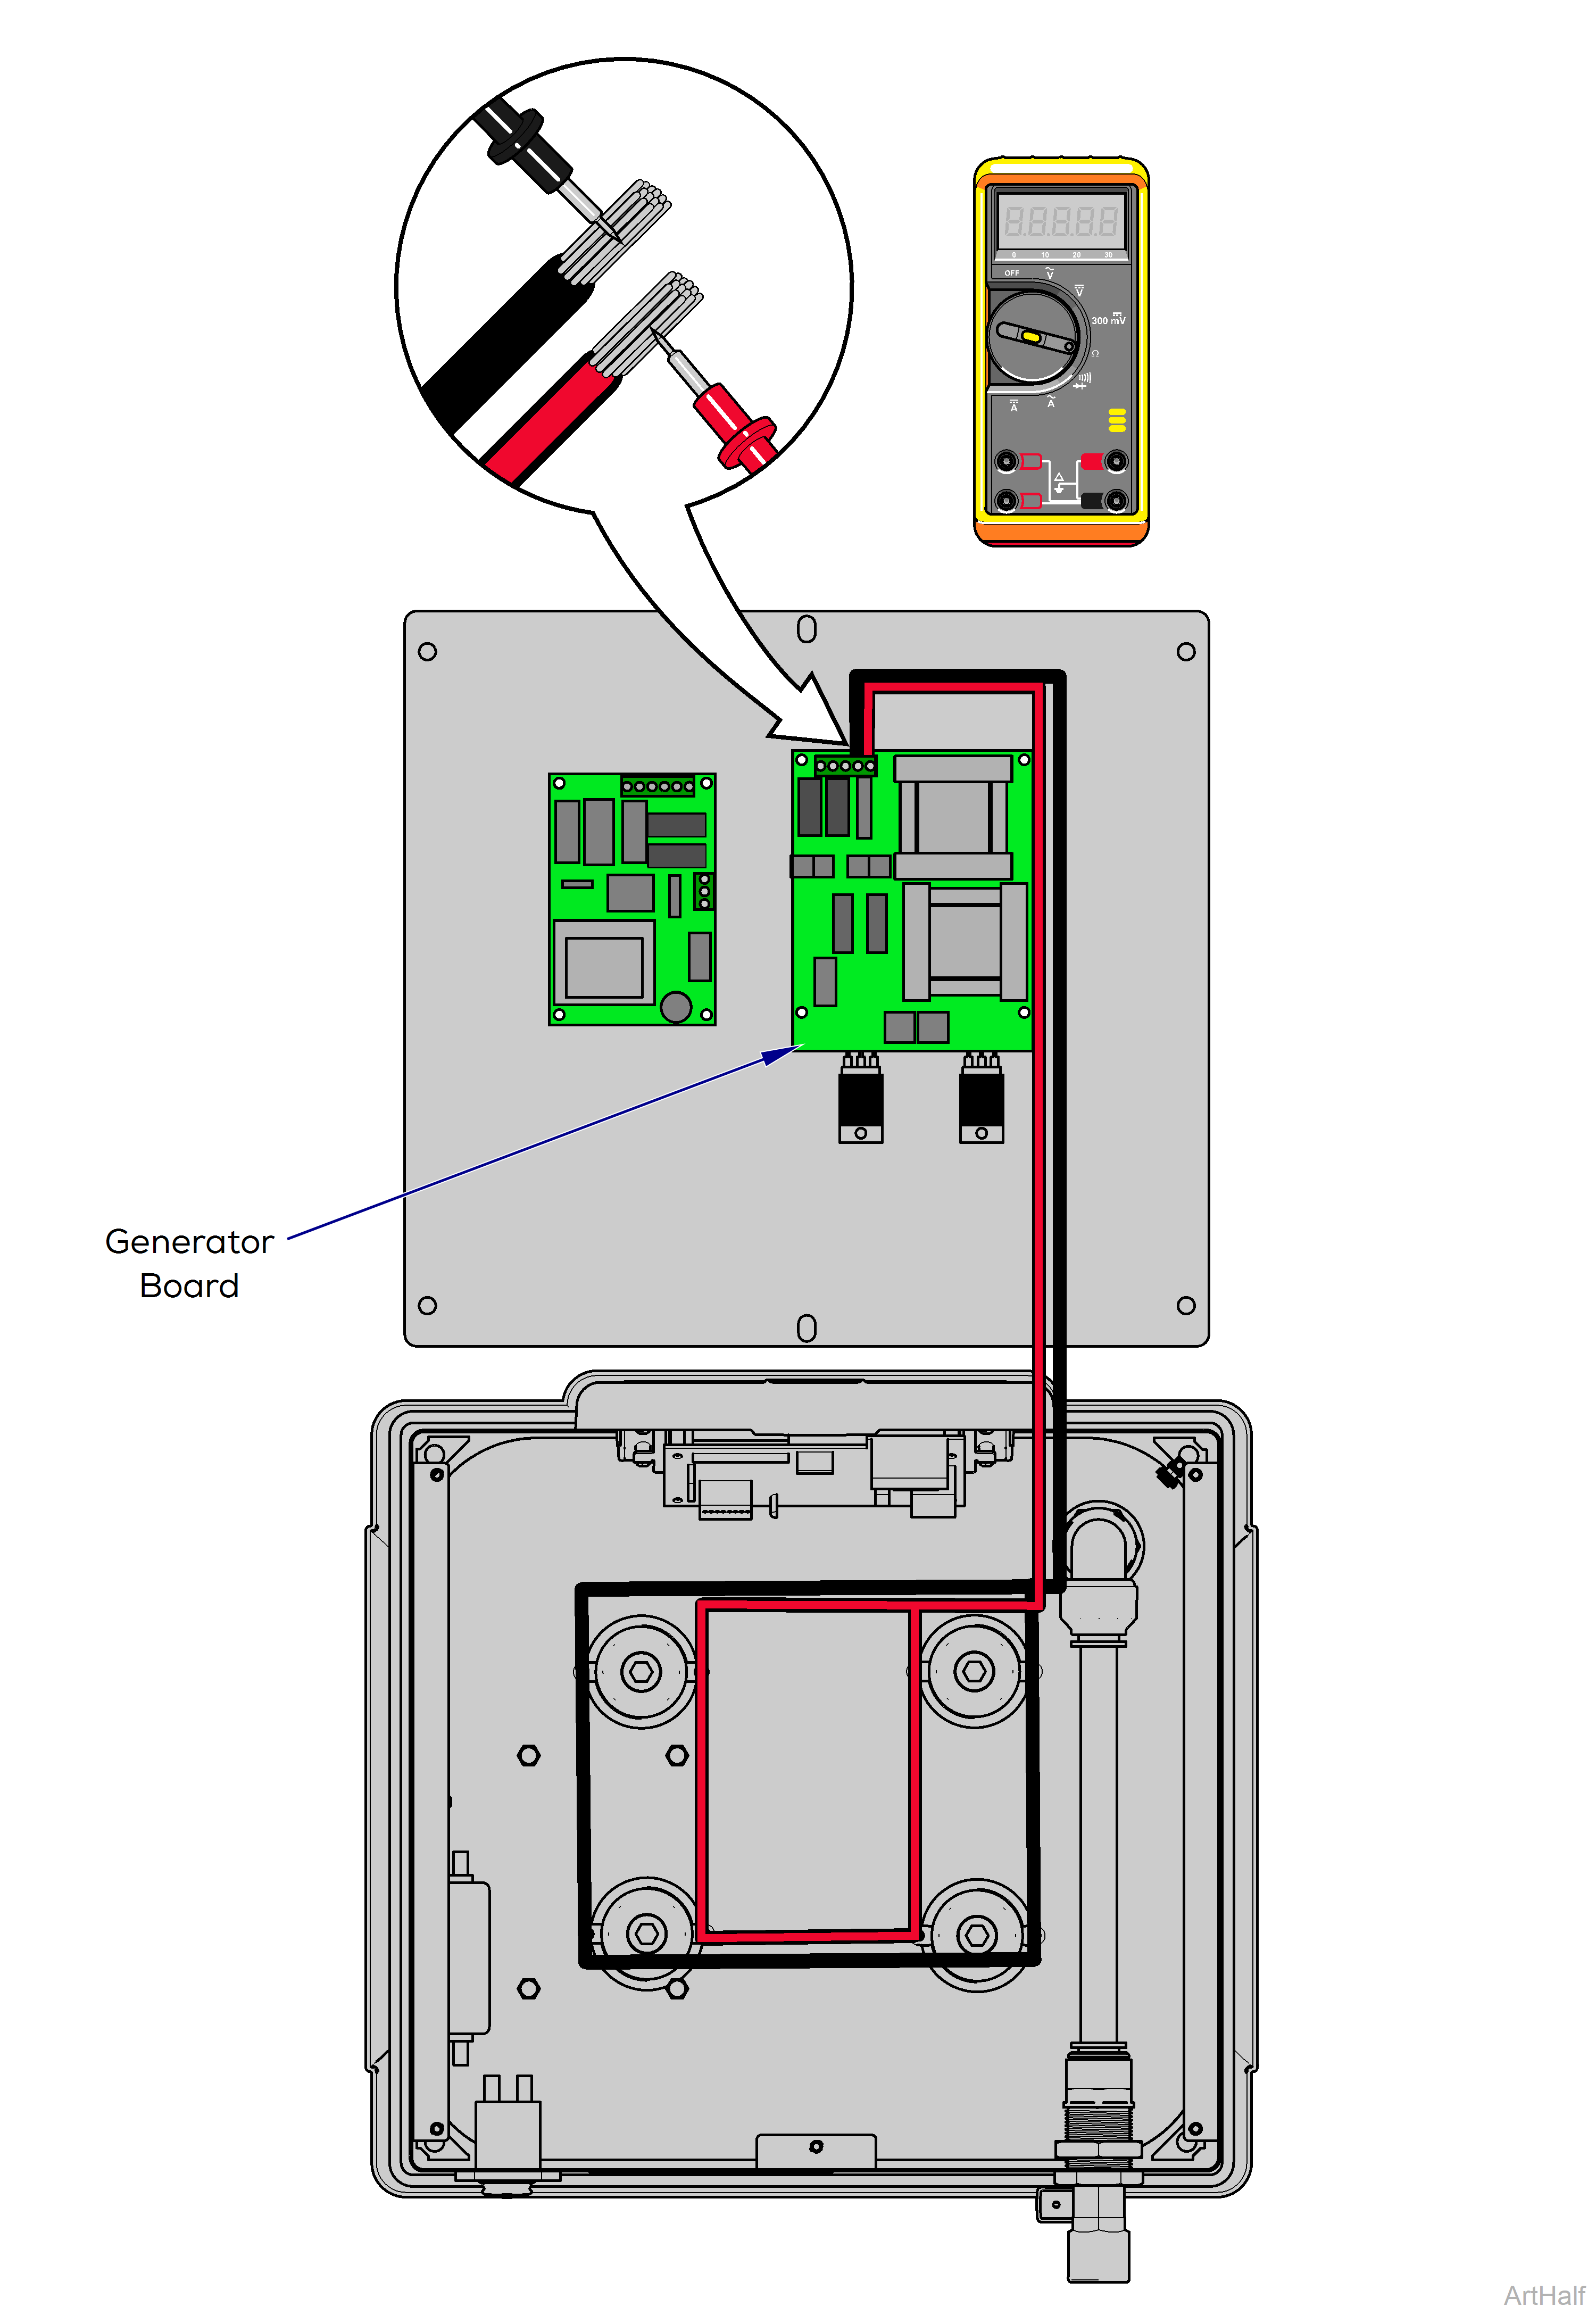
1.Disconnect red and black leads from Generator Board, briefly connect them together to discharge the transducers.
2.Use meter to measure resistance across the red and black wires.
3.If meter is equipped, change the meter setting to measure capacitance, connect leads to the red and black wires.
|
Test |
Meter Reading |
Required Action |
|---|---|---|
|
Transducer Resistance / “Ω” Ohm Test |
Open circuit |
Resistance is good. |
|
Closed circuit |
Resistance is bad. Contact Midmark’s Technical Service. |
|
|
Transducer capacitance Test |
Qc1 = 7nF Qc3 = 14nF Qc6 = 28nF |
Capacitance in range. Transducers are good. |
|
Capacitance out of range. Transducers are bad Contact Midmark’s Technical Service. |
