QuickClean™ Ultrasonic Cleaners Tank Assembly Access Procedures
To prevent risk of shock always disconnect power before removing covers or performing any service procedure.
To prevent damage to the wires ensure they are routed correctly and secured with zip ties.
1.Remove Bottom Plate Assembly. Refer to: Base Plate Access Procedures
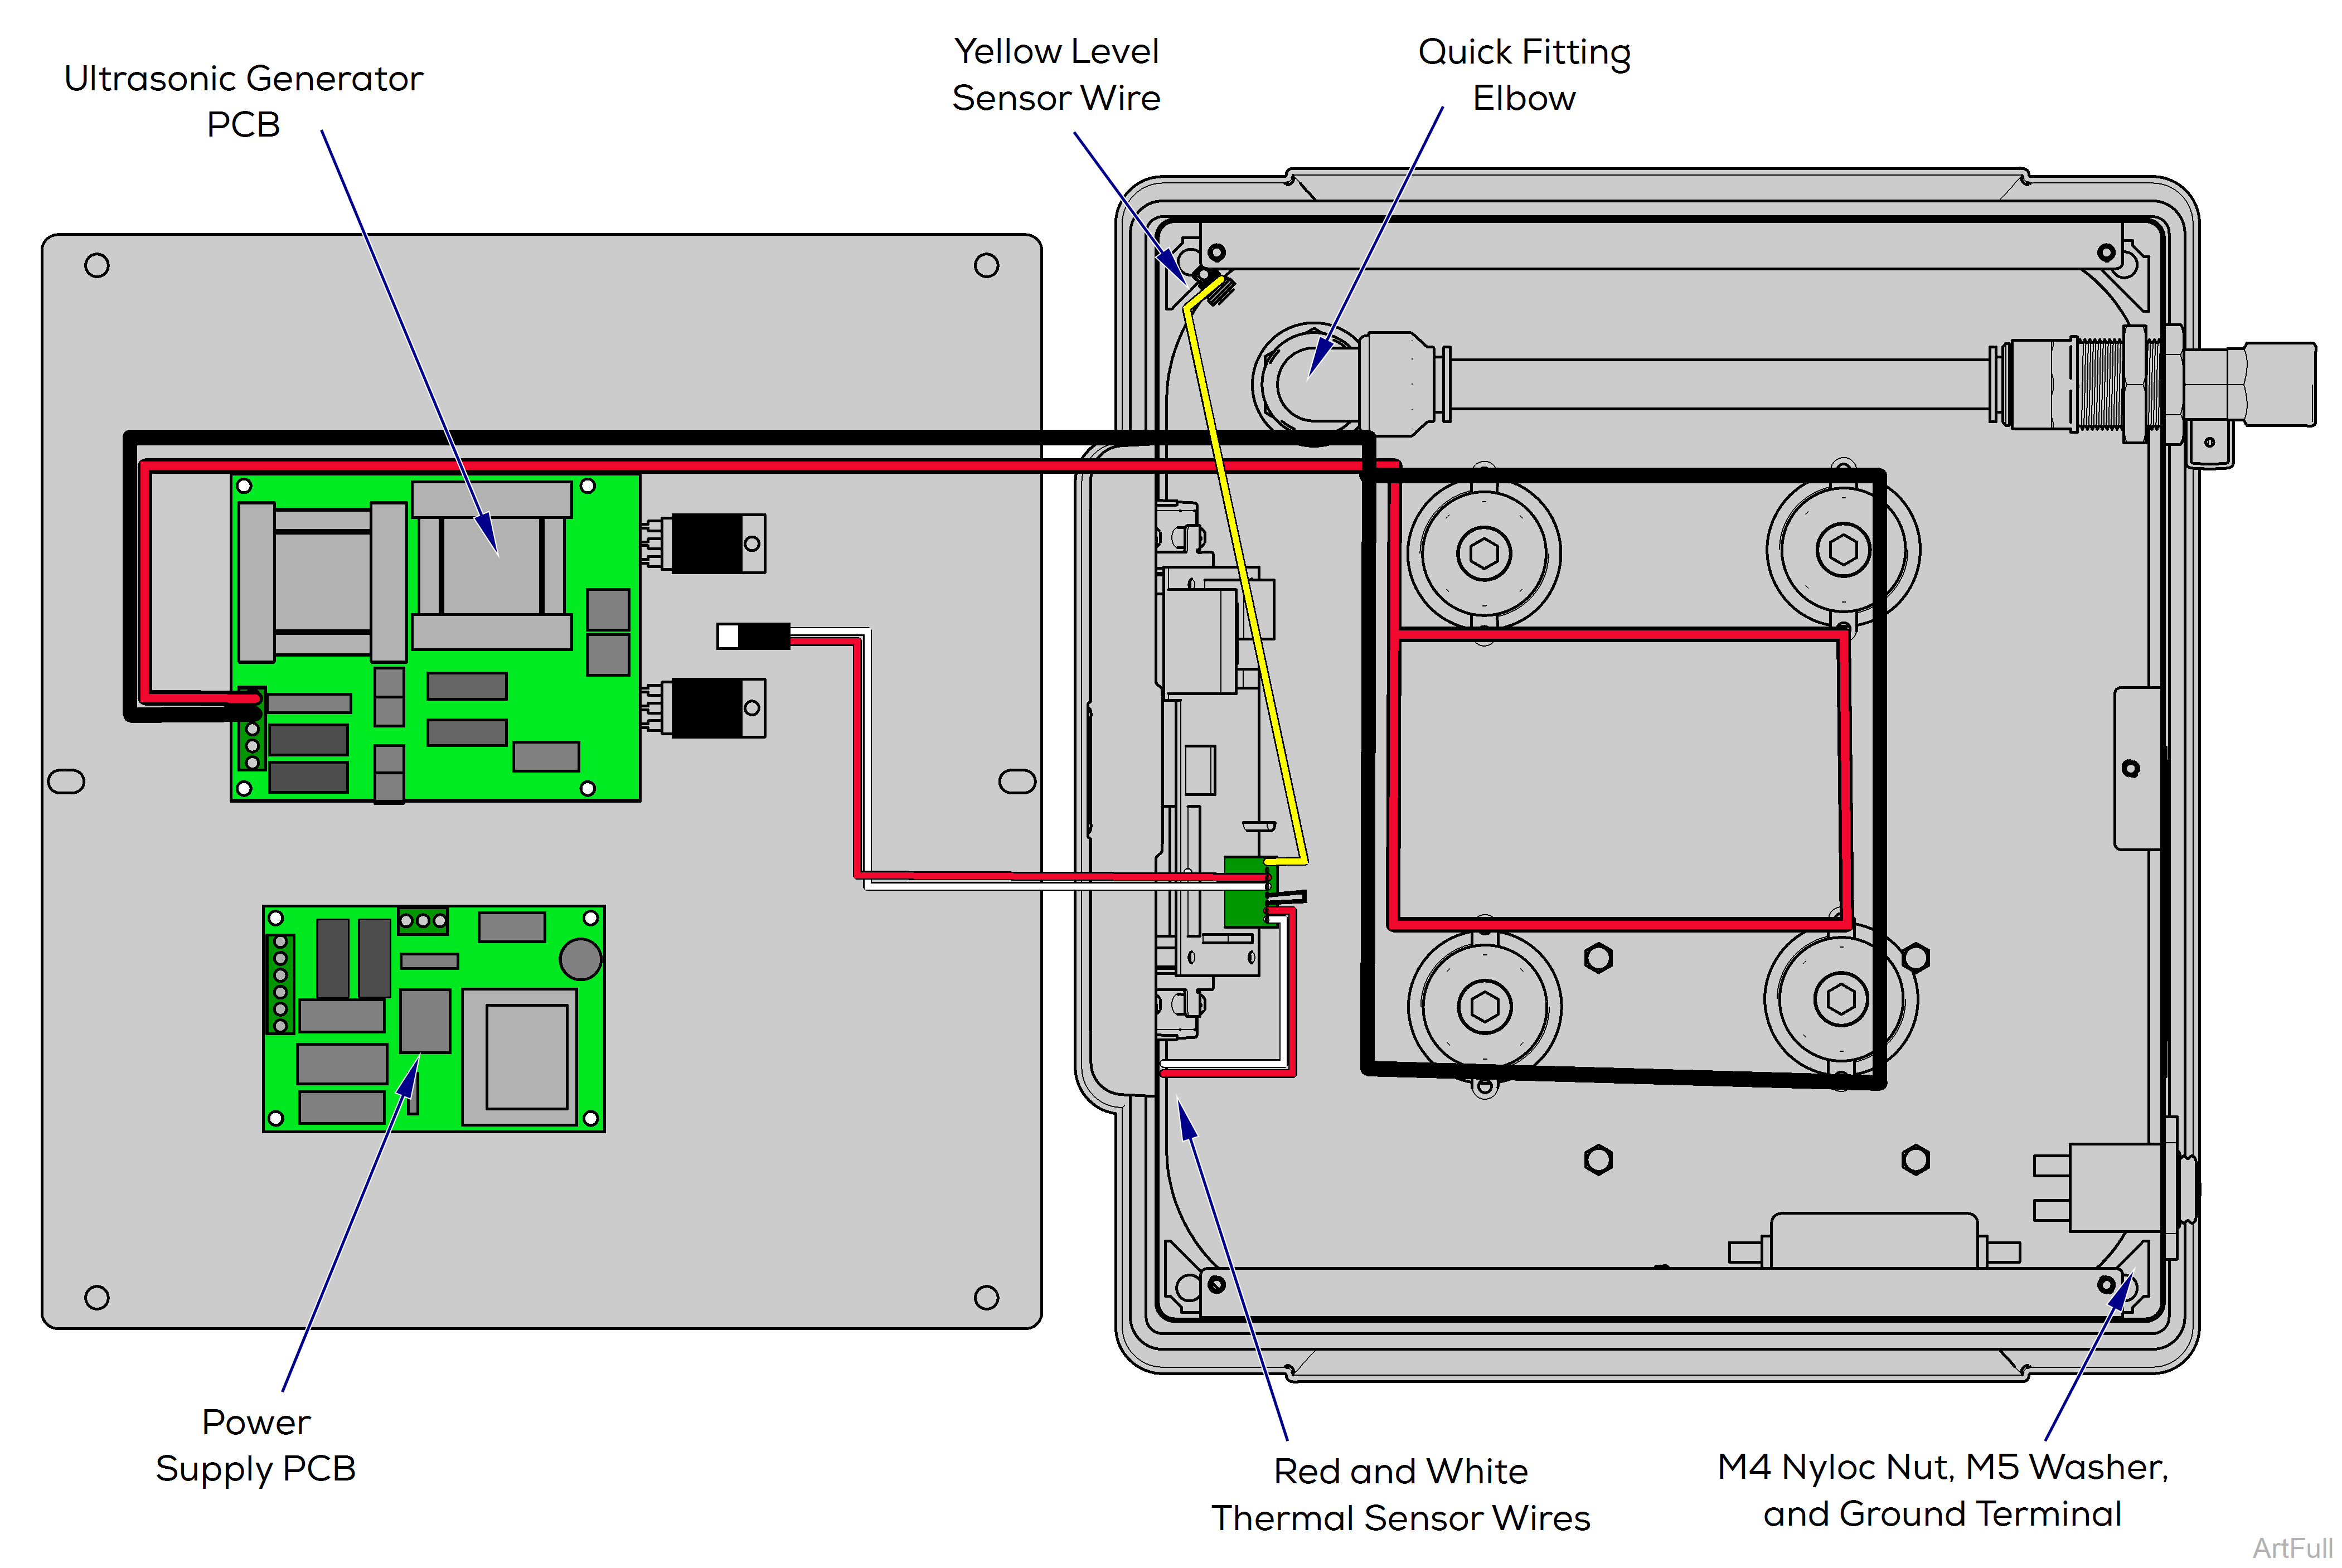
2.Disconnect red and black power wires at the Ultrasonic Generator PCB by loosening the screws on the connector and removing the wires.
3.Disconnect yellow level sensor wire and red and white thermal sensor wires (going to side of tank) from Control PCB using a small screwdriver to push on the tabs while pulling wires from connector.
1.Remove nyloc nuts, washers and terminal holding the ground wire from the tank studs in the corners.
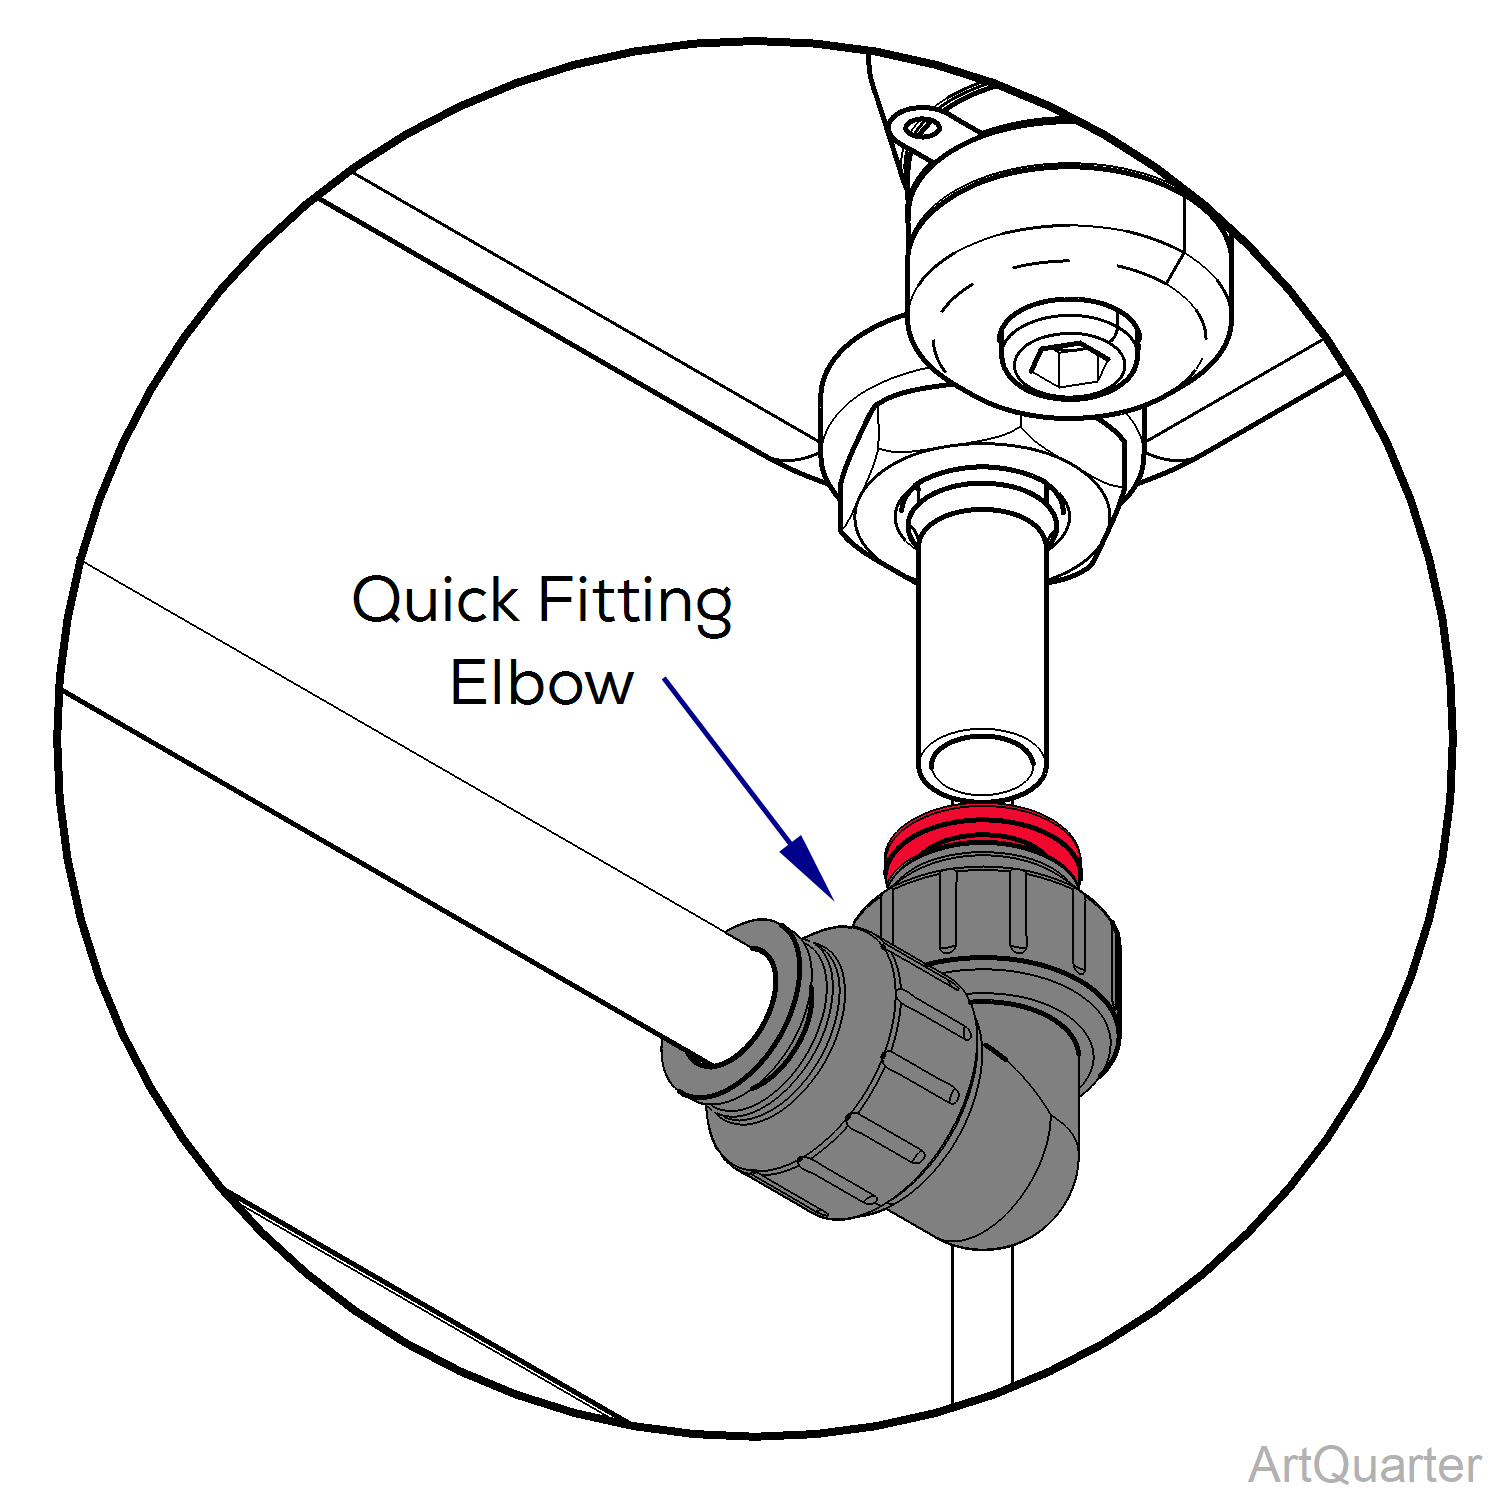
2.Depress and hold the quick fitting elbow retaining ring (shown in red) toward the elbow to release it’s grip on the metal tube coming from the bottom of the tank.
3.Slowly remove the tank from the case. The metal tube extending into the elbow will come out of the elbow fitting as the tank is removed.
4.Reassemble in reverse order.
5.Replace any zip ties that were cut during disassembly.
1.Remove Bottom Plate Assembly. Refer to: Base Plate Access Procedures
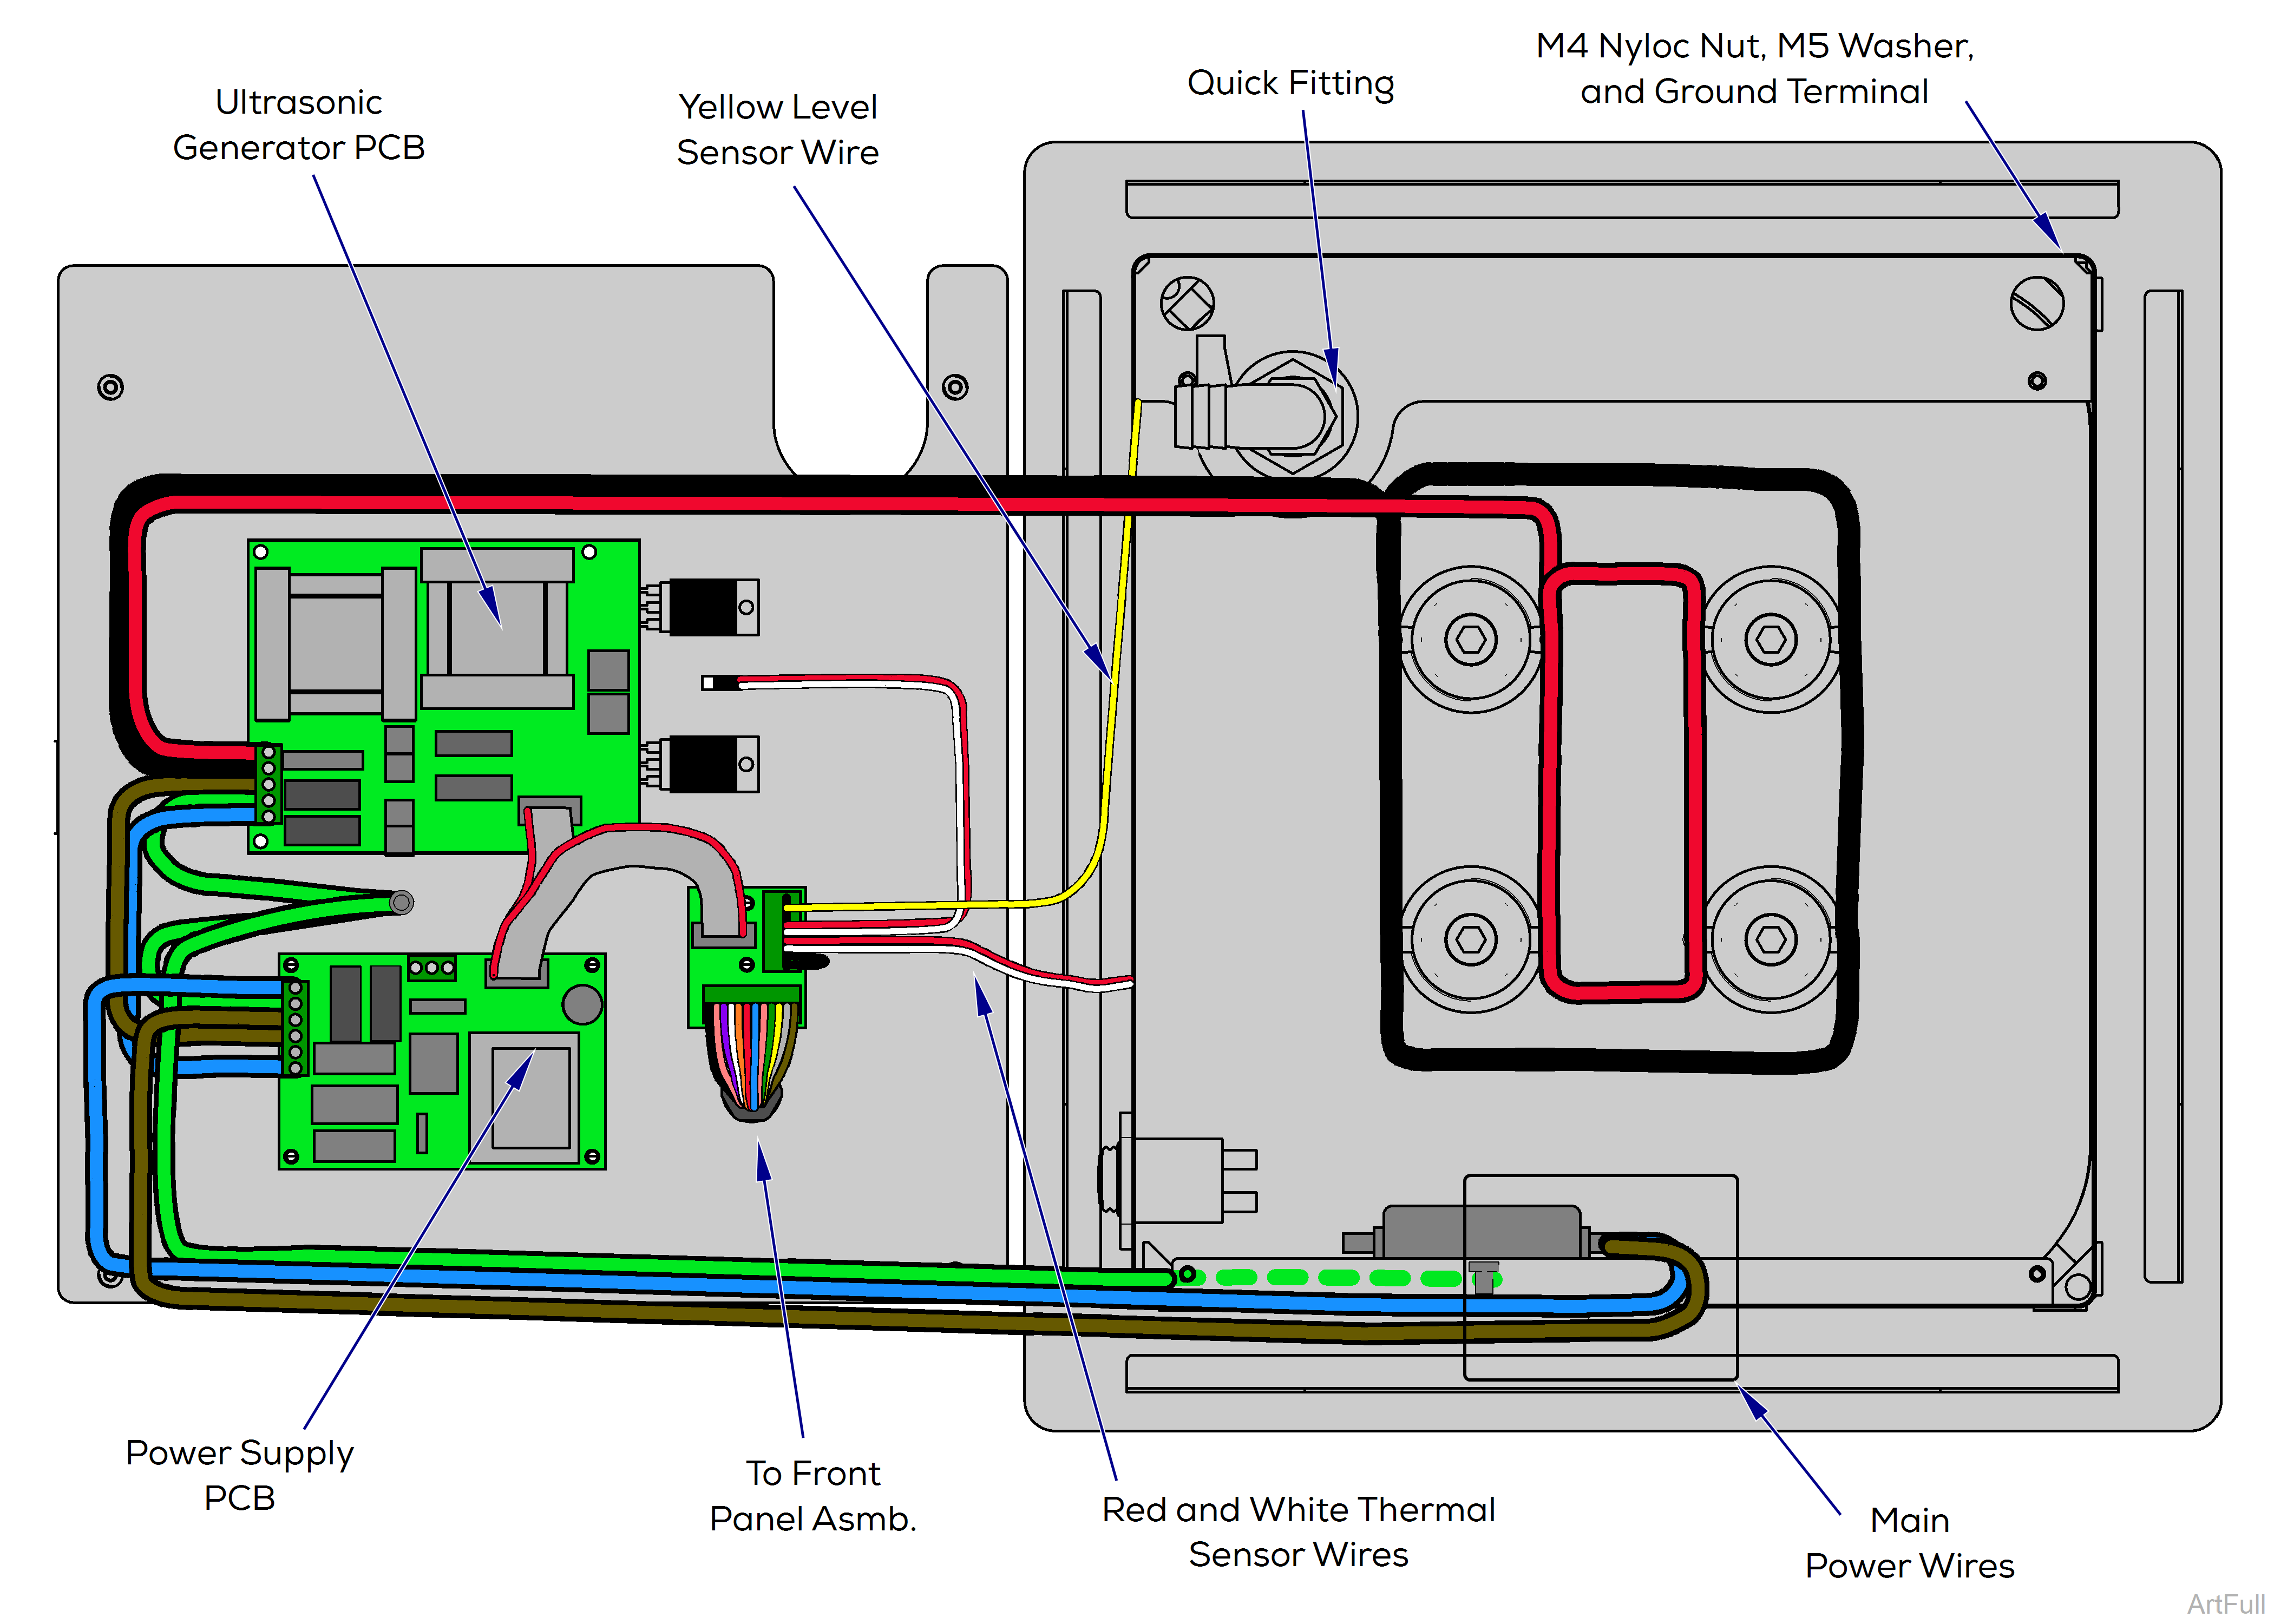
2.Disconnect red and black power wires at the Ultrasonic Generator PCB by loosening the screws on the connector and removing the wires.
3.Disconnect yellow level sensor wire and red and white thermal sensor wires (going to side of tank) from Control PCB using a small screwdriver to push on the tabs while pulling wires from connector.
1.Remove nyloc nut and washer from the tank stud in each corner.
2.Remove the terminal holding the ground wire to the tank stud located in the same corner as the power switch.
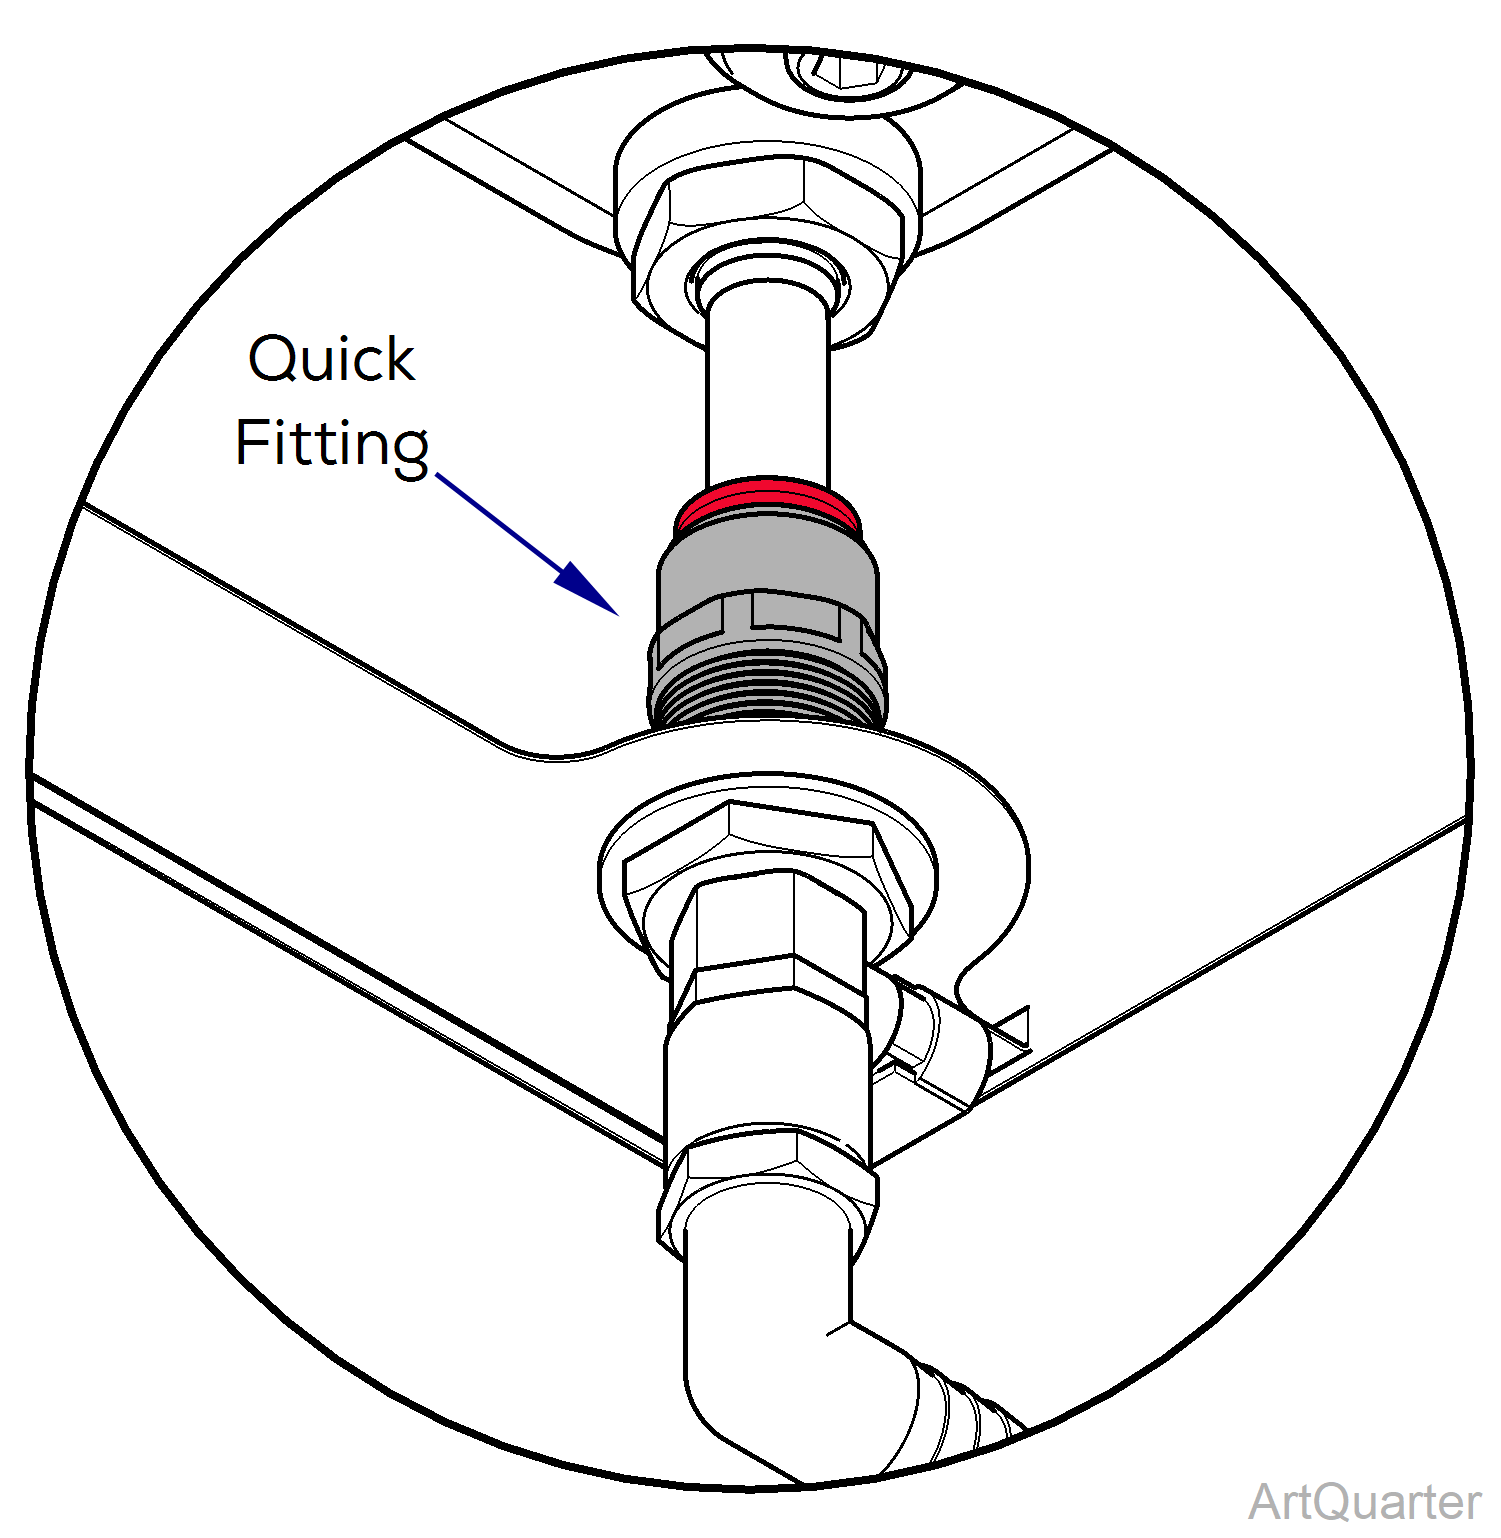
3.Depress and hold the quick fitting retaining ring (shown in red) toward the fitting to release it’s grip on the metal tube coming from the bottom of the tank.
4.Slowly remove the tank from the case. The metal tube extending into the elbow will come out of the elbow fitting as the tank is removed.
5.Reassemble in reverse order.
6.Replace any zip ties that were cut during disassembly.
