Ultra Chair Printed Circuit (PC) Board Test and Repair
Printed Circuit Board.
1.Rotate seat toward patient’s left side.
Unplug chair power cord before removing covers or working on chair. Failure to comply could result in personal injury.
2.Unplug chair power cord.
3.Remove hydraulic cover, see Covers.
Before working on or handling printed circuit boards take precautions to prevent any static discharge that would damage board components.
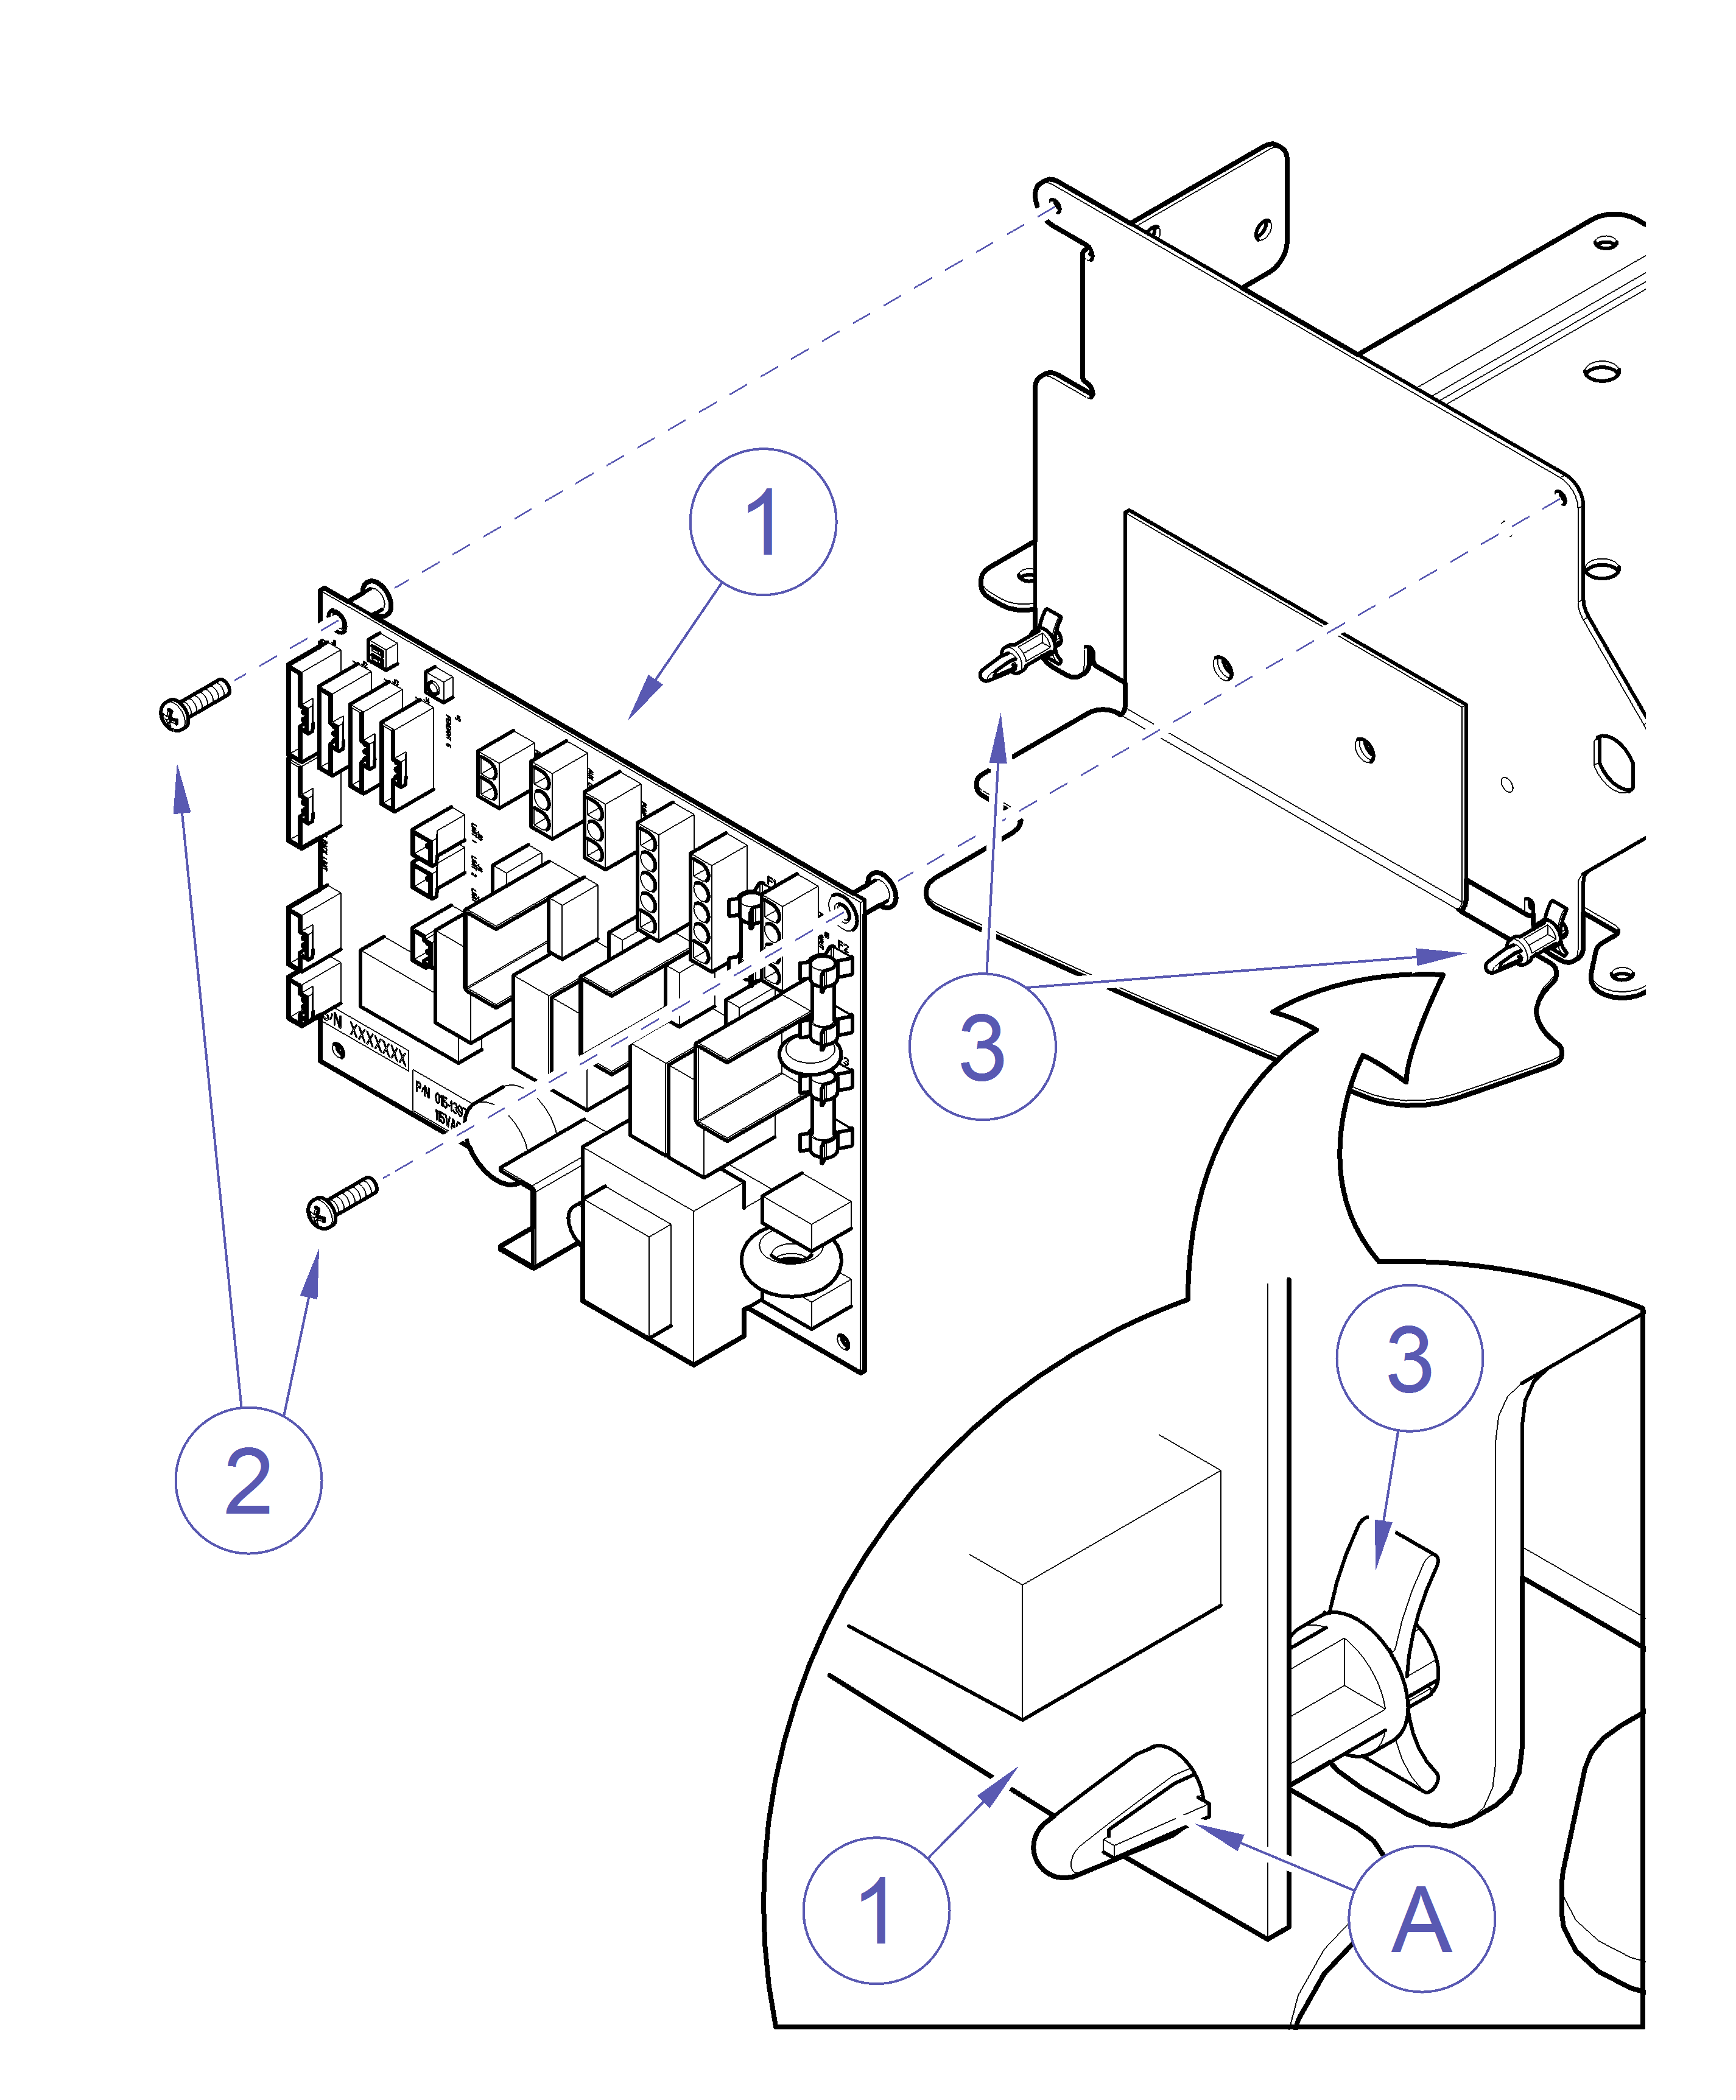
4.Tag then disconnect plug connectors from PC board, Item 1.
5.Remove two mounting screws, Item 2, at top of PC board.
6.While depressing ear (A) on lower mount(s), Item 3, pull outward on PC board to release it from mount(s), Item 3, and remove PC board, Item 1.
When sending PC Board back to factory, place in static bag that new PC board was shipped in.
1.Install PC board, Item 1, on lower mounts, Item 3, pushing inward until it snaps in place.
2.Install top mounting screws , Item 3.
3.Install plug connectors on PC board. Refer to: Wiring Diagrams
Use caution to prevent electrical shock with chair plugged into outlet. Electrical components and connections are exposed.
4.Place both switches on SW1 to On position, Plug in chair power cord, and run a Calibration Mode. Refer to: SW1 Switch Settings
5.After Calibration is completed unplug chair power cord. Place SW1 switches to previous settings. Plug in chair power cord, and run various functions to check operation.
6.Unplug chair and install cover, then plug chair back into outlet.
