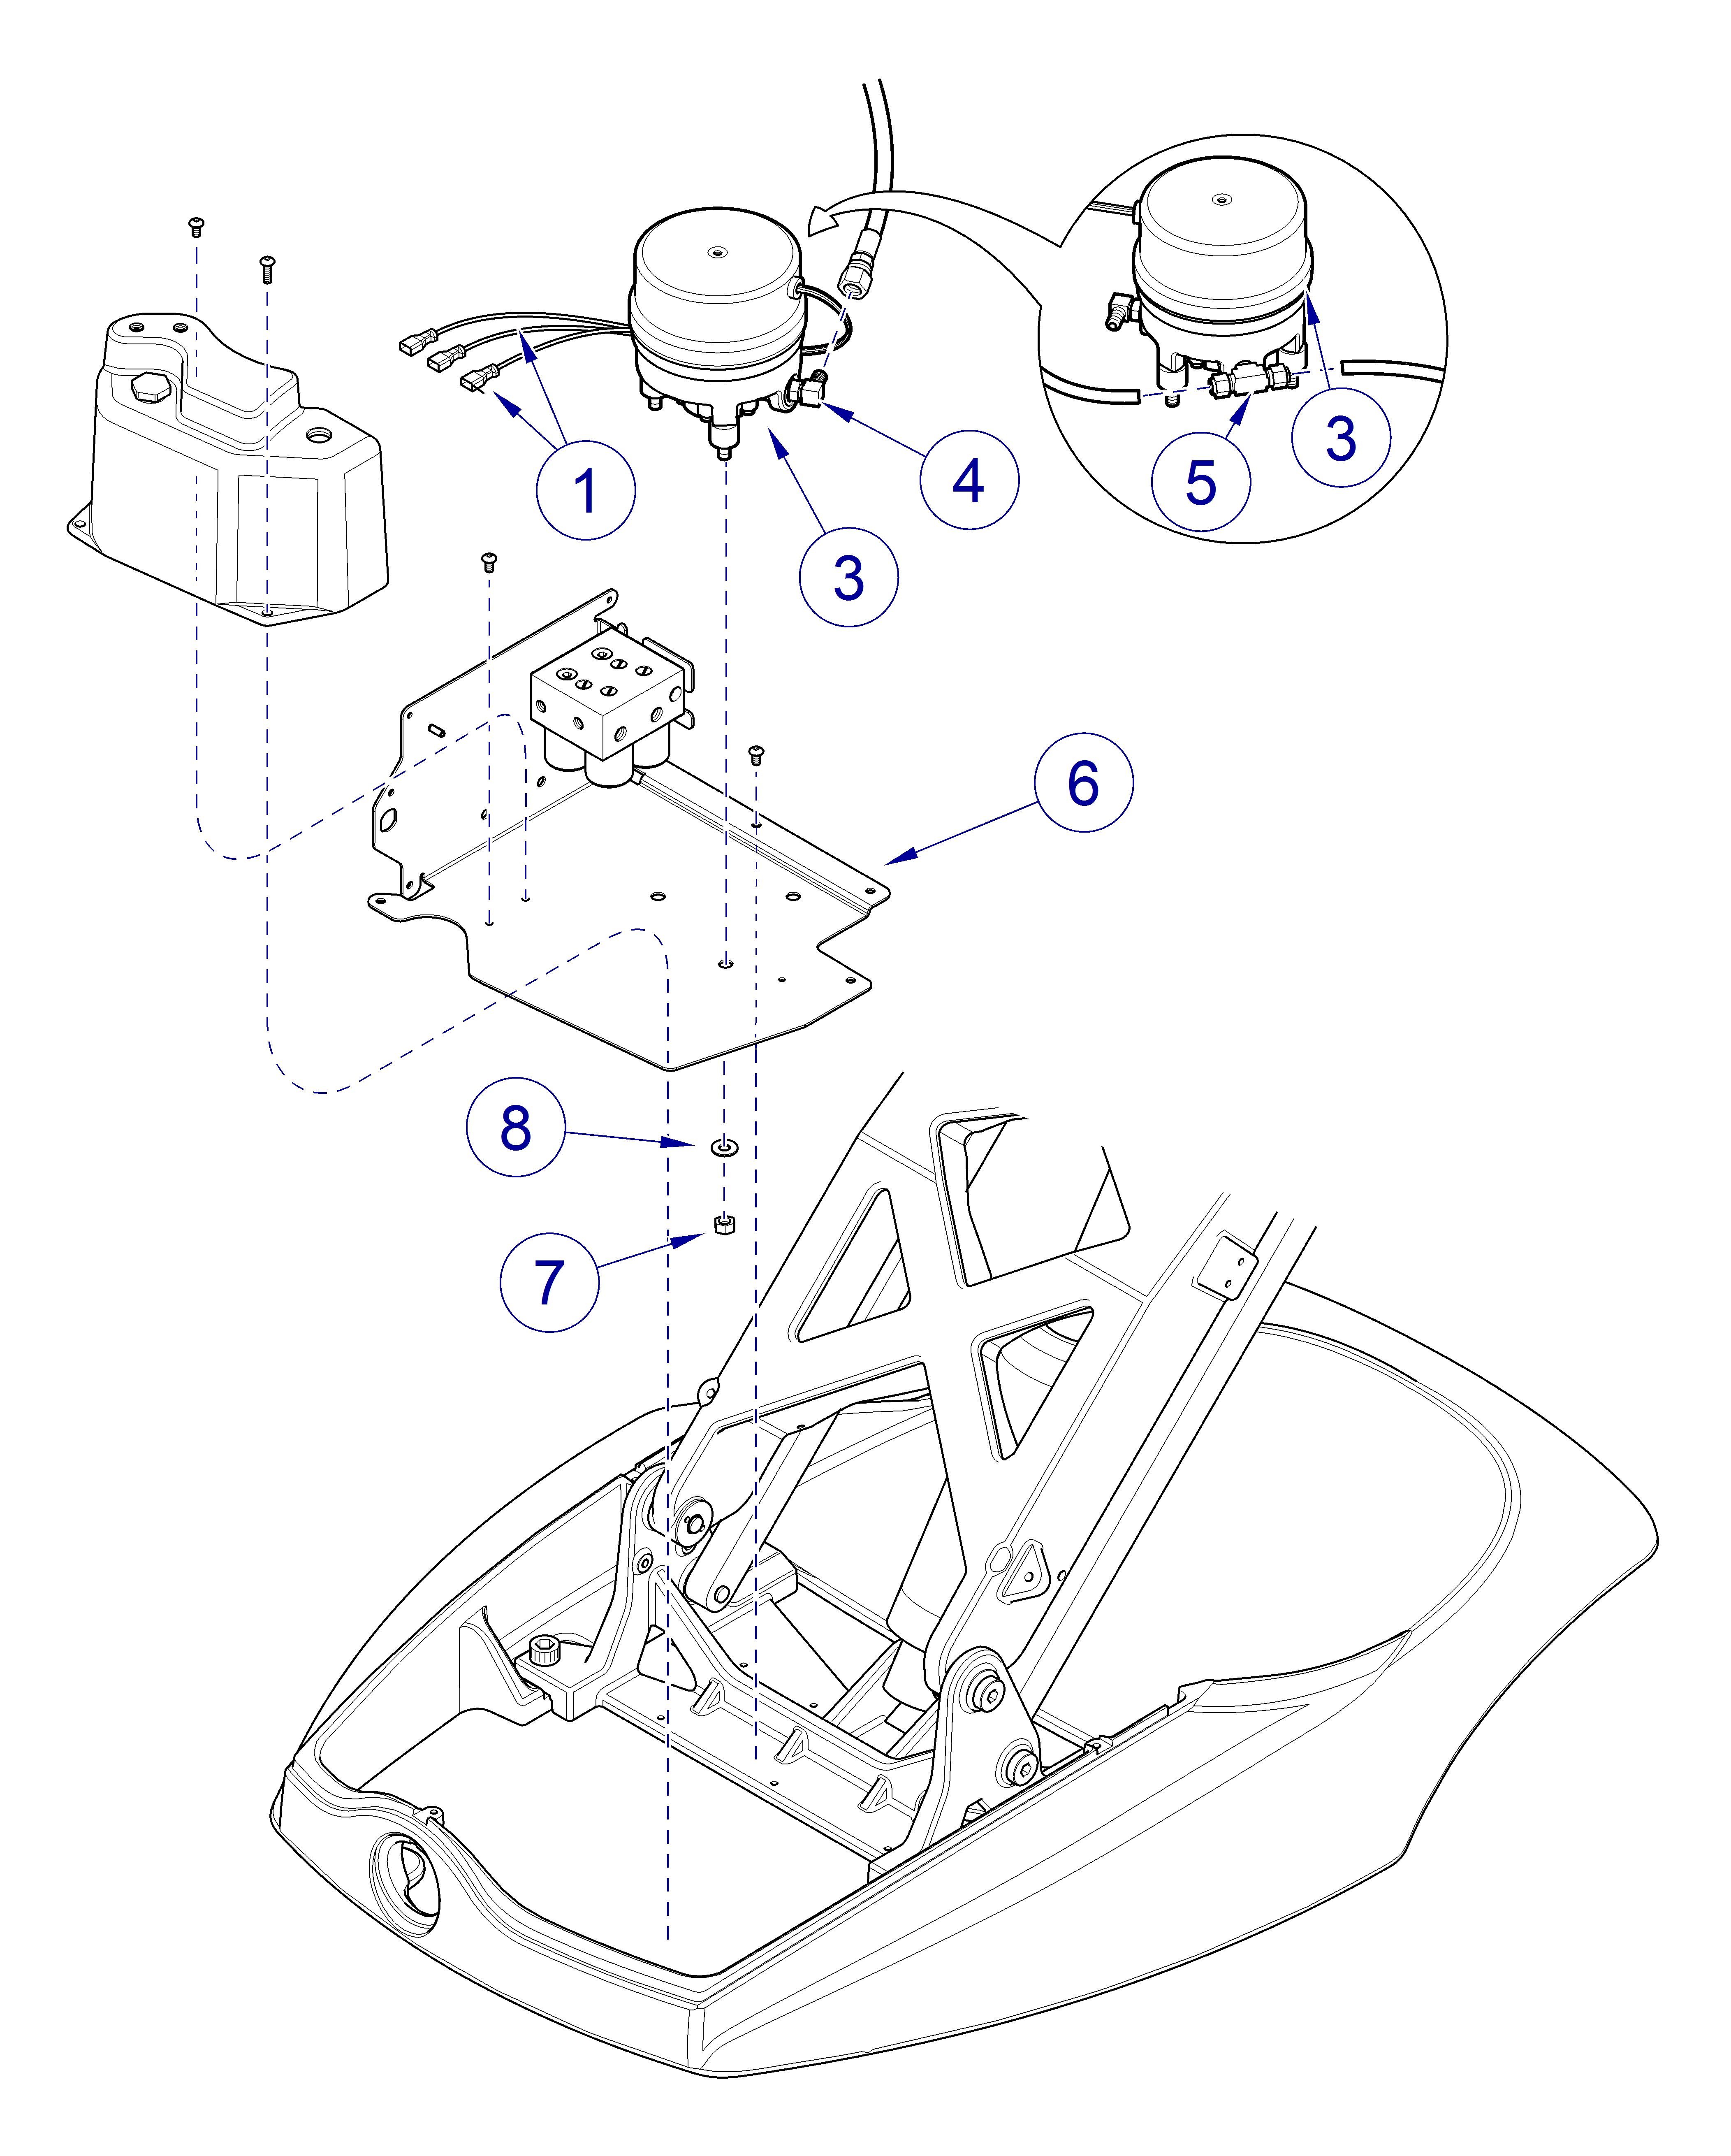
Ultra Chair Hydraulic Motor Pump Test and Repair

Hydraulic Motor Pump
1.Rotate seat to one side.
Unplug chair power cord before removing covers or working on chair. Failure to comply could result in personal injury.
2.Unplug chair power cord.
3.Remove hydraulic cover, Refer to: Covers.
4.Tag, then disconnect motor pump electrical leads, Item 1.
Place towel or equivalent beneath hydraulic lines and fittings to absorb any residual hydraulic fluid.
5.Place towels beneath outlet, Item 4, and inlet, Item 5, fittings, then disconnect hydraulic lines.
6.Remove seven mounting screws (three located on reservoir base) from hydraulic chassis, Item 6.
When removing motor pump mounting nuts, Item 7, use a pliers to prevent rubber mounting grommets on motor pump, Item 3, from turning.
7.Carefully lift hydraulic chassis, Item 6, near motor pump, Item 3, to gain access to three mounting nuts, Item 7,. Remove mounting nuts, Item 7, and washers, Item 8, using a 13 mm wrench.
8.Remove motor pump, Item 3.
Do not over-tighten mounting nuts. Snug up nuts and turn 1/2 turn.
1.Place motor pump, Item 3, in position on hydraulic chassis, Item 6, and secure with three washers, Item 8, and mounting nuts, Item 7.
2.Secure hydraulic chassis, Item 6, to base casting with seven mounting screws. Longer mounting screws are installed on reservoir base.
3.Connect appropriate hydraulic lines to pump outlet fitting, Item 4, and inlet fitting, Item 5. Refer to: Wiring Diagrams
4.Connect electrical leads, Item 1. Refer to: Wiring Diagrams
Using wrong length screw when connecting ground lead to motor pump could result in damage to motor pump. Use only a M5 x 6 screw.
5.Connect ground lead, Item 2, to motor pump, Item 3, using a M5 x 6 screw.
6.Check hydraulic fluid level. Refer to: Hydraulic Fluid Level.
Use caution to prevent electrical shock with chair plugged into outlet. Electrical components and connections are exposed.
7.Plug chair into outlet and run Operational Test. Check for hydraulic leakage.
8.Unplug chair and install hydraulic cover.

