Procenter Cuspidor Cup Fill / Bowl Flush Timing Valve Removal / Installation Test and Repair

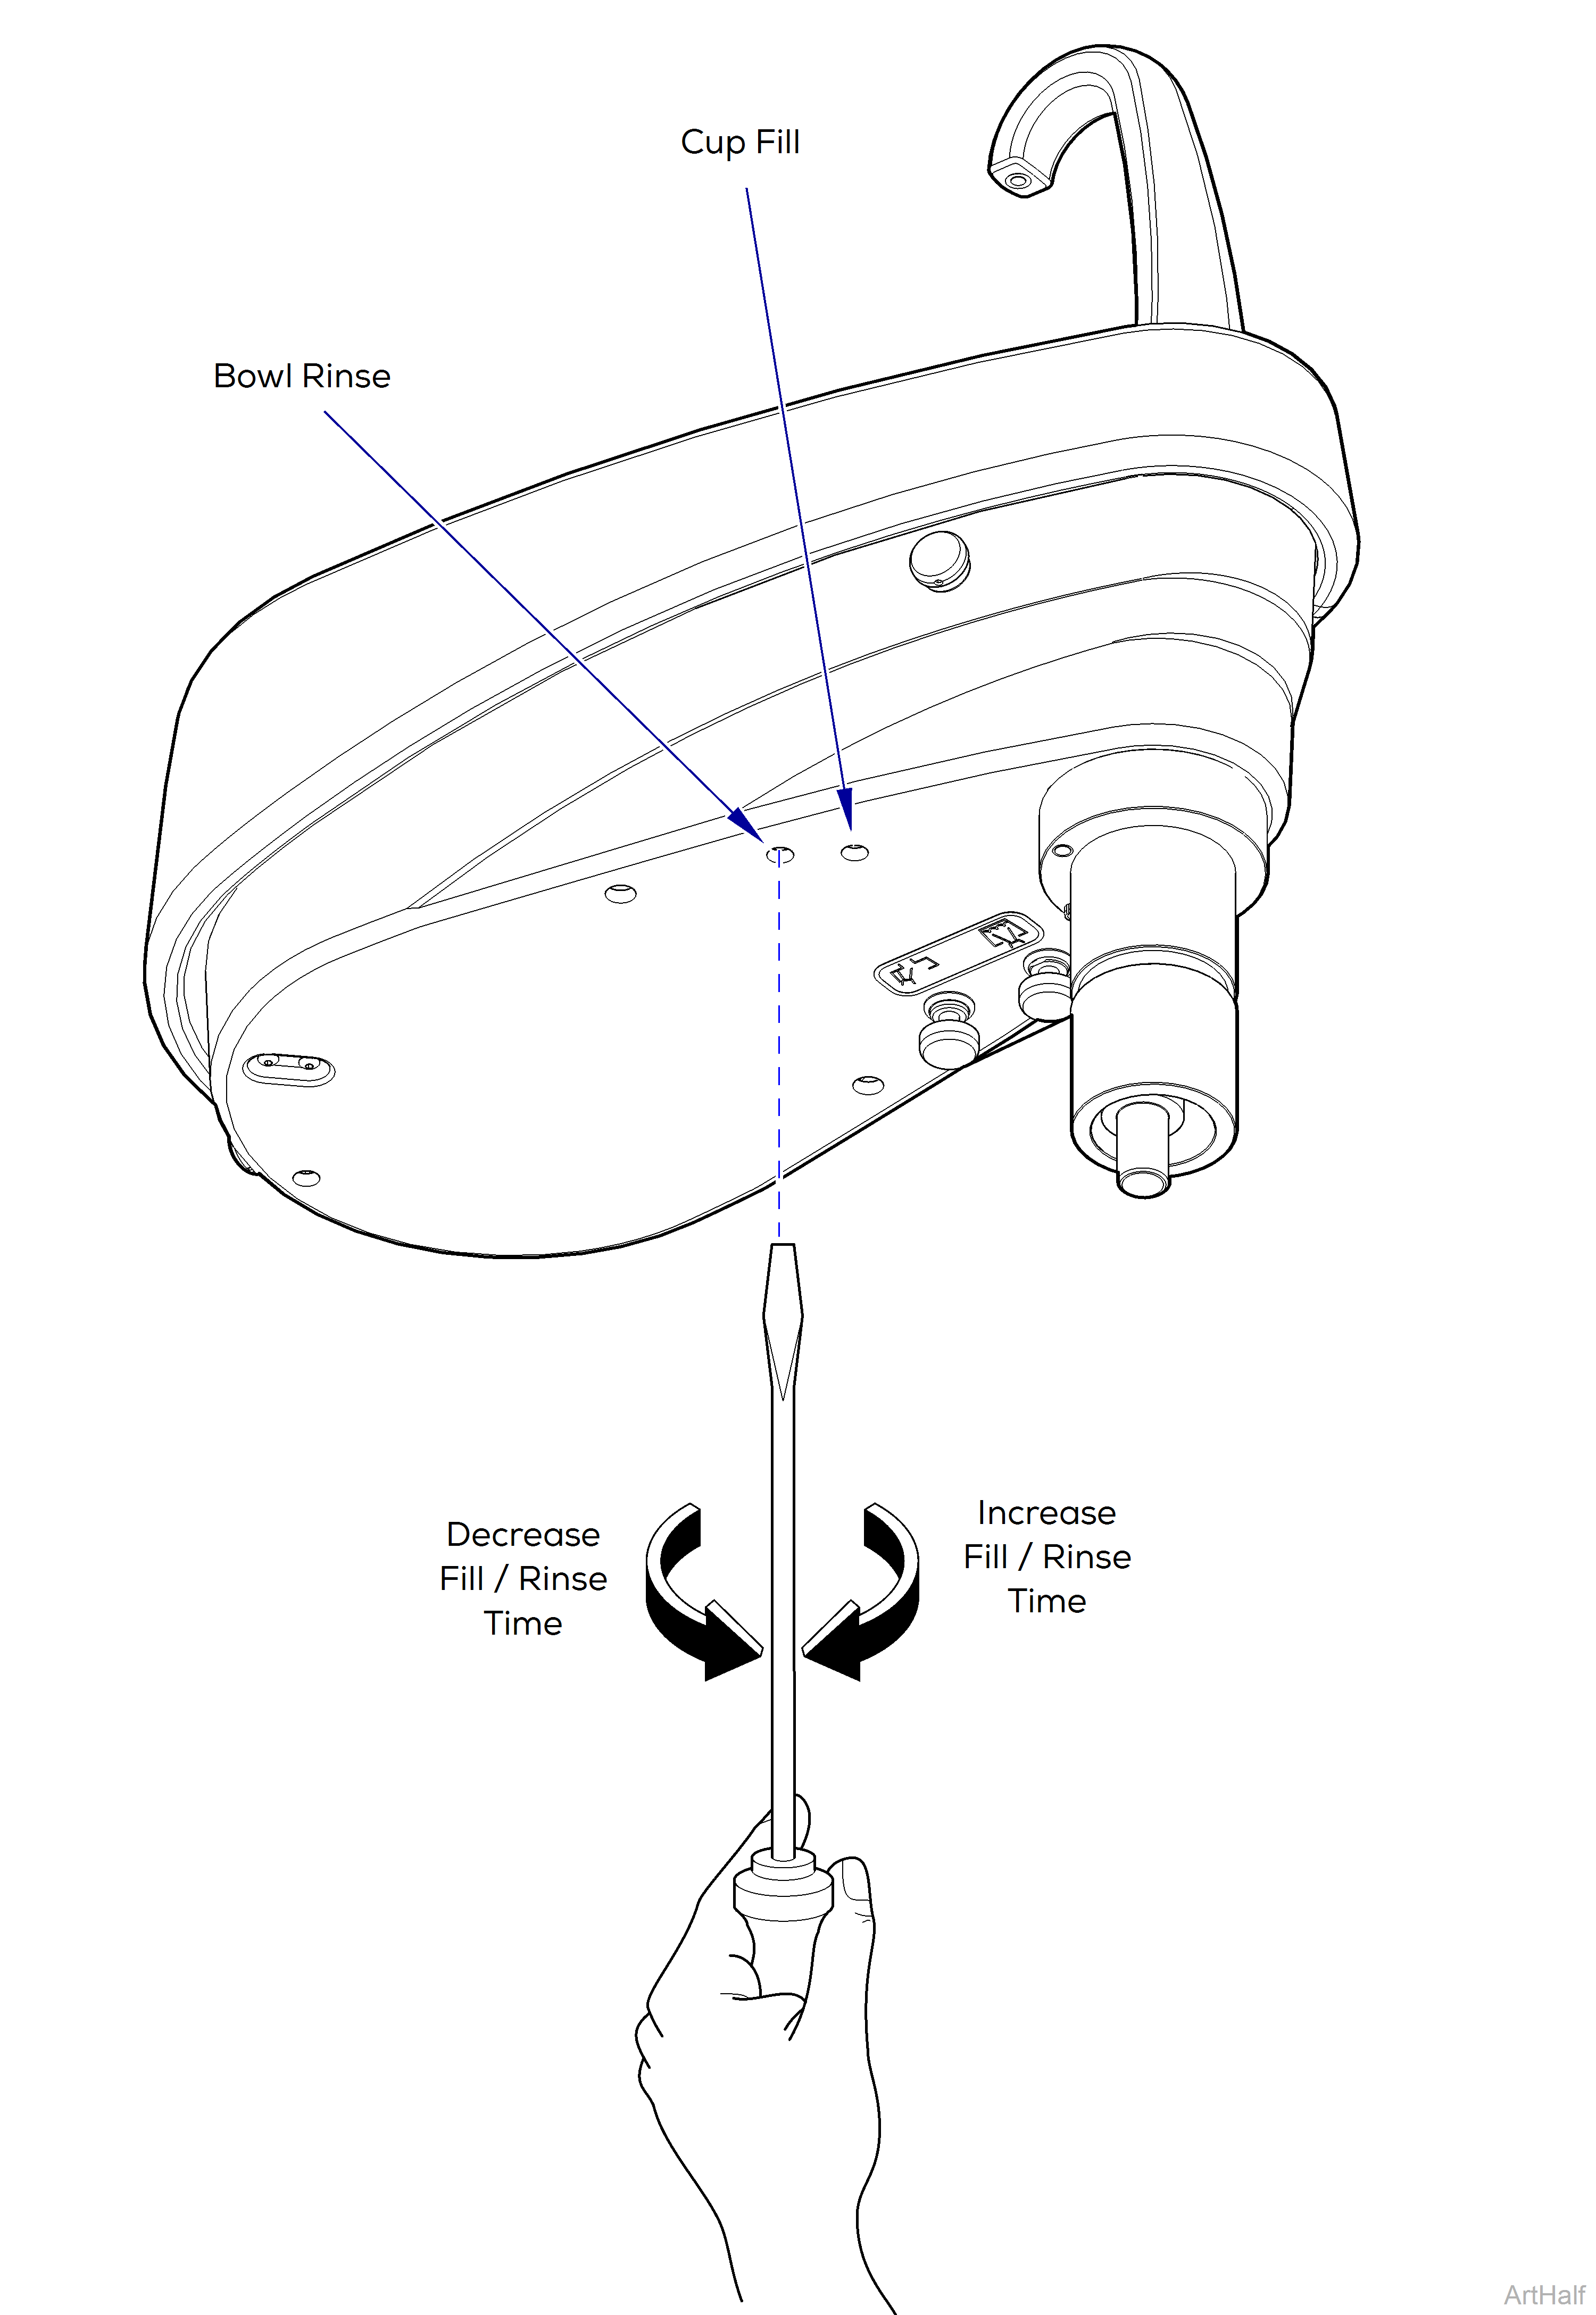
Procenter Cuspidor Cup Fill / Bowl Flush Timing Valve Adjustment
Timing Valve Adjustment
1.To increase the length of time the bowl flush/cup fill water runs, insert a screwdriver through proper hole in bottom housing; then turn valve adjuster counterclockwise.
2.To decrease the length of time the bowl flush/cup fill water runs, insert a screwdriver through proper hole in bottom housing; then turn valve adjuster clockwise.

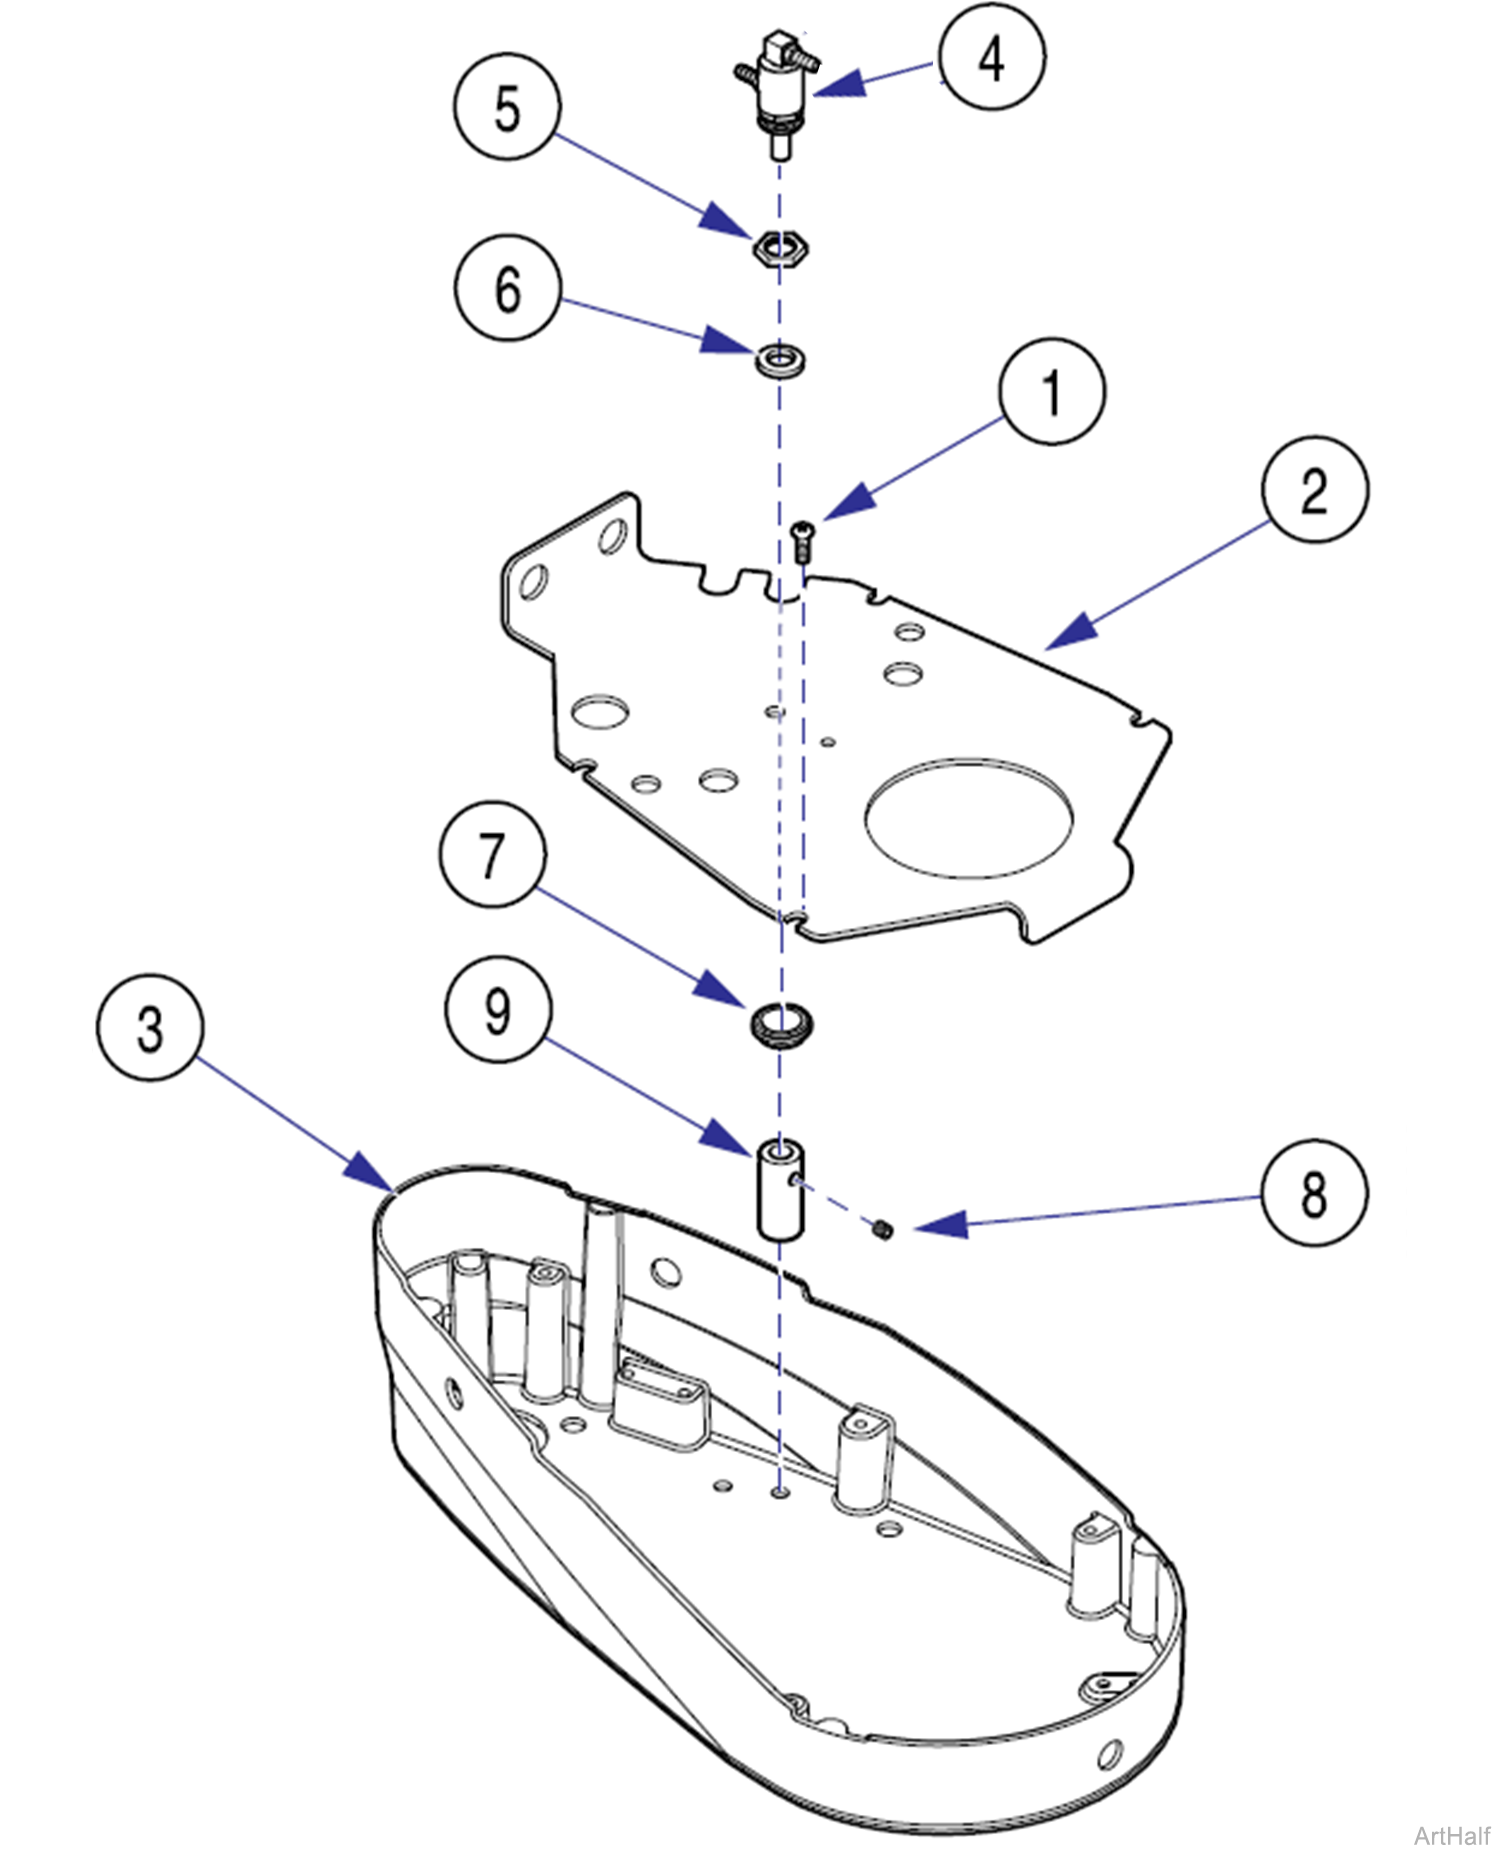
Cup Fill / Bowl Flush Timing Valve - Earlier Units
2.Remove four screws (1); then partially separate mounting plate (2) from bottom housing (3).
3.Tag and disconnect tubing connected to timing adjustment valve (4).
4.Unscrew timing adjustment valve (4); then remove valve, nut (5), washer (6), and trim ring (7) from mounting plate (2).
5.Remove set screw (8) and valve adjuster (9) from timing adjustment valve (4).
1.Install valve adjuster (9) onto timing adjustment valve (4) and secure with set screw (8).
2.Secure timing adjustment valve (4) to mounting plate (2) with nut (5), washer (6), and trim ring (7).
3.Connect tubing to proper fitting of timing adjustment valve (4).
4.Position mounting plate (2) and secure to bottom housing (3) with four screws (1).

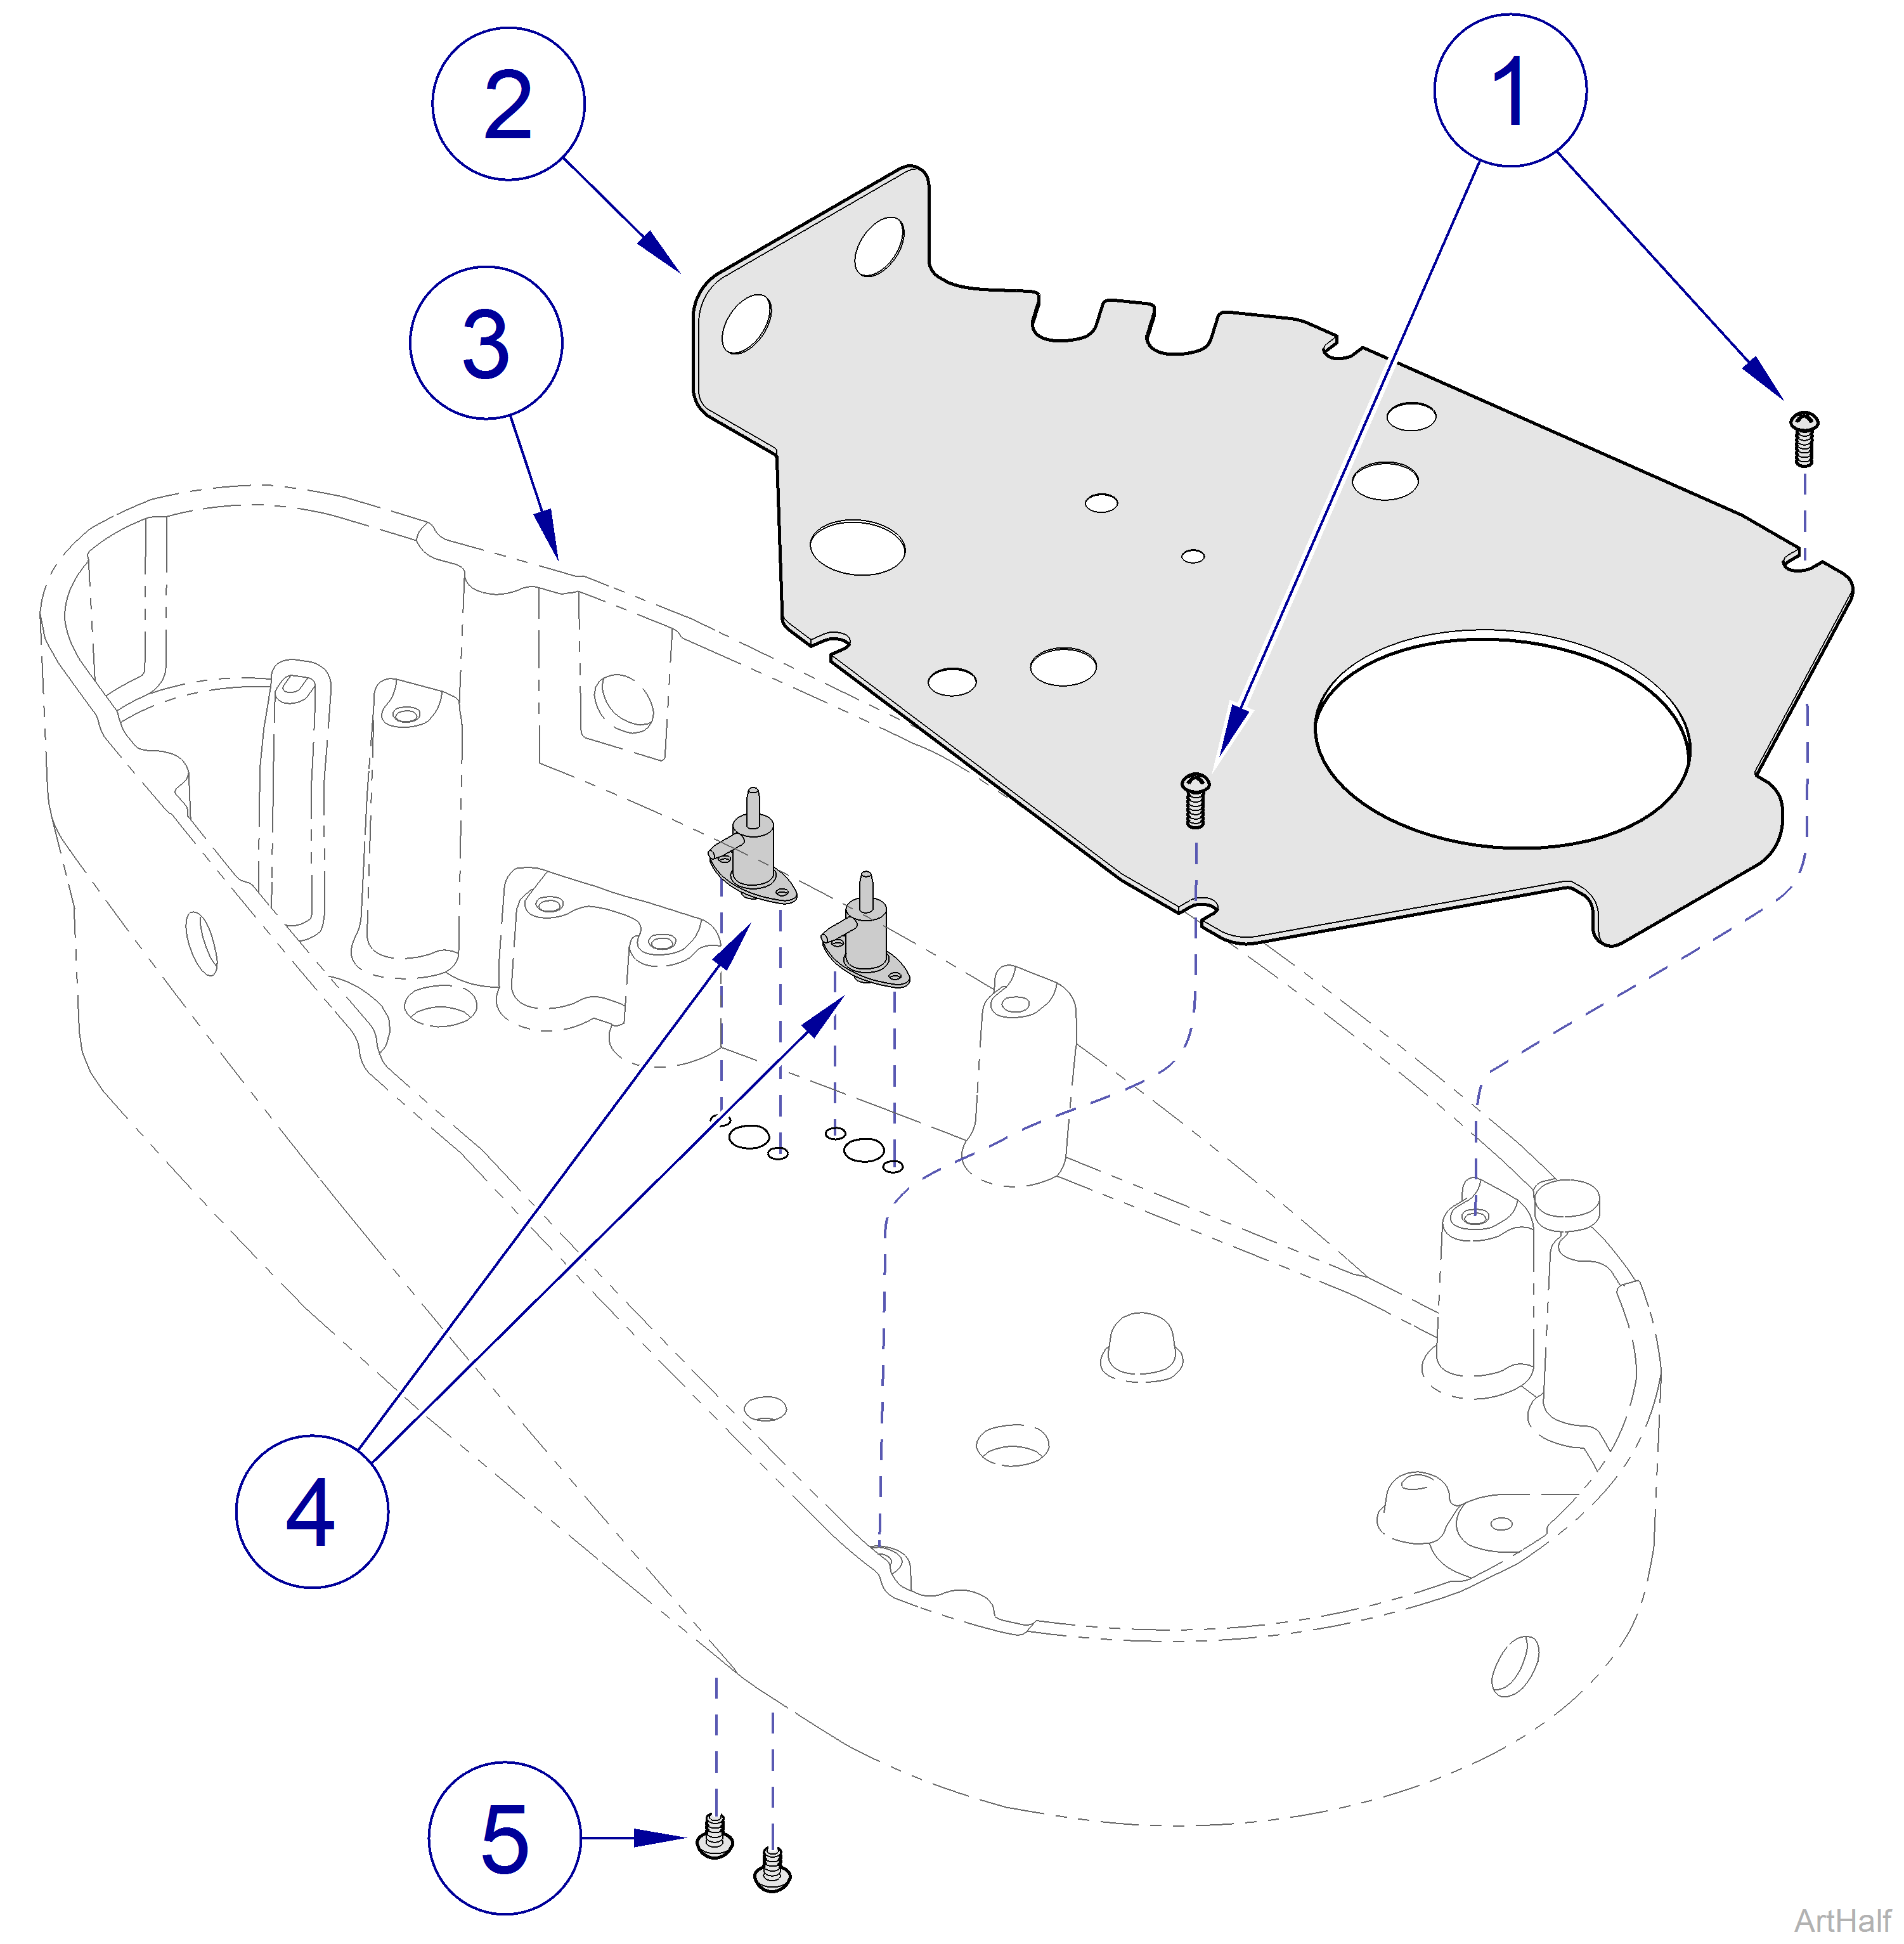
Cup Fill / Bowl Flush Timing Valve - Present Units
2.Remove four screws (1); then partially separate mounting plate (2) from bottom housing (3).
3.Tag and disconnect tubing connected to timing adjustment valve(s) (4).
4.Remove mounting screws (5) and timing adjusting valve(s) (4).
1.Place timing adjusting valve(s) (4) in position and secure with mounting screws (5).
2.Connect tubing to proper fitting(s) of timing adjustment valve (4).
3.Position mounting plate (2) and secure to bottom housing (3) with four screws (1).

