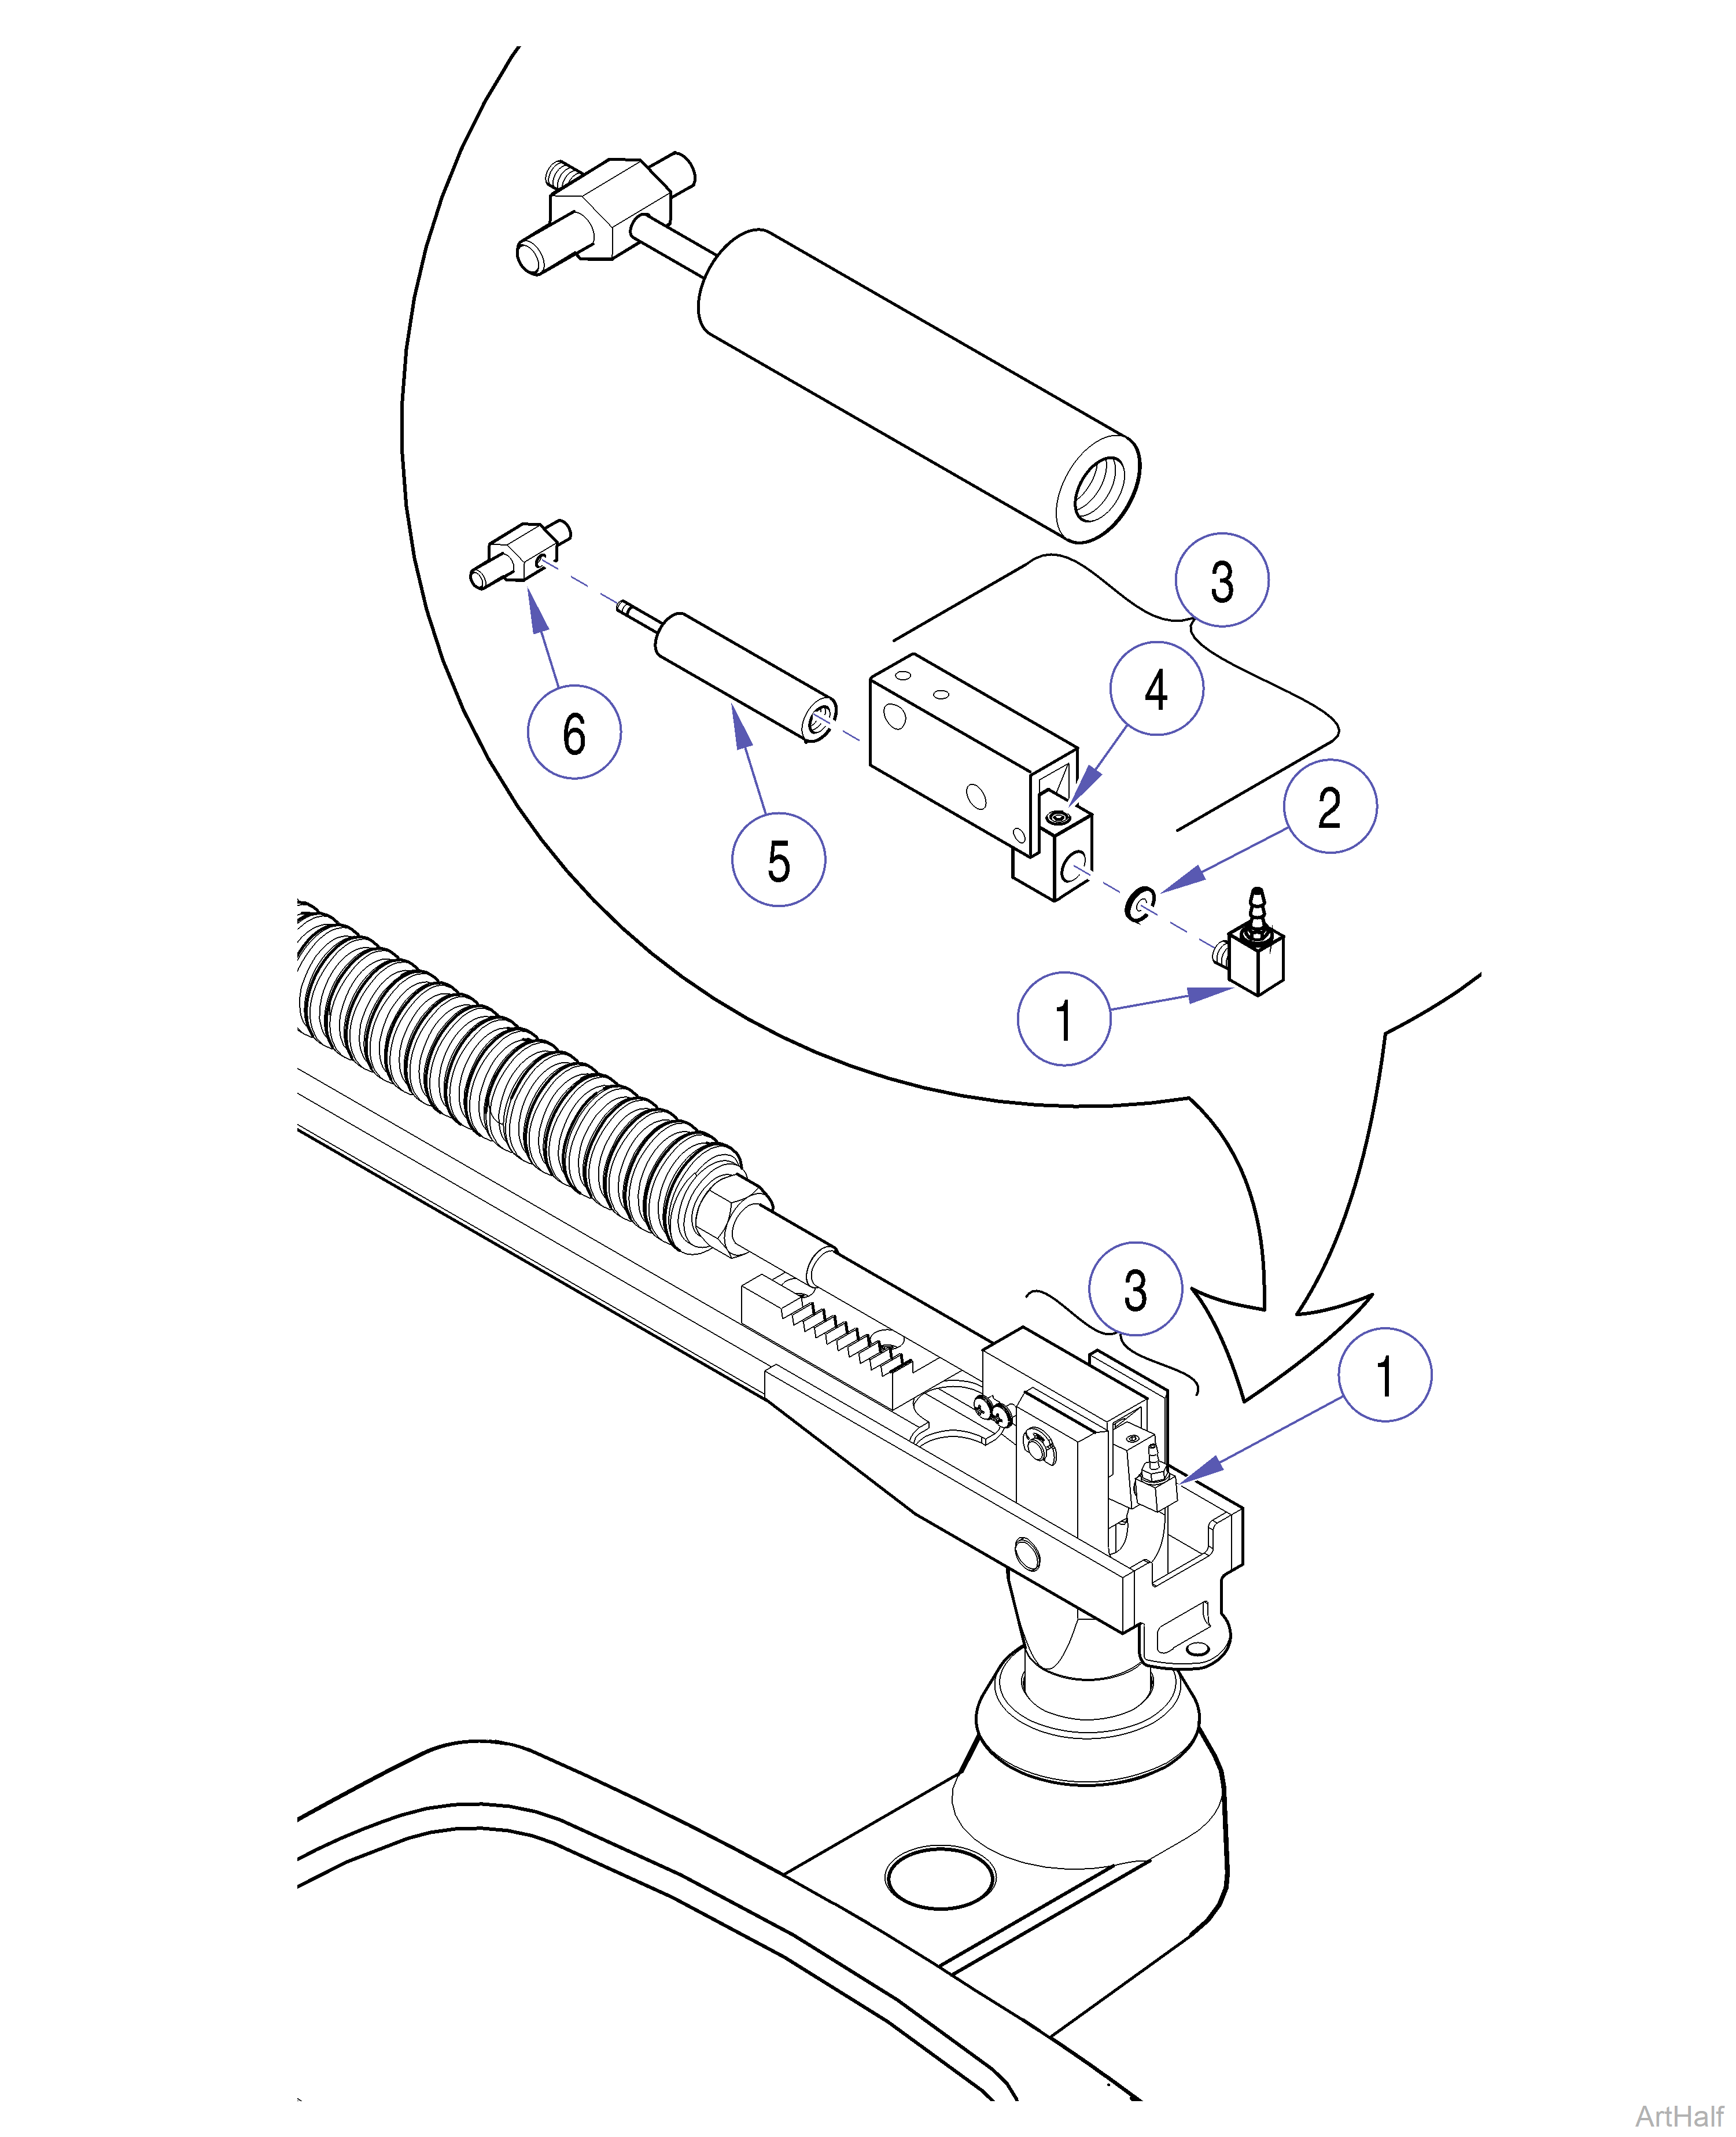
Procenter Assistant's Unit Flex Arm Lock Cylinder Removal / Installation Test and Repair

Procenter Assistant's Unit Flex Arm Lock Cylinder
1.Remove flex arm cover and lock paw.
The 1/8 in. brown tubing has a short section of wire inserted to prevent kinking. Retain wire for installation.
2.Disconnect 1/8 in. brown tubing from fitting (1).
3.Remove fitting (1) and gasket (2) from cylinder block assembly (3).
4.Loosen set screw (4); then remove lock cylinder (5) from cylinder block assembly (3).
5.Remove cylinder pin (6) from lock cylinder (5).
Thread cylinder pin onto lock cylinder so that only 1-2 threads are exposed at the end of the plunger.
1.Install cylinder pin (6) onto lock cylinder (5).
2.Insert lock cylinder (5) into cylinder block assembly (3) until end of cylinder is flush with block; then tighten set screw (4).
3.Install fitting (1) and gasket (2) into lock cylinder (4).
Be sure the short section of wire is installed in 1/8 in. brown tubing before connecting to fitting (1). Failure to do so could allow tubing to kink, preventing proper operation.
4.Connect 1/8 in. brown tubing to fitting (1).

