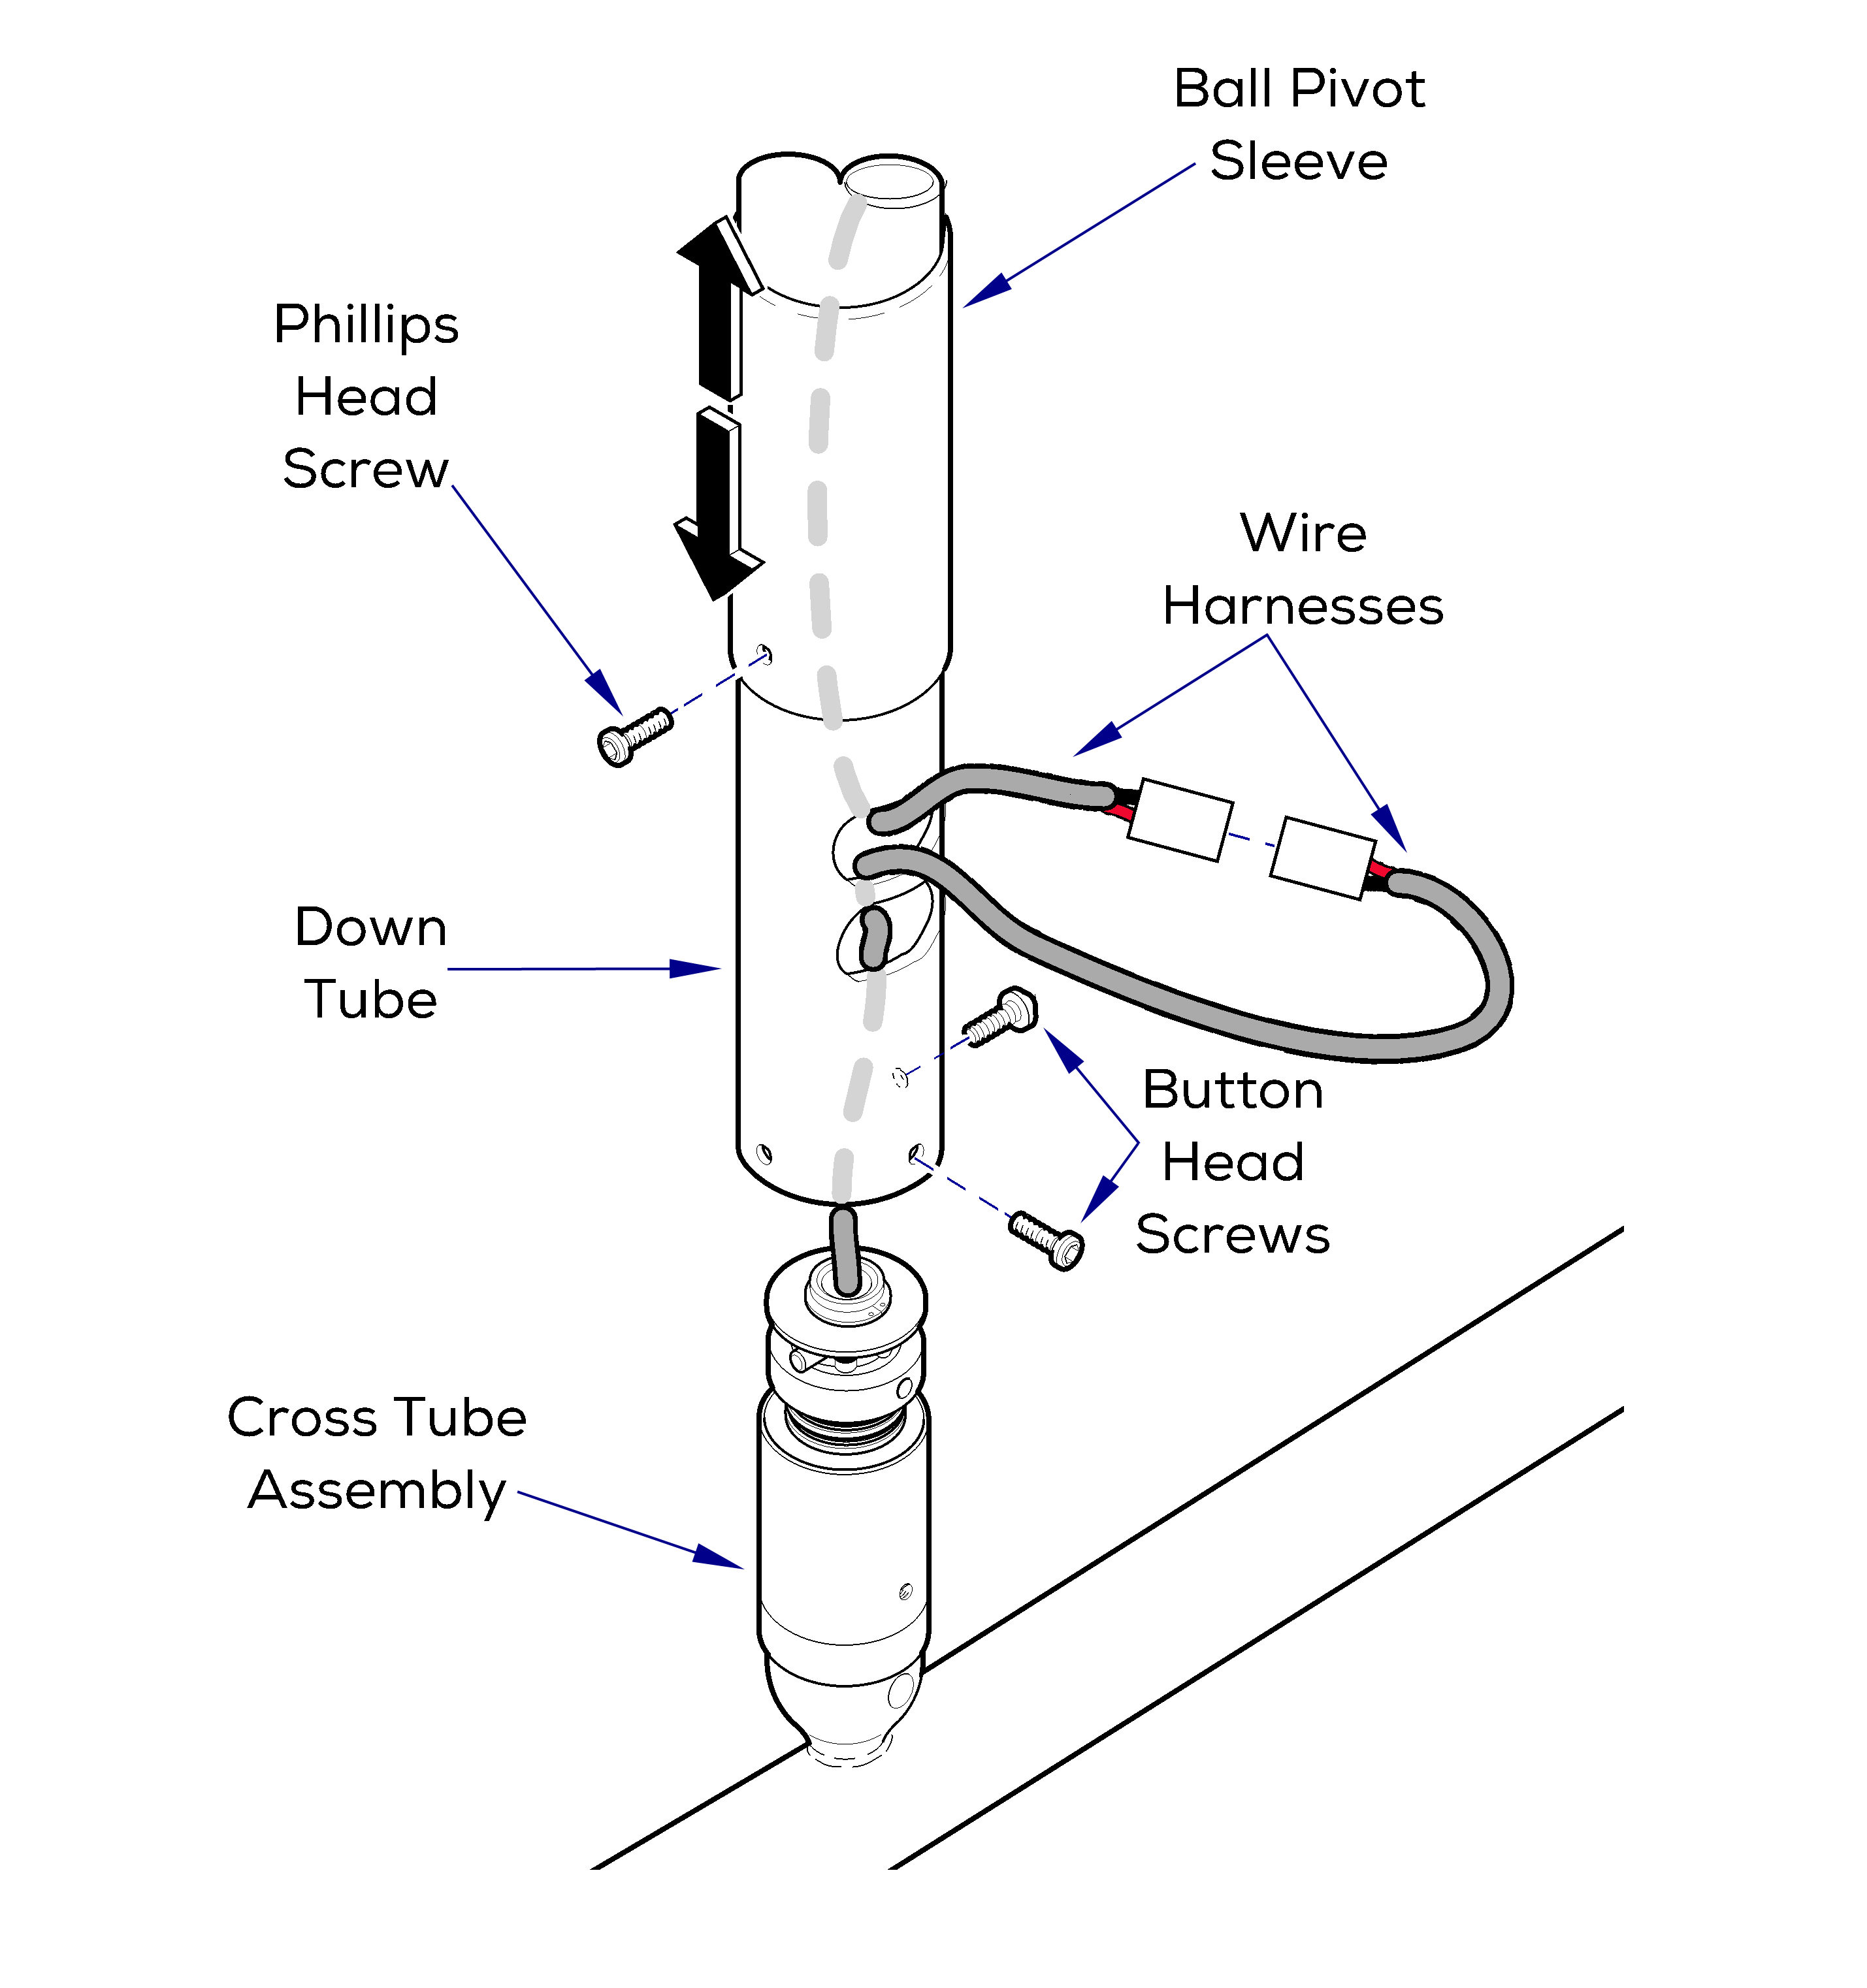
255 Light Ceiling Cross Tube Removal / Installation Test and Repair

Male connector is power. Connectors are small size so use small probes to measure voltage.
Disconnect power to the light before performing the following procedure. Failure to comply may result in electric shock. The cross tube / lighthead is very heavy. To prevent injury, use an assistant for the following procedure.
1.Disconnect power to light.
2.Remove screw, then slide pivot sleeve up.
3.While supporting cross tube / lighthead, remove two screws, then separate cross tube from down tube.
4.Disconnect wire harnesses and remove cross tube.
Screws securing cross tube must be installed properly. Failure to do so may allow lighthead to fall, resulting in injury.
1.Slide ball pivot sleeve onto down tube making sure screw hole in sleeve is towards the bottom.
2.With ball pivot sleeve positioned as high as possible on down tube, pull wire harness through top window of down tube.
3.Align three screw holes, then insert pivot shaft of cross tube assembly into down tube. Secure cross tube assembly in position with two #10-24 x 3/8” button head screws.
4.Feed wire harness through top window of down tube.
5.Connect wire harnesses. Push harness into top window.
6.Slide ball pivot sleeve down into position and secure with one #10-24 x 3/8” (New Units Only) phillips head screw. Refer to: Ball Pivot Tension Adjustment if necessary.
7.Slide pivot sleeve down, secure with screw.

