255 Light Ball Pivot Test and Repair

Ceiling/wall shown.
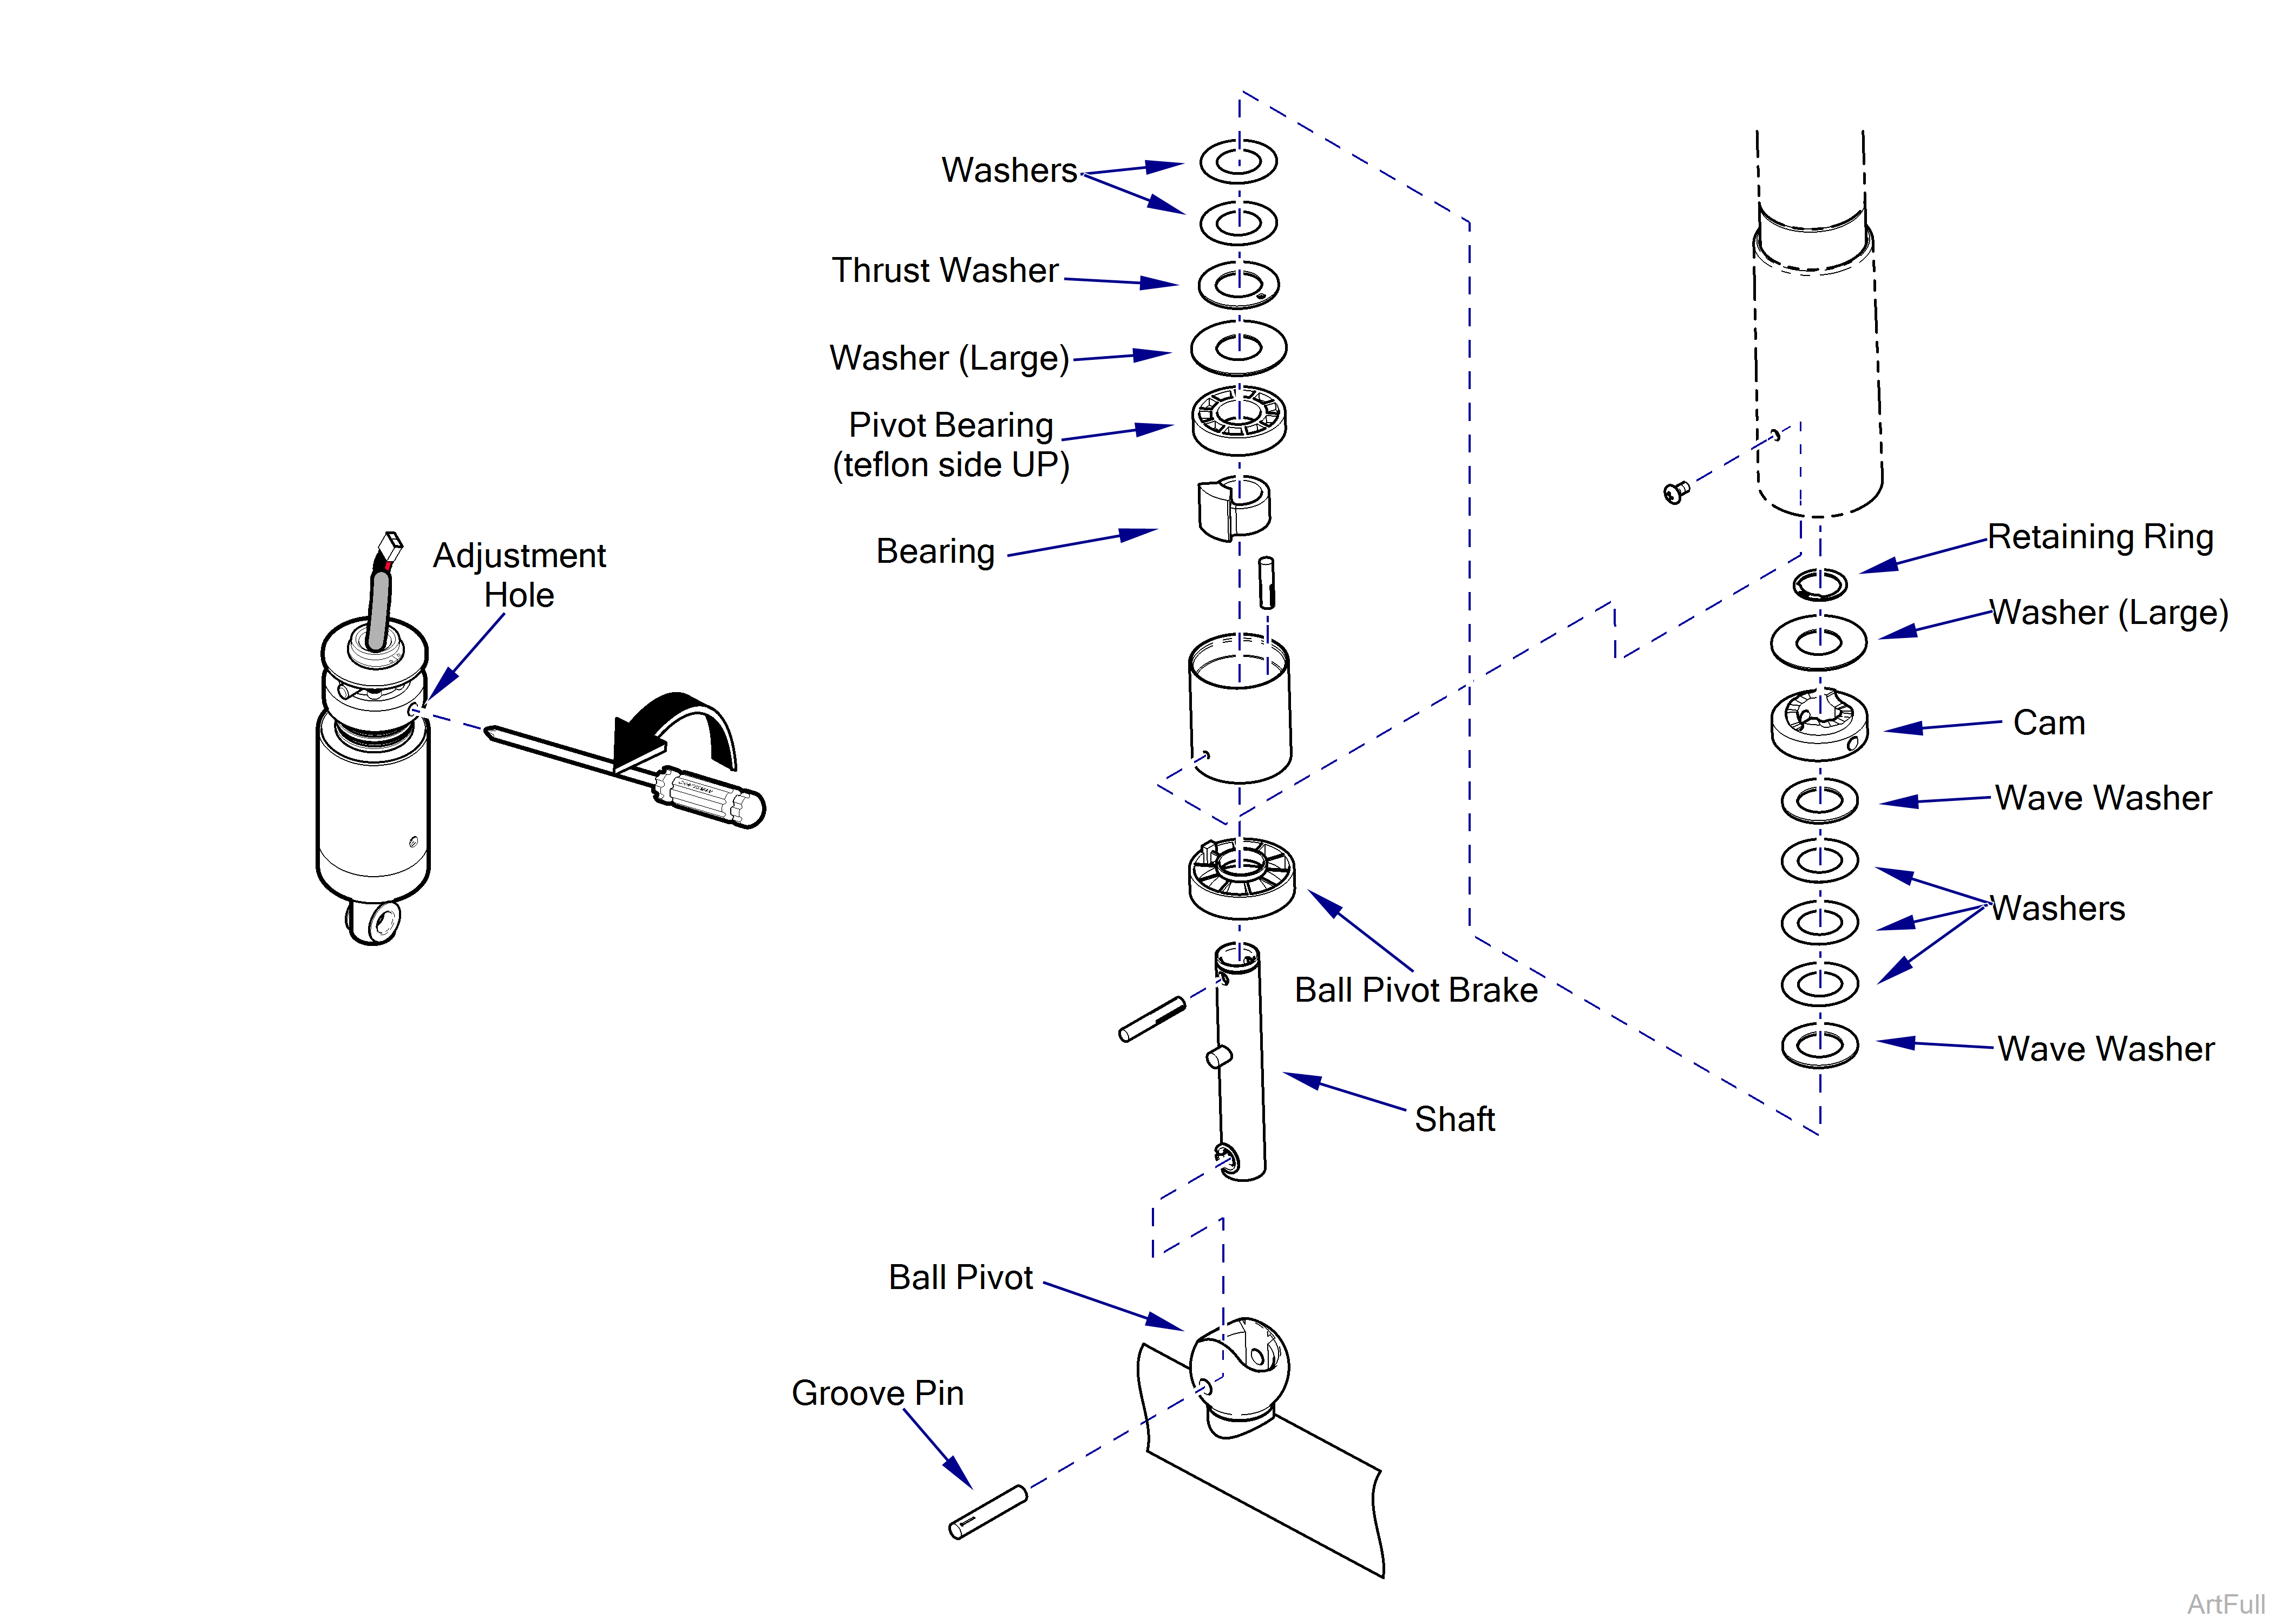
Note the order of all the washers and reassemble in their original positions.
1.Remove cross tube / lighthead. Refer to: Cross Tube Removal / Installation.
Ball pivot must be supported when removing/installing groove pin to avoid damage to four screws.
2.Place screwdriver into adjustment hole.
3.Move the screwdriver left until tension is fully released.
4.Carefully pull harness wires up.
5.Remove groove pin using a punch tool.
6.Remove retaining ring and washers from ball pivot shaft.
7.Using a punch, remove groove pin.
8.Disassemble ball pivot components from shaft / housing.
9.Inspect pivot bearing for excessive wear. Replace if necessary.
Groove pin has serrations on one end. Do not drive serrations through ball pivot shaft.
1. Install pivot bearing, washers, and cam as shown.
2.Install groove pin.
3. Install washer, then secure with retaining ring.
4.Install cross tube / lighthead. Refer to:Cross Tube Removal / Installation.

1.Remove the ball pivot. Refer to: Ball Pivot Repair.
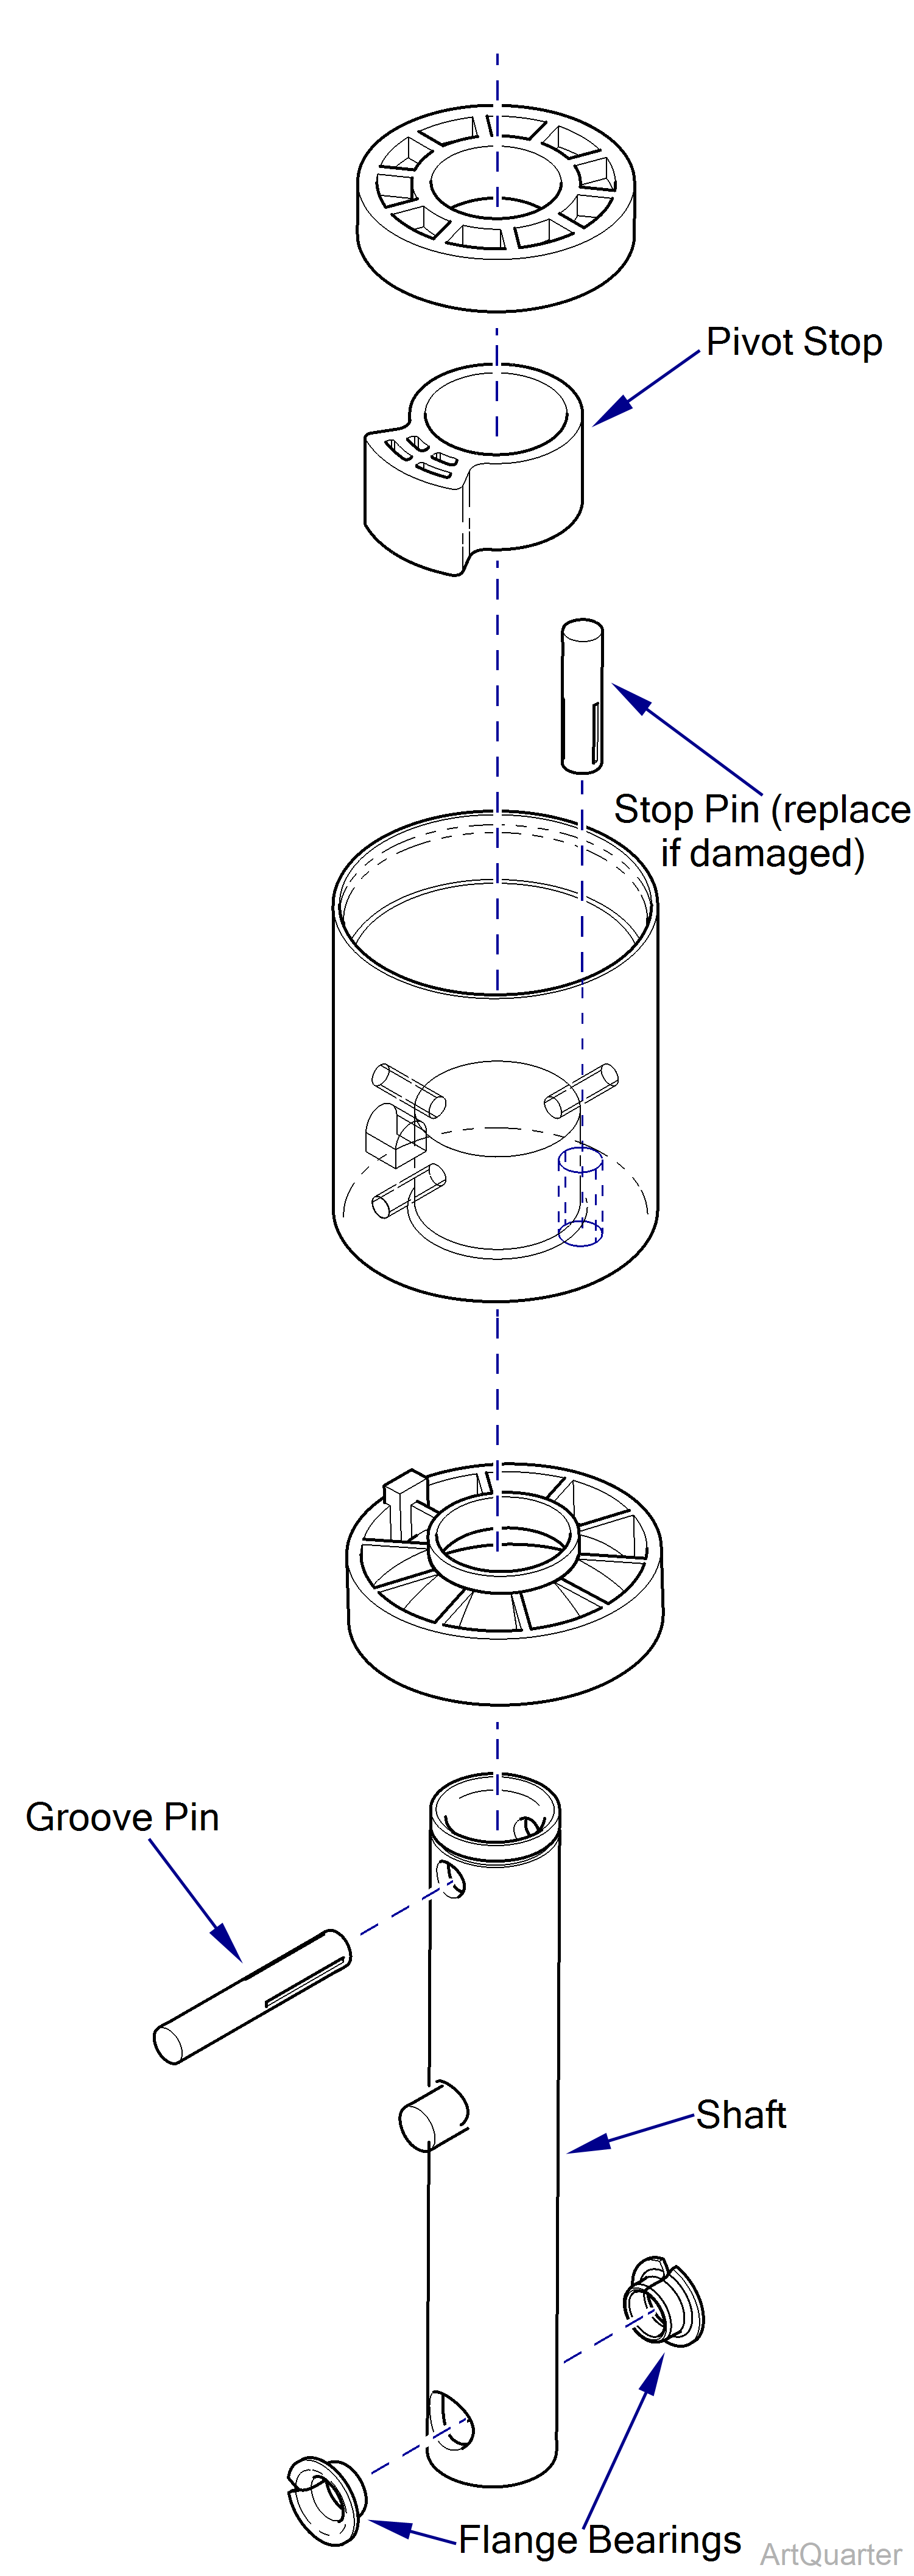
2.Remove two flange bearings from shaft.
3.Disassemble shaft / housing components.
4. Inspect groove pin. Replace if necessary.
5. Install pivot stop with raised portion facing up, housing, and brake to shaft.
Groove pin has serrations on one end. Do not drive serrations through shaft.
6.Install two flange bearings to shaft.
7.Assemble the ball pivot. Refer to: Ball Pivot Repair.

