Midmark® Dental Halogen Light Control Pendant Access Procedures
|
Mounted To |
Ceiling, Chair, Track, Universal and Wall/Cabinet |
| Serial Number | NW, RE and V Serial Number Prefixes |
Refer to: Operator’s Manual for complete instructions on operating the light. Failure to do so could result in personal injury.
Perform an operational test on the dental light after repair is completed to confirm repair was properly made and that all malfunctions were repaired.
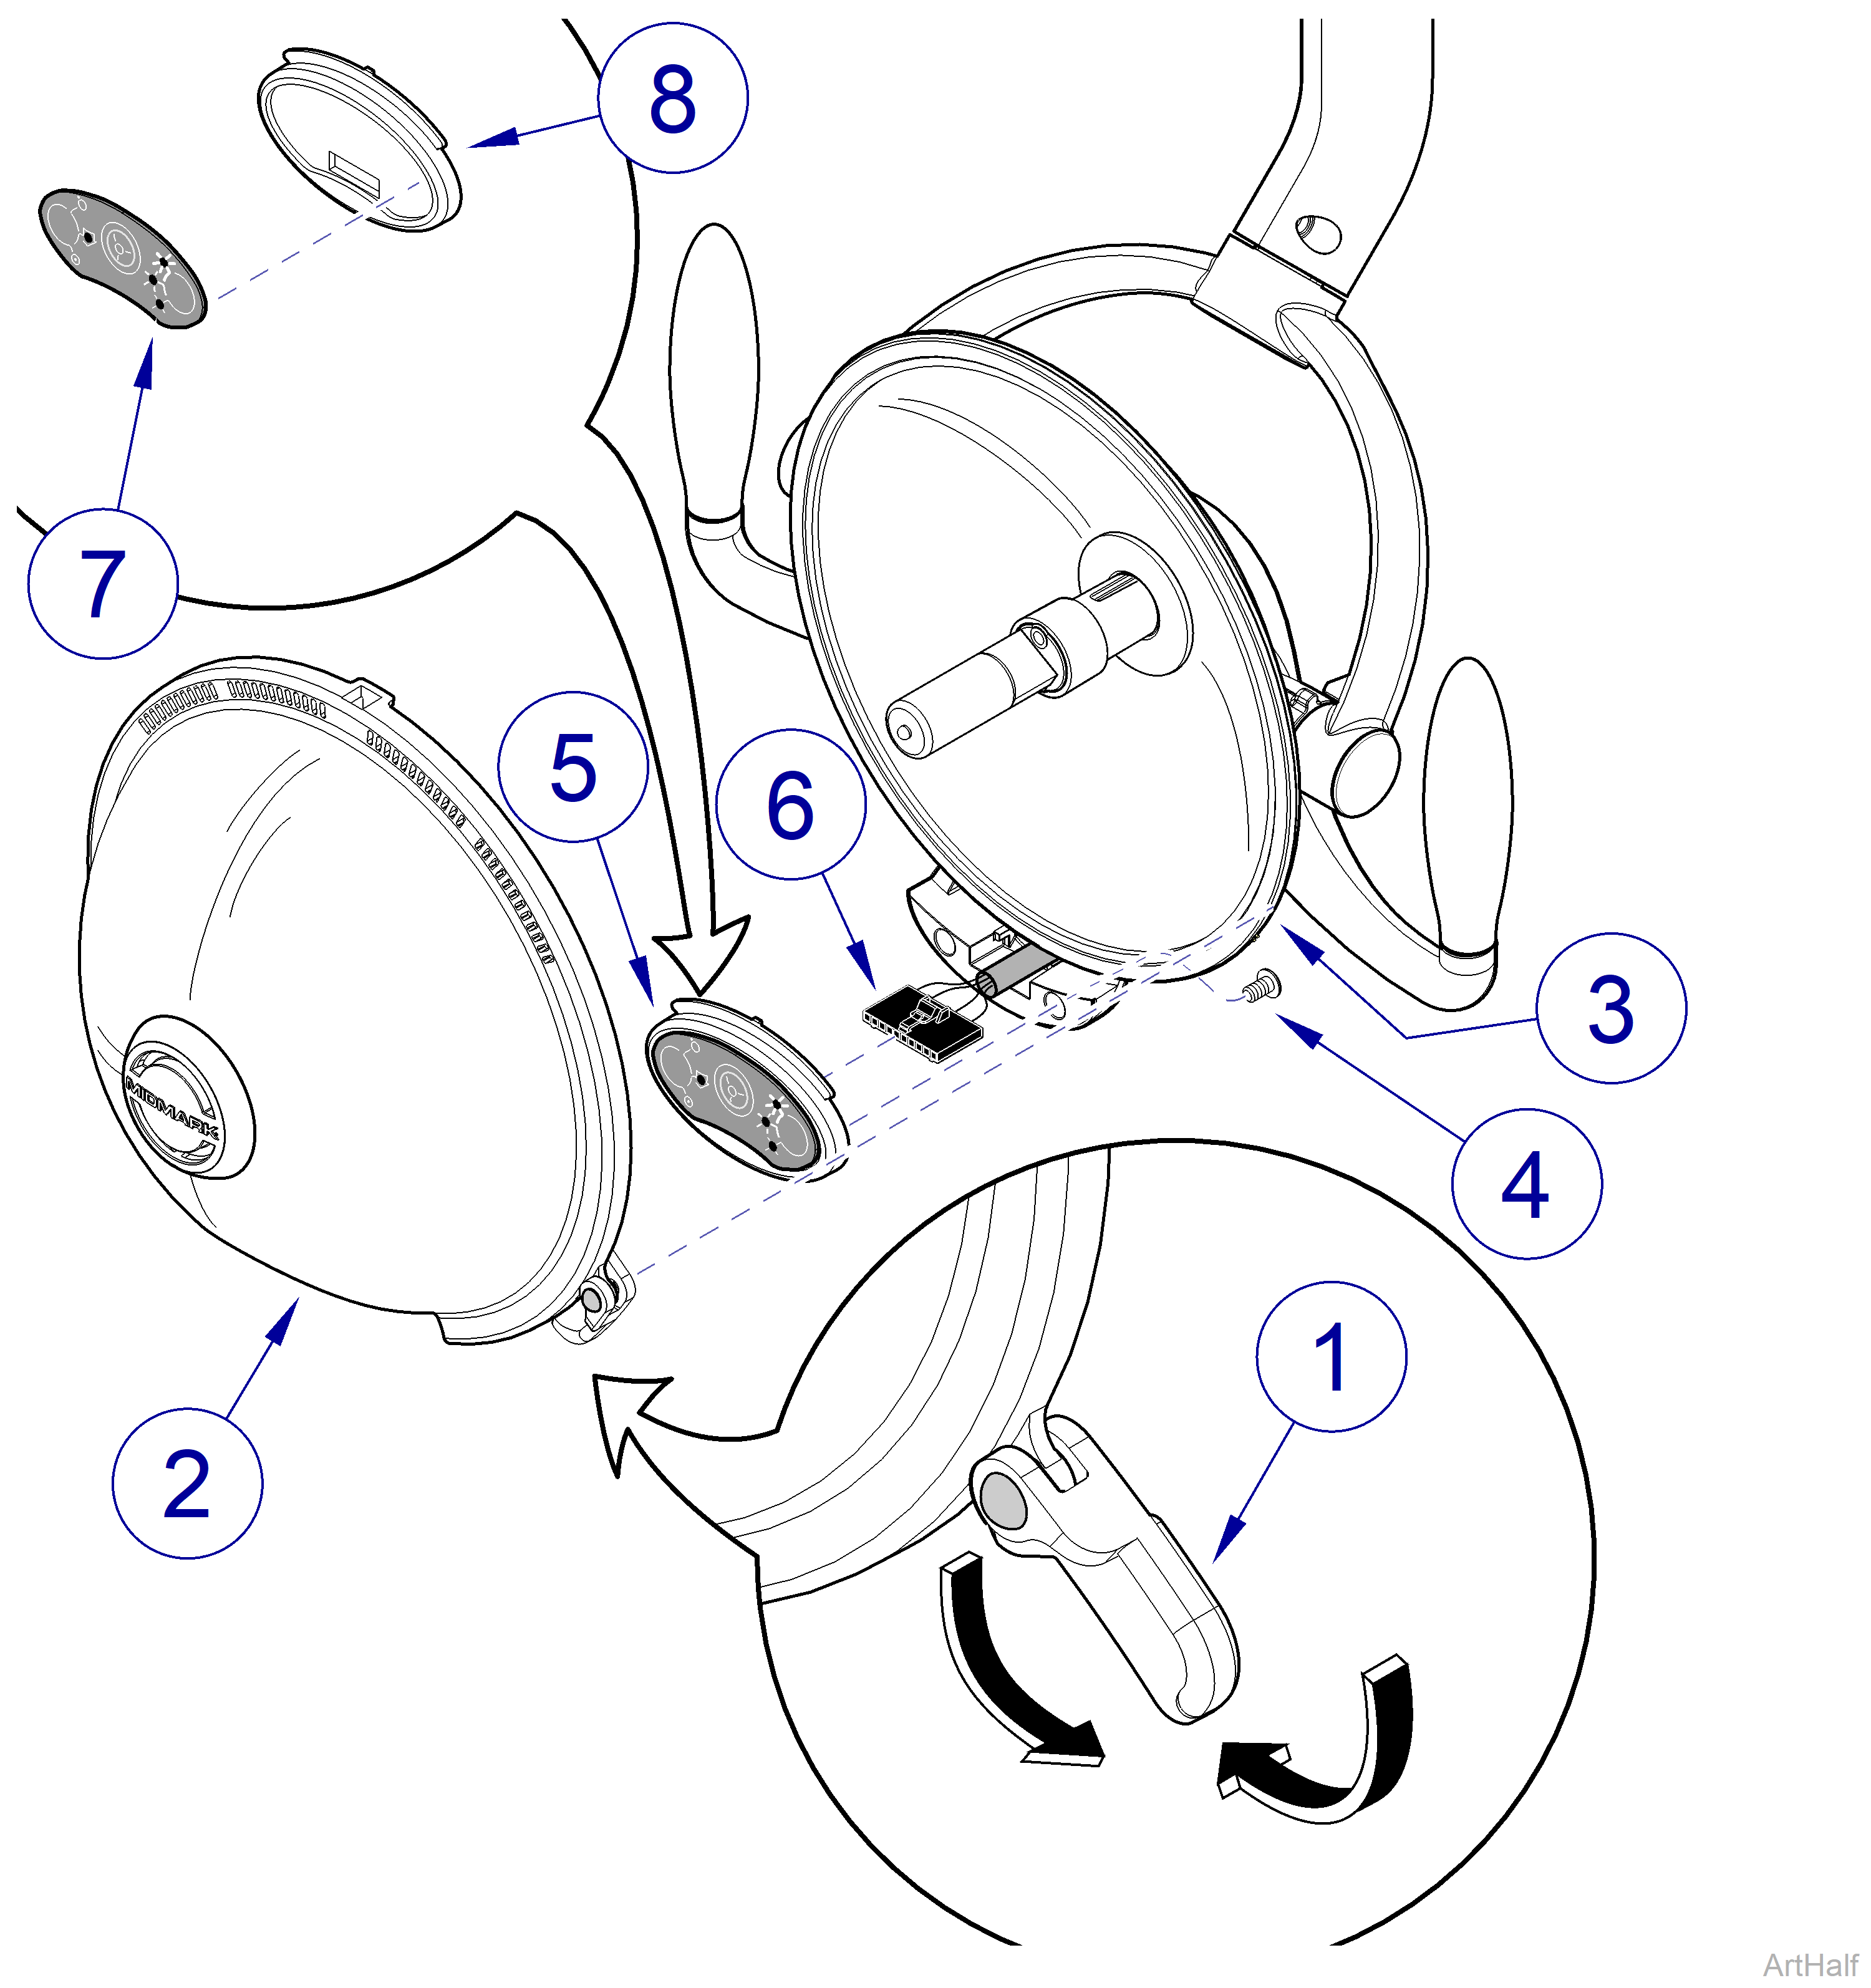
1.Rotate two release levers (1) up 1/4 turn and then remove plastic shield (2) from reflector assembly (3).
2.Remove two screws (4) and separate touch pad assembly (5) from lighthead.
3.Disconnect wire harness (6) from touchpad assembly (5). Discard used touchpad assembly.
1.Remove protective backing from membrane switch panel (7) and then install on control bezel (8). Press down firmly on membrane switch panel to ensure good adhesion between parts.
When connecting wire harness, center wire harness on pins of touchpad assembly; make sure there is one unused terminal on each end of wire harness.
2.Connect wire harness (6) to touchpad assembly (5).
3.Install touchpad assembly (5) on lighthead and secure with two screws (4).
4.Install plastic shield (2) on reflector assembly (3) and secure by rotating two release levers (1) down 1/4 turn.
