Midmark® Dental Lights Flex Arm Spring Tension Adjustments
|
Mounted To |
Ceiling, Chair, Track, Universal, and Wall/Cabinet |
| Serial Number | NW, RE, and V Serial Number Prefixes |
Refer to: Operator’s Manual for complete instructions on operating the light. Failure to do so could result in personal injury.
Perform an operational test on the dental light after repair is completed to confirm repair was properly made and that all malfunctions were repaired.
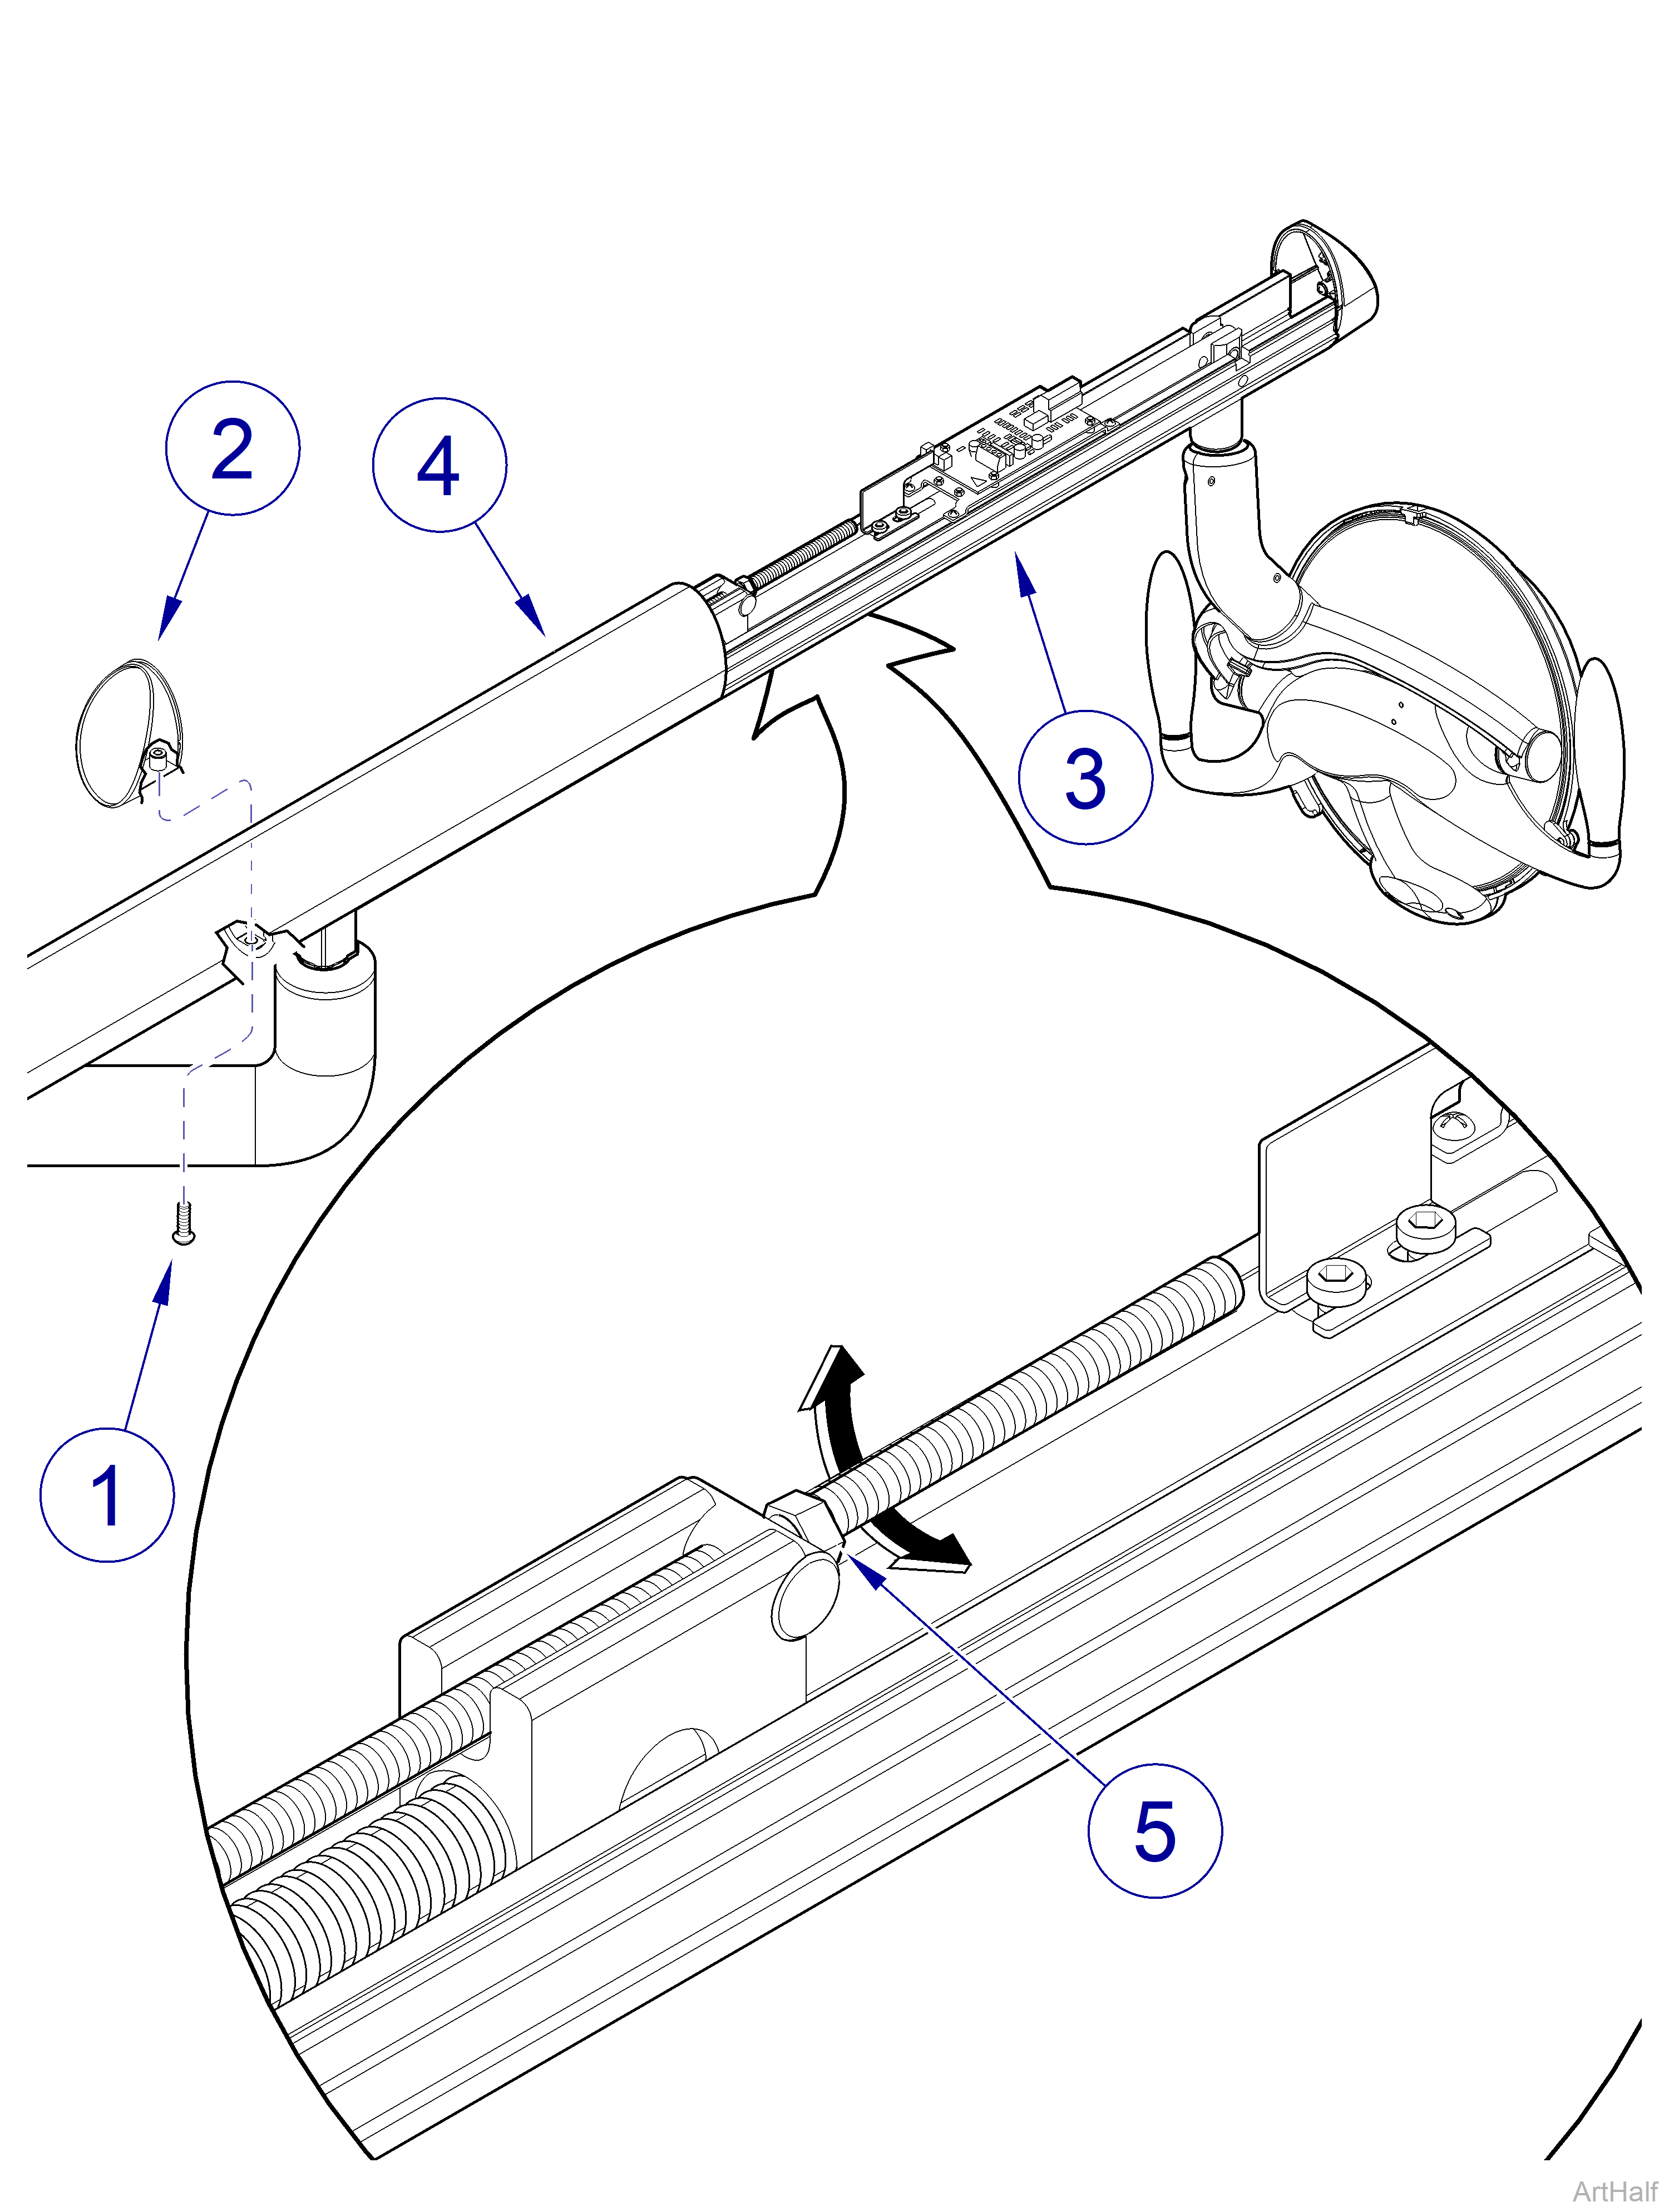
To Adjust Flex Arm Spring Tension
On some units, both end caps will need to be removed to gain access. The rear most end cap on these units will not be held in by screws, but by plastic buttons on the end cap itself.
1.Remove screw (1) and arm endcap (2) from light arm (3).
2.Slide light arm cover (4) backward approximately 20 in. (51 cm) to gain access to tension adjustment nut (5).
3.Using a 1/2 in. open end wrench, adjust tension adjustment nut (5) to increase or decrease spring tension.
4.Raise and lower light arm and then position light arm in a horizontal position and observe to verify that light arm is not stiff and is easy to use, yet will not drift downward by itself. Repeat step 3 as necessary.
5.Slide light arm cover (4) back onto light arm (3) fully.
6.Install arm endcap (2) on light arm (3) and secure with screw (1).
