Midmark® Dental Lights Pressure Switch Access Procedures
|
Mounted To |
Chair Units Powered with Power Supply in a Junction Box |
| Serial Number | NW, RE and V Serial Number Prefixes |
Refer to: Midmark Dental Light User Guide for complete instructions on operating the light. Failure to do so could result in personal injury.
Perform an operational test on the dental light after repair is completed to confirm repair was properly made and that all malfunctions were repaired.
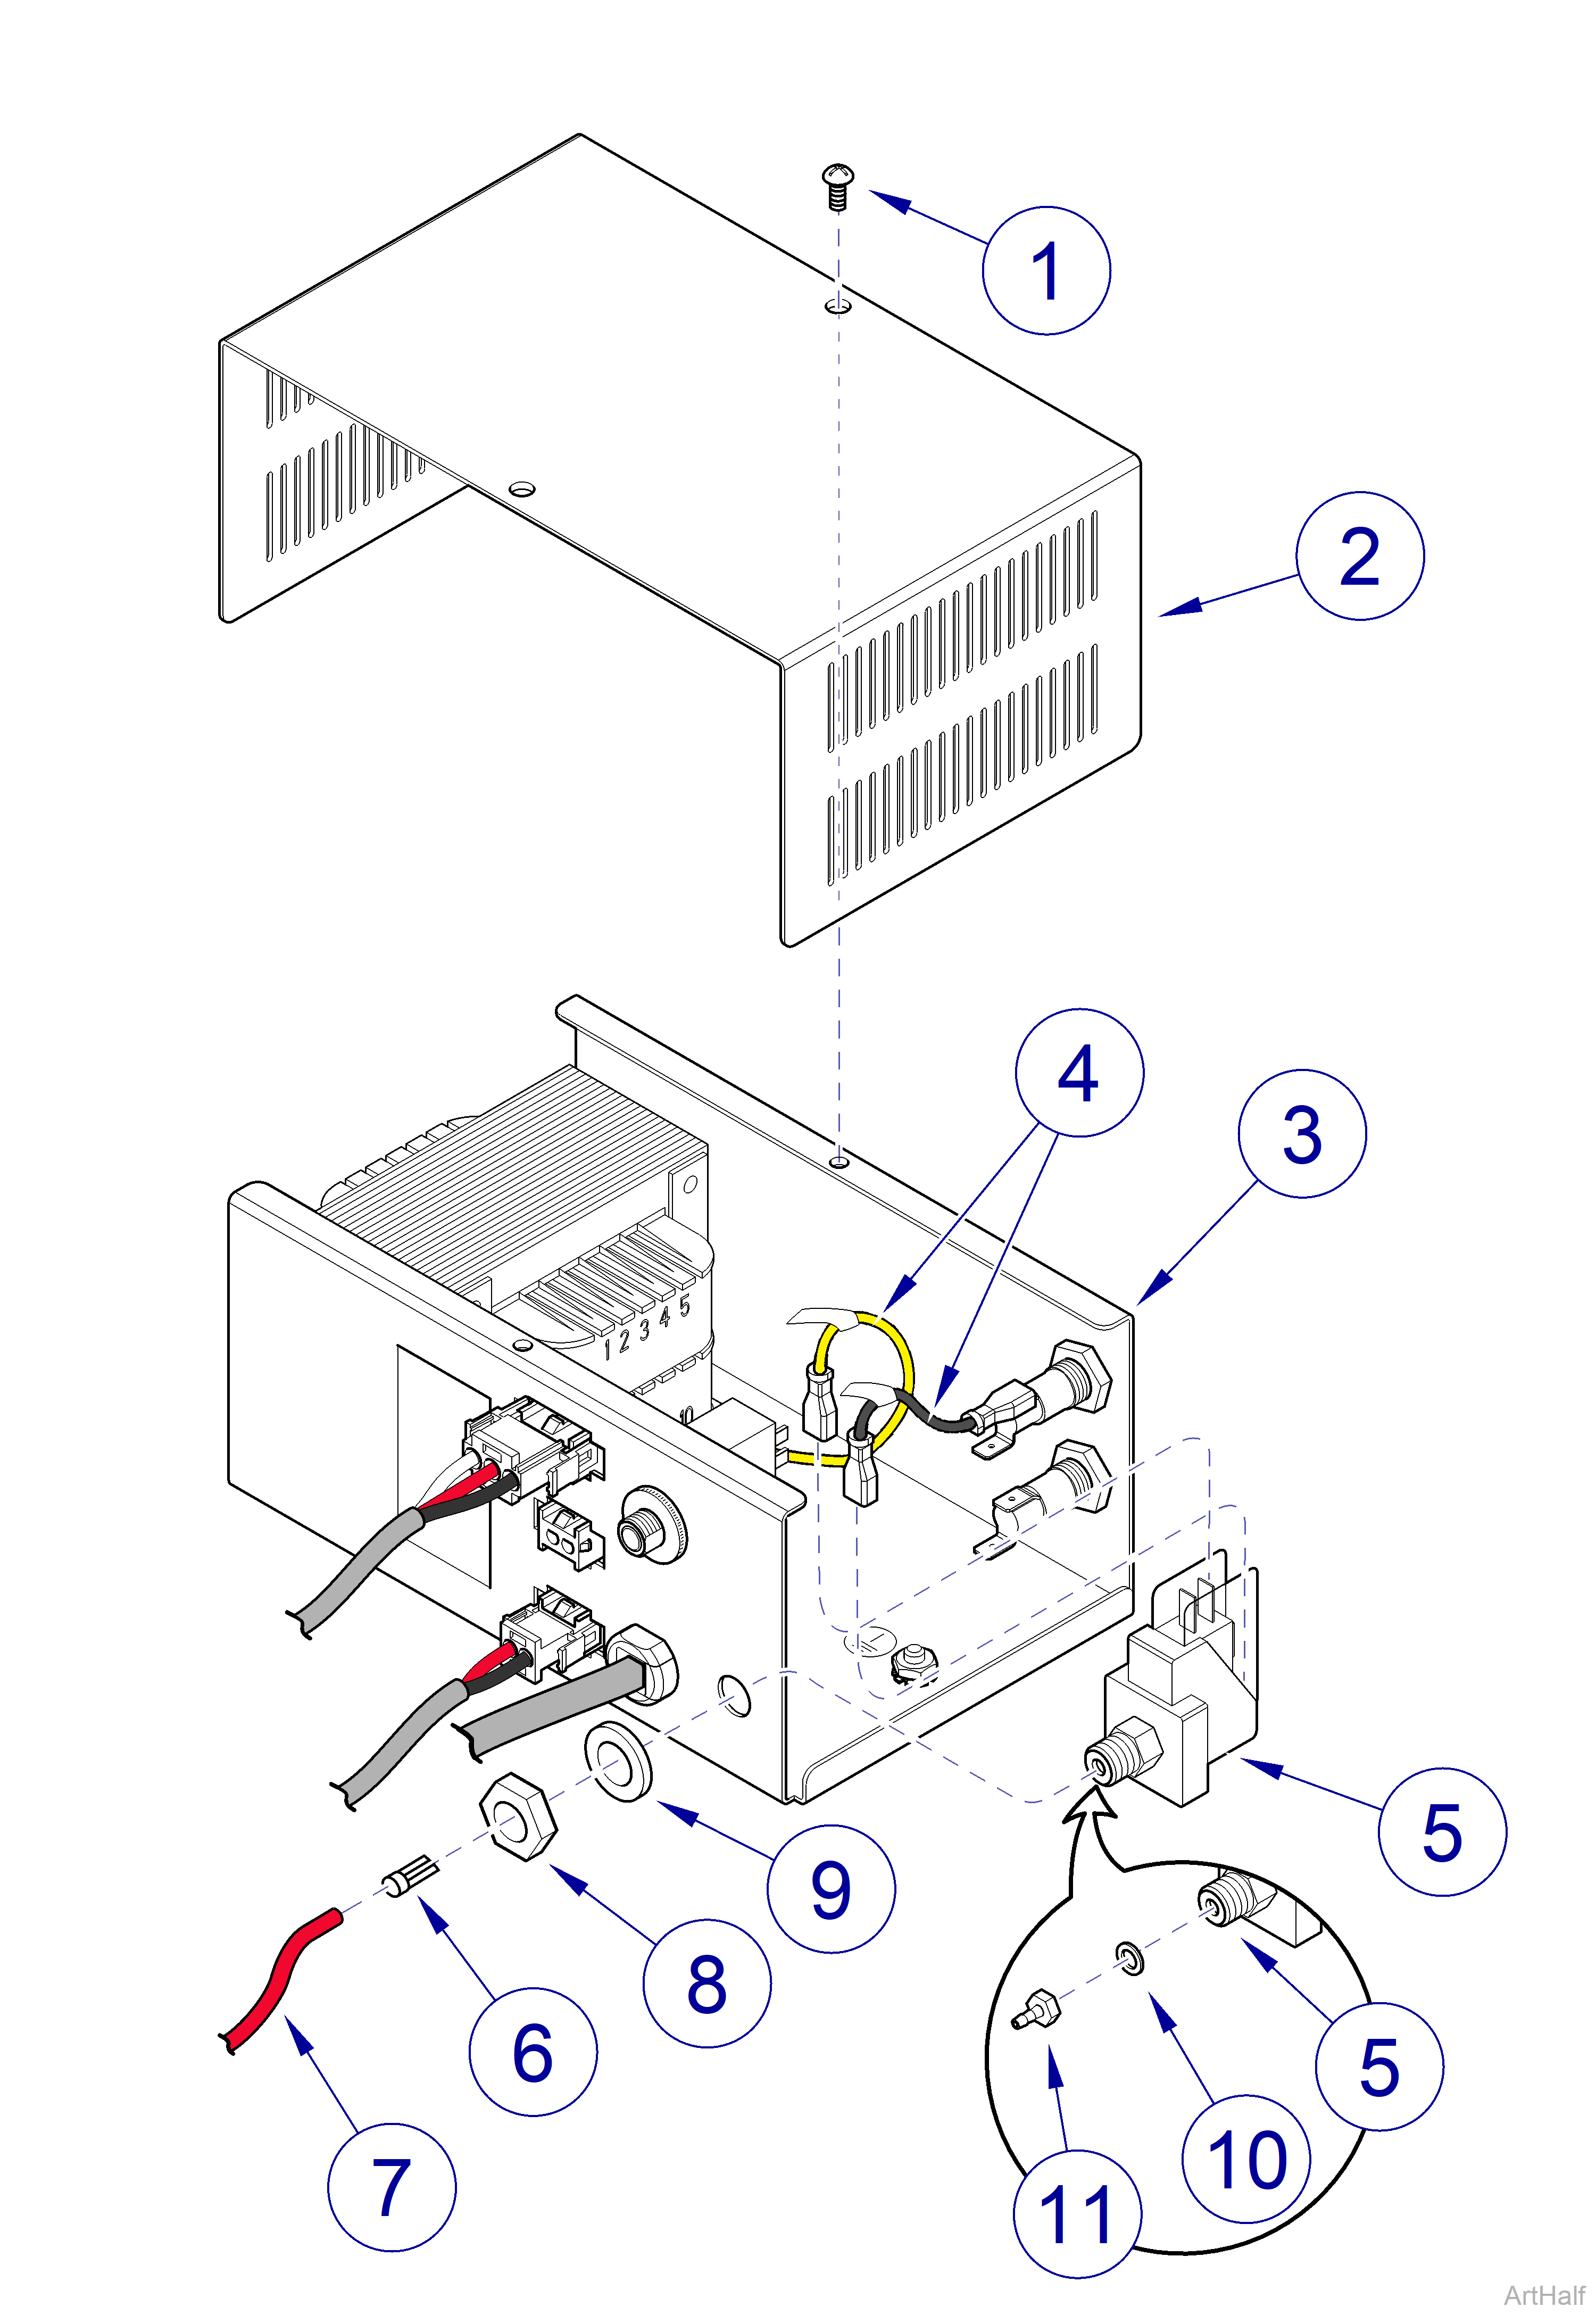
1.Remove junction box cover. Refer to: Junction Box Removal
Always disconnect electrical power from the unit before removing any of the unit’s covers/shrouds or making any repairs to prevent the possibility of electrical shock. Failure to comply with these instructions could result in severe personal injury or death.
2.Unplug power cord of universal power supply from outlet receptacle.
3.Remove two screws (1) and power supply cover (2) from chassis (3).
4.Tag and disconnect two wires (4) from terminals of pressure switch (5).
5.Remove uni-clamp (6) and then cut tube (7) as close as possible to fitting of pressure switch (5).
6.Remove nut (8), washer (9), and pressure switch (5) from chassis (3). Do not discard nut and washer; they will be needed for installation.
7.Remove gasket (10) and fitting (11) from pressure switch (5).
1.Install gasket (10) and fitting (11) on pressure switch (5).
2.Install pressure switch (5) on chassis (3) and secure with washer (9) and nut (8).
3.Slide new uni-clamp (6) onto end of tube (7); then connect tube (7) to fitting (11) and secure in place with uni-clamp.
4.Connect two wires (4) to terminals of pressure switch (5).
5.Install power supply cover (2) on chassis (3) and secure with two screws (1).
6.Plug power cord of universal power supply into outlet receptacle.
7.Install junction box cover. Refer to: Junction Box Installation
