QuickClean™ Ultrasonic Cleaners LCD Display Test and Repair
Some procedures require power to be connected with covers removed. Line voltage is present. Use extreme caution to prevent electric shock.
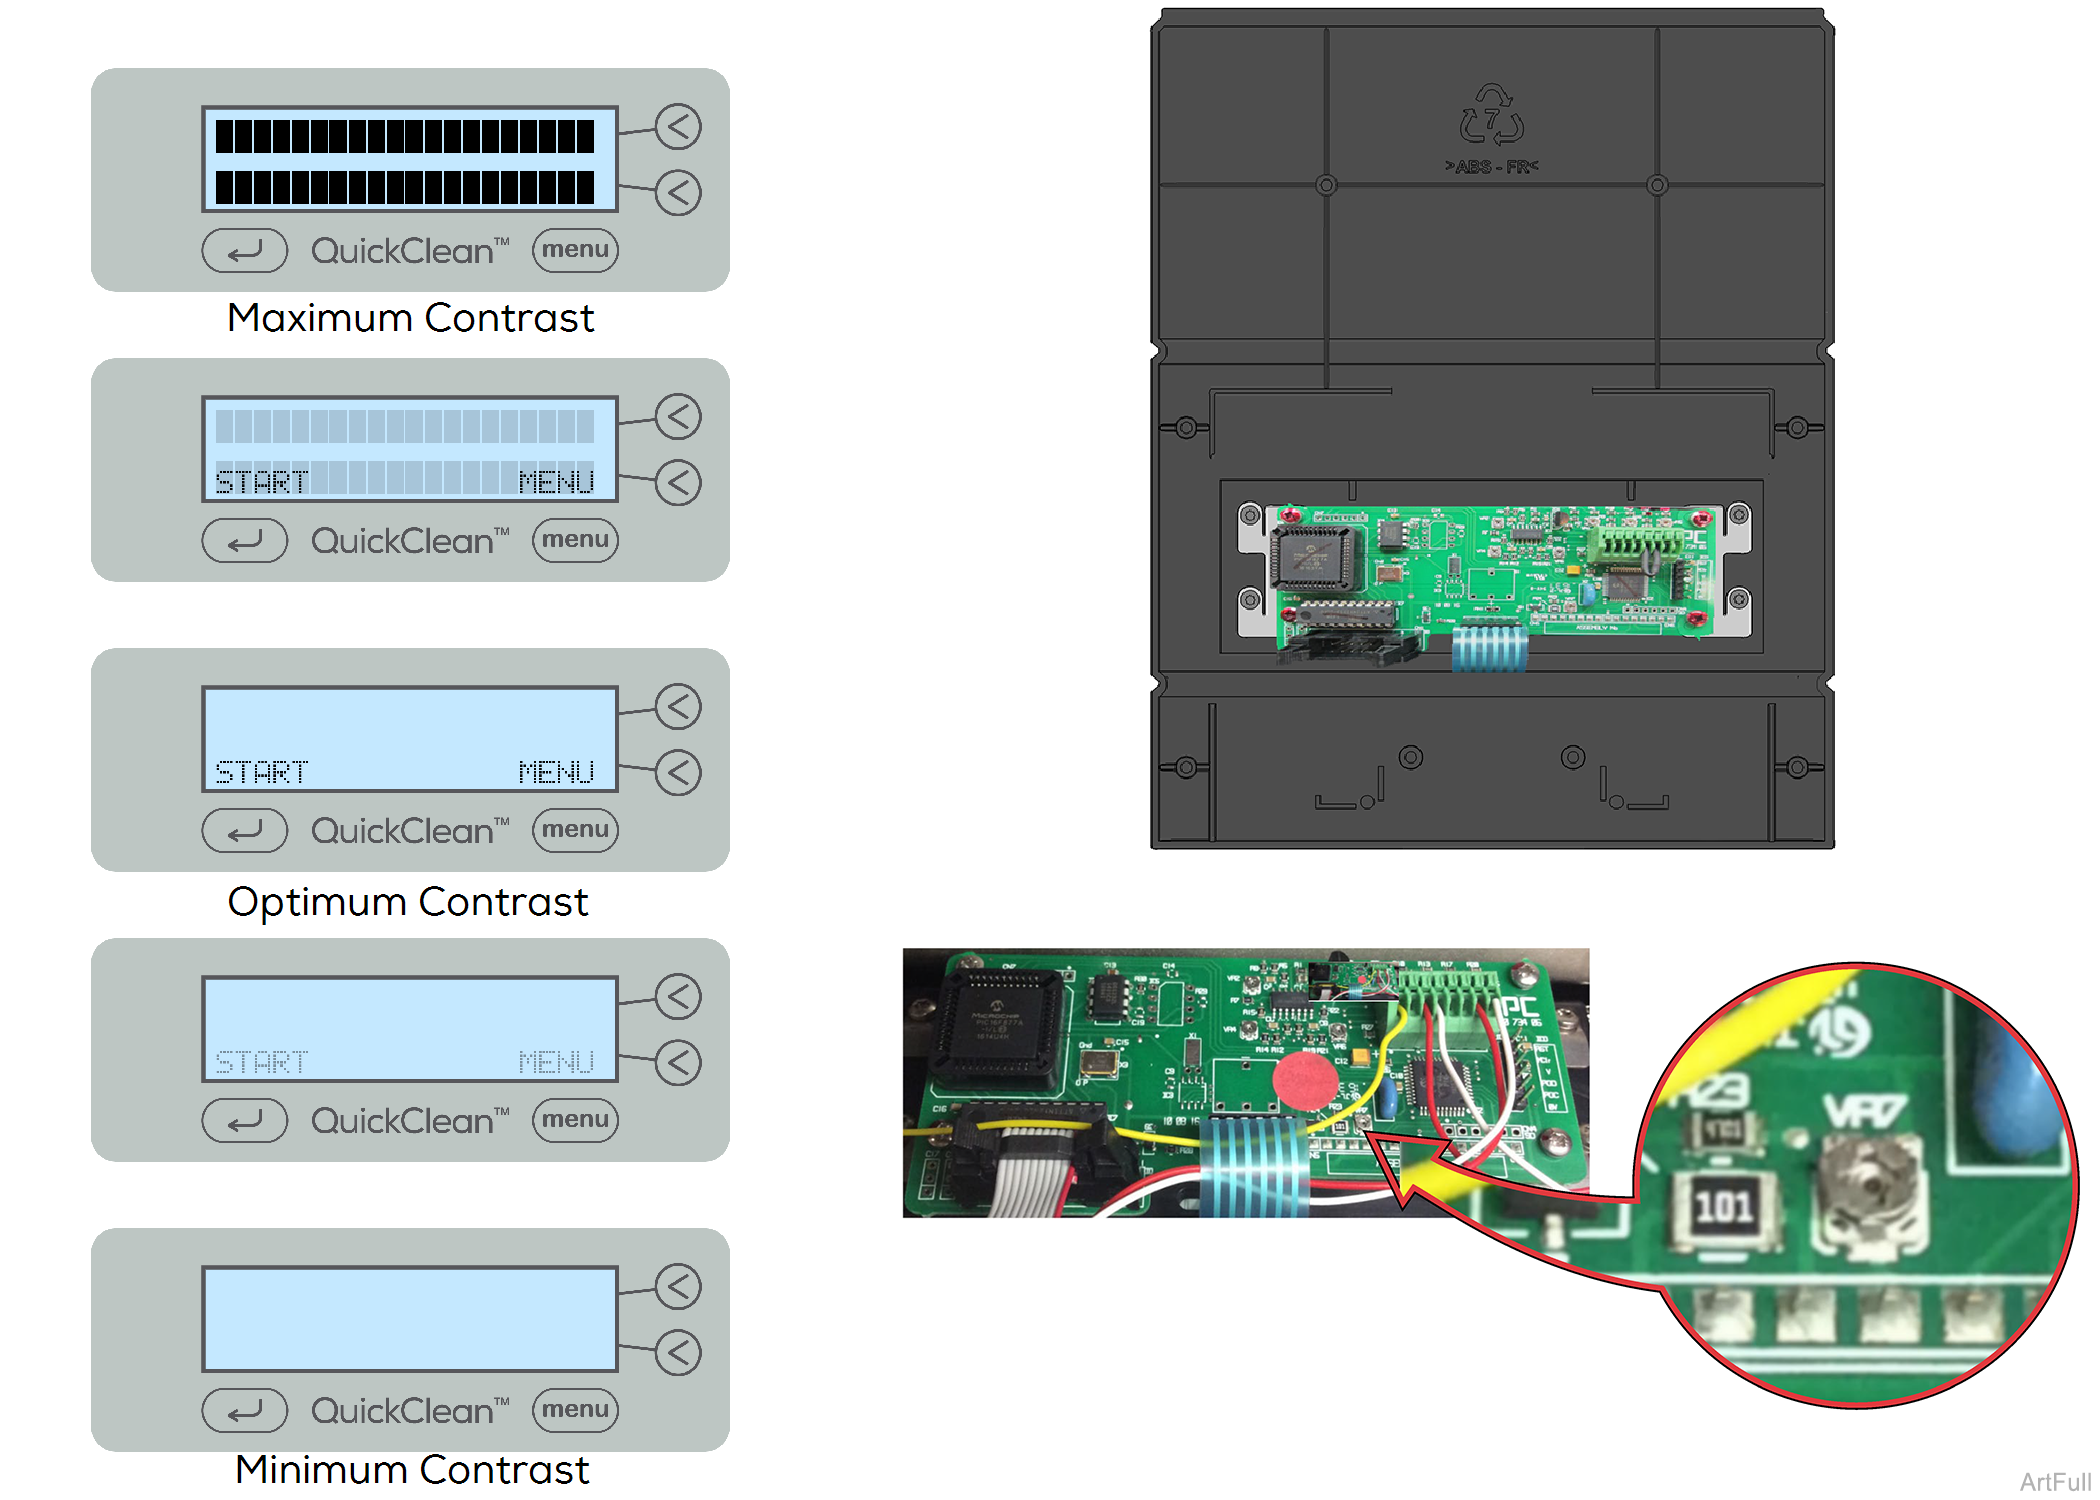
To Adjust LCD Contrast
1.Gain access to the Control PCB using the procedures shown in this manual. Refer to: LCD Display Removal
2.Locate (VR7) on the Control PCB and turn it to adjust the LCD display to the optimum contrast level shown.
3.Rotating Pot clockwise will make display lighter and counterclockwise will make display darker.
To prevent risk of shock always disconnect power before removing covers or performing any service procedure.
To Remove and Replace LCD Display
1.Turn power off, unplug and drain water from tank.
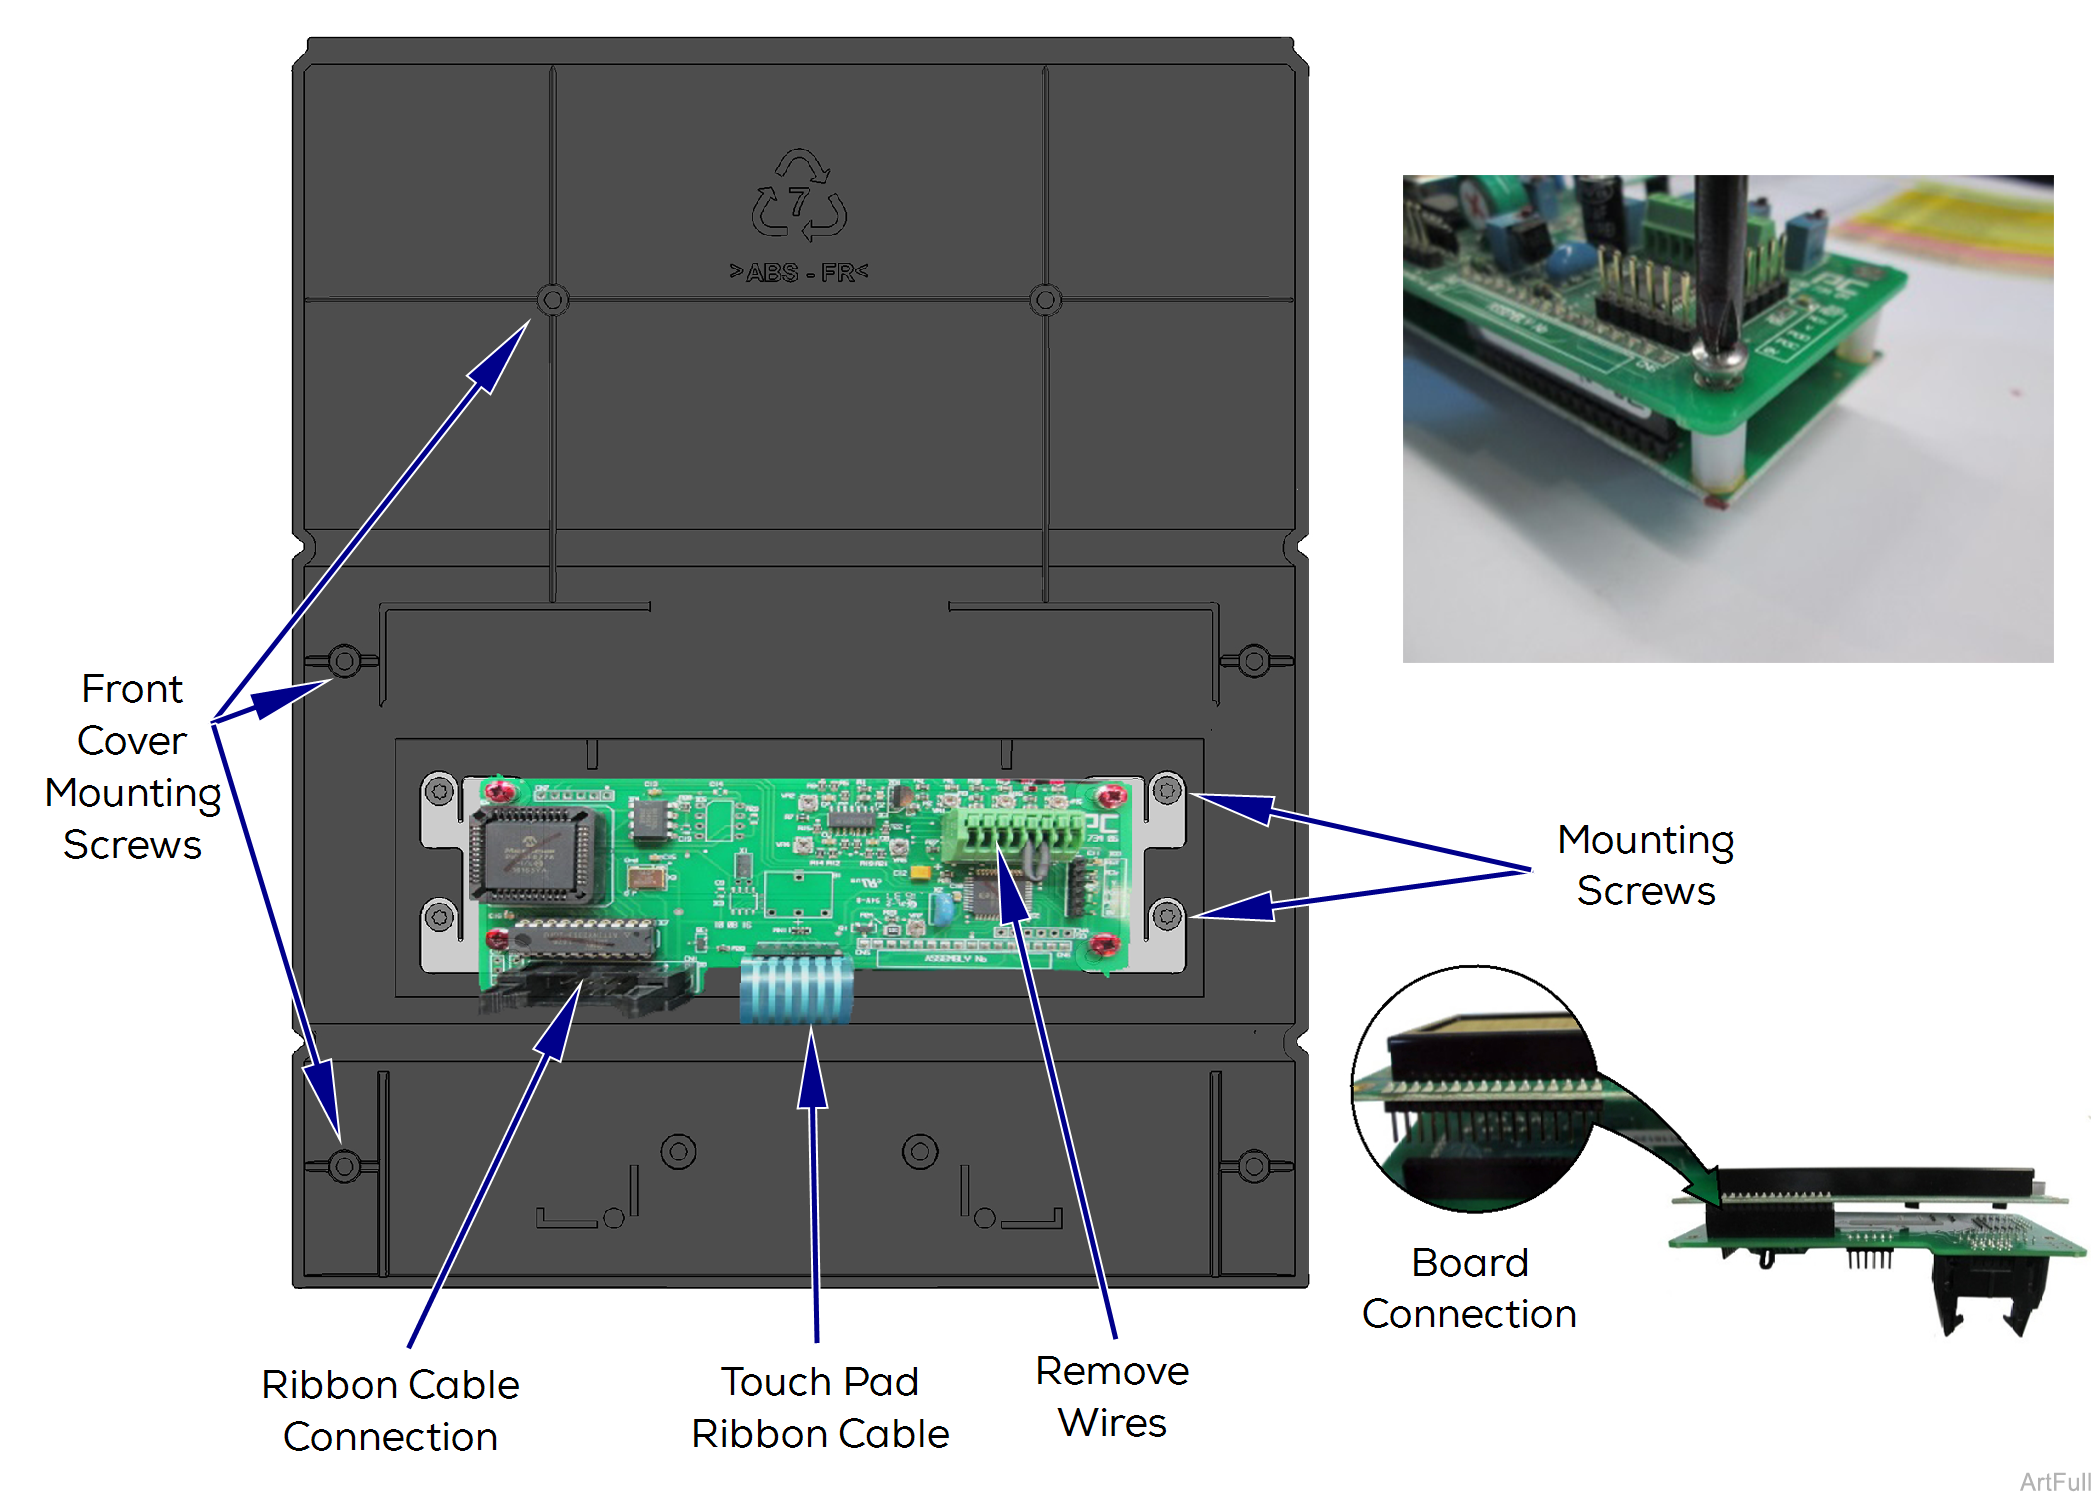
2.Remove the tank following the procedures shown in this manual. Refer to: Access Procedures
3.Remove sensor wires going to the Control PCB by pressing in on tab and pulling on wire.
4.Remove ribbon cable by pulling outward on the side tabs and removing connector.
5.Remove front cover mounting torx screws(6), remove front cover.
6.Remove outer mounting torx screws (4) attaching the Control PCB and LCD Display .
7.Disconnect the touch pad ribbon cable connecting the Control PCB to the Touch Pad.
8.Remove stand off screws holding the two circuit boards together.
9.Separate the boards by pulling them apart at the connection.
10.Reassemble unit with new LCD Display by reversing these directions.
