Midmark® Smart G-Vacuum Variable Frequency Drive Test and Repair
Always go though Troubleshooting and VFD error codes before testing the VFD.
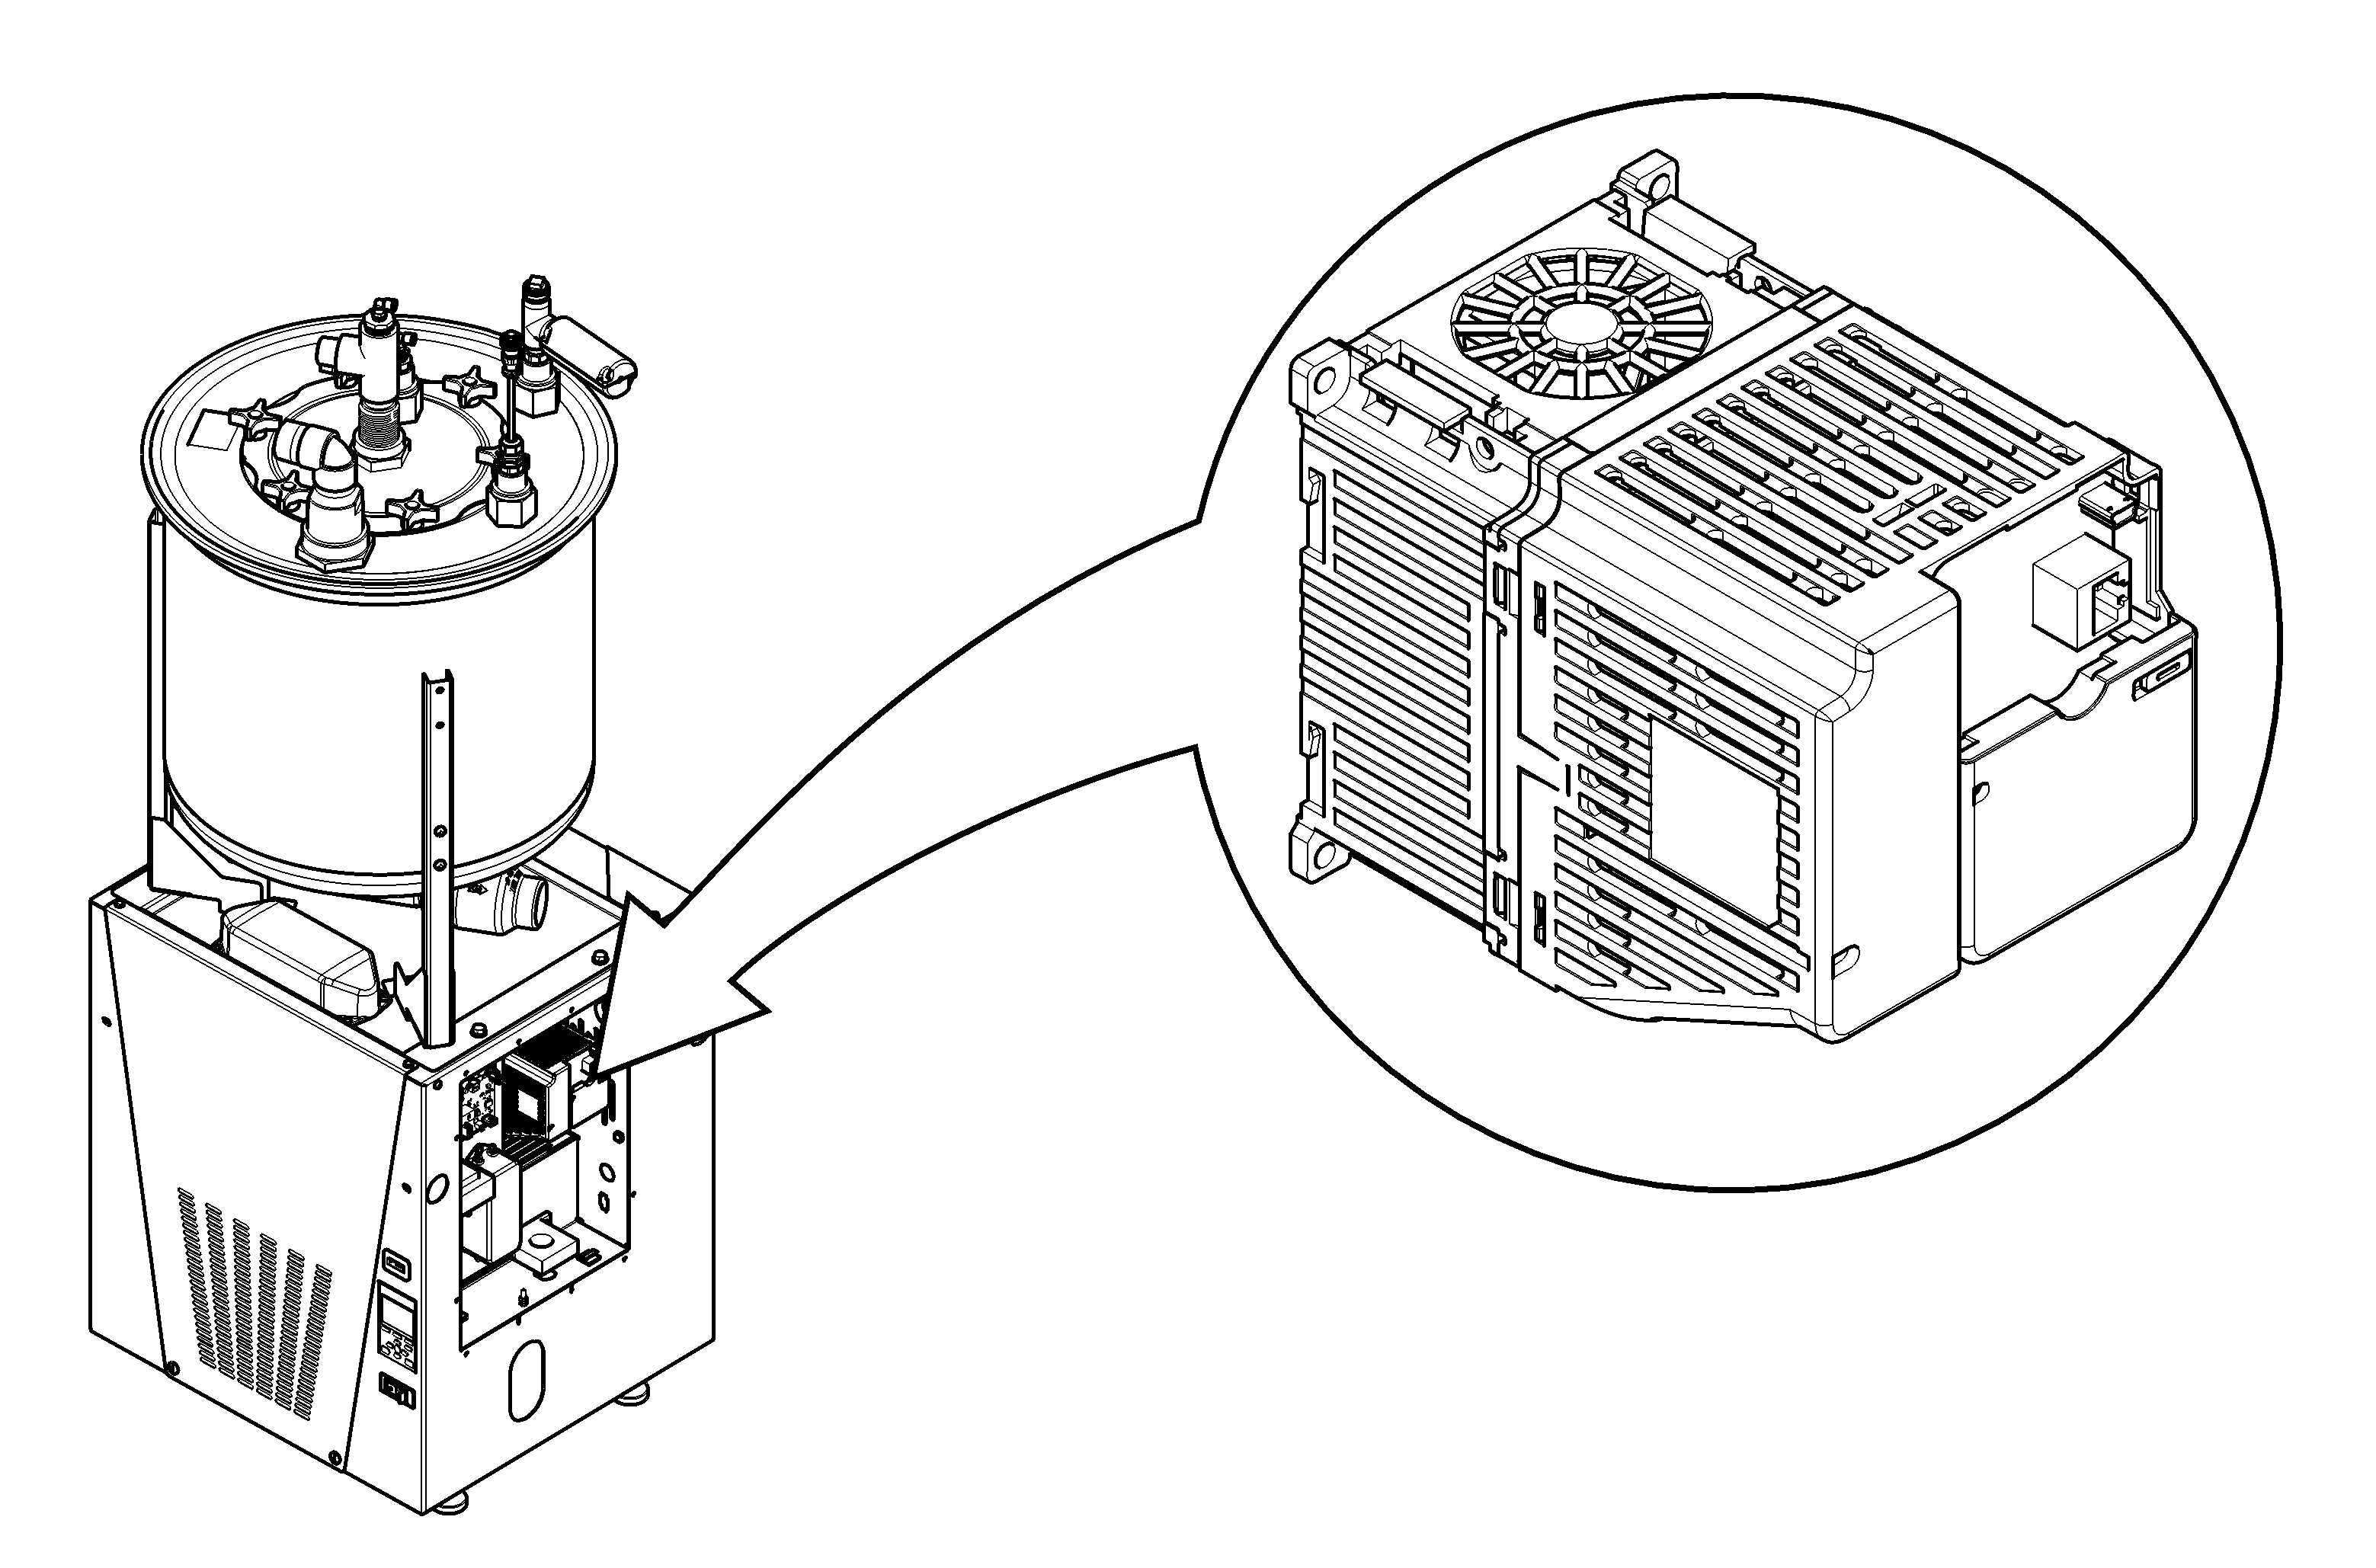
Using the pressure sensor readings, the VFD controls the motor speed to maintain a pressure as determined by the programmed pressure set points during both the operating and sleep modes. Pressure is set to 12”Hg at the factory. The VFD is located in the electrical box.
When testing components with power on, use care to prevent electrical shock.
When working on Twin units, unplug parallel harness.
1.Turn power off at Front Panel switch and main power supply box.
2.Remove electrical box cover.
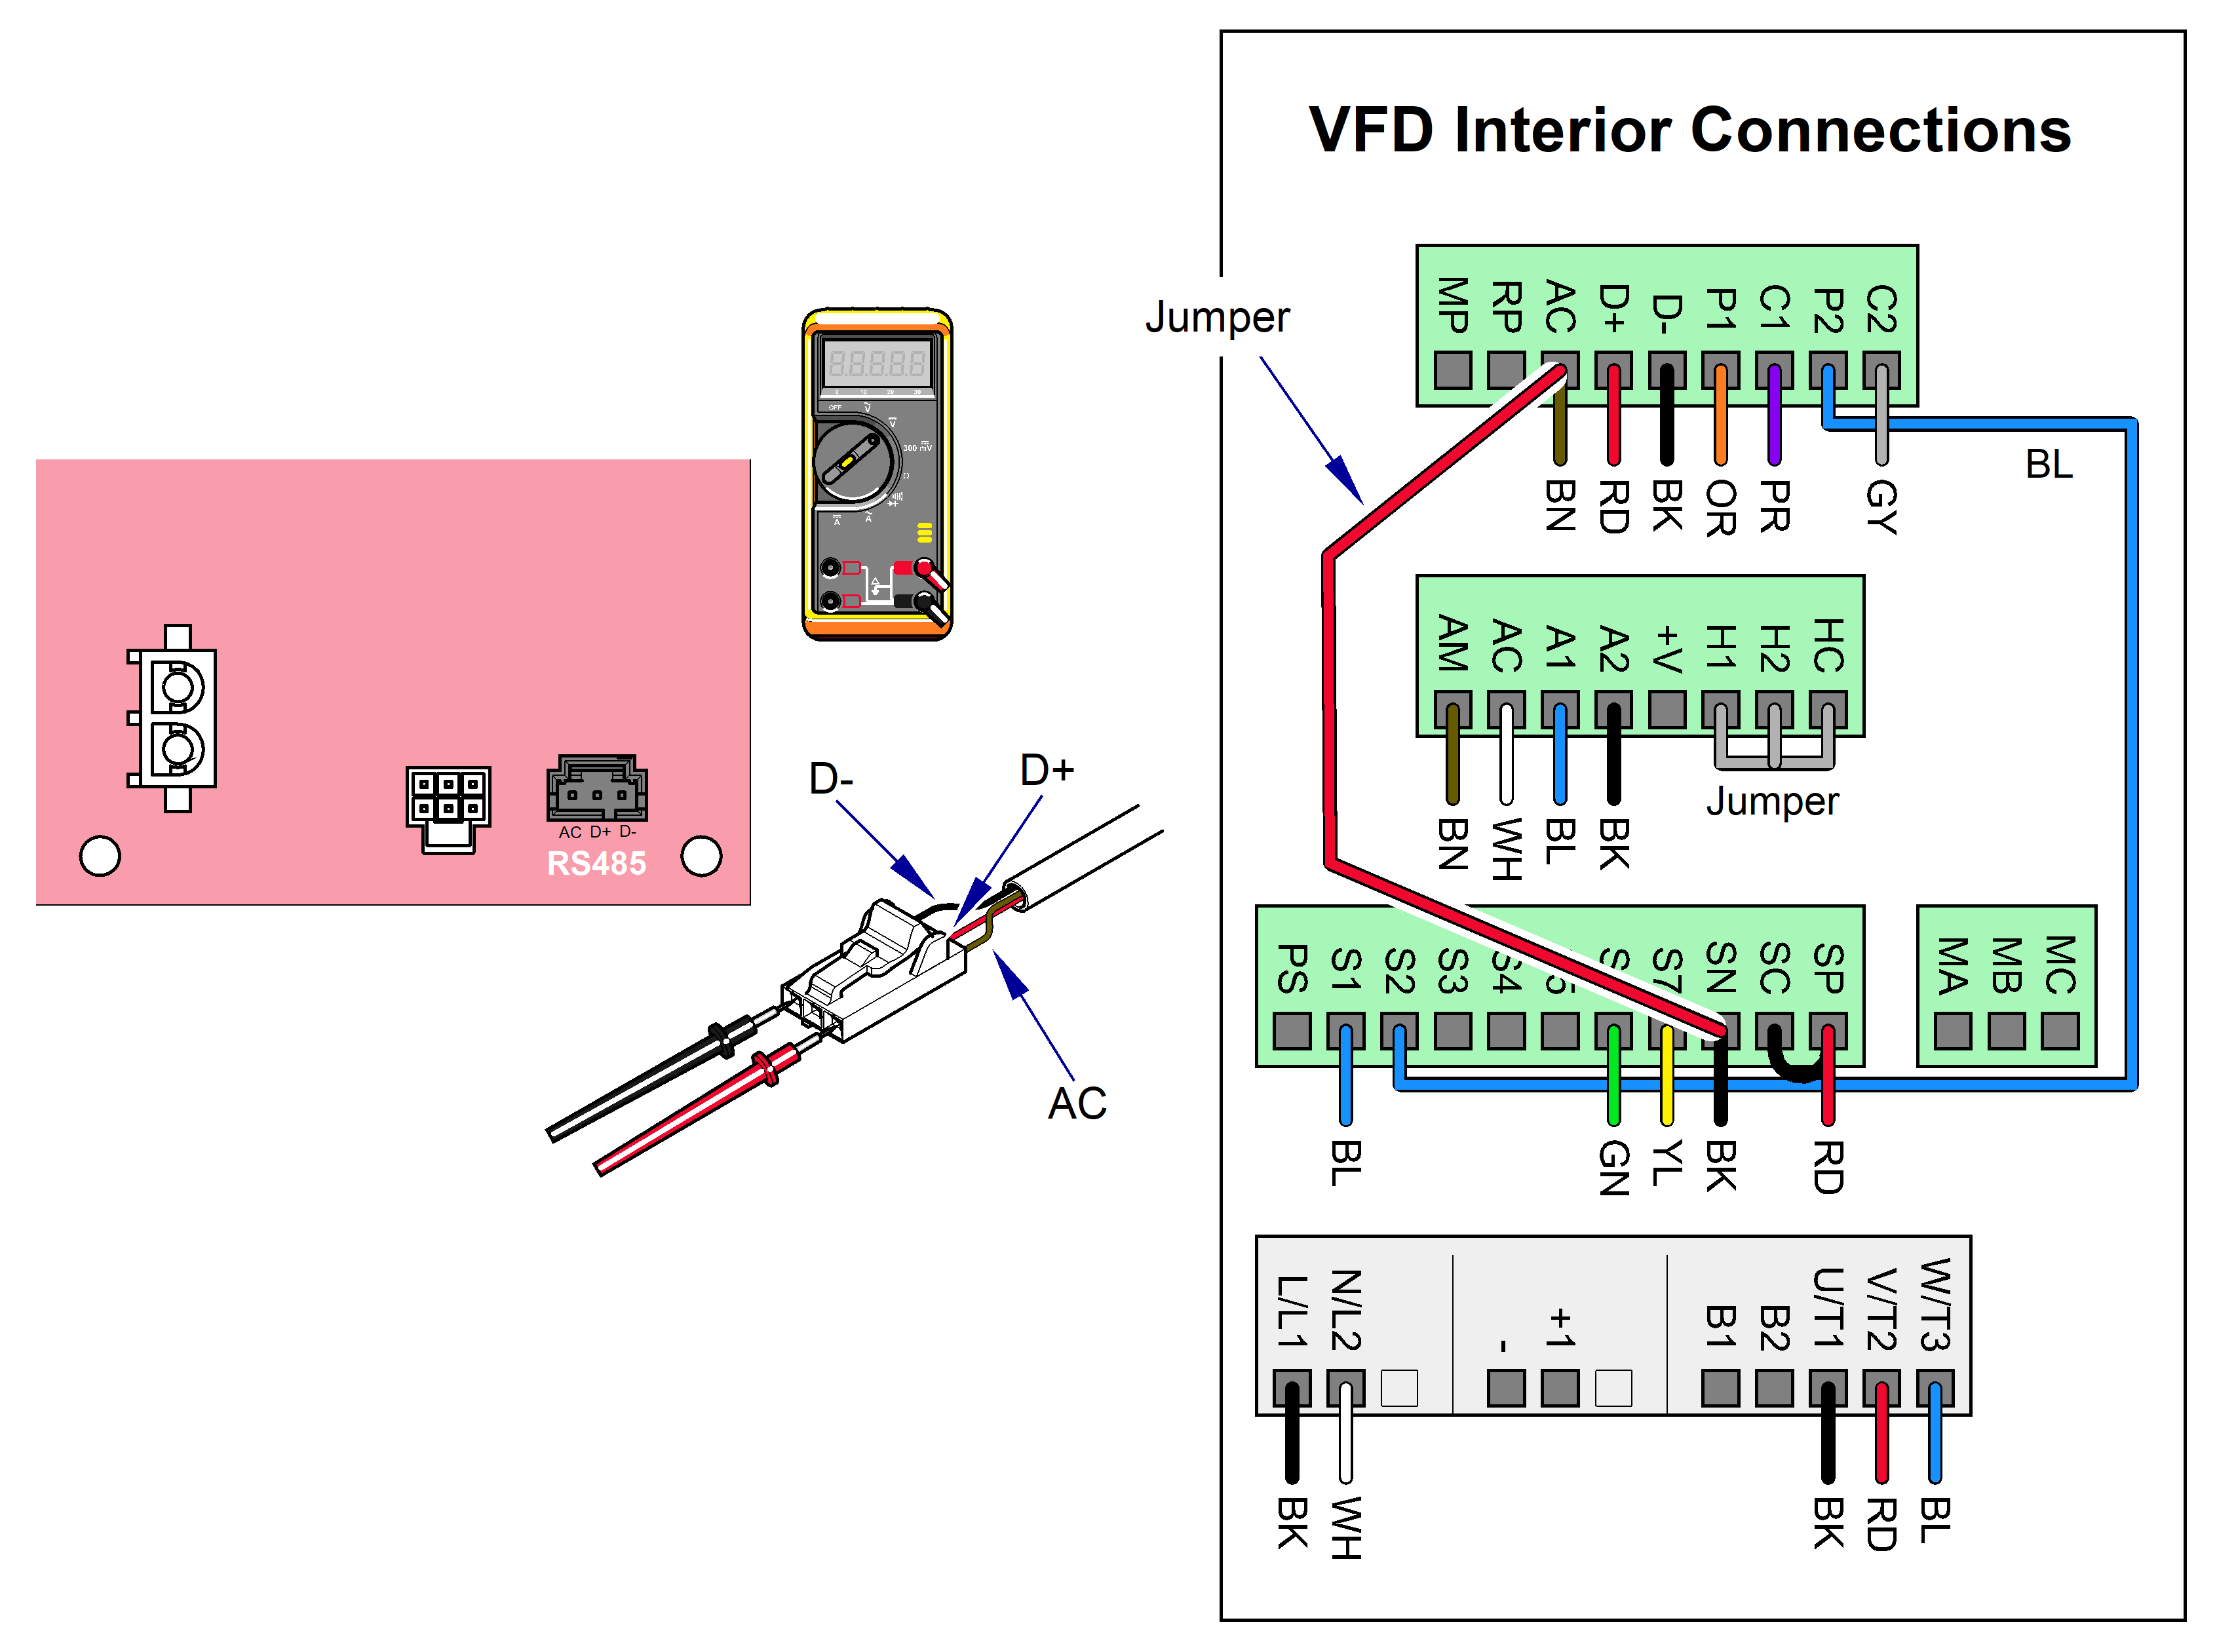
3.Unplug drive harness from PC board RS485 connector.
4.Unplug drive harness from AC and D- on VFD box. Set multi-meter to Ω. Check continuity in wire harness.
|
Meter Reading |
Required Action |
|---|---|
|
OL |
Replace Drive Harness |
|
Less than 5 ohms |
Drive Harness OK, go to Step 5 |
Before performing next step, verify the PC board checks have been completed first. Refer to: PC board.
5.Remove outside and live wire covers only on VFD box. Refer to: Electrical Cover. Install jumper from AC to SN. Turn power on, motor should start.
If motor doesn’t start, replace VFD. If it does start, you may have missed problem with the harness. You may have an intermittent connection.
